 はじめに
はじめに
- 最近、リングフィットアドベンチャーが流行っているらしい
- 自分も運動不足気味なので買おうと思ったのですが、上のリンクにあるようにしばらくは品切れのようです
- いちいちサイトをチェックするのも面倒なので、入荷したら通知するようなシステムを作ってみました
- 無料枠かつシンプルな構成にしたかったのと、GCPでクローラーを作る練習として次のようなものを使ってみました
 使用したもの
 できたもの
できたもの

-
指定の時間にリングフィットアドベンチャーのwebサイトで在庫情報を確認し、LINEで通知するbotを作成しました
-
チェックというメッセージを送ることで好きなタイミングで確認させることもできるようにしました -
LINEbotの無料枠は月1000通までになってしまったので、残念ながらC向けではなく自分用として作成しました
-
ソースコードはこちら
 動作の流れ
動作の流れ
定期処理の場合
- Cloud Schedulerのジョブが実行される
- Cloud Pub/Sub トリガーを呼び出される
- Cloud Functionが実行される
- Puppeteerでwebサイトのクロールを行う
- Cloud Firestoreから前回のクロール結果を取得する
- 今回と前回のクロール結果を比較し、変化があればCloud Firestoreのデータを更新する
- 変更がある場合のみLINEbotでクロール結果を送信する
LINEのメッセージをトリガーとした場合
-
チェックというテキストを送信する - LINE MeesagingAPIからwebhookが呼ばれる
- Cloud Functionが実行される
- Puppeteerでwebサイトのクロールを行う(同じ)
- Cloud Firestoreから前回のクロール結果を取得する(同じ)
- 今回と前回のクロール結果を比較し、変化があればCloud Firestoreのデータを更新する(同じ)
- LINEbotでクロール結果を送信する
 実装手順
実装手順
 Firebaseプロジェクトの作成
-
あらかじめ、GCPにアカウントを作成している前提で進めてきます
-
Firebaseのコンソールページを開き、プロジェクトを作成しておきます
-
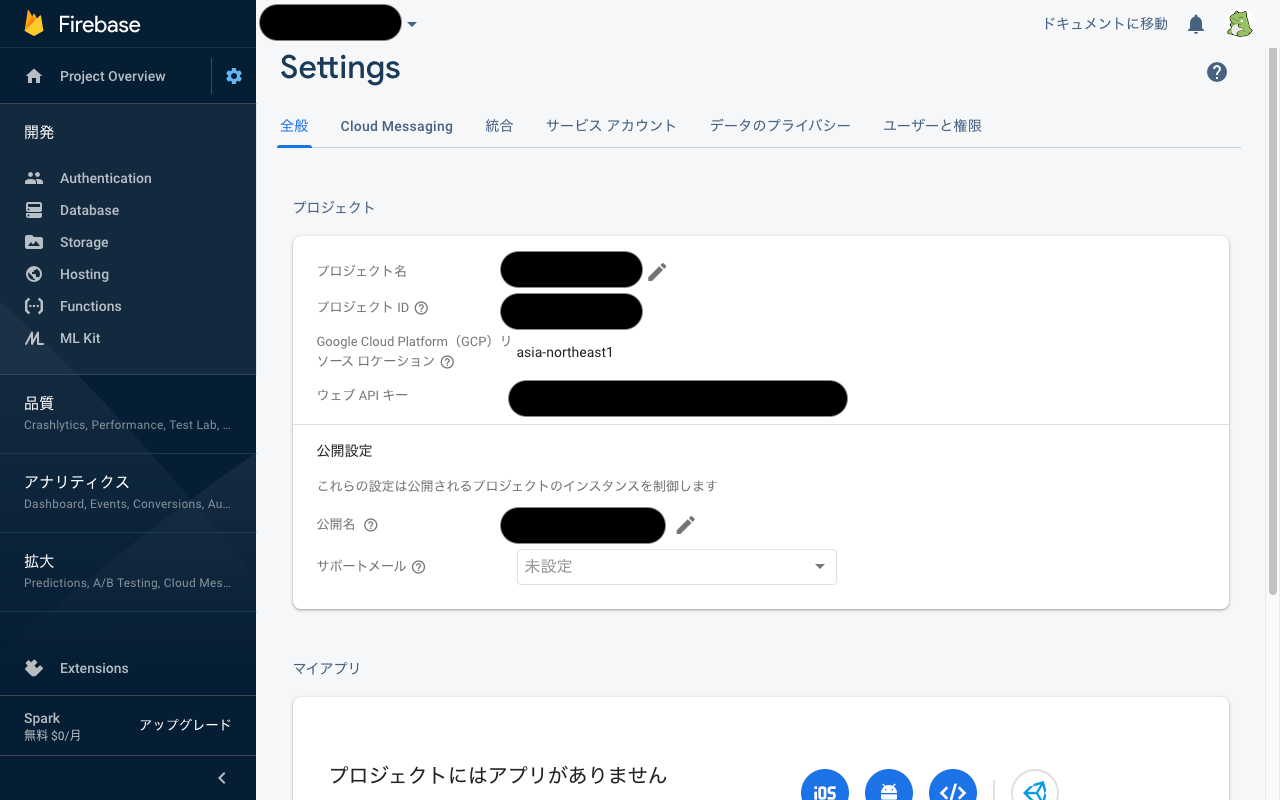
リソースロケーションを設定する必要があります
-
 アイコンをクリックして設定ページに遷移し、
 Google Cloud Platform(GCP)リソース ロケーションを設定します - 東京であれば
asia-northeast1を選択します - これをやっておかないと次のCLIでエラーになるので注意
-
- 以降はterminalから操作していきます
 リポジトリの雛形を生成
- terminalを開き、CLIをインストールします
npm install -g firebase-tools
- ログイン認証を行います
firebase login
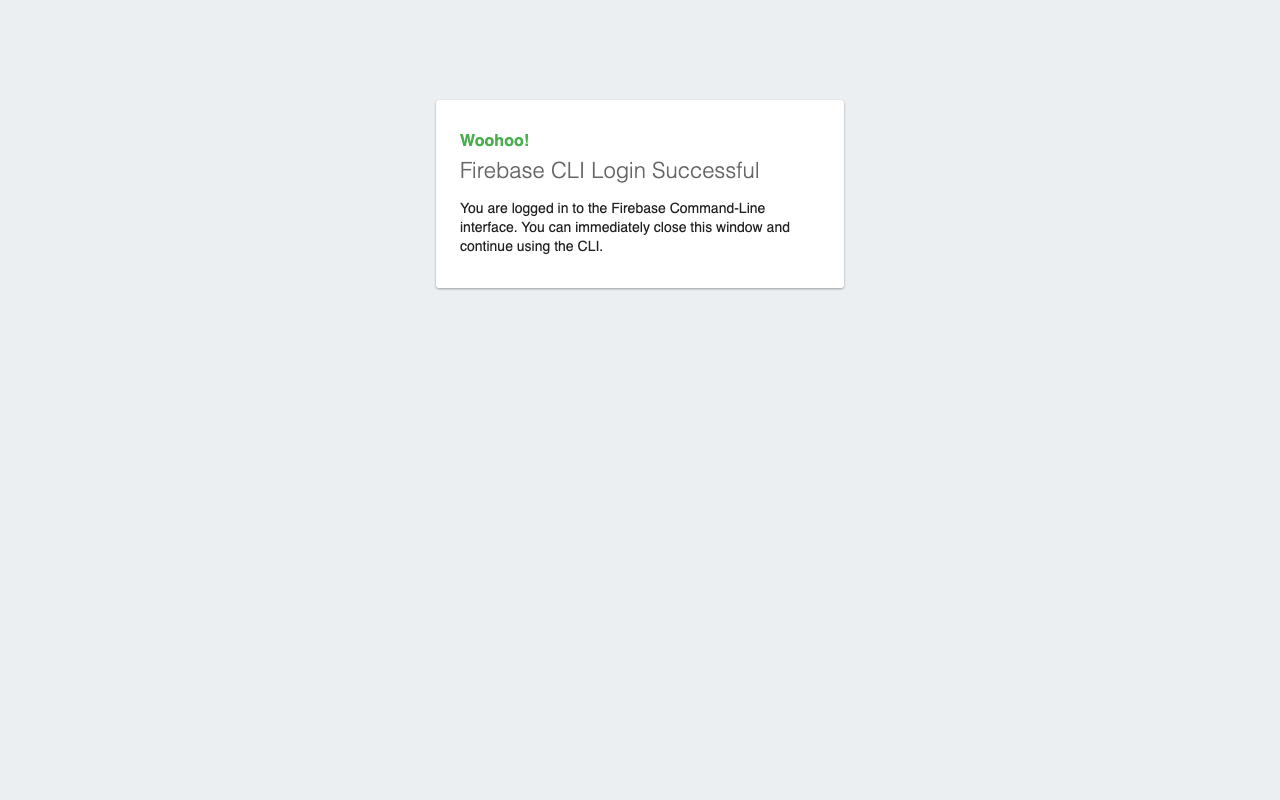
- ブラウザが起動するのでログインします
- リポジトリの雛形を
firebase initで生成できます -
web-crawlというリポジトリ名にしたい場合は次のようになります
mkdir web-crawl
cd web-crawl
firebase init
- 表示される指示に従って入力していきます
- 使用するFirebaseの機能について、今回は FirestoreとFunctionsをspaceキーで選択します
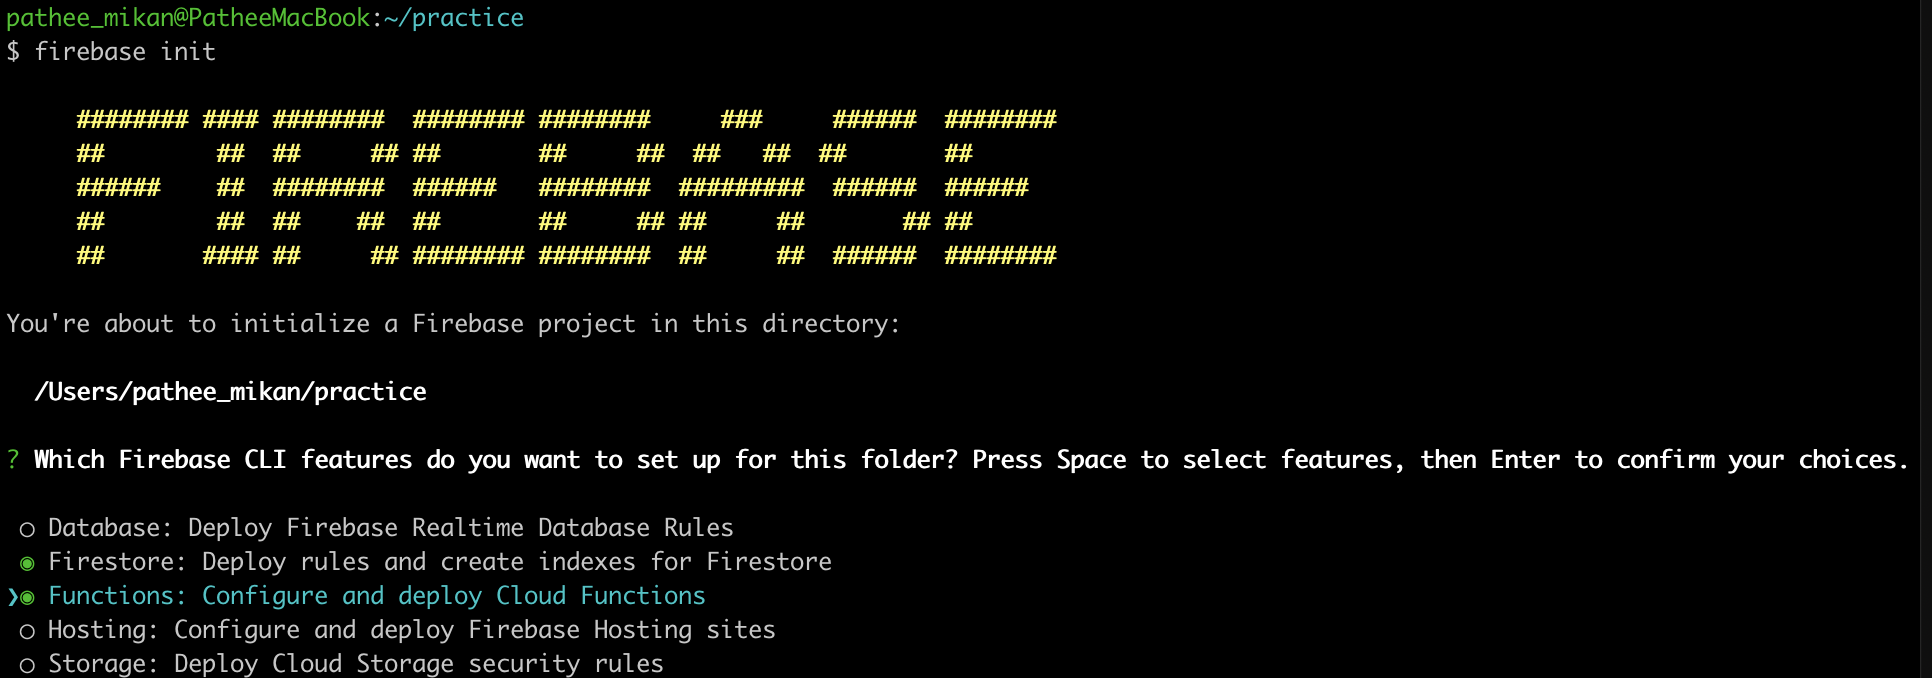
- 次は
Use an existing projectを選択し、先ほど作成したプロジェクトを選択します - ruleとindexはデフォルトのまま進めます
- 言語選択では
TypeScriptを使用します

- TSlintも有効化しておき、ライブラリもinstallしておきます

- 以上でCloud Functionで開発する雛形が生成されます
- この状態
initial commitとしてGitHubなどにリポジトリ登録しておくと良いと思います
 Firebaseにデプロイする
- 次のコマンドでfirebaseにデプロイできます
firebase deploy
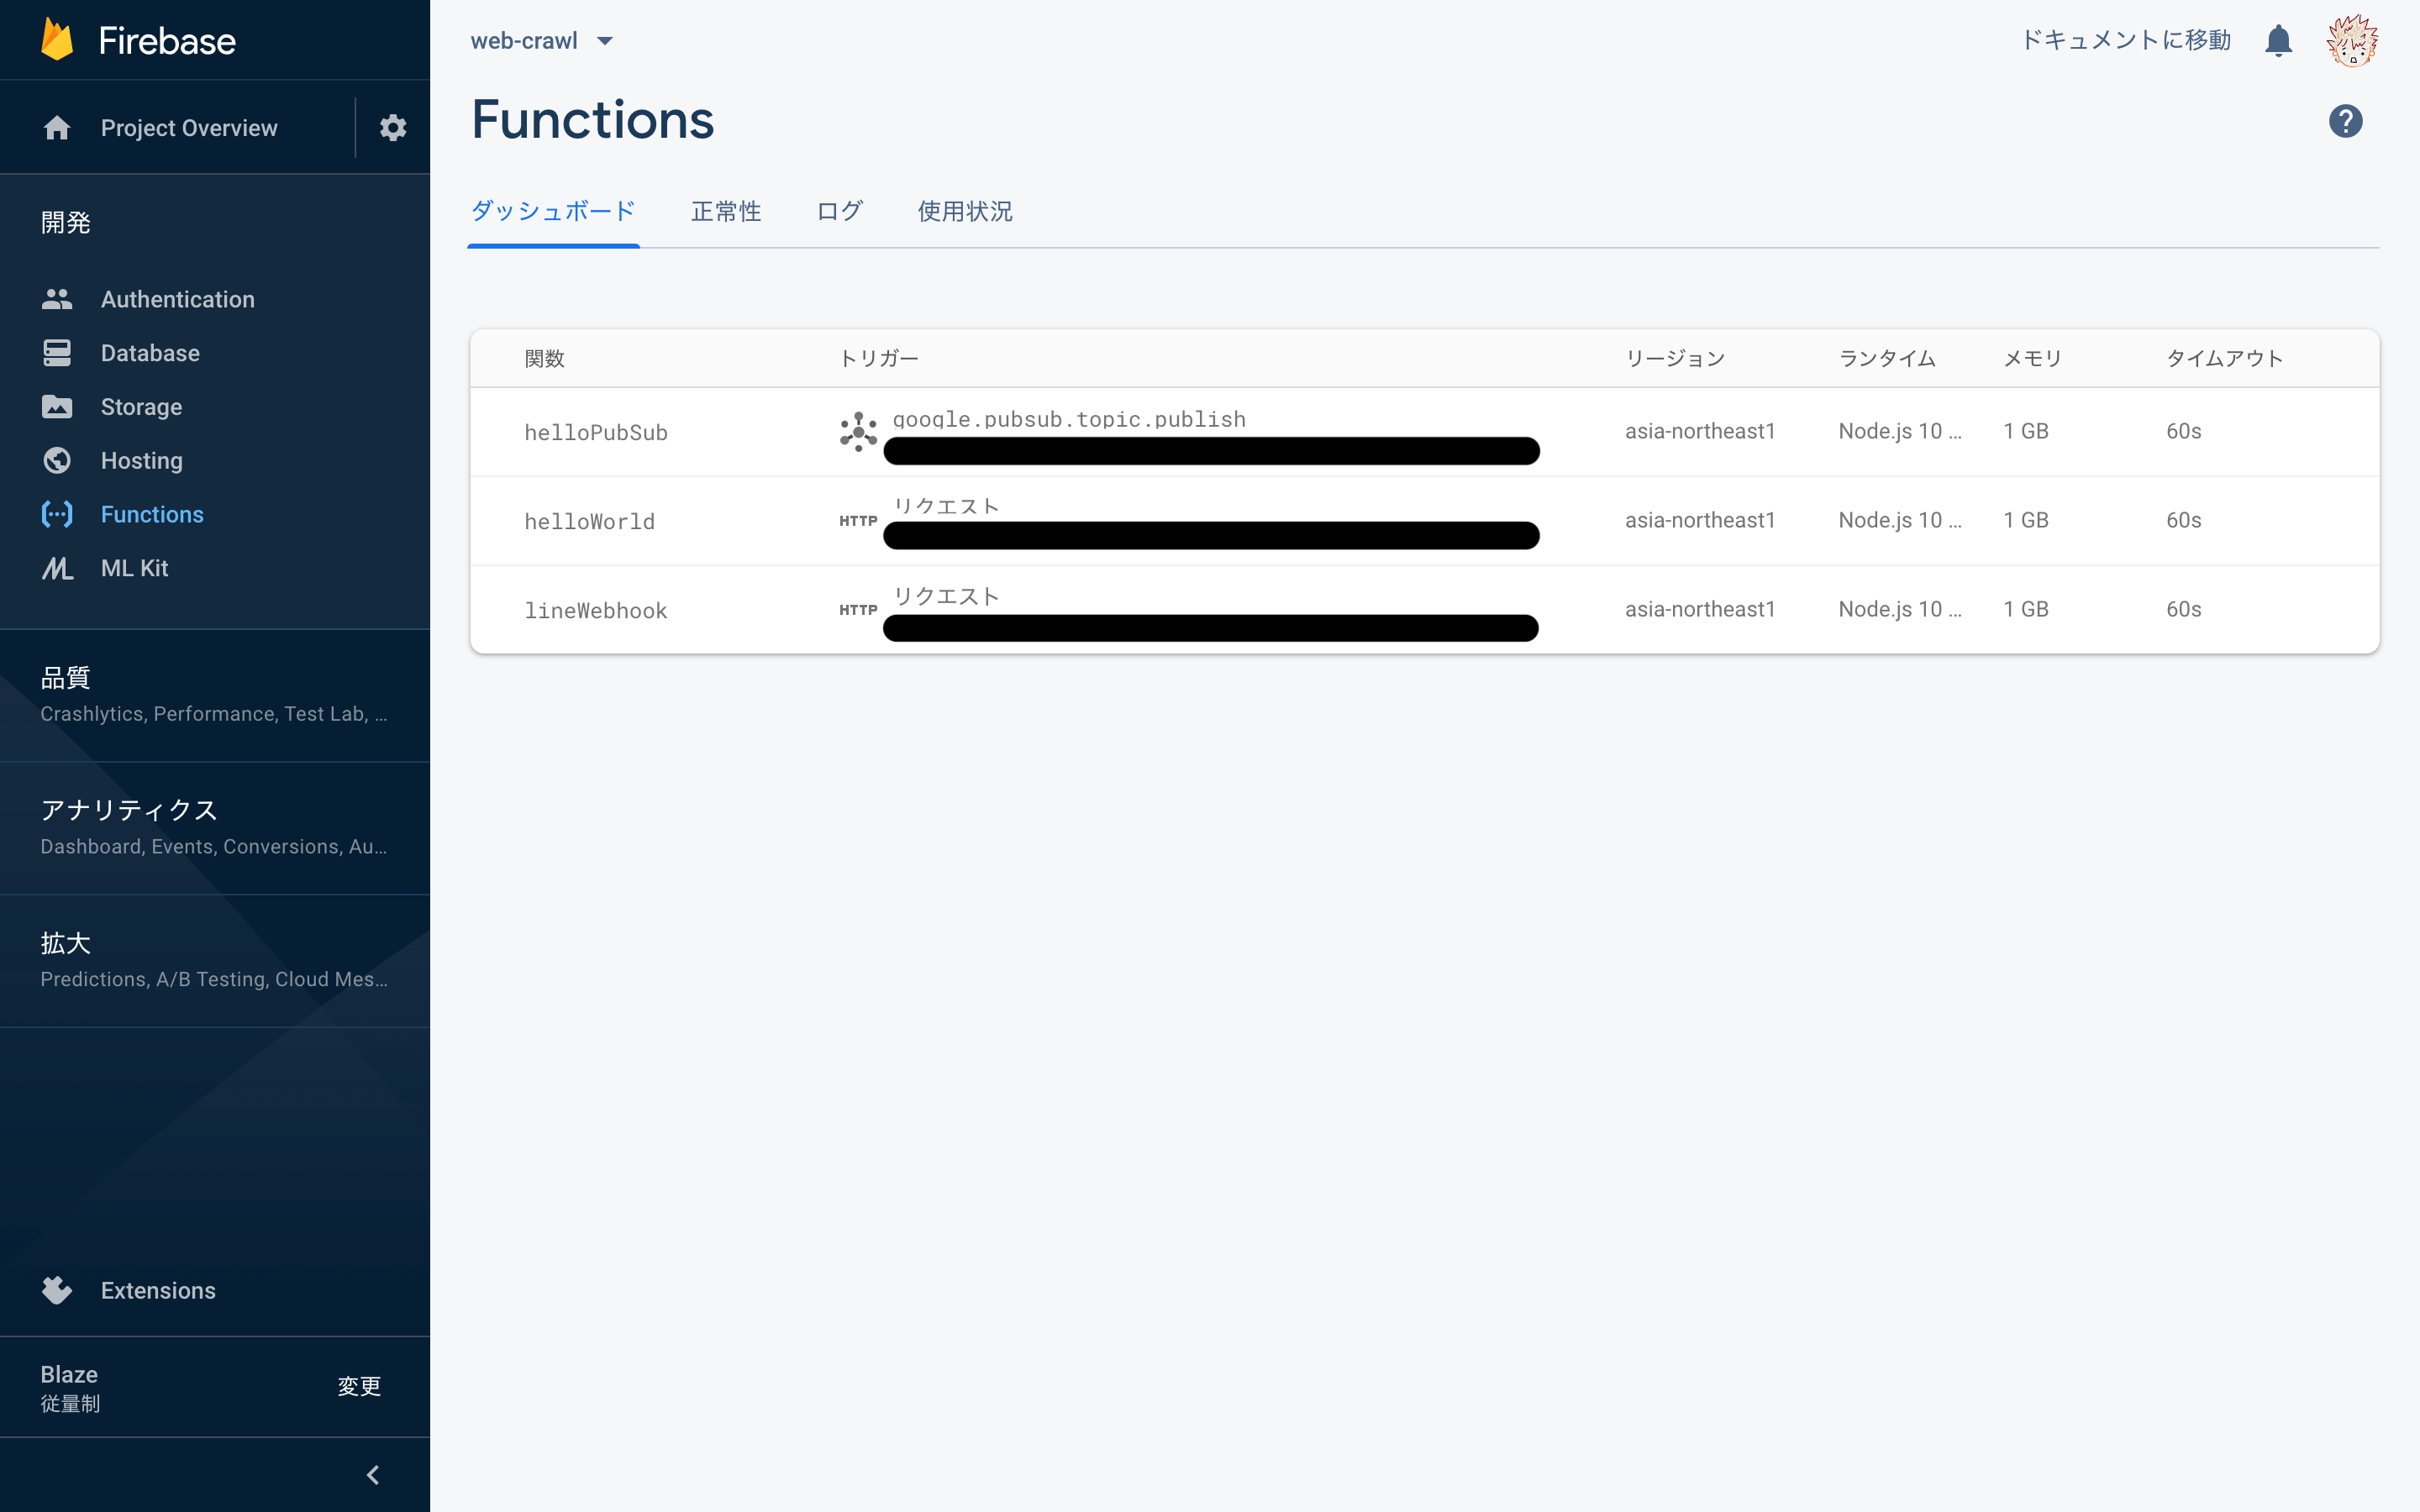
- firebaseのコンソールのページでデプロイされていることを確認できます
- cloud functionのみデプロイすることもできます
firebase deploy --only function:helloWorld
- デプロイされるのは
functions/src/index.tsでexportしている関数となります
import * as functions from 'firebase-functions';

export const helloWorld = functions.https.onRequest((request, response) => {
  response.send('Hello from Firebase!');
});
 Puppeteerでクロールする
- Cloud Functionで外部のネットワークにアクセスするためには従量制のBlazeプランに変更する必要があります
- 今回の利用程度であれば無料枠で利用できますが、使いすぎると課金が発生しますので、よくご確認ください
Spark プランでは、Google が所有するサービスにのみ送信ネットワーク リクエストを送信できます。受信呼び出しリクエストは割り当ての範囲内で実行できます。
Blaze プランでは、Cloud Functions で永久的な無料枠を提供しています。初回の 2,000,000 回の呼び出し、400,000 GB-秒、200,000 CPU-秒、5 GB のインターネット下りトラフィックが毎月無料で提供されます。この無料の割り当てを超えると、使用量に応じて課金されます。料金は呼び出しの総数とコンピューティング時間に基づいて計算されます。コンピューティング時間は、1 つの機能に用意されているメモリと CPU の量によって変化します。また、使用量の上限は、1 日および 100 秒ごとの割り当てによって適用されます。詳しくは、Cloud Functions の料金をご覧ください。
- puppeteerをインストールします
-
package.jsonがあるディレクトリ、つまりfunctionsディレクトリで行う必要があることに注意しましょう
-
cd functions
npm i puppeteer --save
- Puppeteerを使ってwebページをクロールしてみましょう
- 今回のクロール対象は次のページです
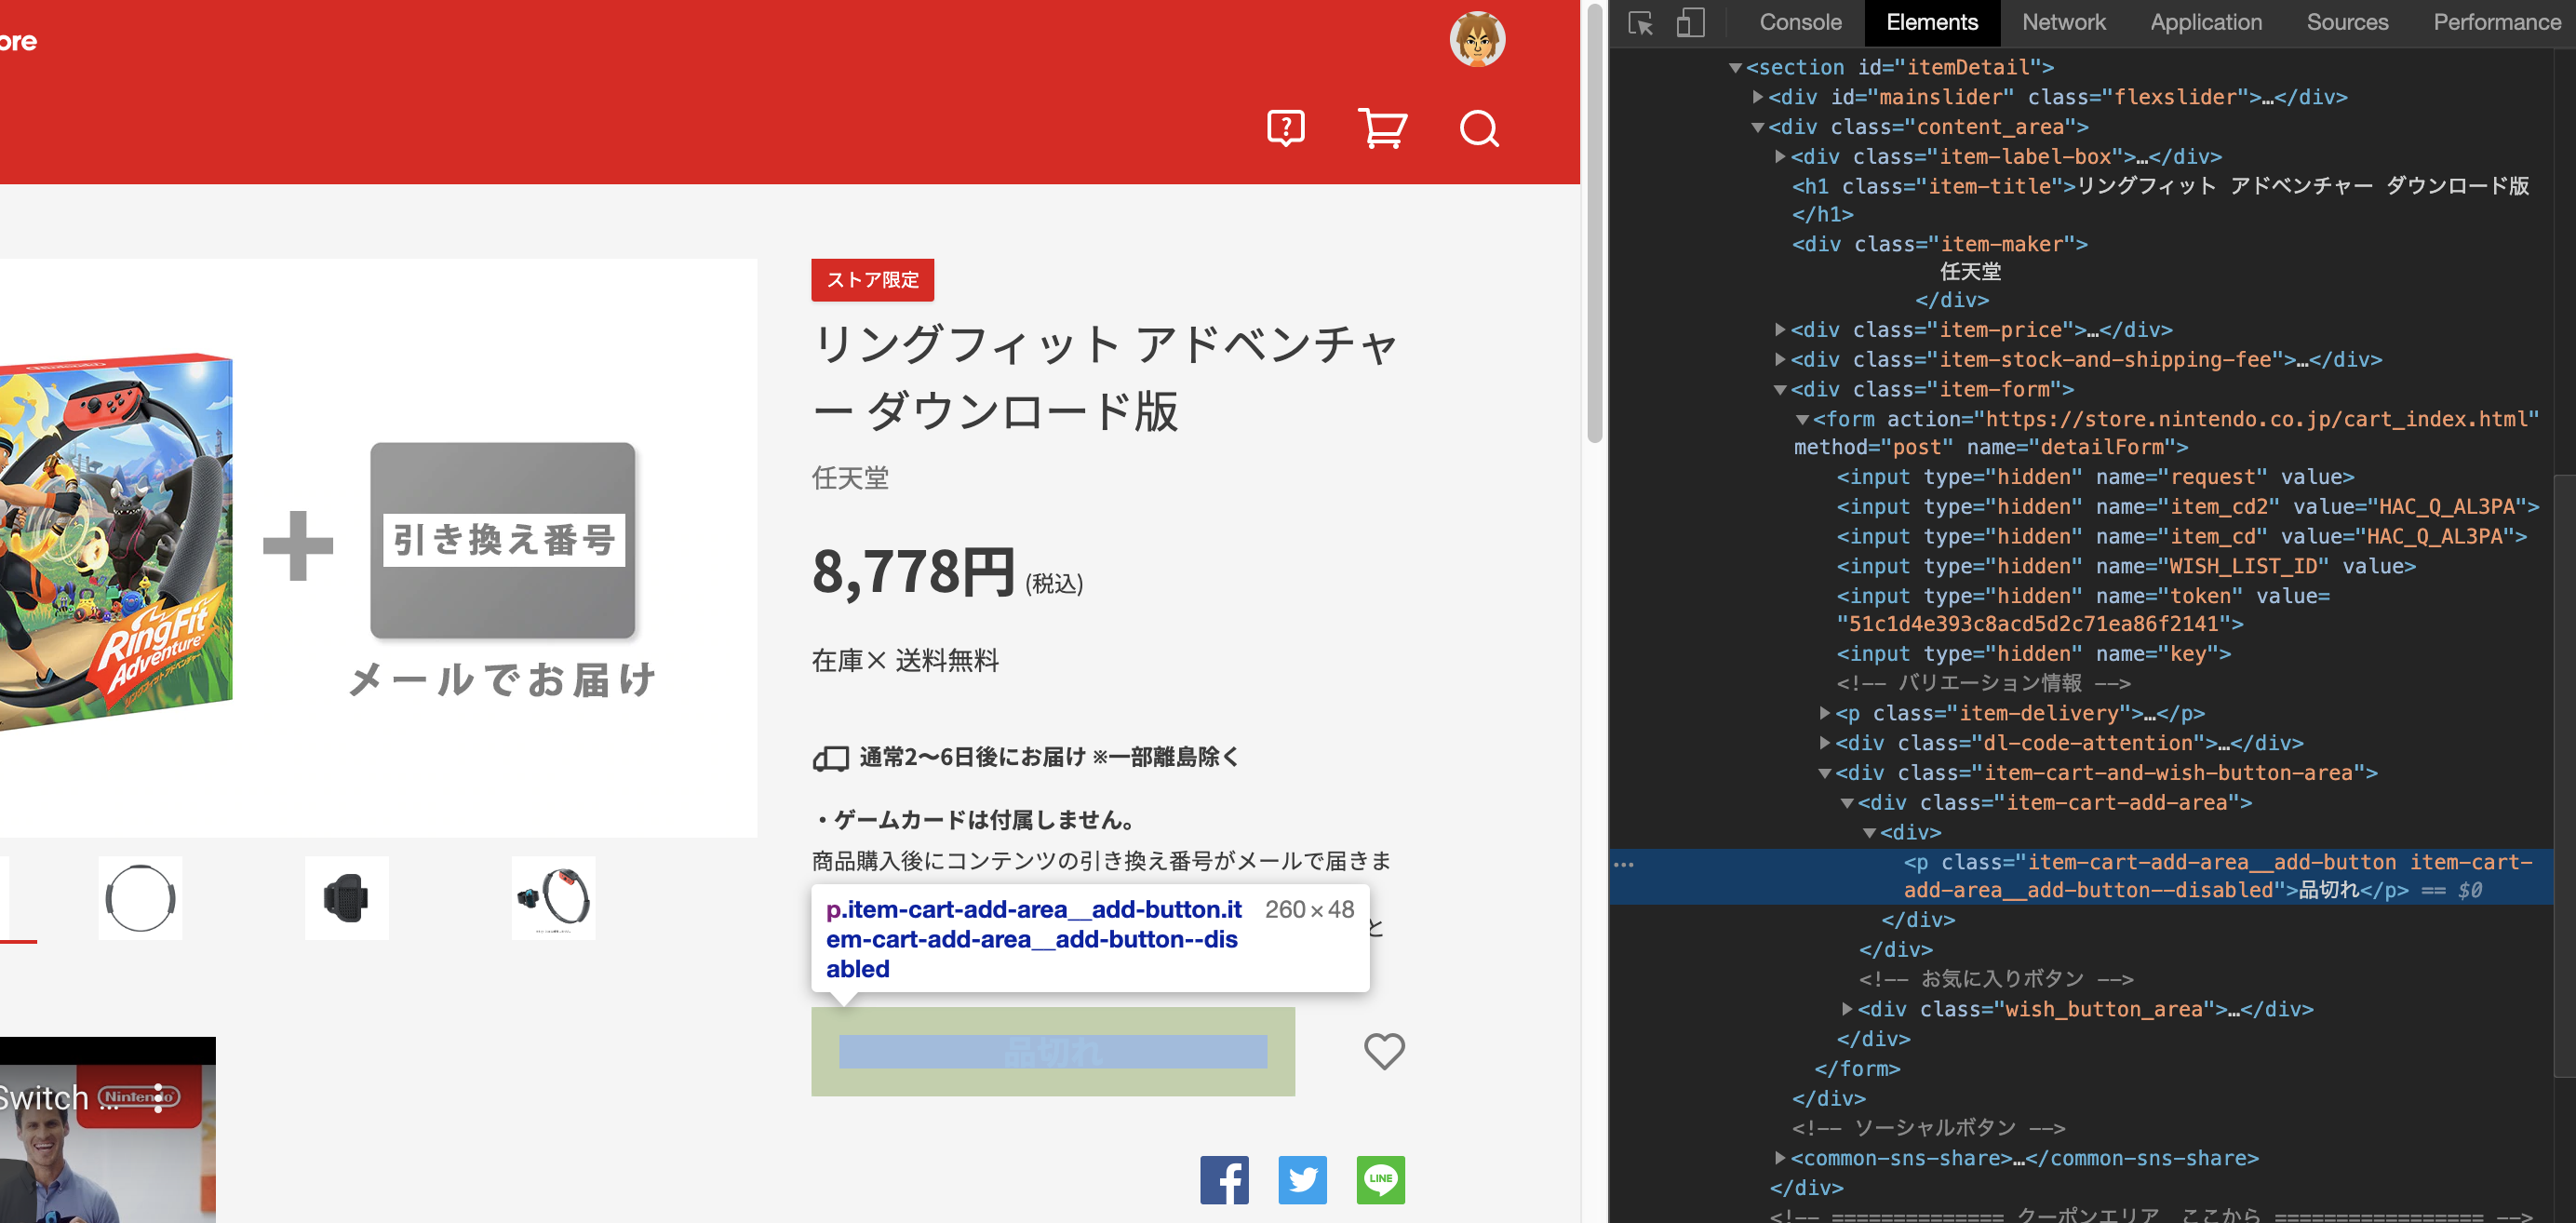
-
getRingFitSaleStatusという関数を定義してクロール処置を書いてみました-
headless: trueにすることで 実際にブラウザの動作を確認できます
-
-
カートに追加するもしくは品切れのボタンの部分を取得してみましょう- 両方とも
.item-cart-add-area__add-buttonセレクタを参照することで確認できます - 在庫がある場合はinputタグになっているため、そのvalueを取得します
- 在庫がない場合はpタグになっているためtextContentを取得します
- puppeteerの詳しい説明は公式のAPIリファレンスをご確認ください
- https://github.com/puppeteer/puppeteer/blob/master/docs/api.md
- 両方とも
- また、PuppeteerをCloud Functionで使うためにはメモリを増やす必要があります
-
functions.runWith({ memory: '1GB' })のようにすることでメモリを増やせます - 同様に、
functions.region('asia-northeast1')でリージョンを東京に指定できます
-
import * as functions from 'firebase-functions';
import * as puppeteer from 'puppeteer';

const RING_FIT_URL = 'https://store.nintendo.co.jp/item/HAC_Q_AL3PA.html';

export const helloWorld = functions
  .runWith({ memory: '1GB' })
  .region('asia-northeast1')
  .https.onRequest(async (request, response) => {
    const result = await getRingFitSaleStatus();
    response.json({ result });
  });


const getRingFitSaleStatus = async () => {
  let content = '';
  try {
    const browser = await puppeteer.launch({
      headless: true,
      args: ['--no-sandbox', '--disable-setuid-sandbox'],
    });
    const page = await browser.newPage();

    await page.goto(RING_FIT_URL);

    const item = await page.$('.item-cart-add-area__add-button');
    if (item) {
      const value = await (await item.getProperty('value')).jsonValue();
      if (value === 'カートに追加する') {
        content = '在庫あり';
      } else {
        const textContent = await (await item.getProperty('textContent')).jsonValue();
        content = value || textContent || '取得できませんでした';
      }
    }

    await browser.close();
  } catch (error) {
    content = JSON.stringify(error);
  }
  console.log('content', content);
  return content;
};
- これを実際に試すには
npm run serveコマンドを使用します- これも
package.jsonのあるディレクトリで実行する必要があります - 成功すると
http://localhost:5000...のようにendpointが表示されるので、そこにアクセスすることで動作させることができます
- これも
npm run serve

...省略

✔  functions[helloWorld]: http function initialized (http://localhost:5000/XXX/asia-northeast1/helloWorld).
- デプロイしてfirebaseのダッシュボードに表示されているendpointにアクセスしてみましょう
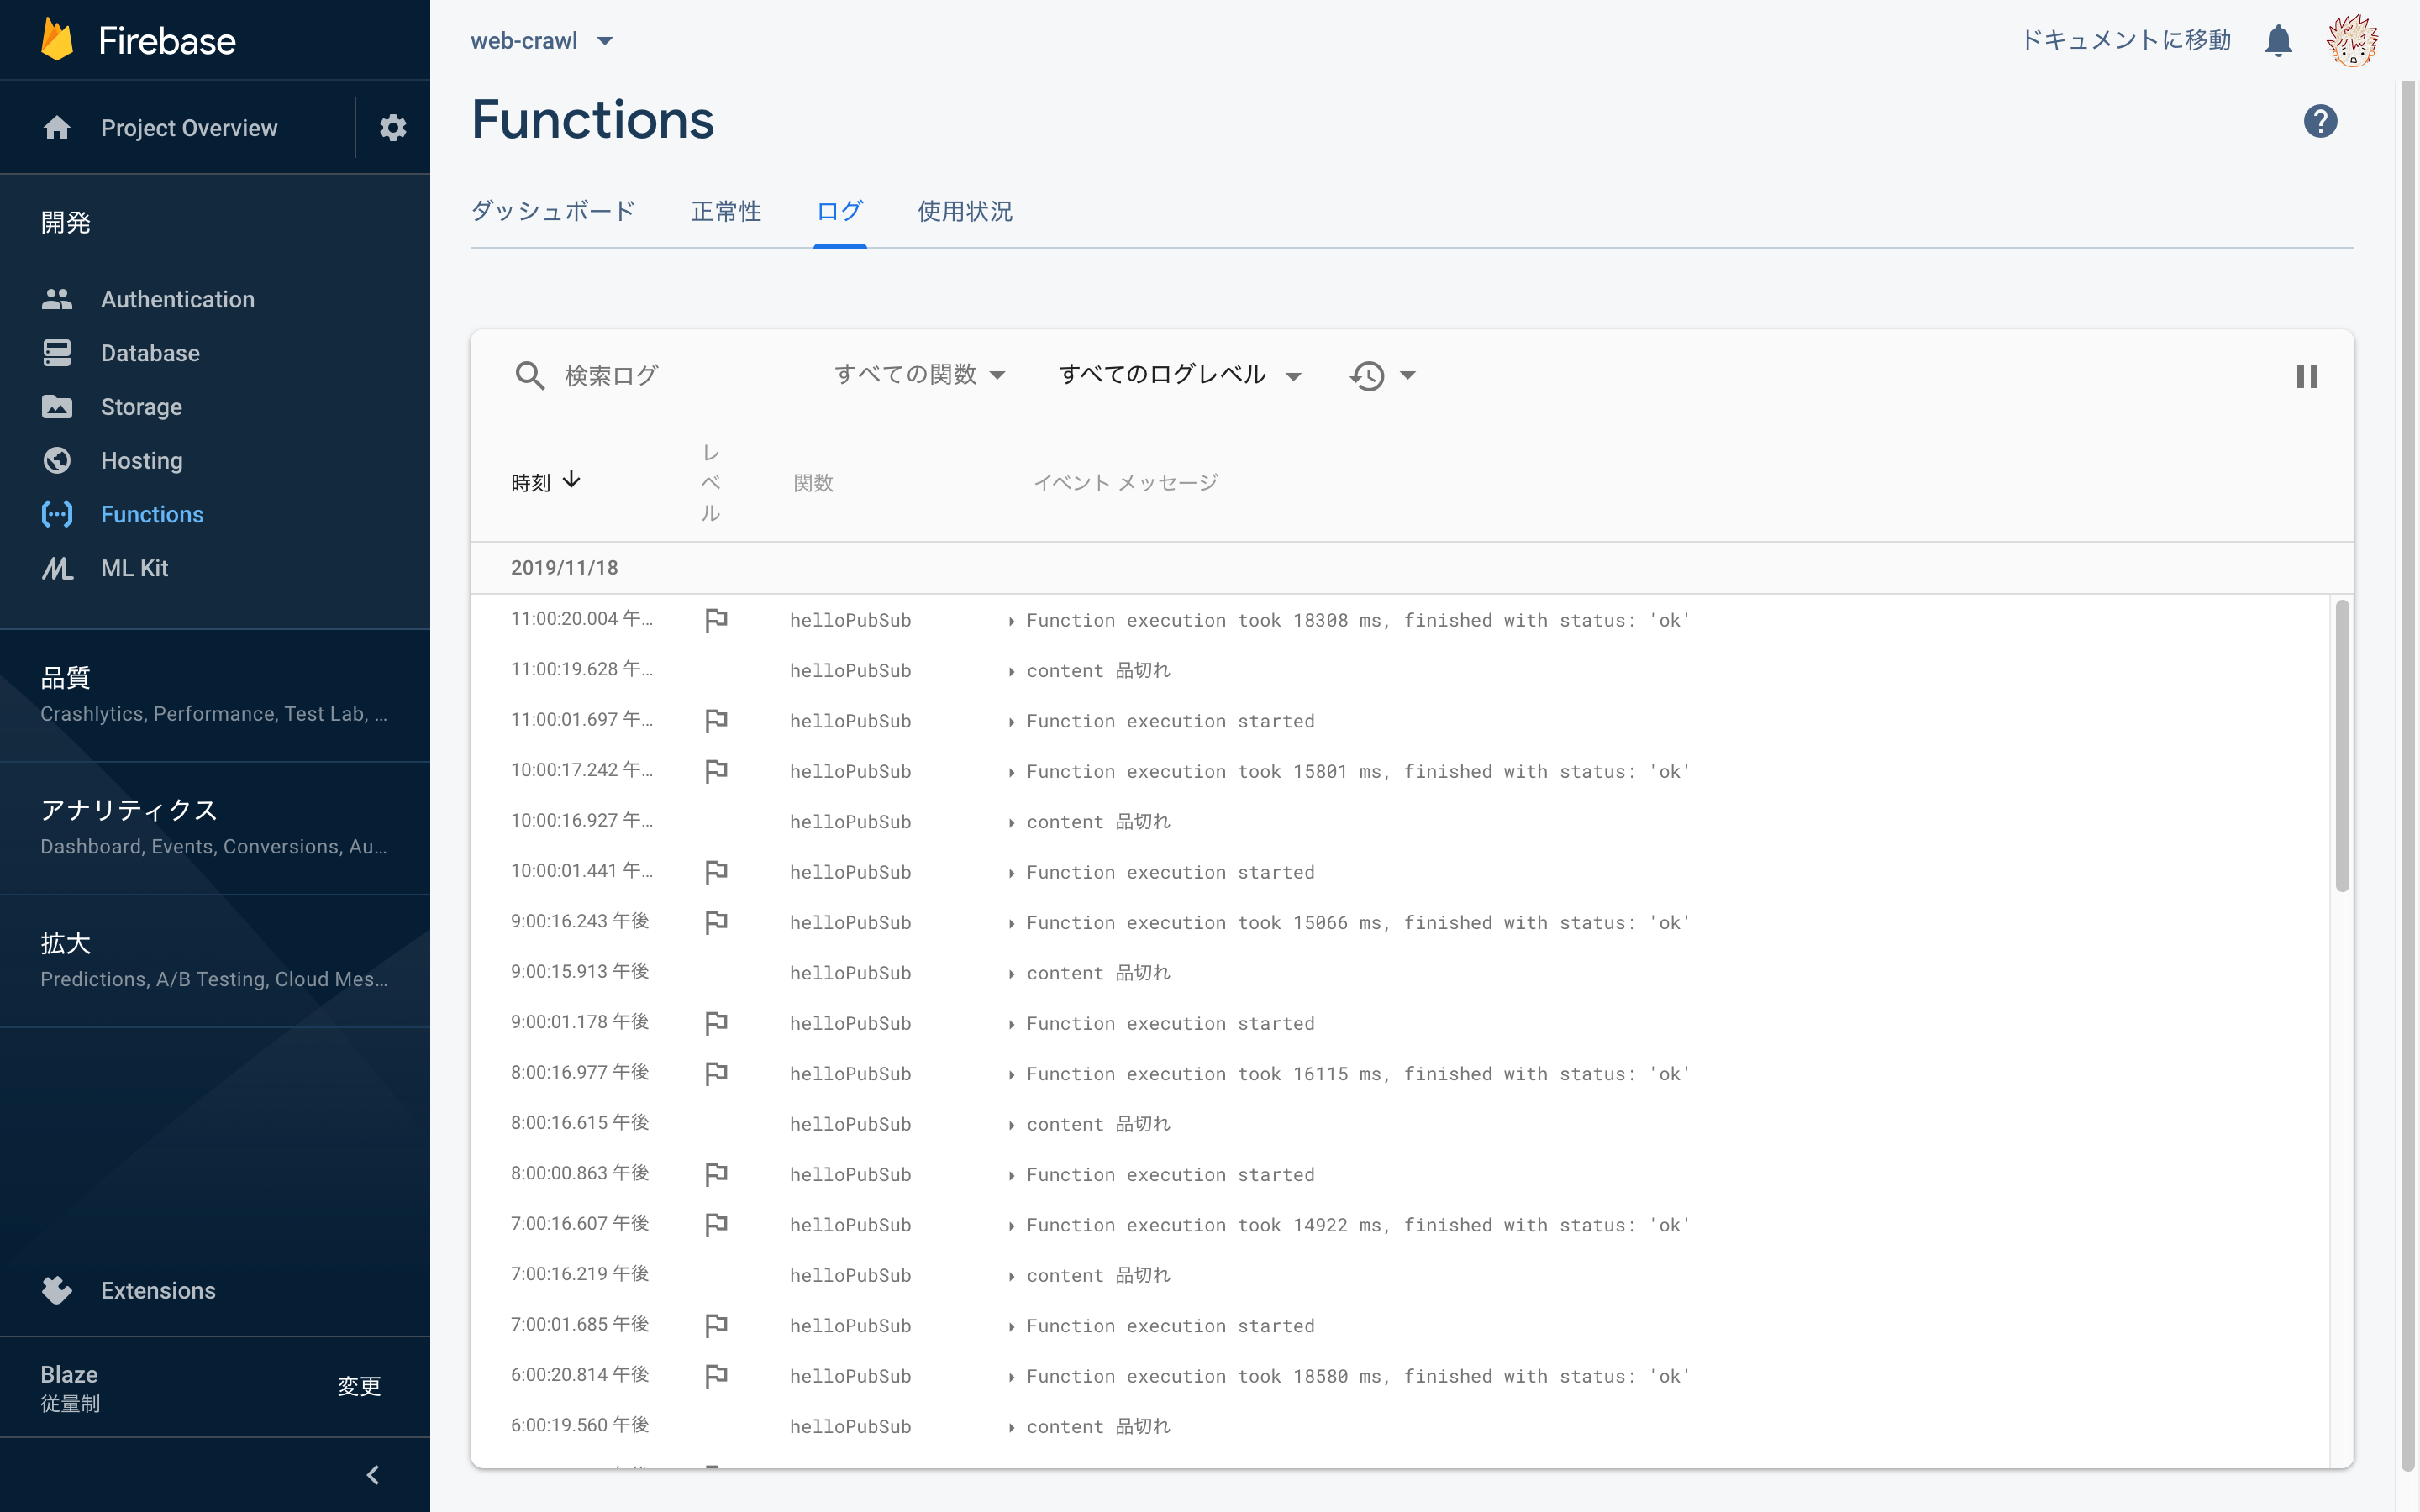
- その後、ログのページで正常に動作したログが残っているか確認してみましょう
 LINEbotを作成する
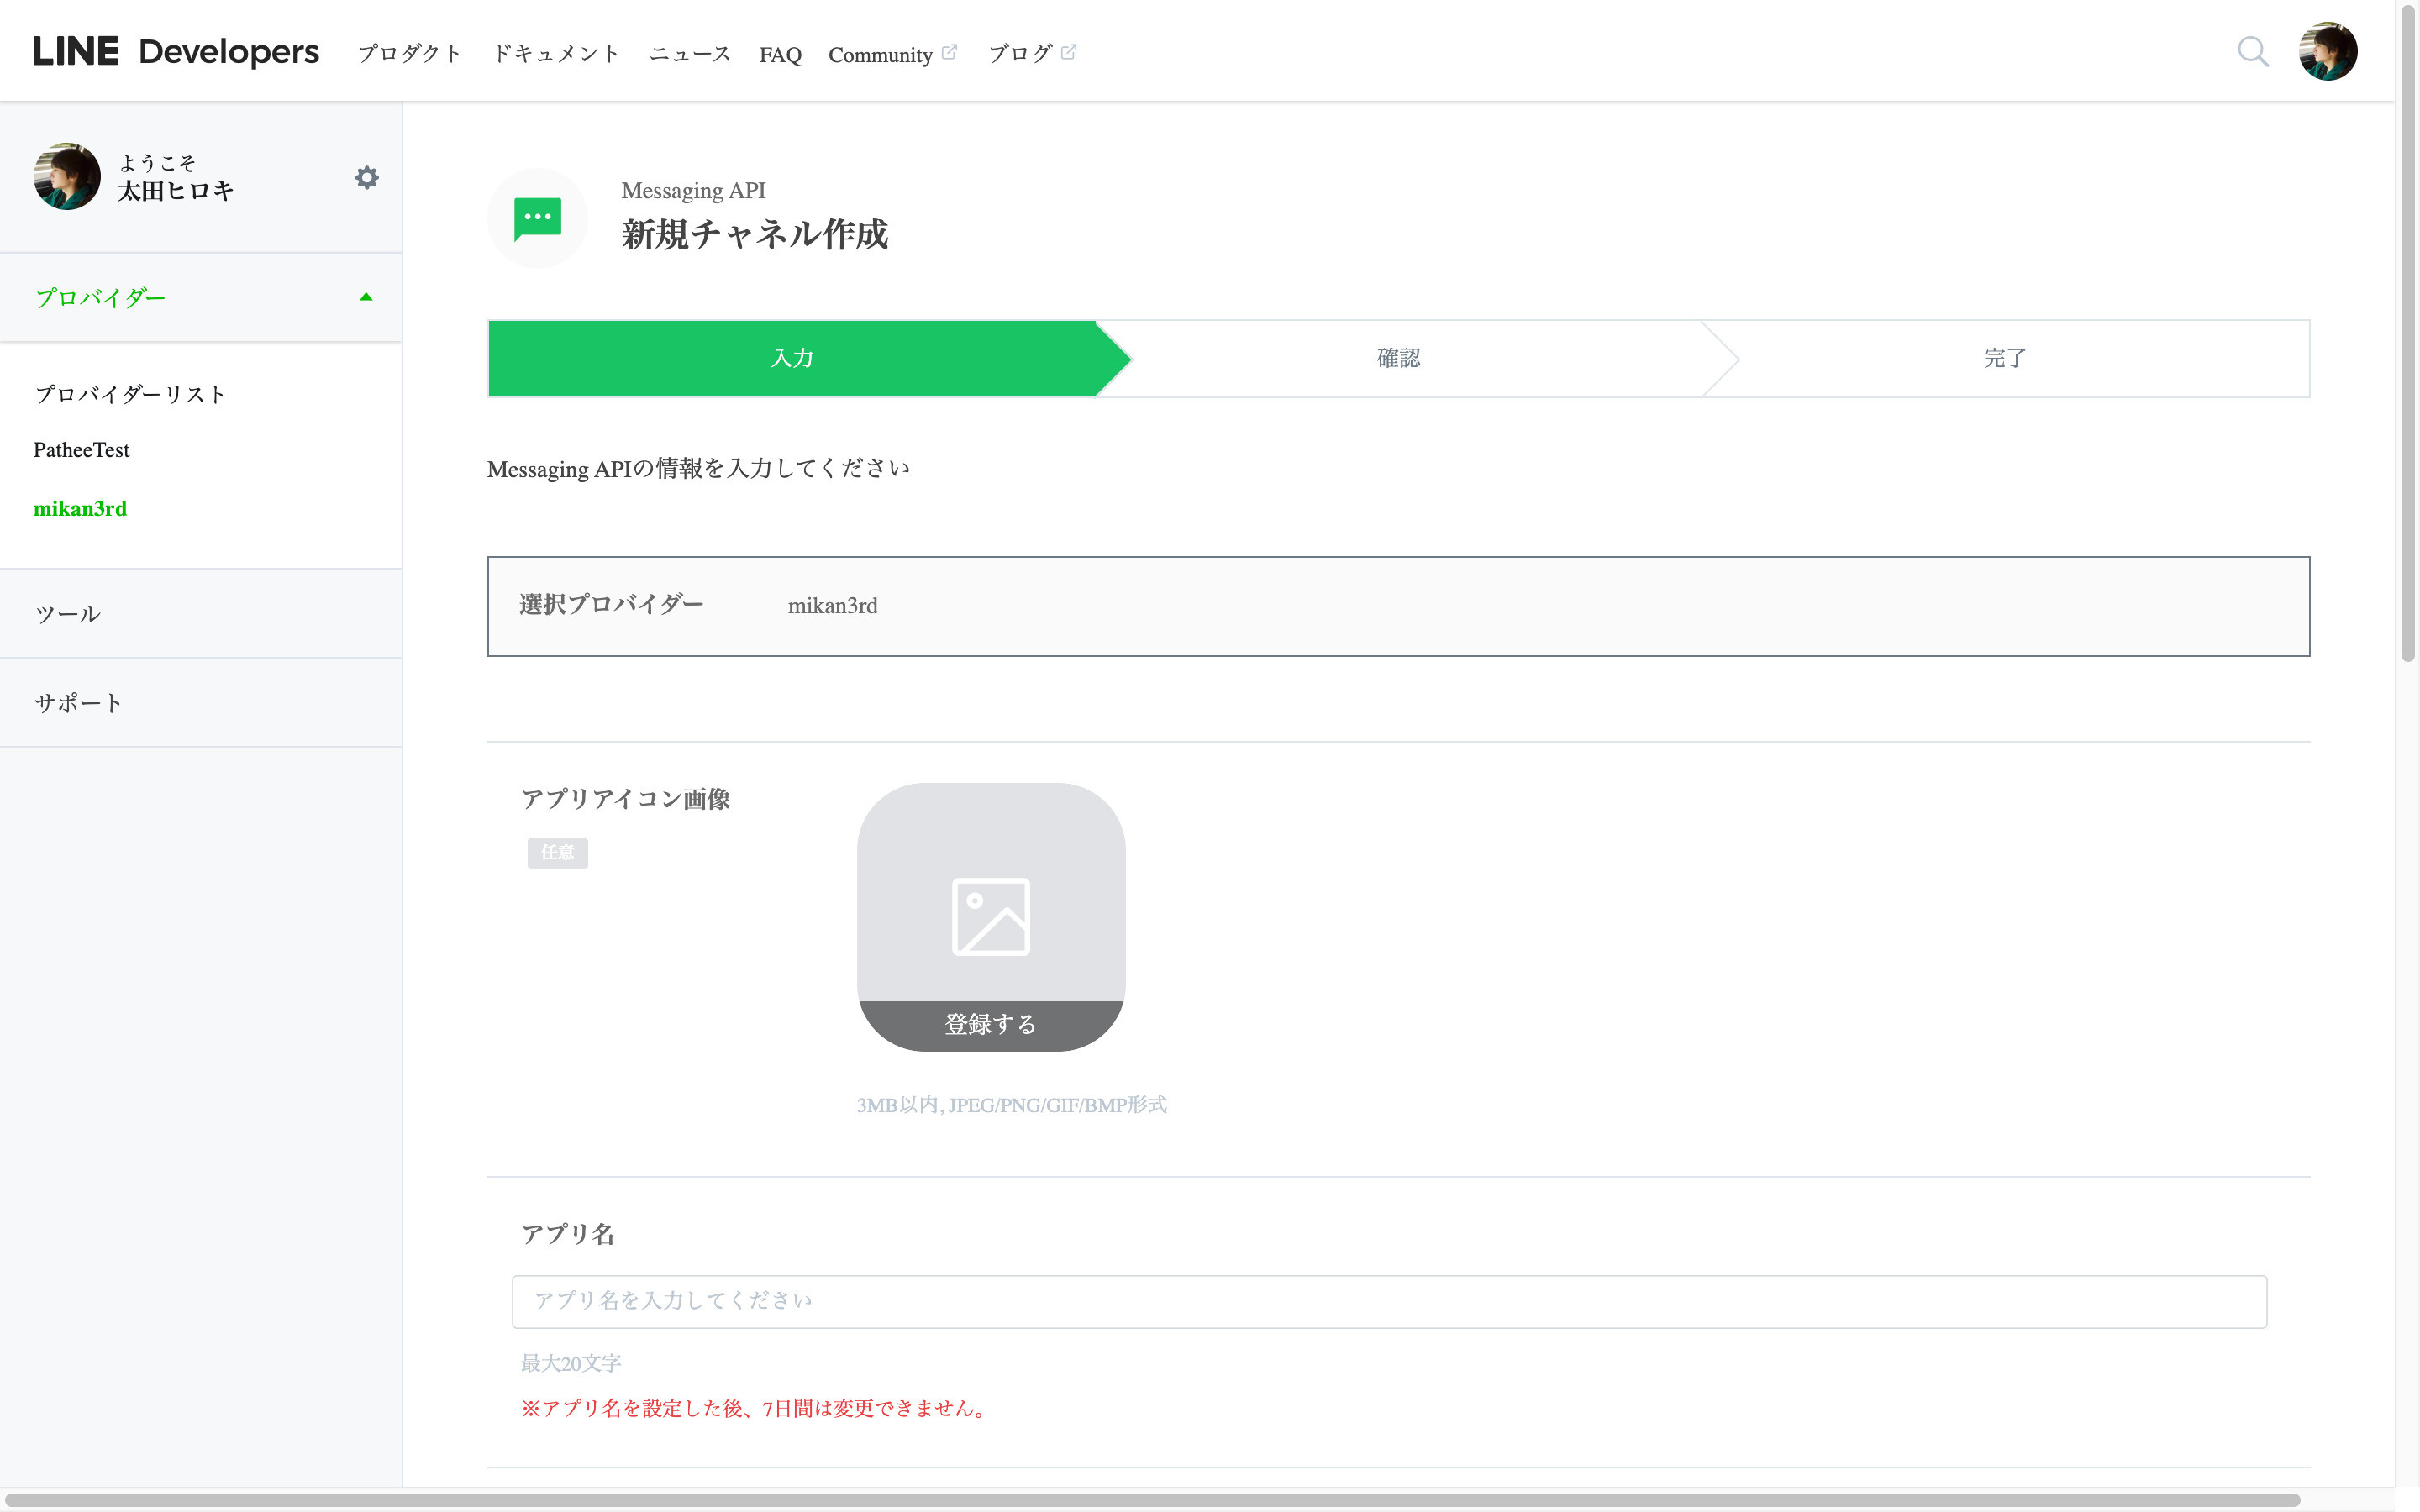
- LINEでMessaging APIのチャネルを作成します
- LINEbotはフリープランで月1000通のメッセージを送信できます
- 作成後、アクセストークンを発行しておきます
- また、下の方に
LINEアプリへのQRコードがあるので自分のLINEの友達に追加しておきます
 LINEのwebhookを受け取る
-
line-bot-sdk-nodejsをinstallします
npm i @line/bot-sdk --save
- LINEのwebhookを受け取るCloud Functionを追加します
-
channelAccessTokenとchannelSecretは先ほど作成したbotのものに置き換えてください -
validateSignatureはX-Line-Signatureリクエストヘッダーに含まれる署名を検証してリクエストがLINEプラットフォームから送信されたことを確認するために必要です
-
- TypeScriptでの実装については次を参考にしました
import * as line from '@line/bot-sdk';

const config = {
  channelAccessToken: 'XXX',
  channelSecret: 'XXX',
} as line.Config;

const client = new line.Client(config as line.ClientConfig);

export const lineWebhook = functions
  .runWith({ memory: '1GB' })
  .region('asia-northeast1')
  .https.onRequest(async (request, response) => {
    const signature = request.get('x-line-signature');

    if (!signature || !line.validateSignature(request.rawBody, config.channelSecret as string, signature)) {
      throw new line.SignatureValidationFailed('signature validation failed', signature);
    }

    Promise.all(request.body.events.map(handleLineEvent))
      .then(result => response.json(result))
      .catch(error => console.error(error));
  });
- さらに、送信されたメッセージによって処理を変えるhandlerを追加します
- ここではテキストメッセージを受け取った時のeventオブジェクトを文字列化して返すようにしています
-
replyMessageで使用しているevent.replyTokenは一度しか使用できません
const handleLineEvent = async (event: line.WebhookEvent) => {
  if (event.type !== 'message' || event.message.type !== 'text') {
    return Promise.resolve(null);
  }

  const {
    message: { text },
  } = event;

  return client.replyMessage(event.replyToken, {
    type: 'text',
    text: JSON.stringify(event),
  });
};
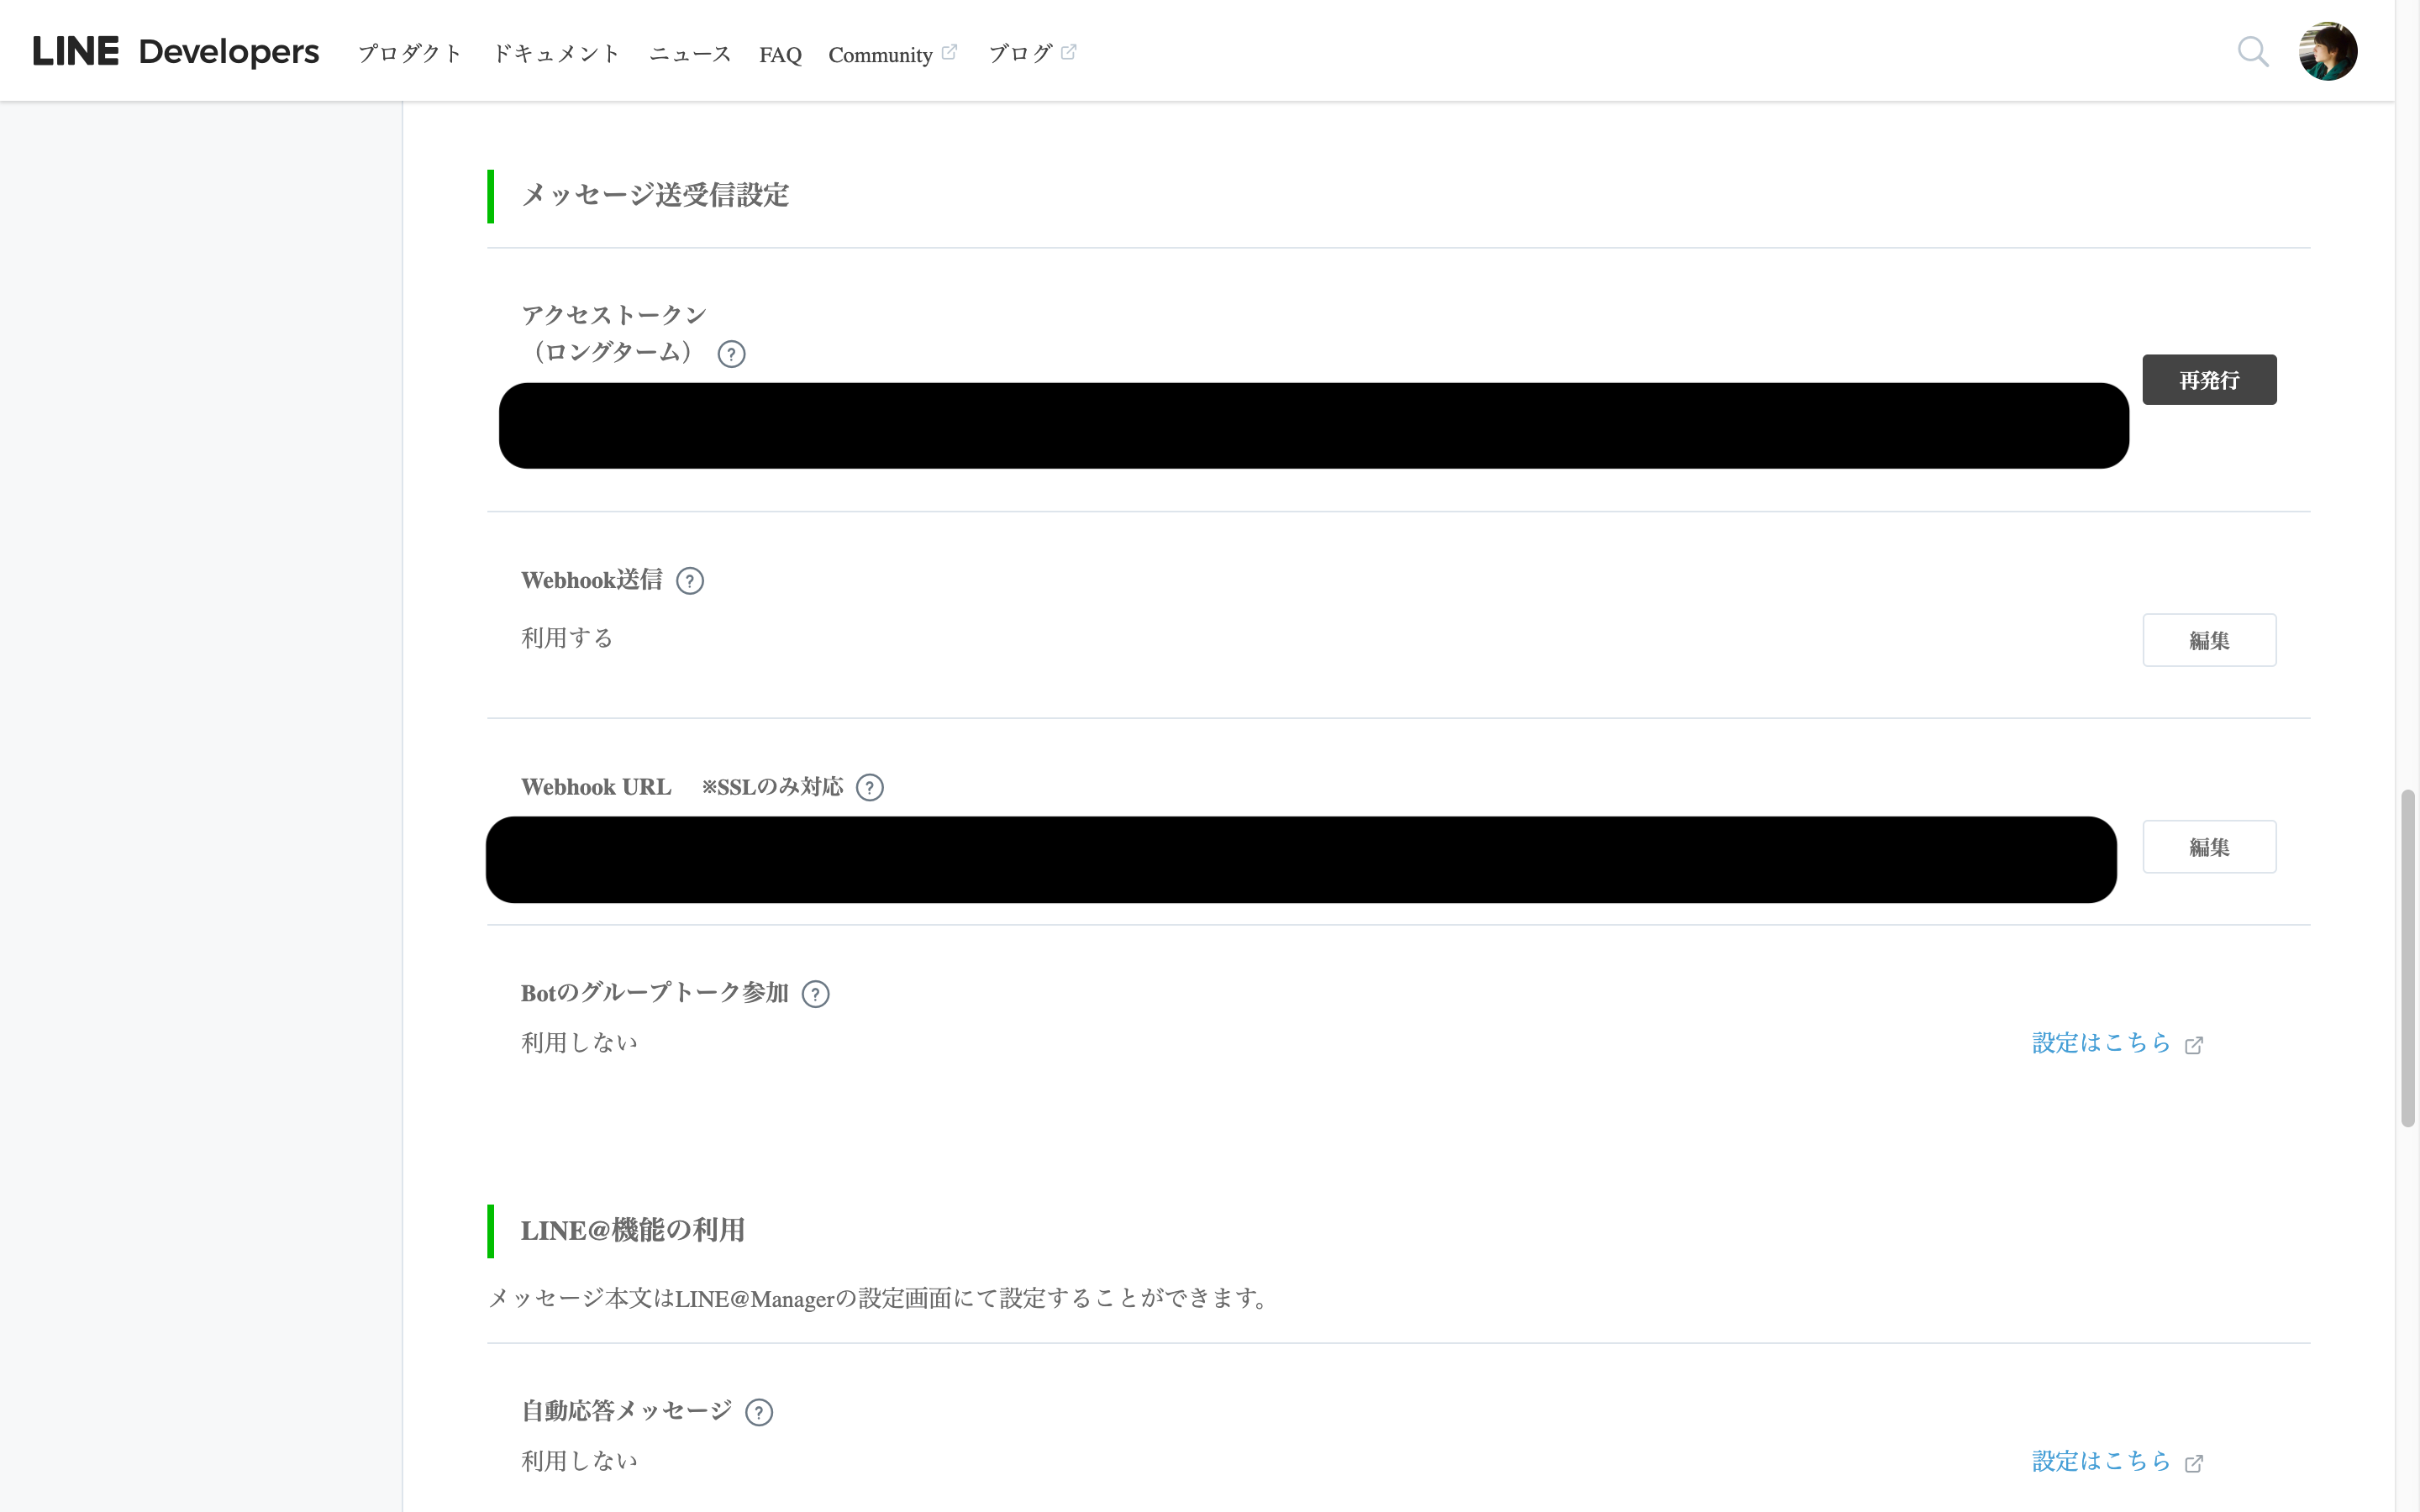
- 上記を追加したものをデプロイし、生成されたURLをfirebaseのコンソールページで確認してください
- それをLINEbot設定画面の
Webhook URLに登録することで、LINEbotにメッセージが送信された時にwebhookに指定されたURLを呼ぶようになります - メッセージを送信すると次のように返ってくることを確認します

- この時に返ってきたメッセージにある
userIdを使用するのでメモしていおいてください
 LINEに通知を送る
-
チェックというテキストが送信された時にクロールを行うように変更します-
targetUserIdには先ほど取得した自分のuserIdを記述します -
userIDが分かっている場合はclient.pushMessage()でpushメッセージを送信できます -
quickReplyを付与することで、メッセージと一緒に小さいテキストボタンなどをつけることができます - 今回は毎回
チェックという文字を入力しなくて良いようにチェックというメッセージアクションをつけています
-
const targetUserId = 'XXX';

const handleLineEvent = async (event: line.WebhookEvent) => {
  if (event.type !== 'message' || event.message.type !== 'text') {
    return Promise.resolve(null);
  }

  const {
    message: { text },
  } = event;

  let replyText = text;
  if (text === 'チェック') {
    await client.pushMessage(targetUserId, { type: 'text', text: 'クロール中...' });
    replyText = await getRingFitSaleStatus();
  }

  return client.replyMessage(event.replyToken, {
    type: 'text',
    text: replyText,
    quickReply: {
      items: [
        {
          type: 'action',
          action: {
            type: 'message',
            label: 'チェック',
            text: 'チェック',
          },
        },
      ],
    },
  });
};
- これをデプロイすると、
チェックというメッセージが送られた時だけクロールが実行されるようになります
 Cloud Functionの環境変数の設定
- 環境変数は
firebase functions:config:setで設定できます
firebase functions:config:set line.user_id="XXX" line.channel_access_token="XXX" line.channel_secret="XXX"
- 設定した環境変数は次のコマンドで確認できます
firebase functions:config:get

{
  "line": {
    "channel_access_token": "XXX",
    "user_id": "XXX",
    "channel_secret": "XXX"
  }
}
- 環境変数には
functions.config()でアクセスすることができます
const LINE_ENV = functions.config().line;

export const targetUserId = LINE_ENV.user_id;
export const config = {
  channelAccessToken: LINE_ENV.channel_access_token,
  channelSecret: LINE_ENV.channel_secret,
} as line.Config;
- これで環境変数を用いてCloud Functionを実行できるようになりました
 Cloud Schedulerで定期実行
- Cloud Schedulerはフルマネージドcronジョブサービスです
- 毎月3つのジョブまで無料で利用できます
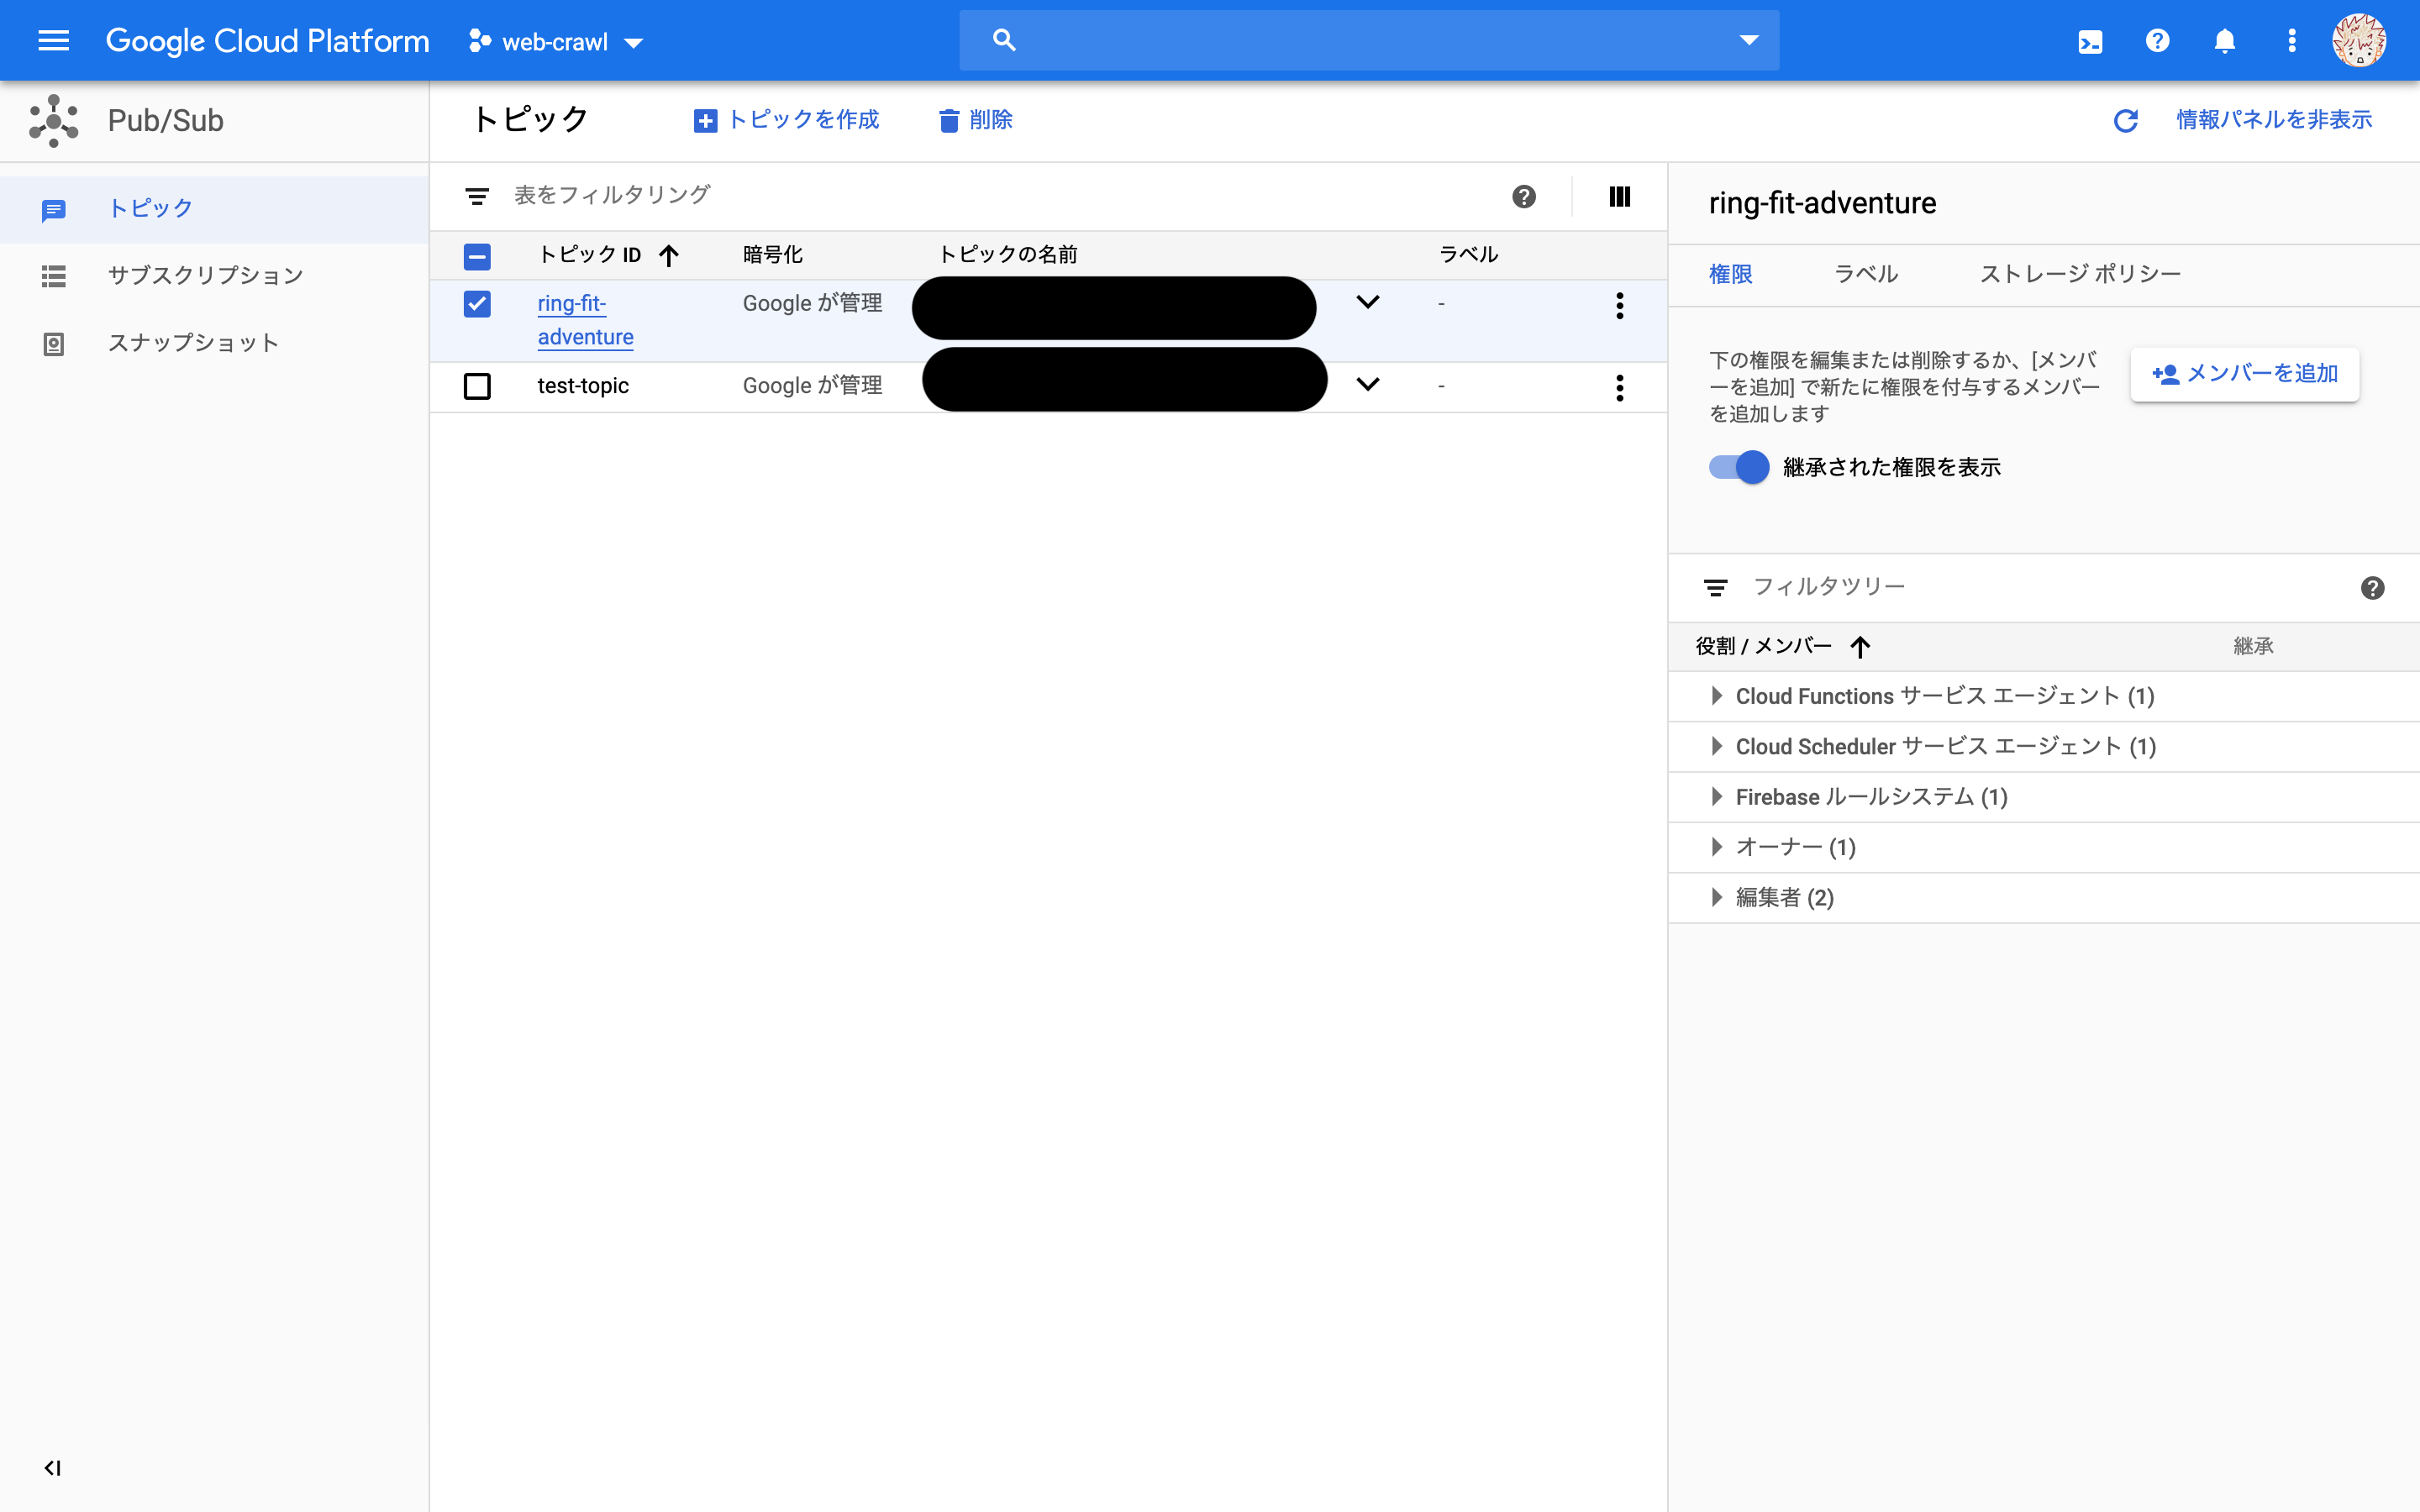
- 先にCloud Schedulerで呼ぶPub/Subトピックを作成しておきます
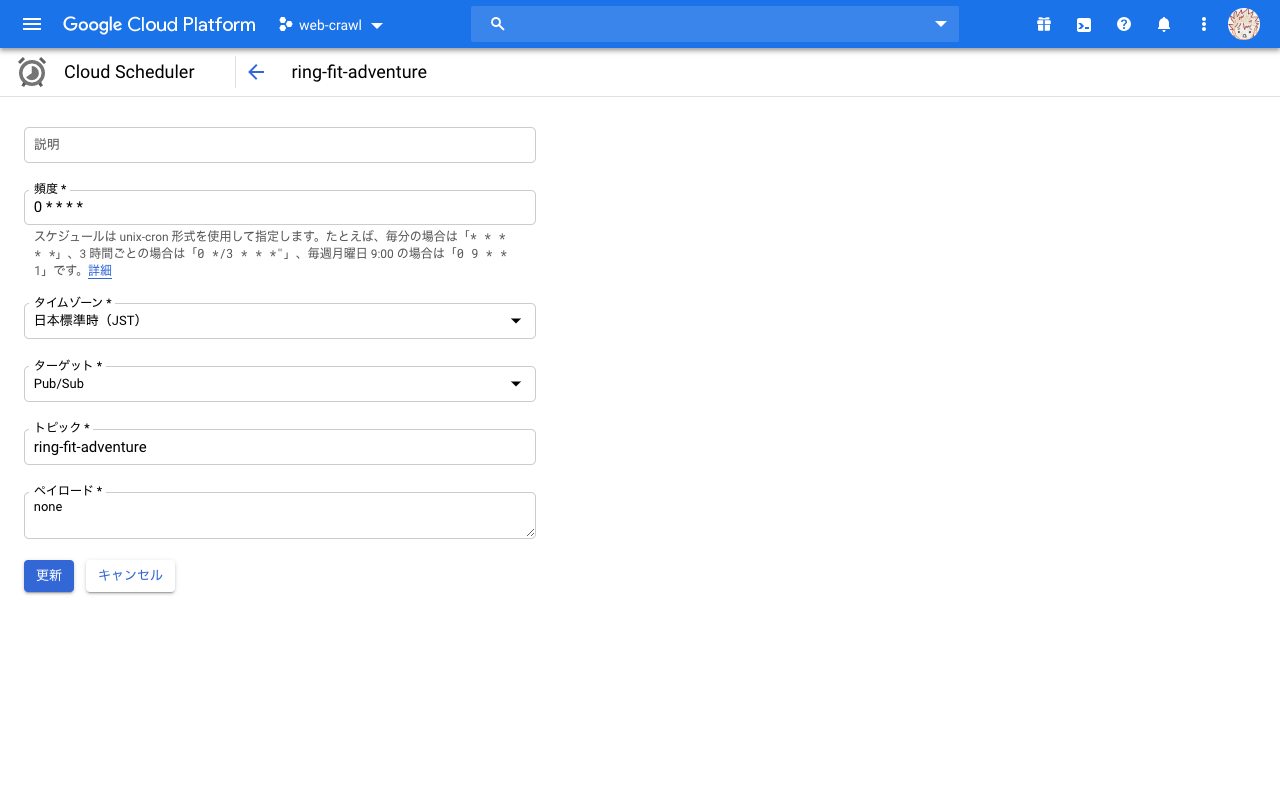
- その後、次のページからCloud Schedulerのジョブを作成します
- https://console.cloud.google.com/cloudscheduler
- 先ほどのPub/Subトピックを指定します
- 頻度を
0 * * * *とした場合、毎時0分に実行されます
- このPub/Subをトリガーとする関数を作成します
export const helloPubSub = functions
  .runWith({ memory: '1GB' })
  .region('asia-northeast1')
  .pubsub.topic('ring-fit-adventure')
  .onPublish(async message => {
    const text = await getRingFitSaleStatus();
    await client.pushMessage(targetUserId, { type: 'text', text });
    return text;
  });
- 上記をデプロイ後、Cloud Schedulerのページで
今すぐ実行をクリックして試すことができます - Cloud Functionのログが正常であれば成功です
 Cloud Firestoreにクロール結果を保存
- このままだと毎時LINEに通知がきてしまうので、変更があった場合のみ通知されるようにします
- 次のように
crawlTypeとnewResultTextを引数とした関数を作成しました- Firestoreの
crawlコレクションからcrawlTypeが一致するものを探します - 既に
resultTextがある場合は比較し、同じ場合はfalseを返して終了します - それ以外の場合は新しい
resultTextで更新し、trueを返します -
FieldValue.serverTimestamp()ではタイムスタンプを自動で付与することができます
- Firestoreの
import * as admin from 'firebase-admin';

admin.initializeApp();
const db = admin.firestore();
const { FieldValue } = admin.firestore;

const updateCrawlResult = async (crawlType: string, newResultText: string) => {
  const crawlCollection = db.collection('crawl');
  const doc = await crawlCollection.doc(crawlType).get();

  if (doc.exists) {
    const result = doc.data();
    if (!result) {
      return false;
    }

    const { resultText } = result;
    if (newResultText === resultText) {
      return false;
    }
  }

  const crawlData = {
    resultText: newResultText,
    updated_at: FieldValue.serverTimestamp(),
  };

  crawlCollection
    .doc(crawlType)
    .set(crawlData, { merge: true })
    .catch(err => {
      throw new functions.https.HttpsError('internal', 'Failed to set crawl data', err);
    });

  return true;
};
- これを用いて今までの関数に組み込むと次のようになります
-
checkRingFitStatus()を作成し、クロールとデータの更新を行い、クロール結果をresultText: string、変更の有無をdifference: booleanで返します - 上記の返り値に合わせて処理を書き変えます
-
const checkRingFitStatus = async () => {
  const ringFitCrawlType = 'ring-fit-adventure';
  const resultText = await getRingFitSaleStatus();
  const difference = await updateCrawlResult(ringFitCrawlType, resultText);
  return { difference, resultText };
};

const handleLineEvent = async (event: line.WebhookEvent) => {
  if (event.type !== 'message' || event.message.type !== 'text') {
    return Promise.resolve(null);
  }

  const {
    message: { text },
  } = event;

  let replyText = text;
  if (text === 'チェック') {
    await client.pushMessage(targetUserId, { type: 'text', text: 'クロール中...' });
    const result = await checkRingFitStatus();
    replyText = result.resultText;
  }

  return client.replyMessage(event.replyToken, {
    type: 'text',
    text: replyText,
    quickReply: {
      items: [
        {
          type: 'action',
          action: {
            type: 'message',
            label: 'チェック',
            text: 'チェック',
          },
        },
      ],
    },
  });
};

export const helloPubSub = functions
  .runWith({ memory: '1GB' })
  .region('asia-northeast1')
  .pubsub.topic('ring-fit-adventure')
  .onPublish(async message => {
    const result = await checkRingFitStatus();
    if (result.difference) {
      await client.pushMessage(targetUserId, { type: 'text', text: result.resultText });
    }
    return result;
  });
- これで定期処理とLINEのwebhookの両方をトリガーにした処理が完成しました!
- ソースコードはこちら
 おわりに
おわりに
- このような仕組みは他の使い方にも応用可能ですし、GCP、puppeteer、TypeScriptを合わせたチュートリアルにもなると思うので、参考にしていただけたら幸いです
- また、内容に不備などございましたら気軽に編集リクエストを送っていただけると助かります

- あとは入荷を待つのみ・・・!
 追記
追記
もりもりやってます
#リングフィットアドベンチャー #RingFitAdventure #NintendoSwitch pic.twitter.com/qDGlfGRYq5
— みかん三世 (@mikan_the_third) January 4, 2020
