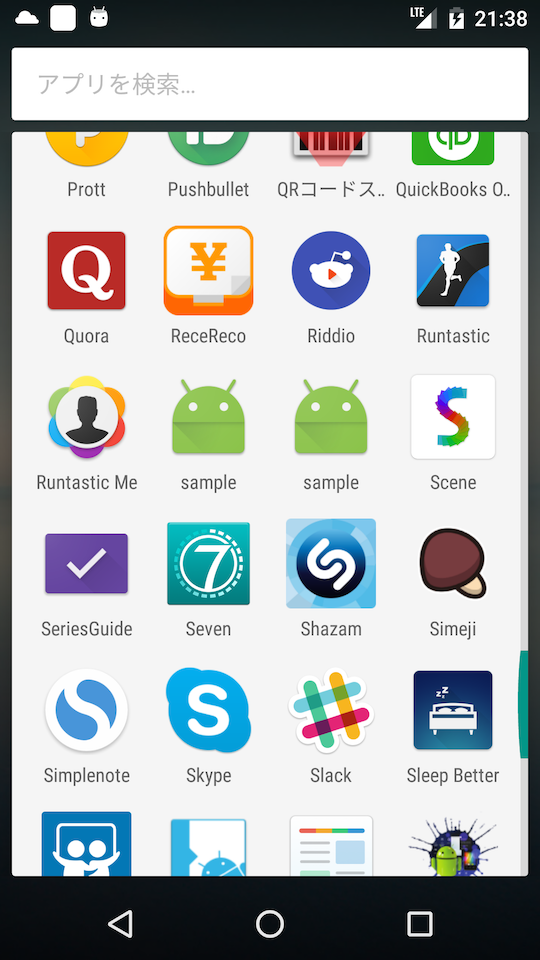
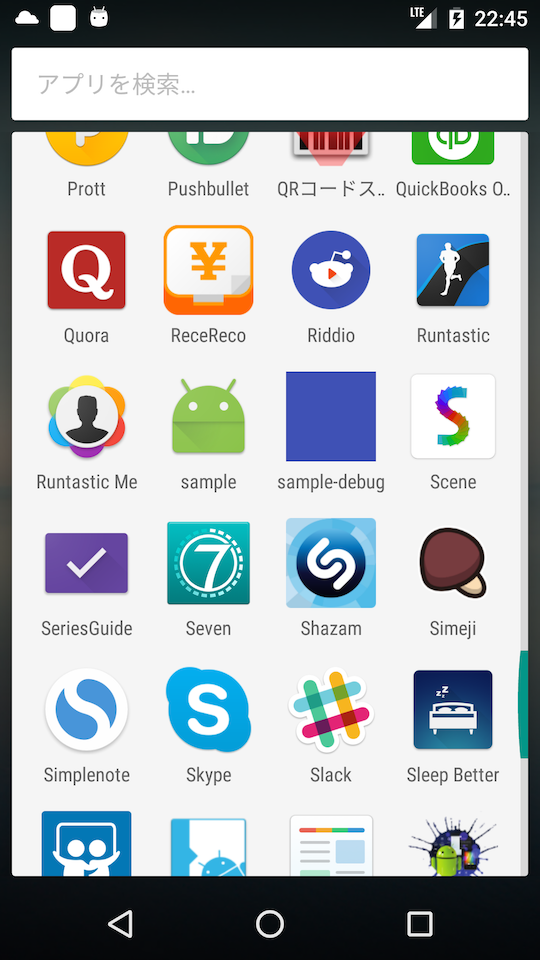
とりあえずアプリは作れるけど、、、
androidアプリからプログラミングを初めて、ある程度アプリは作れるようにはなった。
で、いろいろやってると
- debug版とrelease版を同時に端末に入れたい
- AndroidManifestをdebugとreleaseで分けたい
- apkをストアに上げる度に、同じversionCodeが存在しますエラー食らう
ってな思いが出てきます。
これらは、初心者用の教科書とかには載っていないけど、実際開発やってると、結構重要だったりすると思います。
デバッグ版とリリース版が実機内に両立できない問題は、片方をアンインストールしてもう一方をインストールとかやってると、結構めんどくさいです。
同じく、versionCode問題も、手動で出来るっちゃできるんだけど、それって面倒だし、ダサい。
って具合の、問題とまではいかないけれど、初心者だから甘んじてしまう面倒を、解消するためのメモです。
debug版とrelease版を同一端末内に共存させたい
まず、プロジェクト作製時のapp/build.gradleがこんな感じ。
apply plugin: 'com.android.application'

android {
    compileSdkVersion 23
    buildToolsVersion "23.0.1"

    defaultConfig {
        applicationId "com.exercise.sample"
        minSdkVersion 15
        targetSdkVersion 23
        versionCode 1
        versionName "1.0"
    }
    buildTypes {
        release {
            minifyEnabled false
            proguardFiles getDefaultProguardFile('proguard-android.txt'), 'proguard-rules.pro'
        }
    }
}

dependencies {
    compile fileTree(dir: 'libs', include: ['*.jar'])
    testCompile 'junit:junit:4.12'
    compile 'com.android.support:appcompat-v7:23.1.0'
    compile 'com.android.support:design:23.1.0'
}
今回いじるのは、buildTypes
buildTypes {
        release {
            minifyEnabled false
            proguardFiles getDefaultProguardFile('proguard-android.txt'), 'proguard-rules.pro'
        }
        debug {
            applicationIdSuffix '.debug'
            versionNameSuffix 'd'
        }
    }
こんな感じにします。
applicationIdSuffixってのは、debug版のapplicationIdの接尾辞ってことね。要はお尻に.debugってつけてね、ってGradleさんにお願する訳です。
versionNameSuffixも同じ。ただ、applicationIdの方はidだから、勝手に書けない(たぶん、ピリオドと英数字だけ。たぶんね。違ったら教えてください)けど、versionNameの方はいろいろ自由。
たぶんね。
で、こんな具合に共存できても、見分けつかないとやだ。
ってんで次。
AndroidManifestをdebug, releaseで分ける
アイコンとアプリ名くらいは、debug, releaseで分けたい。
で、それってAndroidManifestをそれぞれで使い分けたいってことですよね。
ここでは、
app/src/debug/AndroidManifest.xml
app/src/release/AndroidManifest.xml
を自分で作成して、デフォルトでAndroid Studioが用意してくれる
app/src/main/AndroidManifest.xml
にビルド時にマージしてもらいましょう。
その際、debugビルド時ならdebug配下の、releaseならrelease配下のAndroidManifestを、Gradleが勝手にマージしてくれます。
今言ったように、mainのAndroidManifestに、各AndroidManifestをくっつけてくれる訳ですから、新たに作成するdebug/AndroidManifest, release/AndroidManifestには、書き分けたいとこだけを書けばいいんです。
あるpermissionを、デバッグ時には欲しいけどリリース版では要らないんだよねーってのも、この方法で解決できるかと思います。
例えば、deployGateのSDKで、ログをリモートで取得することができますが、debug版でだけpermissionタグを書いておけば、毎度リリース版ビルドの度にこの部分を削除しなくて済みます。
https://deploygate.com/docs/sdk
現状のmain/AndroidManifestはこんな感じ。
<?xml version="1.0" encoding="utf-8"?>
<manifest xmlns:android="http://schemas.android.com/apk/res/android"
    package="com.exercise.sample.debug"
    android:versionCode="1"
    android:versionName="1.0d" >

    <uses-sdk
        android:minSdkVersion="15"
        android:targetSdkVersion="23" />

    <application
        android:allowBackup="true"
        android:icon="@mipmap/ic_launcher"
        android:label="@string/app_name"
        android:supportsRtl="true"
        android:theme="@style/AppTheme" >
        <activity
            android:name="com.exercise.sample.MainActivity"
            android:label="@string/app_name"
            android:theme="@style/AppTheme.NoActionBar" >
            <intent-filter>
                <action android:name="android.intent.action.MAIN" />

                <category android:name="android.intent.category.LAUNCHER" />
            </intent-filter>
        </activity>
    </application>

</manifest>
アプリ名は、applicationタグの、labelってとこで指定してます。アイコンも変えた方がいいでしょうから、
        android:icon="@mipmap/ic_launcher"
        android:label="@string/app_name"
の部分だけ削除します。
で、appフォルダにdebug用、release用のフォルダを作成し、その中に新しくAndroidManifest.xmlファイルを作り、以下のように書きます。
<?xml version="1.0" encoding="utf-8"?>
<manifest xmlns:android="http://schemas.android.com/apk/res/android"
          package="com.exercise.sample" >

    <application
        android:icon="@color/colorPrimary"
        android:label="@string/debug_app_name">
    </application>
</manifest>
<?xml version="1.0" encoding="utf-8"?>
<manifest xmlns:android="http://schemas.android.com/apk/res/android"
          package="com.exercise.sample" >

    <application
        android:icon="@mipmap/ic_launcher"
        android:label="@string/app_name">
    </application>
</manifest>
アイコン作るの面倒なんで、debug版ではcolorPrimaryにしてます。
で、これでOKだと思ってたんですけど、applicationタグのandorid:labelって、ランチャーの名前ではないようでした。
設定画面とかで表示される名前ではあるんですけど、、、
よくわかんないけど、ここでは深入りせずに、main/AndroidManifest.xmlのMainActivityからlabelを削除しましょう。
<?xml version="1.0" encoding="utf-8"?>
<manifest xmlns:android="http://schemas.android.com/apk/res/android"
    package="com.exercise.sample" >

    <application
        android:allowBackup="true"
        android:supportsRtl="true"
        android:theme="@style/AppTheme" >
        <activity
            android:name=".MainActivity"
            android:theme="@style/AppTheme.NoActionBar" >
            <intent-filter>
                <action android:name="android.intent.action.MAIN" />

                <category android:name="android.intent.category.LAUNCHER" />
            </intent-filter>
        </activity>
    </application>

</manifest>
はい、こんな感じ。
versionCodeのincrement
GooglePlayにいよいよ上げようって時に、リリース版でいろいろいじってたらバグみっけて、直してもっぺん署名付きリリース版ビルドしてよしOK!ってなってストアにapkアップロードしたら、同じバージョンコードのapkが存在します、ってなってうあああああ、ってなりながら再ビルド
ってなことよくあると思います。
そんな時にうあああああああああってならないために、Gradleにバージョンコードを毎度1ずつ足してもらいましょう。
おなじみapp/build.gradleです。
import java.util.regex.Pattern

apply plugin: 'com.android.application'

android {
    compileSdkVersion 23
    buildToolsVersion "23.0.1"

    task('incrementVersionCode') << {
        // AndroidManifest.xmlを取得
        def manifestFile = file("src/release/AndroidManifest.xml")
        def manifestText = manifestFile.getText()
        // versionCodeの記述を探す
        def pattern = Pattern.compile("versionCode=\"(\\d+)\"")
        def matcher = pattern.matcher(manifestText)
        matcher.find()
        def versionCode = Integer.parseInt(matcher.group(1))
        // AndroidManifest.xmlの記述を更新
        def manifest = matcher.replaceAll("versionCode=\""
                + ++versionCode + "\"")
        manifestFile.write(manifest)
    }

    tasks.whenTaskAdded { task ->
        if (task.name == 'generateReleaseBuildConfig') {
            task.dependsOn 'incrementVersionCode'
        }
    }

    defaultConfig {
        applicationId "com.exercise.sample"
        minSdkVersion 15
        targetSdkVersion 23
        versionName "1.0"
    }
    // ~~ 省略 ~~
}
読めばだいたいわかるんですけど、releace/AndroidManifest.xmlからversionCodeの記述を探してきて、それをインクリメントして書きなおす、って感じね。
でもversionCodeなんてAndroidManifestに書いてないよって?じゃあ書きましょう。
<?xml version="1.0" encoding="utf-8"?>
<manifest xmlns:android="http://schemas.android.com/apk/res/android"
    package="com.exercise.sample"
    android:versionCode="1">

    <application
        android:icon="@mipmap/ic_launcher"
        android:label="@string/app_name">
    </application>
</manifest>
これで、リリース版をビルドする度にここのversionCodeがインクリメントされていきます。
あ、defaultConfig内のversionCodeを削除するのを忘れないでください。
本来、versionCodeは、AndroidStudioだとbuild.gradleが管理してるんですけど、この方法だと、AndroidManifest.xmlに持たせてるんで、build.gradle内にもversionCodeがあると競合してしまうので。
署名付きapkを作成する度に更新されていくversionCodeを見ると、かわいいですよ。
まだまだペーペーなんでここはこうせい!みたいなのいただけると嬉しいです。
よろしくお願いします。

