前書き
以前こちらの記事でServer to Server OAuth Appの利用について投稿しましたが、
その後JWT Appの廃止など大きな変更点があったため、改めてリライトしたものをお送りいたします。不明点などあれば、コメントやDMでどしどしお寄せください。
はじめに🐣
こんにちは、Zoom Developer Supportです。Zoom APIを自社システムから安全・手軽に使いたい方には「Server to Server OAuth App」がおすすめです。
管理者権限のトークンなので、取り扱いには十分ご注意が必要ですが、この仕組みならユーザーごとに都度認証を行う必要なく、システム間で直接API連携が実現できます。
ここではアプリ作成からトークン取得、API呼び出しまでの基本フローをまとめています。
Server to Server OAuth Appとは?🎁

ZoomのServer to Server OAuth Appは、「サーバー間連携(バックエンド同士の連携)」に特化した認証方式です。
通常のOAuth(ユーザー認証あり)
一般的なOAuthアプリは、
- エンドユーザーが自分で認証画面にログインし、権限を与える
- サービスA(たとえば自作アプリ)がサービスB(Zoomなど)の「あなたの情報へのアクセス権」を “本人同意”で取得 する
というフローです。そのため毎回ユーザーの認証(ログイン/許可)が発生します。
Server to Server OAuth App(サーバー間認証)
一方、Server to Server OAuth Appは
- ユーザー個別の認証を必要とせず
- システム同士(自社システム⇔Zoom)で、管理者権限のトークンを使ってAPI通信を行う方式です
主な特徴として
- 管理者が一度アプリ登録・スコープ許可すれば、以降ユーザーの操作は不要
- たとえば定期的なバッチ処理、社内の管理ツール、バックグラウンドで自動的にZoom APIを呼びたいケースに最適
- 「人間の認証フロー」がない=完全にバックエンド用途
という違いがあります。
| OAuth(ユーザー認証) | Server to Server OAuth App(サーバー認証) | |
|---|---|---|
| 利用シーン | ユーザー個人のZoom連携・外部サービスとの連携 | 社内自動化・バッチ・管理者主導の連携 |
| 認証フロー | 各ユーザーごとに認証画面で同意・許可 | 管理者が一度設定すればOK |
| 利用例 | ユーザーごとのZoom予定取得 ユーザーのZoom Phone録音取得など |
社内自動会議作成 定期的なアカウントのレポート取得など |
「ユーザーごとに“許可”を得てデータを取る」場合は通常のOAuth、「自動的にシステムで操作したい」「管理者として全体を操作したい」場合はServer to Server OAuth Appを使う、というイメージです。
Server to Server OAuth Appの特徴 🚀
Server to Server OAuth アプリには以下のような特徴があります。
- オーナー権限でAPIアクセスできるトークンを発行できます
- トークンの有効期限は1時間
- リフレッシュトークンはありません(都度発行)
- アプリが無効化・削除されると発行済みトークンも無効化されます
- 必要なAPIスコープのみ付与できます(最小限の権限付与を推奨)
- 社内利用(internal use)のみ許容されています
Server to Server OAuth Appで発行されるトークンは管理者と同等の権限を持っていますので取り扱いにはご注意ください。
また、IDやSecret、発行したトークンは社外共有禁止となっています。例えば、Zoomのミーティング、ウェビナーなどの自動化を目的として Server to Server OAuth Appの作成を促し、そのClient IDやSecretを要求するサードパーティのサービスなども同様に規約違反となります。
社外公開や外部連携が必要な場合には、Zoom ISVパートナープログラムによる組込み、もしくはZoom App Marketplaceでのアプリ公開(連携)をご検討ください。
公式規約リンク
Marketplaceへの登録手順 📝
-
Zoom Marketplaceにサインインします。
-
サインインしたユーザーがオーナーでない場合、「管理者 > 役割」から Server-to-server OAuth App の権限を付与して「設定を保存」します。
-
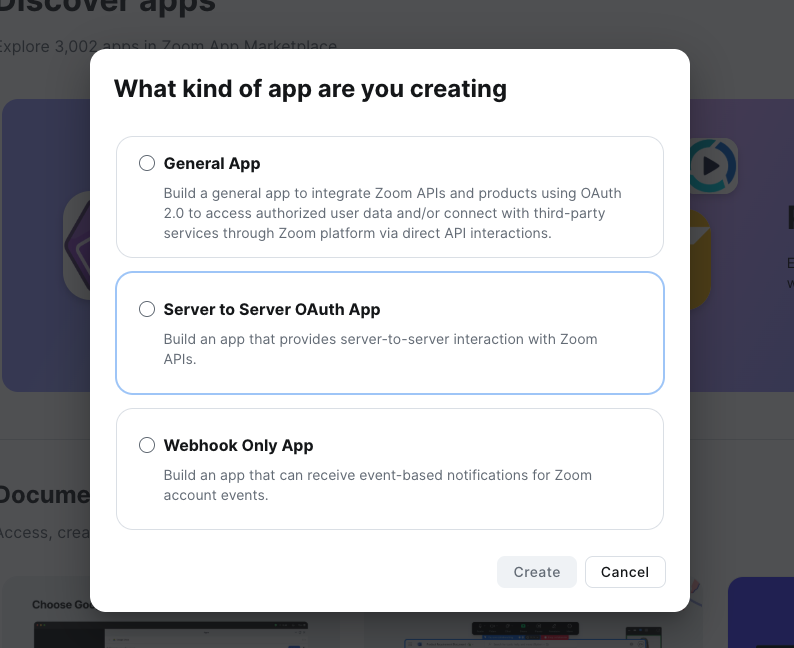
Marketplace右上の「Build App」→「Server-to-server OAuth」を選択し「Create」をクリックします。
-
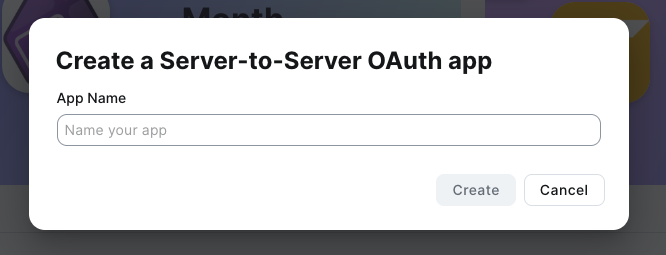
「App Name」に名前を入力し「Create」で進みます。
-
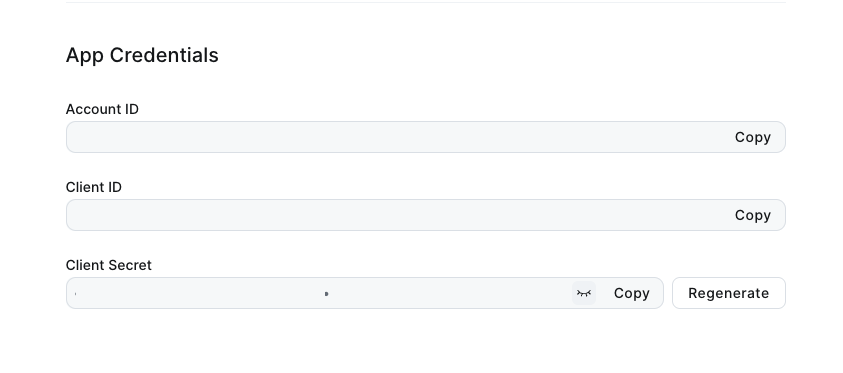
「Account ID」「Client ID」「Client Secret」が表示されるので必ず控えておきます。
-
Continueをクリックして、名前やメールアドレスなどを入力します(通知先となる有効なメールアドレスを指定してください)。 -
Webhook通知が不要な場合、Feature画面はスキップして大丈夫です。

-
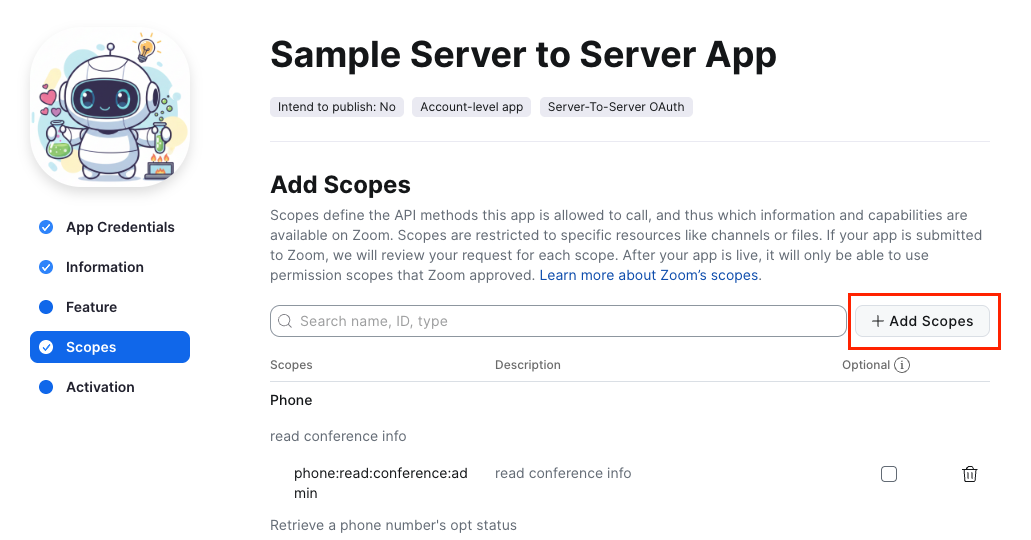
「Scopes」で必要なAPI権限のみ選択します。
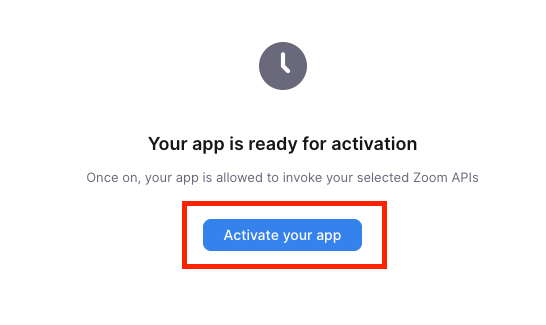
-
最後に「Activate your App」をクリックし、有効化します。
アクセストークン生成方法 🔑
アクセストークンは「Client ID」「Client Secret」をBase64エンコードし、「Account ID」とともにZoomにPOSTリクエストすることで取得できます。
Curlコマンドで取得する
以下のコマンドで、1行でアクセストークンを取得することができます。
curl -s --request POST \
  --url "https://zoom.us/oauth/token?grant_type=account_credentials&account_id=<Account ID>" \
  --header "Authorization: Basic $(echo -n '<Client ID>:<Client Secret>' | base64)" \
  | jq -r .access_token
jqコマンドのインストールが必要です。
Node.jsで取得する
const request = require('request');

const accountId = '<Account ID>';
const clientId = '<Client ID>';
const clientSecret = '<Client Secret>';
const basenc = Buffer.from(clientId + ':' + clientSecret).toString('base64');

async function getToken(accountId, basenc) {
  return new Promise((resolve, reject) => {
    request({
      url: `https://zoom.us/oauth/token?grant_type=account_credentials&account_id=${accountId}`,
      method: "POST",
      headers: {
        'Authorization': 'Basic ' + basenc
      }
    }, (error, response, body) => {
      if (error) {
        reject(error);
      } else {
        const obj = JSON.parse(body);
        resolve(obj.access_token);
      }
    });
  });
}

// 使い方
getToken(accountId, basenc).then(token => {
  console.log(token);
});
APIリクエスト例 📡
取得したアクセストークンを使い、Zoom APIにリクエストできます。以下は、自分の名前を取得するコマンドです。
Curlで実行する
#access_tokenを取得して保存
export access_token=$(curl -s --request POST \
  --url "https://zoom.us/oauth/token?grant_type=account_credentials&account_id=<Account ID>" \
  --header "Authorization: Basic $(echo -n '<Client ID>:<Client Secret>' | base64)" \
  | jq -r .access_token)
#取得したトークンを使って /v2/users/me エンドポイントを呼び出し、display_nameを取得
curl -s --request GET --url 'https://api.zoom.us/v2/users/me' \
  --header "Authorization: Bearer $access_token" | jq -r .display_name
Node.jsで実行する
const axios = require('axios');

const accountId = '<Account ID>';
const clientId = '<Client ID>';
const clientSecret = '<Client Secret>';
const basenc = Buffer.from(`${clientId}:${clientSecret}`).toString('base64');
const baseUrl = 'https://api.zoom.us';
const authUrl = `${baseUrl}/oauth/token?grant_type=account_credentials&account_id=${accountId}`;

async function getAccessToken() {
  try {
    const response = await axios.post(authUrl, null, {
      headers: { 'Authorization': `Basic ${basenc}` },
    });
    return response.data.access_token;
  } catch (err) {
    console.error('Error getting access token:', err.response?.data || err.message);
    return null;
  }
}

async function getUserInfo(accessToken) {
  try {
    const response = await axios.get(`${baseUrl}/v2/users/me`, {
      headers: { 'Authorization': `Bearer ${accessToken}` },
    });
    return response.data.display_name;
  } catch (err) {
    console.error('Error getting user info:', err.response?.data || err.message);
    return null;
  }
}

(async () => {
  console.log('starting');
  const token = await getAccessToken();
  if (token) {
    const displayName = await getUserInfo(token);
    if (displayName) {
      console.log(`success! > ${displayName}`);
    }
  }
})();
参考リンク・リソース 🌏
おわりに 🏁
Server to Server OAuth App はこんな用途で便利です:
-
社内システムや管理ツールからZoom APIを使いたいとき
例)全社員のミーティングスケジュールを自動取得したい -
定期的なバッチ処理やレポート作成を自動化したいとき
例)毎朝、前日の会議情報をまとめてSlackに通知 -
バックグラウンドで動くアプリケーションやサービス連携
例)申請システムとZoomを連動させて自動で会議室を作成
など、ユーザーごとの個別認証がいらない 場合や、管理者として自動処理したい場面で活用できます。
ただし、先もお伝えしましたが管理者権限トークンの取扱いには十分ご注意ください。
先ほども申し上げましたが、社外公開やユーザー提供を考える場合は、必ずZoom App Marketplaceの申請を経て公開いただくか、Zoom ISVパートナープログラムのご契約をご検討ください。困ったときは公式ドキュメントやZoomサポートも活用してください。