はじめに
- 普段はOpenLayersばかりいじってて、自治体向けweb版ハザードマップとかやってたりします。
- JSフロントエンドフレームワークを使わずVanila JSが得意です。
- サンプルとしてコードを書いているので、表現が雑です。
- さらに、実際にコードを書いたのが半年以上も前のことで、詳しいことを覚えてません。
そういうのでも良ければ、お目汚しかもしれませんが、どうぞ。
目標
仙台市の避難所・避難場所を、とりあえず表示してみたい。
なお、公式には、「せんだいくらしのマップ | 位置選択」から参照できる。
最初の一歩
開発を始める前に、HERE無料アカウントの取得を行いました。
参考→地図 位置情報サービス HERE 無料アカウント有効化手順 #初心者 - Qiita
続いて、アクセスマネージャにて、APIキーを取得しました。
さらに、webpack5を使うプロジェクトとして立ち上げてます。
プロジェクト構造

srcフォルダの下に、index.html, index.js, index.scss を置いてます。
<!DOCTYPE html>
<html lang="en">
<head>
    <meta charset="UTF-8">
    <title>heretest1</title>
</head>
<body>
<div id="mapContainer"></div>
</body>
</html>
@import "@here/maps-api-for-javascript/bin/mapsjs-ui.css";

html, body {
  width: 100%;
  height: 100%;
  margin: 0;
  padding: 0;
}

#mapContainer {
  width: 100%;
  height: 100%;
  margin: 0;
  padding: 0;
}
JavaScriptのコードはサンプルコードの継ぎはぎになってますから、あまり自分では書かないスタイルに戸惑いましたが、とりあえず動いてます。
'use strict';
import "./index.scss";

import(/* webpackChunkName: "mapsjs" */ '@here/maps-api-for-javascript').then(
    ({default: H}) => {
        const platform = new H.service.Platform({
            'apikey': '---ここにAPIキーを貼り付ける---'
        });


        // configure an OMV service to use the `core` enpoint
        const omvService = platform.getOMVService({path: 'v2/vectortiles/core/mc'});
        const baseUrl = 'https://js.api.here.com/v3/3.1/styles/omv/oslo/japan/';

        // create a Japan specific style
        const style = new H.map.Style(`${baseUrl}normal.day.yaml`, baseUrl);

        // instantiate provider and layer for the basemap
        const omvProvider = new H.service.omv.Provider(omvService, style);
        const omvlayer = new H.map.layer.TileLayer(omvProvider, {max: 22});

        // instantiate (and display) a map:
        const map = new H.Map(
            document.getElementById('mapContainer'),
            omvlayer,
            {
                zoom: 12,
                center: {lng: 140.882041, lat: 38.259901}
            });
        const ui = H.ui.UI.createDefault(map, {});
        const mapSettings = ui.getControl('mapsettings');
        mapSettings.setVisibility(false);

        const behavior = new H.mapevents.Behavior(new H.mapevents.MapEvents(map));

        const icon_hinanjo = new H.map.Icon('images/hinanjo.png', {
            size: {w: 16, h: 16}
        });
        const icon_hinan_basho = new H.map.Icon('images/hinan_basho.png', {
            size: {w: 16, h: 16}
        });
        const reader = json_to_marker(map, ui, 'json/shitei_hinanjo.geojson', icon_hinanjo);
        const reader2 = json_to_marker(map, ui, 'json/chiiki_hinan_basho.geojson', icon_hinan_basho);
        const reader3 = json_to_marker(map, ui, 'json/koiki_hinan_basho.geojson', icon_hinan_basho);
    }
).catch(error => console.log(error));

function json_to_marker(map, ui, url, icon) {
    const reader = new H.data.geojson.Reader(url, {
        style: function (mapObject) {
            mapObject.icon = icon;
        },
        disableLegacyMode: true
    });
    reader.parse();
    map.addLayer(reader.getLayer());
    reader.getLayer().getProvider().addEventListener("tap", function (e) {
        if (e.target instanceof H.map.Marker) {
            console.log(e.target.toGeoJSON());
            const json = e.target.toGeoJSON().properties;
            const keys = Object.keys(json);
            let html = `<table>`;
            for (const k of keys) {
                html += `<tr><th nowrap>${k}</th><td>${json[k]}</td>`;
            }
            html += `</table>`;
            const bubble = new H.ui.InfoBubble(e.target.getGeometry(), {
                // read custom data
                content: html
            });
            // show info bubble
            ui.addBubble(bubble);
        }
    });
    return reader;
}
実行時に読み込ませるgeojsonファイルは、dist/jsonフォルダにまとめてます。
「せんだいくらしのマップ | オープンデータ一覧」から地域避難場所、広域避難場所、指定避難所など取得しています。
jsonとみなして整形ツールにかけたものを(一部分ですが)示します:

webpackの設定は、こんな感じ:
const path = require('path');
const MiniCssExtractPlugin = require("mini-css-extract-plugin");
const CssMinimizerPlugin = require("css-minimizer-webpack-plugin");
const HtmlWebPackPlugin = require('html-webpack-plugin');

module.exports = {
   node: { global: false },
   mode: 'production',
   entry: {
       index: './src/index.js',
   },
   devtool: 'source-map',
   output: {
       /* publicPath: './out/', */
       path: path.resolve(__dirname, 'dist'),
       filename: '[name].js',
       chunkFilename: '[name].bundle.js'
   },
   module: {
       rules: [
           {
               test: /\.html$/,
               loader: 'html-loader',
           },

           {
               test: /\.(sa|sc|c)ss$/,
               use: [
                   // CSSファイルを書き出すオプションを有効にする
                   {
                       loader: MiniCssExtractPlugin.loader,
                   },
                   // CSSをバンドルするための機能
                   {
                       loader: "css-loader",
                       options: {
                           // オプションでCSS内のurl()メソッドの取り込まない
                           url: false,
                           // ソースマップの利用有無
                           sourceMap: true,
                           // Sass+PostCSSの場合は2を指定
                           importLoaders: 2,
                       },
                   },
                   // PostCSSのための設定
                   {
                       loader: "postcss-loader",
                       options: {
                           // PostCSS側でもソースマップを有効にする
                           sourceMap: true,
                           postcssOptions: {
                               // ベンダープレフィックスを自動付与する
                               plugins: ["autoprefixer"],
                           },
                       },
                   },
                   // Sassをバンドルするための機能
                   {
                       loader: "sass-loader",
                       options: {
                           // ソースマップの利用有無
                           sourceMap: true,
                       },
                   },
               ]
           },
           {
               test: /\.(png|svg|jpg|gif)$/,
               use: {
                   loader: 'url-loader',
                   options: {
                       name: './dist/img/icon/[name].[ext]',
                   }
               }
           },
           {
               test: /\.(woff|woff2)$/,
               use: {
                   loader: 'file-loader',
                   options: {
                       name: './[name].[ext]',
                   }
               }
           }
       ]
   },
   plugins: [
       new HtmlWebPackPlugin({
           template: './src/index.html',
           filename: 'index.html',
       }),
       new MiniCssExtractPlugin({
           filename: "[name].bundle.css",
           /* chunkFilename: "[id]-bundle.css", */
           ignoreOrder: false
       }),
   ],
   devServer: {
       static: {
           directory: __dirname + '/dist',
           watch: true,
       },
       devMiddleware: {
           publicPath: '/',
       },
       open: true,
       port: 8082,
   },
   optimization: {
       splitChunks: {
           chunks: 'all',
           cacheGroups: {
               defaultVendors: {
                   test: /[\\/]node_modules[\\/]/,
                   priority: -10,
                   reuseExistingChunk: true,
               },
               default: {
                   minChunks: 2,
                   priority: -20,
                   reuseExistingChunk: true,
               },
           }
       },
       minimizer: [new CssMinimizerPlugin()]
   }
};
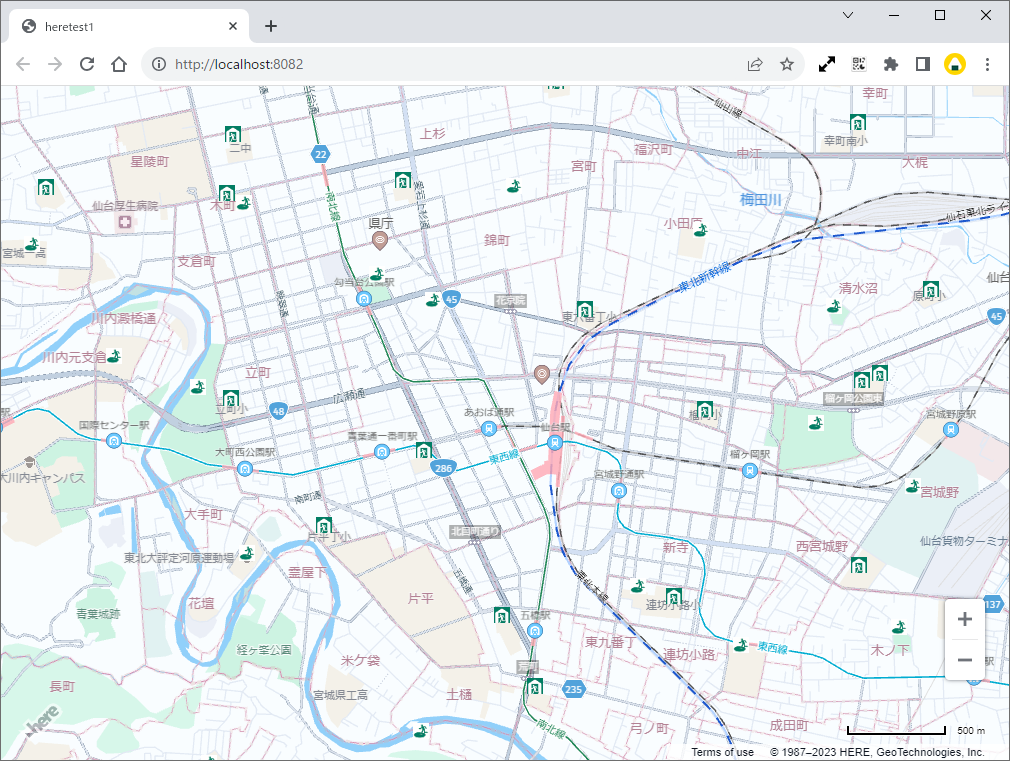
実行結果
起動直後

仙台市中心部を拡大
アイコンをクリックしてみる

吹き出しの表示位置の制御までは及んでいないので、こんなガッカリ表示もあります。

感想
ベクタタイルなので、拡大縮小時にほんのり待たされますが、ラスタタイルと違って表示されると「ぶわっ」と一気に背景地図が表示されるのは気持ちいいです。
OpenLayersだと、クリック位置ピクセル座標および緯度経度座標をごにょごにょして吹き出し表示とか工夫しているので、そういうのを実現する方法が分かればいつかは仕事でもHEREを使ってみたい気もします。
背景地図としての表現のカスタマイズが自分でもできちゃうのか、実際に使うならカスタマイズにも踏み込んでみたいですね。
まだまだ事例が少ないし、サンプルコードを見つけるのも大変な感じなので、まだまだこれからですね。
お粗末様でした。