前提条件
SDKバージョン: 30
Androidバージョン: 9.0
作りたいもの
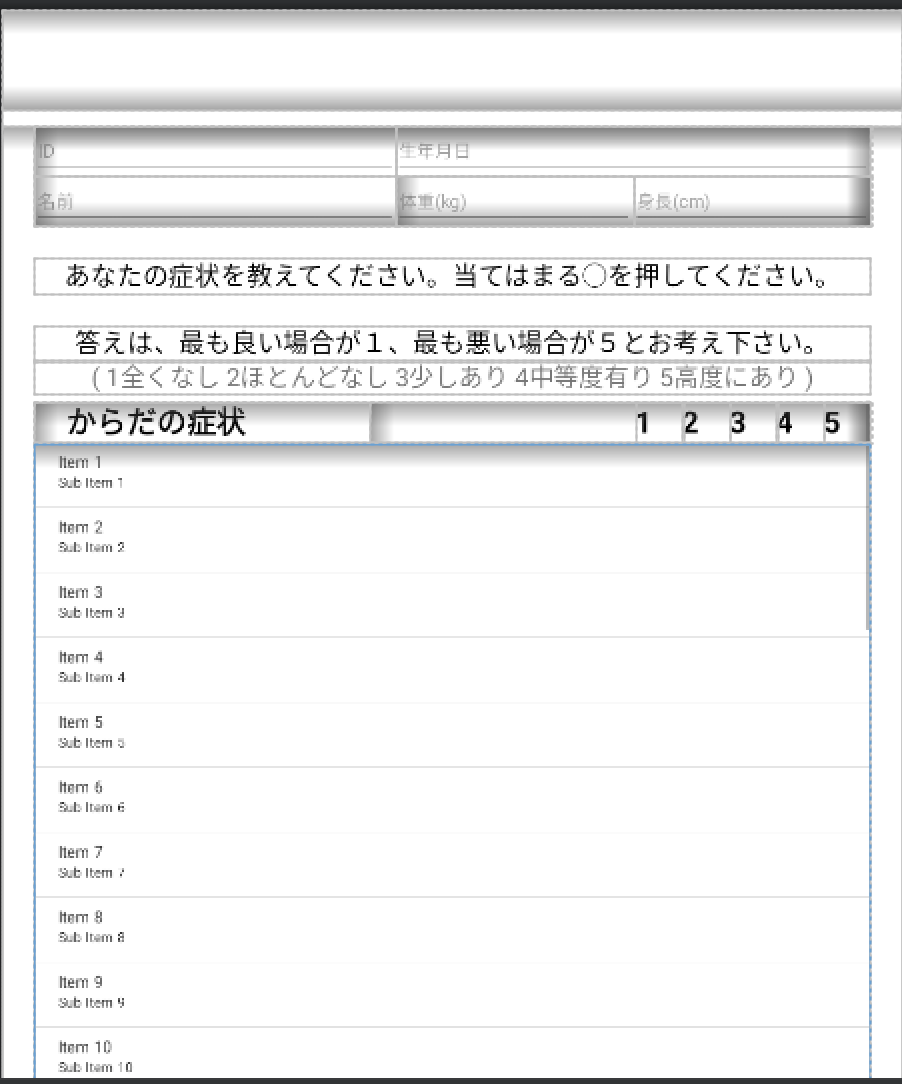
 この画像の「からだの症状」という部分ですが、「目が疲れる」などのタイトルの横にラジオボタンが5つ並んでいます。そして同じような構造が下にいくつも繰り返されています。このように同じ構造のアイテムを繰り返すときには、ListView✖️ArrayAdapterが良いです。
参考:[Using an ArrayAdapter with ListView
](https://guides.codepath.com/android/Using-an-ArrayAdapter-with-ListView)
この画像の「からだの症状」という部分ですが、「目が疲れる」などのタイトルの横にラジオボタンが5つ並んでいます。そして同じような構造が下にいくつも繰り返されています。このように同じ構造のアイテムを繰り返すときには、ListView✖️ArrayAdapterが良いです。
参考:[Using an ArrayAdapter with ListView
](https://guides.codepath.com/android/Using-an-ArrayAdapter-with-ListView)
1. 繰り返したいアイテムを作成
こんな感じでリストアイテムを作成します。

コードはこんな感じです。
<?xml version="1.0" encoding="utf-8"?>
<LinearLayout xmlns:android="http://schemas.android.com/apk/res/android"
    android:layout_width="match_parent"
    android:layout_height="match_parent">

    <LinearLayout
        android:layout_width="match_parent"
        android:layout_height="wrap_content"
        android:orientation="horizontal">

        <TextView
            android:id="@+id/txt_question"
            android:layout_width="match_parent"
            android:layout_height="wrap_content"
            android:layout_weight="6"
            android:paddingStart="32dp"
            android:text="目が疲れる"
            android:textColor="@color/black"
            android:textSize="30dp" />

        <LinearLayout
            android:layout_width="match_parent"
            android:layout_height="wrap_content"
            android:layout_weight="4"
            android:gravity="right"
            android:orientation="horizontal">

            <RadioGroup
                android:id="@+id/radio_group"
                android:orientation="horizontal"
                android:layout_width="wrap_content"
                android:layout_height="wrap_content">

                <RadioButton
                    android:id="@+id/radio_1"
                    android:layout_width="wrap_content"
                    android:layout_height="wrap_content"/>
                <RadioButton
                    android:id="@+id/radio_2"
                    android:layout_width="wrap_content"
                    android:layout_height="wrap_content"/>
                <RadioButton
                    android:id="@+id/radio_3"
                    android:layout_width="wrap_content"
                    android:layout_height="wrap_content"/>
                <RadioButton
                    android:id="@+id/radio_4"
                    android:layout_width="wrap_content"
                    android:layout_height="wrap_content"/>
                <RadioButton
                    android:id="@+id/radio_5"
                    android:layout_width="wrap_content"
                    android:layout_height="wrap_content"/>
            </RadioGroup>
        </LinearLayout>
    </LinearLayout>

</LinearLayout>
ListViewを設置
リストアイテムを繰り返し配置したいと思うところにListViewを設置します。
今回だと、「からだの症状」の下のところです
コードだとこんな感じ
<LinearLayout
                    android:layout_width="match_parent"
                    android:layout_height="wrap_content"
                    android:orientation="horizontal">
                    <TextView
                        android:layout_width="match_parent"
                        android:layout_height="wrap_content"
                        android:layout_weight="6"
                        android:paddingStart="32dp"
                        android:text="からだの症状"
                        android:textColor="@color/black"
                        android:textSize="30dp"
                        android:textStyle="bold" />
                    <LinearLayout
                        android:layout_width="match_parent"
                        android:layout_height="wrap_content"
                        android:orientation="horizontal"
                        android:layout_weight="4"
                        android:gravity="right">

                        <TextView
                            android:layout_width="wrap_content"
                            android:layout_height="wrap_content"
                            android:textSize="30dp"
                            android:textStyle="bold"
                            android:textColor="@color/black"
                            android:paddingEnd="30dp"
                            android:text="1" />
                        <TextView
                            android:layout_width="wrap_content"
                            android:layout_height="wrap_content"
                            android:textSize="30dp"
                            android:textStyle="bold"
                            android:textColor="@color/black"
                            android:paddingEnd="30dp"
                            android:text="2" />
                        <TextView
                            android:layout_width="wrap_content"
                            android:layout_height="wrap_content"
                            android:textSize="30dp"
                            android:textStyle="bold"
                            android:textColor="@color/black"
                            android:paddingEnd="30dp"
                            android:text="3" />
                        <TextView
                            android:layout_width="wrap_content"
                            android:layout_height="wrap_content"
                            android:textSize="30dp"
                            android:textStyle="bold"
                            android:textColor="@color/black"
                            android:paddingEnd="30dp"
                            android:text="4" />
                        <TextView
                            android:layout_width="wrap_content"
                            android:layout_height="wrap_content"
                            android:textSize="30dp"
                            android:textStyle="bold"
                            android:textColor="@color/black"
                            android:paddingEnd="30dp"
                            android:text="5" />
                    </LinearLayout>
                </LinearLayout>
                <View
                    android:layout_width="wrap_content"
                    android:layout_height="1dp"
                    android:background="@color/black"
                    android:visibility="visible"
                    app:layout_constraintBottom_toBottomOf="parent"
                    app:layout_constraintEnd_toEndOf="parent"
                    app:layout_constraintStart_toStartOf="parent"
                    app:layout_constraintTop_toTopOf="parent" />
                <LinearLayout
                    android:layout_width="match_parent"
                    android:layout_height="match_parent"
                    android:orientation="vertical">
                    <ListView
                        android:id="@+id/lv_question"
                        android:layout_width="match_parent"
                        android:layout_height="1600dp" />
                </LinearLayout>
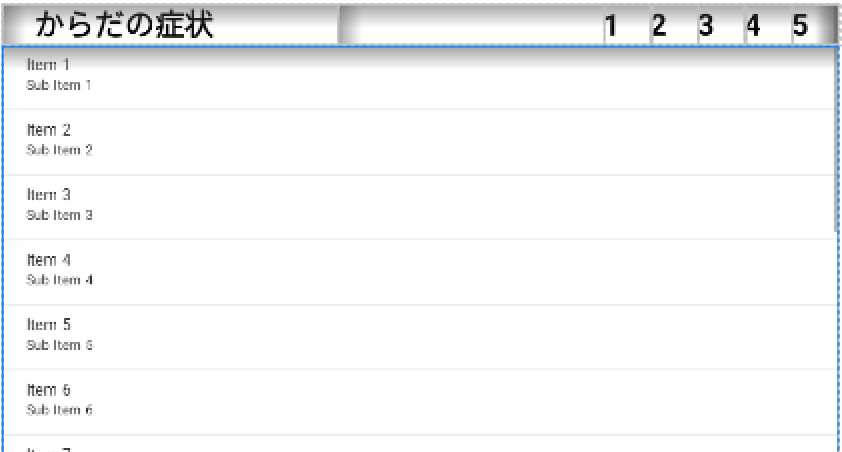
これは「からだの症状」のタイトルと、「1、2、3、4、5」という数字と、線(Viewっていうタグのやつ)と、ListViewをLinearLayoutに入れている部分のコードです。つまりこの部分。
では次に、リストアイテムに表示したい質問内容などを作成してみます。質問内容というのは一番最初の画像で言う「目が疲れる」などの項目のことを言っています。
質問内容をarrayListに詰める
シンプルすぎて説明の余地すらないのでコードだけ貼ります。
        // アンケート項目のデータリストを作成
        private lateinit var questionList: ArrayList<String>
        questionList = arrayListOf(
                "目が疲れる",
                "目がかすむ",
                "肩がこる",
                "眼痛",
                "筋肉痛・こり",
                "動悸",
                "息切れ",
                "ふとりやすい",
                "るいそう・やせ",
                "だるい",
                "健康感がない",
                "口渇",
                "肌の不調",
                "食欲不振",
                "胃が張る",
                "胃痛",
                "風邪をひきやすい",
                "咳や痰",
                "下痢",
                "便秘",
                "白髪",
                "抜け毛",
                "頭痛",
                "めまい",
                "耳鳴り",
                "腰痛",
                "関節痛",
                "むくみ",
                "汗をかきやすい",
                "頻尿",
                "のぼせ",
                "冷え性"
        )
ArrayAdapterを作成
このAdapterは全部をつなげるところだと私は思っています。
全部というのは今まで用意してきた
- リストアイテム(繰り返したい構造)
- ListView(リストアイテムを配置するための入れ物)
- arrayList(リストアイテムに表示したい内容)
のことです。
もう少し具体的なことを言うと、
arrayList(リストアイテムに表示したい内容)を受け取って、受け取った内容をリストアイテムに設置し、リストアイテムとListViewをつなげる役割って感じです。
class QuestionAdapter(context: Context, var questionList: ArrayList<String>) : ArrayAdapter<String>(context, 0, questionList) {

    private val layoutInflater = context.getSystemService(Context.LAYOUT_INFLATER_SERVICE) as LayoutInflater

    override fun getView(position: Int, convertView: View?, parent: ViewGroup): View {
        // アンケート項目を取得
        val question = questionList[position]

        // レイアウトの設定
        var view = convertView
        if (convertView == null) {
            view = layoutInflater.inflate(R.layout.listitem_question, parent, false)
        }

        // 各Viewの設定
        val textView = view?.findViewById<TextView>(R.id.txt_question)

        // 取得したViewにアンケート項目をセットする
        textView?.text = question

        // viewを返す
        return view!!
    }
}
さぁ、次は仕上げです。このAdapterにarrayList(リストアイテムに表示したい内容)を渡してあげます。Adapterの役割は先ほども述べた通り、arrayList(リストアイテムに表示したい内容)を受け取って、受け取った内容をリストアイテムに設置し、リストアイテムとListViewをつなげることなので、AdapterはarrayListの内容を受けとらないことには何も役割を果たせません。
AdapterにarrayListを渡してあげる
こんな感じで渡してあげましょう。
// 作成したリストをアダプターにセット
private lateinit var questionAdapter: QuestionAdapter
questionAdapter = QuestionAdapter(this, questionList)
以上です(^-^)v
ちなみに、このようにListViewを使って連続で表示した場合のRadioButtonの結果を取得する方法は以下のようにします。
補足:RadioButtonの結果を一気に取得する方法
//「からだの症状」の結果を取得
val questionAdapterBody = binding.lvQuestion
var isSelectedOneAnsOnBody = readEachRadioBtn(questionAdapterBody)
if (!isSelectedOneAnsOnBody) {
      // ラジオボタンが選択されてなかった時の処理
      radioBtnList.clear()
      return@setPositiveButton
}


// ===== ラジオボタンの結果を1行1行読み取る =====
    private fun readEachRadioBtn(questionAdapter: ListView): Boolean {
        var isSelectedOneAns = false
        for (i in 0 until questionAdapter.adapter.count) {
            val question = questionAdapter.adapter.getItem(i)
            val view = questionAdapter.adapter.getView(i, questionAdapter.getChildAt(i), questionAdapter)

            // 選択されたラジオボタンの番号を取得
            val selectedNum = getSelectedRadioBtn(view)
            isSelectedOneAns = radioBtnValidation(selectedNum)

            // ラジオボタンが一つも選択されていない場合はアラートを表示
            if(!isSelectedOneAns) {
                showAlertDialog(question)

                return false
            }
            // 選択されたボタンをリストに保存
            radioBtnList.add(selectedNum)
        }
        return true
    }

// ===== 選択されたラジオボタンの番号を取得 =====
private fun getSelectedRadioBtn(view: View): String {
    val radioGroup = view!!.findViewById<RadioGroup>(R.id.radio_group)
    val id = radioGroup.checkedRadioButtonId
    val radioButton = radioGroup.findViewById<RadioButton>(id)
    val selectedNum = radioGroup.indexOfChild(radioButton) + 1
    return selectedNum.toString()
}

// ===== チェックボックスが1つだけ選択されているかチェック =====
private fun radioBtnValidation(selectedNum: String): Boolean {
   if (selectedNum == "0") {
       return false
   }
   return true
}