はじめに
Zabbix6.0 LTSが2022年02月15日にリリースされました。
5.0 LTSから1年9ヶ月ぶりのリリースとなり、ネイティブHA機能やKubernetes監視機能が追加されています。
本記事では、Zabbix6.0をRHEL8にインストールした際の手順をまとめます。
Zabbix6.0.1 リリースノート
システム構成
今回使用したソフトウェアとバージョンは、以下の通りです。
・Zabbix : Zabbix 6.0.1
・OS : RHEL8.5
・Webサーバー : Apache HTTP Server 2.4.37
・PHP : PHP 7.2.24
・DBMS : MariaDB 10.6.7
環境及び前提
・導入対象サーバーは、インターネットと疎通可能
・Zabbix Server、関連パッケージ、Zabbix Agentを1台のサーバーにAll-in-Oneで導入する
・SELinuxは、無効状態で導入
・各手順は、root権限を持つユーザで実施
・firewallは、HTTP(80/tcp) 、HTTPS(443/tcp) 、10050/tcp、10051/tcpを開放
1. MariaDBのインストール
dnfコマンドでMariaDBをインストールすると、RHEL8ではMariaDB 10.3がインストールされます。
しかし、Zabbix6.0では、MariaDB 10.5.X ~ 10.6.Xがサポート対象となるため、標準リポジトリからではなく、MariaDBのリポジトリから導入する必要があります。
なお、MariaDBのリポジトリでは、明示的にバージョンを指定しないと最新の10.7.xが導入されてしまうため、これもZabbixのサポート対象外となってしまいます。そのため、--mariadb-server-versionでZabbixのサポートするバージョンを指定する必要があります。
1.1 mariadb_repo_setupをダウンロード
 # curl -O https://downloads.mariadb.com/MariaDB/mariadb_repo_setup
  % Total    % Received % Xferd  Average Speed   Time    Time     Time  Current
                                 Dload  Upload   Total   Spent    Left  Speed
100 30081  100 30081    0     0  29931      0  0:00:01  0:00:01 --:--:-- 29931
1.2 MariaDB リポジトリの設定
--mariadb-server-versionで10.6を指定
# bash mariadb_repo_setup --mariadb-server-version mariadb-10.6

# [info] Checking for script prerequisites.
# [info] MariaDB Server version 10.6 is valid
# [info] Repository file successfully written to /etc/yum.repos.d/mariadb.repo
# [info] Adding trusted package signing keys...
/etc/pki/rpm-gpg ~
~
# [info] Successfully added trusted package signing keys
# [info] Cleaning package cache...
Updating Subscription Management repositories.
41 files removed
1.3 MariaDB のインストール
# dnf install MariaDB-server
(出力省略)
# mariadb --version
mariadb  Ver 15.1 Distrib 10.6.7-MariaDB, for Linux (x86_64) using readline 5.1
1.4 MariaDB の起動
# systemctl start mariadb
# systemctl enable mariadb
1.5 MariaDB の設定
mysqlのrootパスワード設定や不要な設定削除のため、mysql_secure_installationを利用してセキュリティの初期設定を行います。
# mariadb-secure-installation

NOTE: RUNNING ALL PARTS OF THIS SCRIPT IS RECOMMENDED FOR ALL MariaDB
      SERVERS IN PRODUCTION USE!  PLEASE READ EACH STEP CAREFULLY!

In order to log into MariaDB to secure it, we'll need the current
password for the root user. If you've just installed MariaDB, and
haven't set the root password yet, you should just press enter here.

Enter current password for root (enter for none):      <- Enterを入力
OK, successfully used password, moving on...

Setting the root password or using the unix_socket ensures that nobody
can log into the MariaDB root user without the proper authorisation.

You already have your root account protected, so you can safely answer 'n'.

Switch to unix_socket authentication [Y/n] n       <- unix_socket認証を使用しないのでnを入力
 ... skipping.

You already have your root account protected, so you can safely answer 'n'.

Change the root password? [Y/n] y                  <- yを入力
New password:                                      <- DBユーザ-rootのパスワード
Re-enter new password:                             <- 再度パスワードを入力
Password updated successfully!
Reloading privilege tables..
 ... Success!


By default, a MariaDB installation has an anonymous user, allowing anyone
to log into MariaDB without having to have a user account created for
them.  This is intended only for testing, and to make the installation
go a bit smoother.  You should remove them before moving into a
production environment.

Remove anonymous users? [Y/n] y          <- yを入力(不要なユーザーを削除)
 ... Success!

Normally, root should only be allowed to connect from 'localhost'.  This
ensures that someone cannot guess at the root password from the network.

Disallow root login remotely? [Y/n] y      <- yを入力(rootのリモートログイン禁止)
 ... Success!

By default, MariaDB comes with a database named 'test' that anyone can
access.  This is also intended only for testing, and should be removed
before moving into a production environment.

Remove test database and access to it? [Y/n] y  <- yを入力(不要なDBを削除)
 - Dropping test database...
 ... Success!
 - Removing privileges on test database...
 ... Success!

Reloading the privilege tables will ensure that all changes made so far
will take effect immediately.

Reload privilege tables now? [Y/n] y        <- yを入力
 ... Success!

Cleaning up...

All done!  If you've completed all of the above steps, your MariaDB
installation should now be secure.

Thanks for using MariaDB!
MariaDBの構成ファイルを編集し、デフォルト文字コードなどを設定します。
なお、以前推奨されていたinnodb_file_per_tableパラメータは、MariaDB10.6であればデフォルトで有効化されているため、設定は不要です。
また、Zabbix6.0からutf8mb4をサポートしているため、文字コードには「utf8mb4」を設定します。
$ vi /etc/my.cnf.d/mariadb-server.cnf
(略)
[mysqld]
character-set-server = utf8mb4
collation-server     = utf8mb4_bin
skip-character-set-client-handshake
(略)
設定反映の為、MariaDBを再起動します。
# systemctl restart mariadb
2. Zabbixのインストール
公式サイトの手順を参考に導入していきます。
2.1 Zabbix LLCリポジトリの登録
※今後新しいバージョンのパッケージが公開される可能性がありますので、以下の公式リポジトリで、確認が必要です。
https://repo.zabbix.com/zabbix/6.0/rhel/8/x86_64/
リポジトリ登録後、キャッシュを削除しておきます。
# rpm -Uvh https://repo.zabbix.com/zabbix/6.0/rhel/8/x86_64/zabbix-release-6.0-1.el8.noarch.rpm
# dnf clean all
2.2 Zabbix ServerとZabbix Agentパッケージのインストール
Zabbix Server関連のパッケージとZabbix Agentをインストールします。
# dnf -y install zabbix-server-mysql zabbix-web-mysql zabbix-apache-conf zabbix-sql-scripts zabbix-selinux-policy zabbix-agent zabbix-web-japanese
3. Zabbixの初期設定
3.1 Zabbix用のDB作成
MariaDB上にデータベースとユーザを作成します。
# mysql -uroot -p
Enter password:           <- DBユーザ-rootのパスワードを入力
Welcome to the MariaDB monitor.  Commands end with ; or \g.
Your MariaDB connection id is 3
Server version: 10.6.7-MariaDB MariaDB Server

Copyright (c) 2000, 2018, Oracle, MariaDB Corporation Ab and others.

Type 'help;' or '\h' for help. Type '\c' to clear the current input statement.

MariaDB [(none)]> create database zabbix character set utf8mb4 collate utf8mb4_bin;
Query OK, 1 row affected (0.000 sec)

MariaDB [(none)]> create user zabbix@localhost identified by '<DBユーザzabbixのパスワードを入力>';
Query OK, 0 rows affected (0.004 sec)

MariaDB [(none)]> grant all privileges on zabbix.* to zabbix@localhost;
Query OK, 0 rows affected (0.002 sec)

MariaDB [(none)]> quit;
Bye
Zabbix用のDBスキーマと初期データをインポートします。
# zcat /usr/share/doc/zabbix-sql-scripts/mysql/server.sql.gz | mysql -uzabbix -p zabbix
Enter password:         <- DBユーザーzabbixのパスワードを入力
3.2 Zabbix Serverの構成
Zabbix Serverの構成ファイルを編集し、Zabbix用DBのパスワードをDBPasswordに設定します。
# vi /etc/zabbix/zabbix_server.conf
DBPassword=<DBユーザzabbixのパスワード>
3.3 Zabbix Agentの構成
Zabbix Agentの構成ファイルを編集し、接続先Zabbix ServerとAgentホスト名を設定します。
$ vi /etc/zabbix/zabbix_agent2.conf
# 監視通信を許可するZabbix ServerのIPアドレス
# 今回の構成では、Zabbix Server自身にAgentを導入しているので値を変更しない
# Zabbix Server以外のマシンにAgentを構成する場合は、Zabbix ServerのIPアドレスを指定する
Server=127.0.0.1

# ActiveCheckのデータ送信先Zabbix Server IPアドレス
# 今回の構成では、Zabbix Server自身にAgentを導入しているので値を変更しない
ServerActive=127.0.0.1

# Agentのホスト名(OSのhostnameではなく、zabbixに登録するホスト名)
Hostname=Zabbix server
↓
Hostname=<ホスト名>
3.4 サービス再起動と自動起動の有効化
# systemctl restart zabbix-server zabbix-agent httpd php-fpm
# systemctl enable zabbix-server zabbix-agent httpd php-fpm
3.5 Zabbixフロントエンドの構成
ブラウザで下記URLを開き、設定を行います。
http://<ZabbixServerのIPアドレス>/zabbix

「Default language」で、「日本語 (ja_JP)」を選択します。
言語表示が日本語に切り替わるので、「次のステップ」をクリックします。

前提条件のチェックで、全ての項目が「OK」になっていることを確認して、「次のステップ」をクリックします。

「パスワード」欄に、DBユーザzabbixのパスワードを入力を入力し「次のステップ」をクリックします。

サーバーの設定は、「Zabbix サーバー名」がデフォルト空白なのでホスト名など任意の名前を入力し、デフォルトのタイムゾーンで、「(UTC+9:00) Asia/Tokyo」を選択して「次のステップ」をクリックします。

最終確認画面で間違いがなければ「次のステップ」をクリックします。

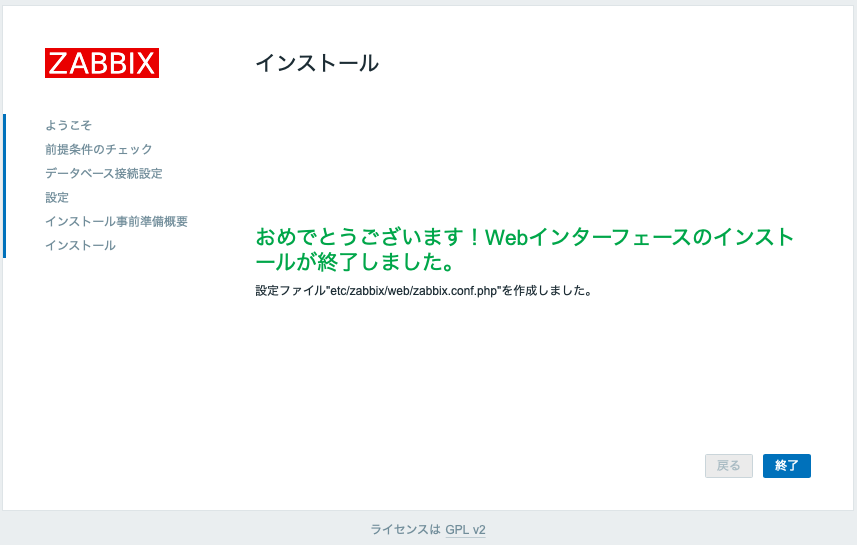
「おめでとうございます!Webインターフェースのインストールが終了しました。」が表示されていることを確認し、「終了」をクリックします。
ログイン画面が表示されるので、下の初期ユーザーとパスワードでログインします。
ユーザ: Admin
パスワード: zabbix

ダッシュボードが表示されることを確認し、インストールは完了です。
