microCMSは純日本製のHeadlessCMSで、分かりやすいUIと完全日本語対応が最高に使いやすいサービスです。
この記事ではGridsomeというSSGを使い、microCMSで用意したデータを取得し、GraphQLに変換し画面に表示するまでの流れをメモ代わりに書いていきたいと思います。
実装概要
流れとしては、
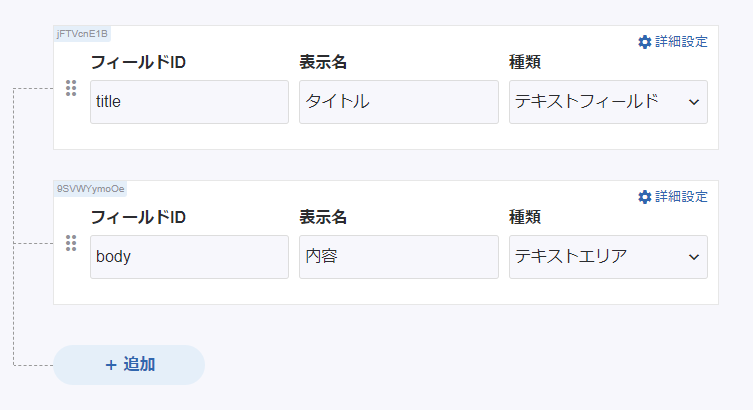
- 『お知らせ』をmicroCMSに投稿
- Gridsomeのサーバ起動時にmicroCMSからデータ取得
- GraphQLに変換しindex.vueに一覧表示
していきたいと思います。
microCMSでデータを準備
こちらの手順 に従い、お知らせデータの作成を行います。
microCMSでの作業は以上です。簡単!
Gridsome プロジェクト作成
これも公式ドキュメント通りにすれば問題なく作成できるはず。
それと dotenv と axios を使用するのでついでにインストールしておきましょう。
gridsome develop でサーバーが起動できることを確認出来たら次に進みます。
サーバー起動時にmicroCMSからデータを取得する
サーバーが起動したときの処理はgridsome.server.js に記述します。
require('dotenv').config()
const axios = require('axios')

module.exports = function (api) {
  api.loadSource(async actions => {
    const { data } = await axios
      .get('https://yourapi.microcms.io/api/v1/news', {
        headers: { 'X-API-KEY': process.env.API_KEY }
      })

    const news = actions.addCollection({
      typeName: 'PostNews'
    })

    for (const item of data.contents) {
      news.addNode({
        id: item.id,
        title: item.title,
        body: item.body
      })
    }
  })
}
ここでコレクションを準備すると、他のファイルでも参照できるようになるみたいですね。
詳細はこちら => Collections - 公式ドキュメント
.env ファイルも準備
API_KEY=xxxxxxxxx-xxxx-xxxx-xxxx-xxxxxxxxxx
GraphQLに変換し一覧表示
この辺はよくわかってないですが、とりあえずここでGraphQLに変換してるみたいです。
<template>
  <Layout>
    <ul>
      <li v-for="edge in $page.news.edges" :key="edge.node.id">
        <h2></h2>
        <g-link :to="'/news/' + edge.node.id">
          {{ edge.node.title }}
        </g-link>
      </li>
    </ul>

  </Layout>
</template>

<page-query>
query {
  news: allPostNews {
    edges {
      node {
        id
        title
        body
      }
    }
  }
}
</page-query>
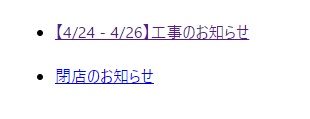
きちんと表示されればOK!
こんな感じに表示されるはず、です。
今はまだリンク先を準備していないので遷移してもエラーになりますが、ひとまず表示は問題なさそうですね。
参考ページ
※追記 詳細画面の実装
module.exports = {
  siteName: 'Gridsome',
  templates: {
    PostNews: [
      {
        path: '/news/:id',
        component: './src/templates/PostNews.vue'
      }
    ]
  },
  plugins: []
}
<template>
  <Layout>
    <h1>{{ $page.news.title }}</h1>
    <main>
      <div v-html="$page.news.body"></div>
    </main>
  </Layout>
</template>

<page-query>
  query news($id: ID!) {
    news: postNews(id: $id) {
      title
      body
    }
  }
</page-query>
※追記 静的化しないページの実装
ドキュメントどおり、基本的にはnuxtと同じように実装するみたい
https://gridsome.org/docs/dynamic-routing/
module.exports = function (api) {
  api.createPages(({ createPage }) => {
    createPage({
      path: '/news/:id',
      component: './src/templates/News.vue'
    })
  })
}
<template>
  <Layout>
    <h1>{{ news.title }}</h1>
    <div v-html="news.body" />
  </Layout>
</template>

<script>
const axios = require('axios')
export default {
  data () {
    return {
      news: {}
    }
  },
  mounted () {
    axios.get(`https://yourapi.microcms.io/api/v1/news/${this.$route.params.id}`, {
      headers: {
        'X-API-KEY': 'xxx'
      }
    }).then((res) => {
      this.news = res.data
    }).catch((err) => {
      console.log(err)
    })
  }
}
</script>


