はじめに
iOSアプリの開発もInfrastructure as Code(言いたいだけ)したいと思い、この記事を書いて見ました。それぞれ、秘伝の方法があると思いますので、知見を共有いただけると、大変うれしいです!!
環境
- OS X El Captian 10.11.4
構築手順
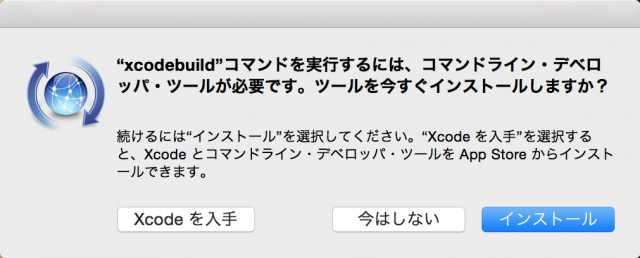
コマンドラインツールのインストール
xcode-select --install
このコマンドをTerminalに入力すると、コマンドラインツールかXcodeのインストールを促されるので、ここではコマンドラインツールの方をダウンロードする
Homebrewのインストール
コマンドラインツールをインストールすると、コマンドが実行できるので、つぎのコマンドでHomebrewをインストールする
ruby -e "$(curl -fsSL https://raw.githubusercontent.com/Homebrew/install/master/install)"
インストールできた所で、最新の状態にしておく
brew doctor
brew update
Andibleのインストール
Ansible でプロビジョニングを行うため python と ansible を入れる。二つとも Homebrew で入る。
pythonもいつも使うよって人は、pyenvとかで入れるのがいいんではないでしょうか
Ansibleの設定など
mkdir .macbook-provisioning
cd .macbook-provisioning/
inventory ファイル
echo 'localhost' > hosts
playbook ファイル作成
localhost.ymlファイルを作成します
- hosts: localhost
  connection: local
  gather_facts: no
  sudo: no
  vars:
    homebrew_taps:
      - homebrew/binary
      - homebrew/dupes
      - caskroom/cask
      - railwaycat/emacsmacport
      - sanemat/font
    homebrew_packages:
      - { name: readline }
      - { name: openssl, state: linked, install_options: force }
      - { name: python }
      - { name: ansible }
      - { name: coreutils }
      - { name: git }
      - { name: zsh, install_options: disable-etcdir }
      - { name: wget }
      - { name: curl }
      - { name: cmake }
      - { name: autoconf }
      - { name: automake }
      - { name: pkg-config }
      - { name: ctags }
      - { name: tree }
      - { name: go }
      - { name: peco }
      - { name: hub }
      - { name: tig }
      - { name: fish }
      - { name: rbenv }
      - { name: ruby-build }
      - { name: lha }
      - { name: imagemagick }
      - { name: mercurial }
      - { name: tmux }
      - { name: graphviz }
      - { name: gibo }
      - { name: carthage }
      - { name: cocoapods }
      - { name: swiftlint }
    homebrew_cask_packages:
      - { name: emacs-mac }
      - { name: iterm2 }
      - { name: firefox }
      - { name: google-chrome }
      - { name: adobe-reader }
      - { name: java }
      - { name: skype }
      - { name: slack }
      - { name: sourcetree }
      - { name: gitx }
      - { name: karabiner }
      - { name: seil }
      - { name: flux }
      - { name: dash }
      - { name: skitch }
      - { name: seashore }
      - { name: atom }
      - { name: webstorm }
      - { name: phpstorm }
      - { name: intellij-idea }
      - { name: vagrant }
      - { name: virtualbox }

  tasks:
    - name: homebrew の tap リポジトリを追加
      homebrew_tap: tap={{ item }} state=present
      with_items: homebrew_taps

    - name: homebrew をアップデート
      homebrew: update_homebrew=yes

    # brew
    - name: brew パッケージをインストール
      homebrew: >
        name={{ item.name }}
        state={{ item.state | default('latest') }}
        install_options={{
          item.install_options | default() | join(',')
          if item.install_options is not string
          else item.install_options
        }}
      with_items: homebrew_packages
      register: brew_result
    - name: brew パッケージの情報保存先ディレクトリを作成
      file: path=brew_info state=directory
    - name: brew パッケージの情報を保存
      shell: brew info {{ item }} > brew_info/{{ item }}
      with_items: brew_result.results | selectattr('changed') | map(attribute='item') | map(attribute='name') | list

    # cask
    - name: homebrew-cask のインストール
      homebrew: name=brew-cask state=latest
    - name: cask パッケージをインストール
      homebrew_cask: name={{ item.name }} state={{ item.state|default('installed') }}
      with_items: homebrew_cask_packages
      register: cask_result
    - name: cask パッケージの情報保存先ディレクトリを作成
      file: path=cask_info state=directory
    - name: cask パッケージの情報を保存
      shell: brew cask info {{ item }} > cask_info/{{ item }}
      with_items: cask_result.results | selectattr('changed') | map(attribute='item') | map(attribute='name') | list

    # oh-my-zsh
    - name: oh-my-zsh のインストール
      shell: curl -L https://raw.github.com/robbyrussell/oh-my-zsh/master/tools/install.sh | sh
      args:
        creates: ~/.oh-my-zsh/

    # Ricty
    - name: xquartz のインストール (for Ricty)
      homebrew_cask: name=xquartz
    - name: fontforge のインストール (for Ricty)
      homebrew: name=fontforge
    - name: Ricty のインストール
      homebrew: name=ricty
    - name: 生成されたフォントファイルをコピー
      shell: cp -f $(brew --cellar ricty)/*/share/fonts/Ricty*.ttf ~/Library/Fonts/
      args:
        creates: ~/Library/Fonts/Ricty-Bold.ttf
      notify: run fc-cache

  handlers:
    - name: run fc-cache
      shell: fc-cache -vf
※こちらは、お好きな要に設定してください
実行
HOMEBREW_CASK_OPTS="--appdir=/Applications" ansible-playbook -i hosts -vv localhost.yml
これで、もろもろインストールされるはず><
Rubyのインストール
rbenv、ruby-buildがインストールできたので、Rubyをインストールしていきます
まずは、rbenvの設定と起動確認
$ echo 'eval "$(rbenv init -)"' >> ~/.bash_profile

$ source ~/.bash_profile
$ rbenv --version
rbenv 1.0.0
Rubyのインストール
$ rbenv install --list
Available versions:
      ・
      ・
  2.1.1
  2.1.2
  2.2.0-dev
  jruby-1.5.6
  jruby-1.6.3
  jruby-1.6.4
      ・
      ・
$ rbenv install 2.0.0p648
インストールしてRubyをデフォルトに設定します
$ rbenv global 2.0.0
$ ruby -v
ruby 2.0.0p648 (2015-12-16 revision 53162) [x86_64-darwin15.4.0]
$ rbenv versions
  system
* 2.0.0-p648 (set by /Users/fukasem/.rbenv/version)
gemをインストールする
まずは、bundlerというgemの管理ツールをインストールします
gem install bundler
HOMEディレクトリに以下のようなファイルを作成します
gem "fastlane"
gem "xcode-install"
gem "jazzy"
次に、gemの設定ファイルを同じくHOMEディレクトリに作成します
install: --no-document --env-shebang
update: --no-document
このファイルは、gemコマンド使用時の設定を記述するファイルです
この状態でホームディレクトリにて下記のコマンドを実行します
もろもろ、依存関係のあるgemなどもインストールされます
bundle install
そうするとGemfile.lockファイルが生成されるので、こちらファイルも管理対象に入れておきます
Xcodeのインストール
gemでxcode-installをインストールしたので、これを使ってXcodeをMacにインストールしていきます
xcode-installは、cocoapodsのメンバーでもあるBoris Büglingさんが公開している、Xcodeインストールマネージャーです
Xcodeのインストール時にAppleIDを聞かれるので、事前に準備してきましょう
また、fastlaneの環境変数(XCODE_INSTALL_USERとXCODE_INSTALL_PASSWORD)をみにいくので、事前にfastlaneコマンドを実行しておくといいです
使い方
rbenvどうように、現在インストールできるバージョンの取得をします
~  xcversion update
-------------------------------------------------------------------------------------
The login information you enter will be stored in your Mac OS Keychain
You can also pass the password using the `FASTLANE_PASSWORD` env variable
More information about it on GitHub: https://github.com/fastlane/fastlane/tree/master/credentials_manager
-------------------------------------------------------------------------------------
Username: # AppleIDをいれる
-------------------------------------------------------------------------------------
The login information you enter will be stored in your Mac OS Keychain
You can also pass the password using the `FASTLANE_PASSWORD` env variable
More information about it on GitHub: https://github.com/fastlane/fastlane/tree/master/credentials_manager
-------------------------------------------------------------------------------------
Password (for mfks17@gmail.com): パスワードをいれる
リストを取得する
~  xcversion list
7
7.0.1
7.1
7.1.1
7.2
7.2.1
7.3
7.3.1
Xcodeのインストールの例
~ xcversion install 6.3
###########################################################               82.1%
######################################################################## 100.0%
Please authenticate for Xcode installation...

Xcode 6.3
Build version 6D570
こんな感じでインストールできます
これの良いところは、GMやBeta版をインストールするときに威力を発揮してくれると思います。1
Xcode Pluginのインストール
次にXcodeのプラグインをインストールします
curl -fsSL https://raw.githubusercontent.com/supermarin/Alcatraz/deploy/Scripts/install.sh | sh
Homebrew同様、コマンド一発でインストールできます
具体的な使い方は、マニュアルを参考にしていただいて今回おすすめのプラグインをご紹介します。
-
XVim
キーバインドをvimライクにする事ができます -
SYXcodeIconVersion
起動しているXcodeにバージョン番号が表示される要になります -
SwiftLintXcode
XcodeからSwiftLintのautocorrectを実行する事ができます
まだまだ沢山のプラグインがありますので、是非ホームページをご覧くらい
感想
いかがだったでしょうか?
モバイルアプリ開発でもDRYで冪等性を担保できる環境を共有して、準備に時間をかけずに且つ同じ環境で開発できれば、不具合の切り分けも簡単になり、時間の短縮になるのではないでしょうか。
コーディングするまでの時間もより早くなる事を期待しています。
謝辞
- ansible
- Ansibleでmacの開発環境を構築してみた
- Mac の開発環境構築を自動化する (2015 年初旬編)
- Homebrew
- Rubygems
- Travis
- cocoapods
- xcode-install
-
くれぐれも
xcode-selectをお忘れなく ↩