はじめに
自分は英語がとても苦手ため、今までわからない単語や文章が出てきたら翻訳サイトを利用していました。
しかし、 DeepLを利用するためにGoogleなどの検索サイトを開くよりも常に開いているDiscord上で翻訳できたら楽になるなと思い英語を日本語に翻訳してくれるボットを作成しました。
(今回Mac環境で行なっています。)
使用したAPIの紹介
Freeプラン(無料)
・すべての機能をご利用可能
・DeepL REST APIへのアクセス
・1か月に500,000文字まで翻訳
・1,000個の用語集(一部言語のみ)
Proプラン(月/650円)
・万全のセキュリティ対策
・DeepL REST APIへのアクセス
・翻訳できるテキスト量に制限なし
・1,000個の用語集(一部言語のみ)
・ご利用分だけお支払い(1,000,000文字あたり¥2,500)
・リクエストを優先的に処理
今回は、Freeプランで作成。
Discord botの作成
以下のリンクからDiscordにログインする。
https://discord.com/developers/applications
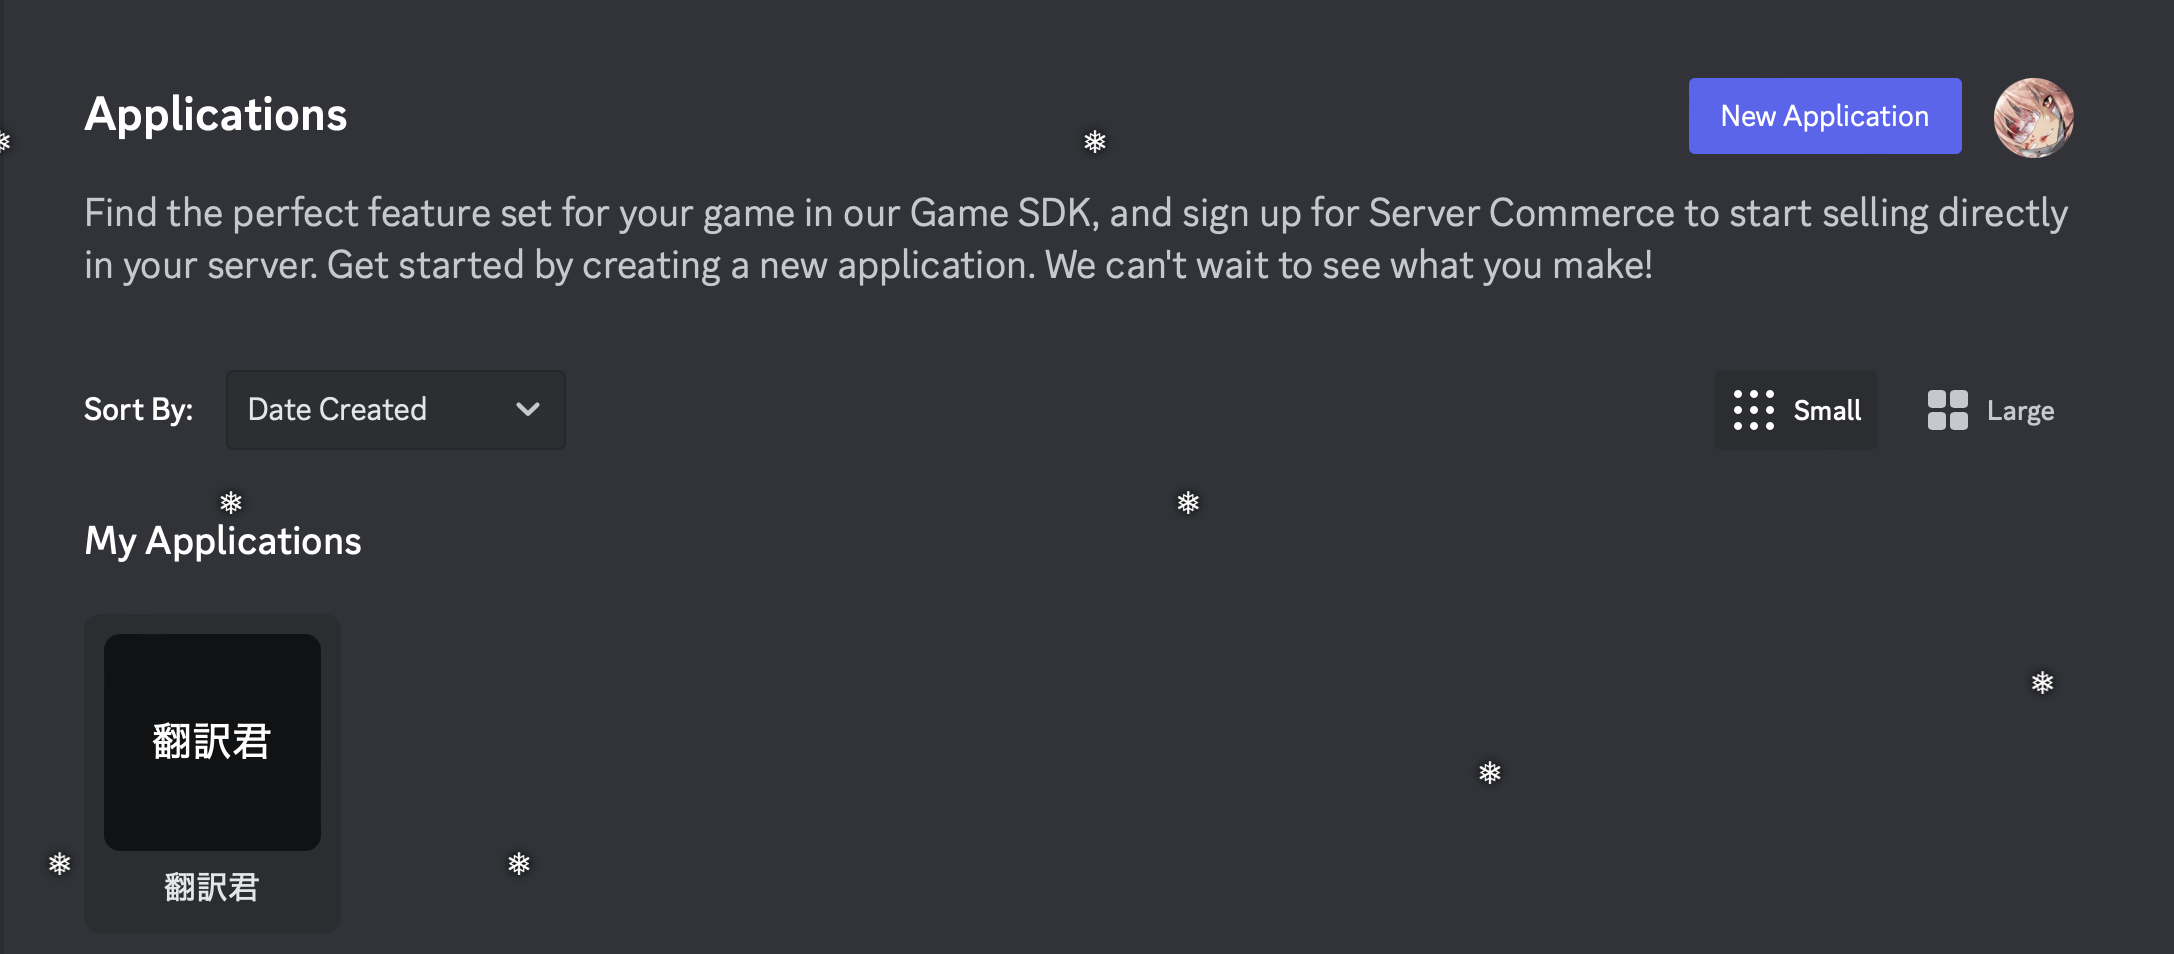
右上のNew Applicationを押し、botの名前を決める。

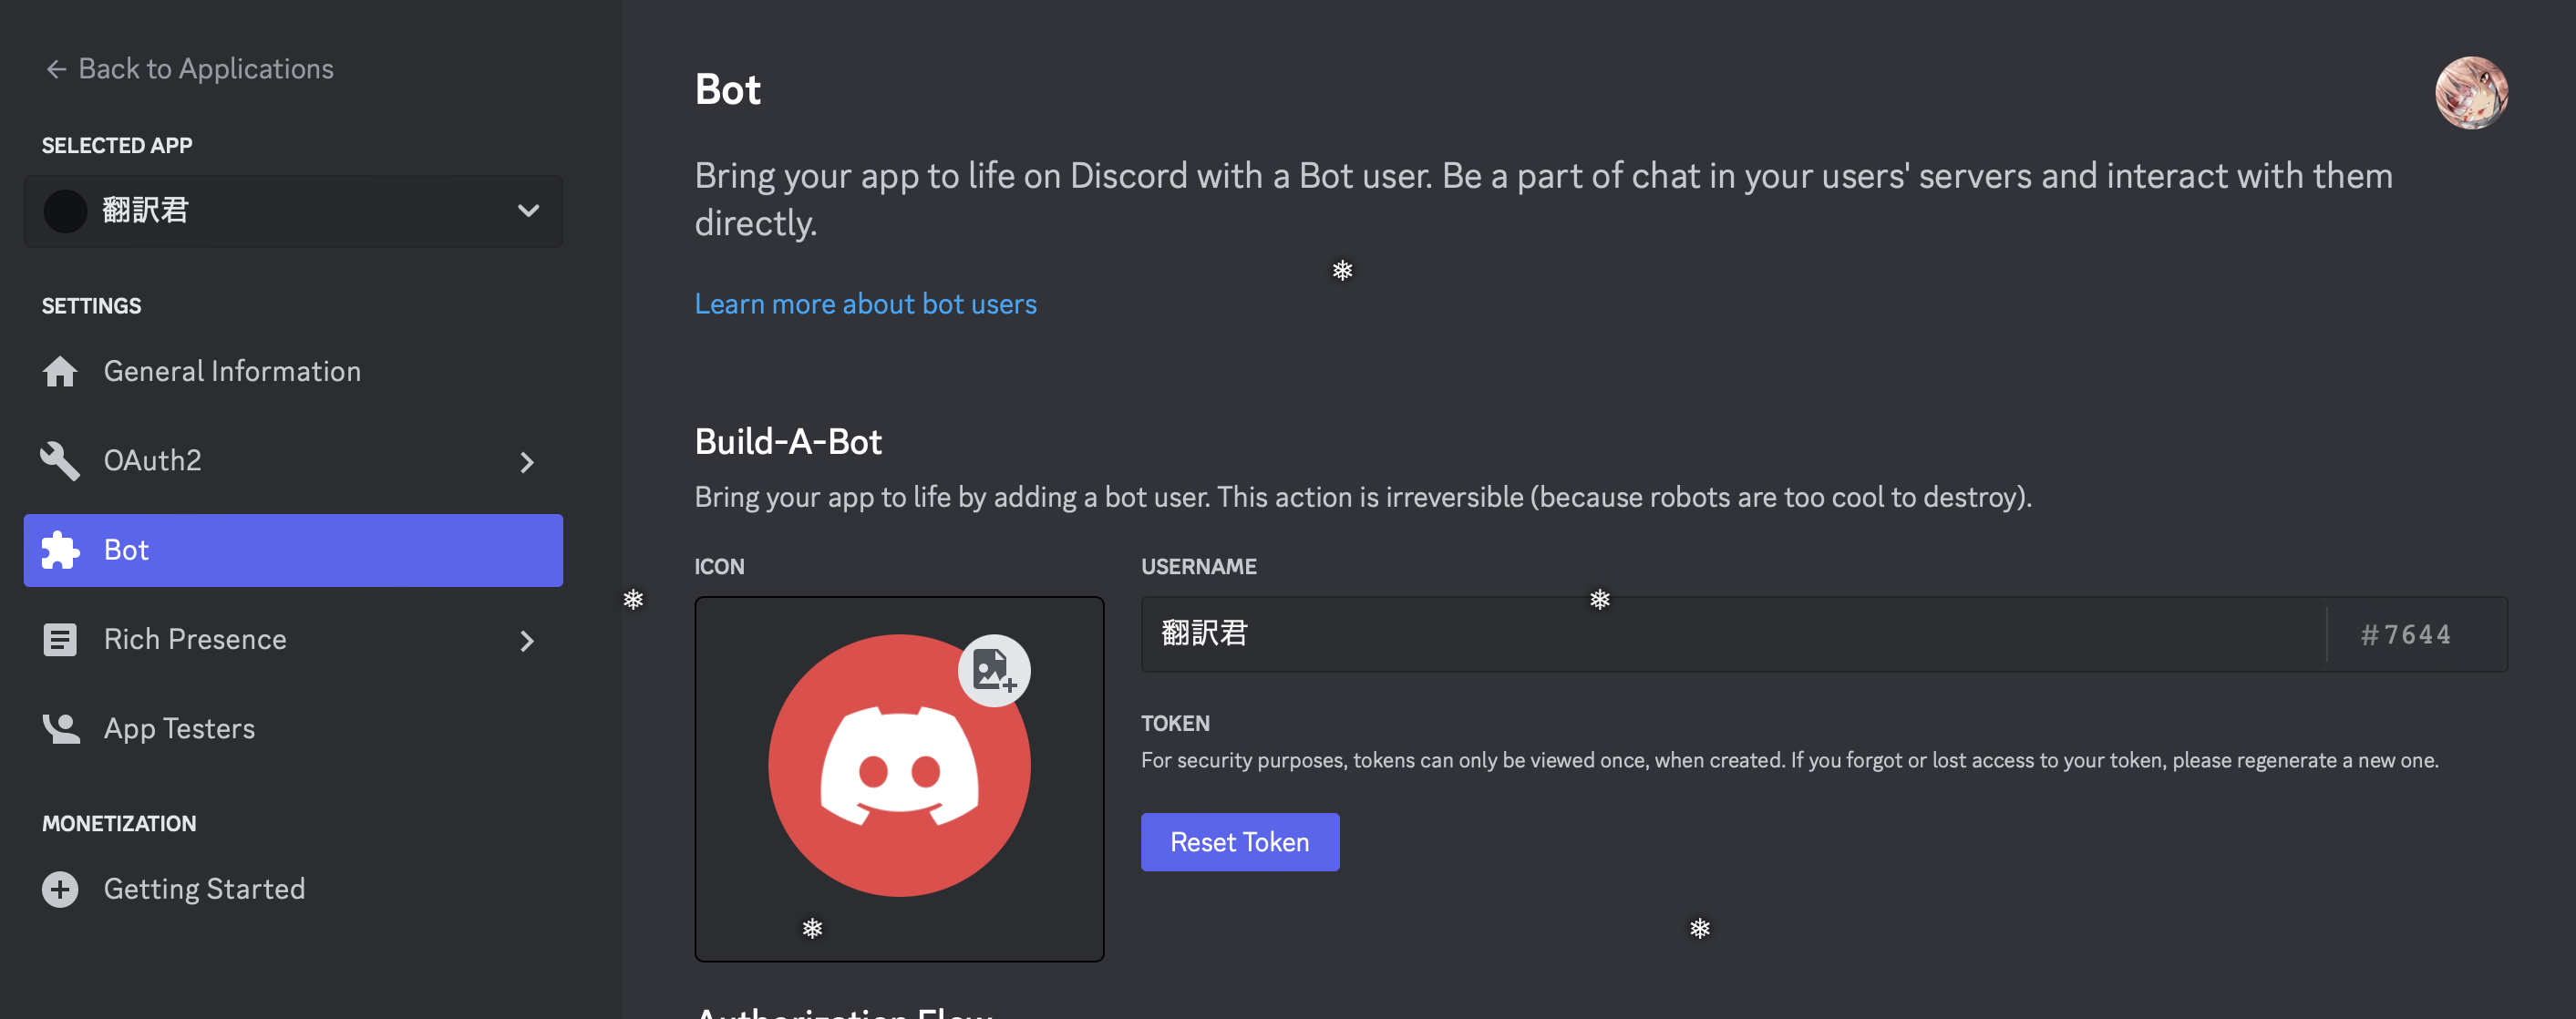
botを作成したらTOKENをメモしておく。(後で使うため)

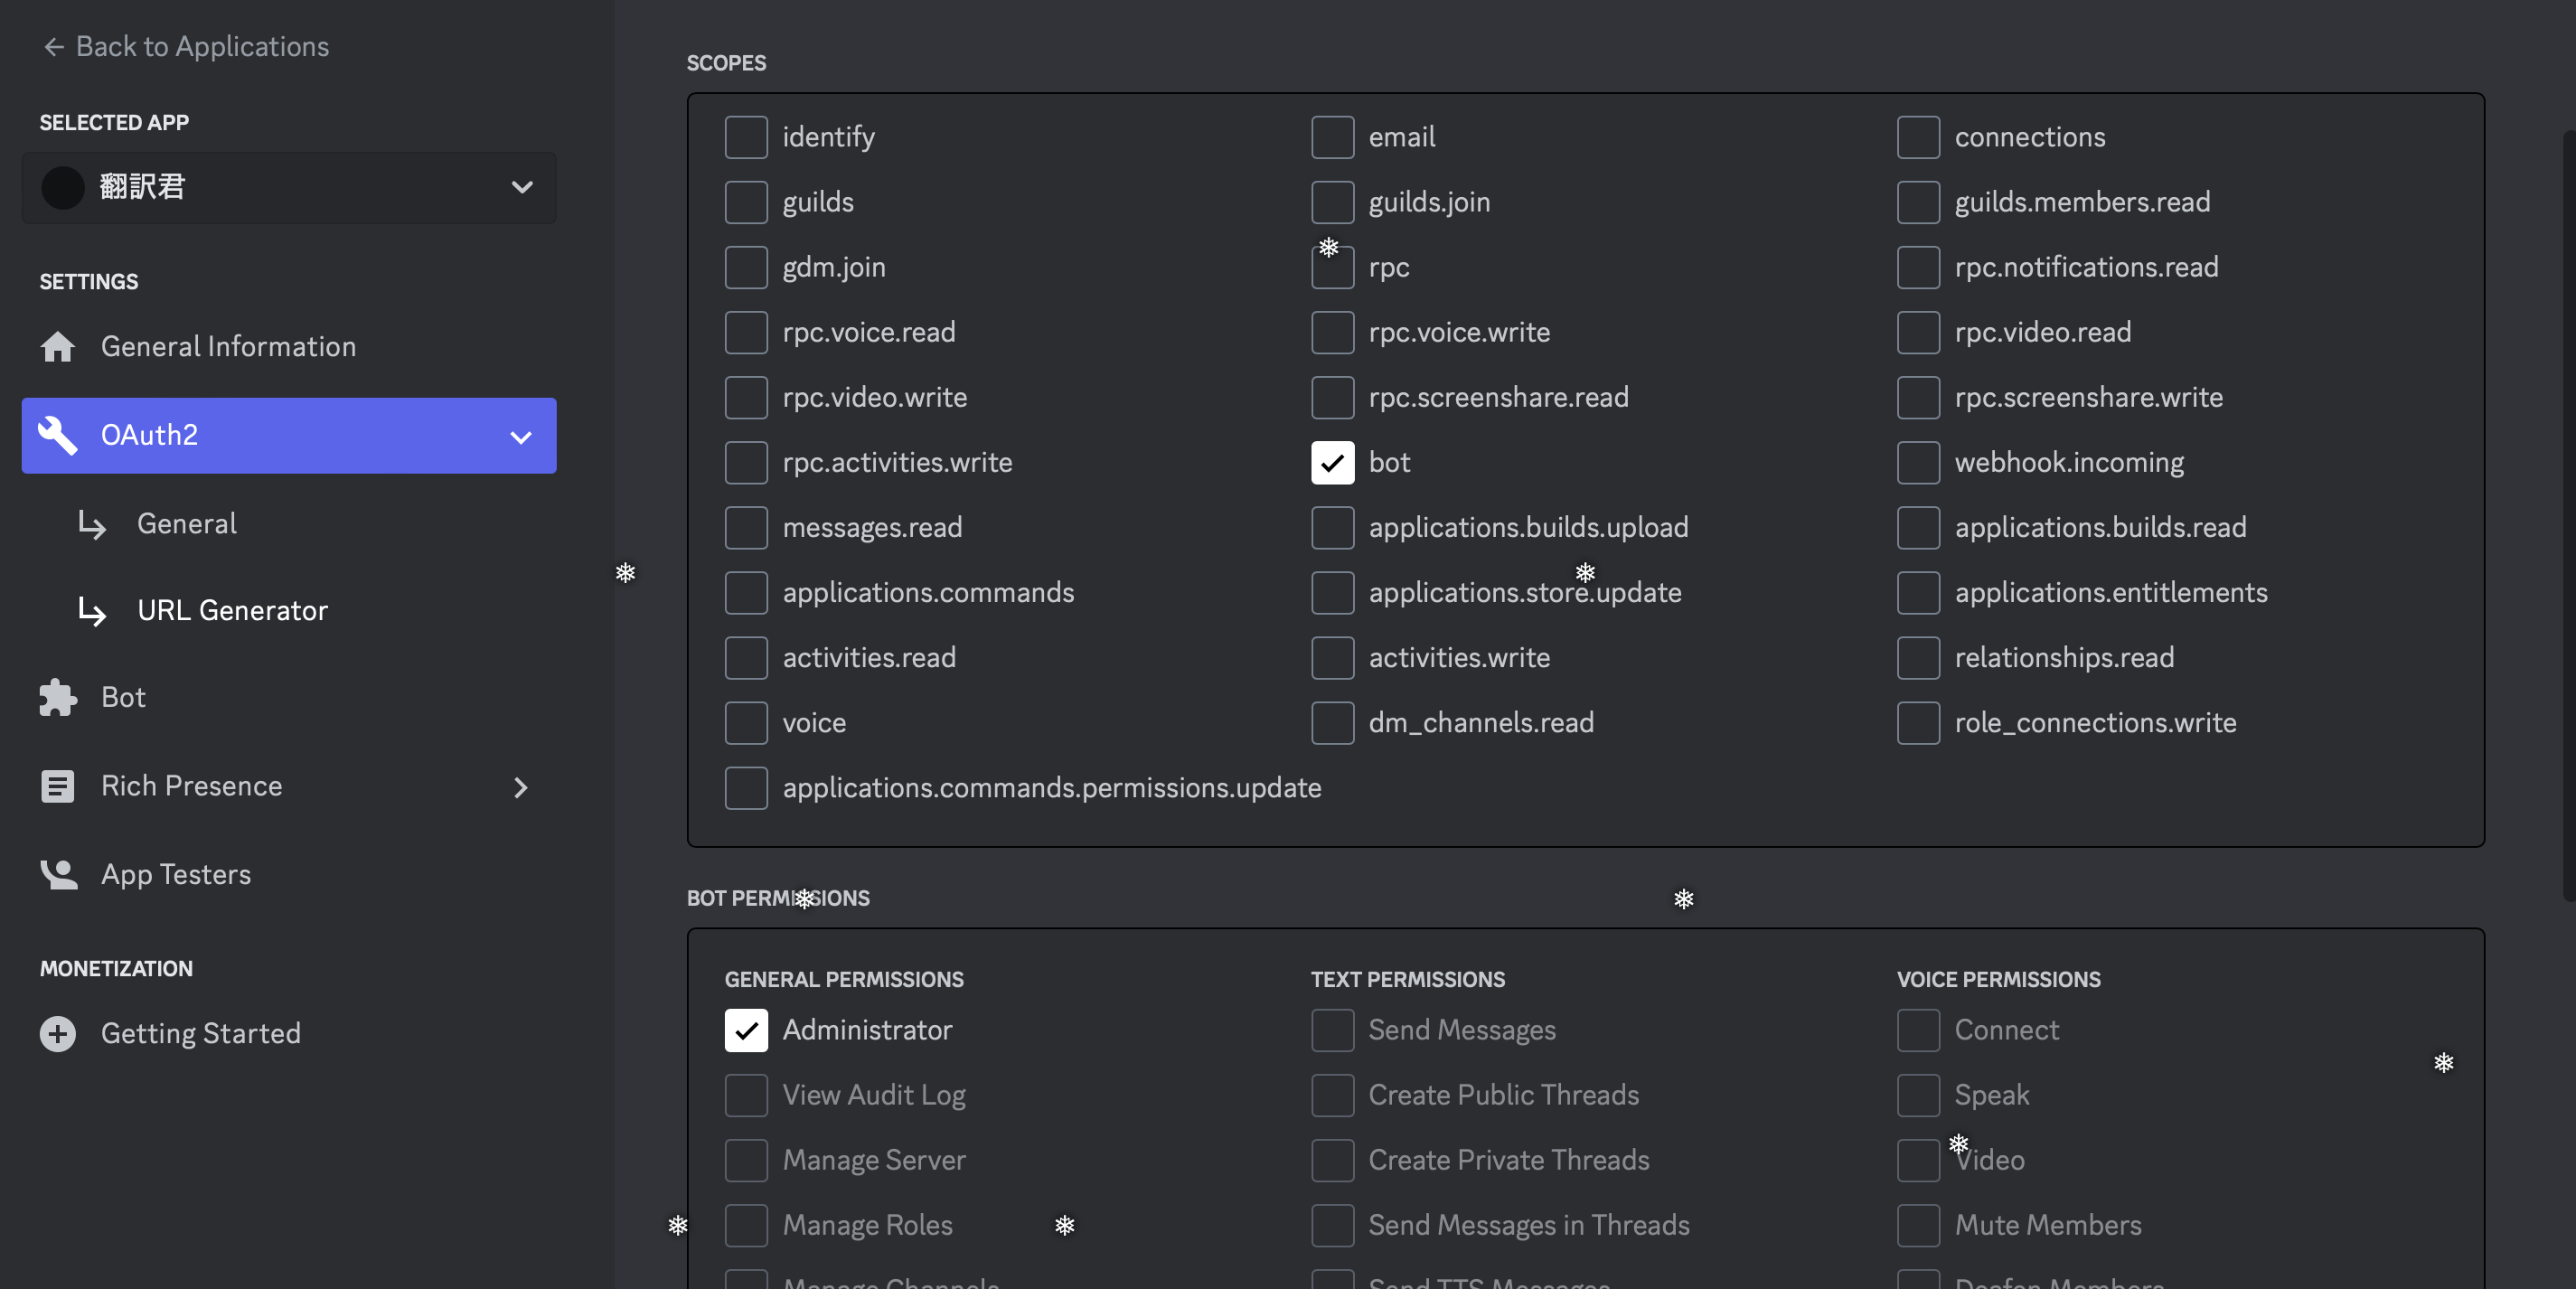
URL GeneratorでURLを招待用のURLを作成する。

作成したURLをブラウザのURL欄に入力し実行する。
その後、botを入れたいサーバーに招待する。
コード・環境を作成
1,Python3とpip3をインストールします。
以下の内容をターミナルに入力します。
sudo apt update
sudo apt install python3
sudo apt install python3-pip
2,ライブラリのインストールをします。
pip3 install discord.py
pip3 install requests
3、メインになるコードを作成します。
from discord import Intents
import requests

TOKEN = 'YOUR_DISCORD_BOT_TOKEN'
DEEPL_API_KEY = 'YOUR_DEEPL_API_KEY'
DEEPL_API_ENDPOINT = 'https://api-free.deepl.com/v2/translate'

intents = Intents.default()
intents.message_content = True  # メッセージ内容にアクセスするための権限を付与
client = discord.Client(intents=intents)

@client.event
async def on_ready():
    print(f'We have logged in as {client.user}')

@client.event
async def on_message(message):
    if message.author == client.user:
        return

    if message.content.startswith('!translate'):
        # メッセージから翻訳対象のテキストを取得
        text_to_translate = message.content[11:]

        # DeepL APIに翻訳リクエストを送信
        translation_params = {
            'auth_key': DEEPL_API_KEY,
            'text': text_to_translate,
            'target_lang': 'ja',  # 翻訳先の言語(ここでは日本語に設定)
        }
        response = requests.post(DEEPL_API_ENDPOINT, data=translation_params)

        # 翻訳結果を取得してDiscordに送信
        if response.status_code == 200:
            translation_result = response.json()['translations'][0]['text']
            await message.channel.send(f'Translation: {translation_result}')
        else:
            await message.channel.send('Translation failed. Please try again later.')

client.run(TOKEN)
YOUR_DISCORD_BOT_TOKENに先程メモしたTOKENを入力します。
YOUR_DEEPL_API_KEYに、自分のDeepl-APIの認証キーを入力します。
4,最後に実行します。
python3 index.py
結果

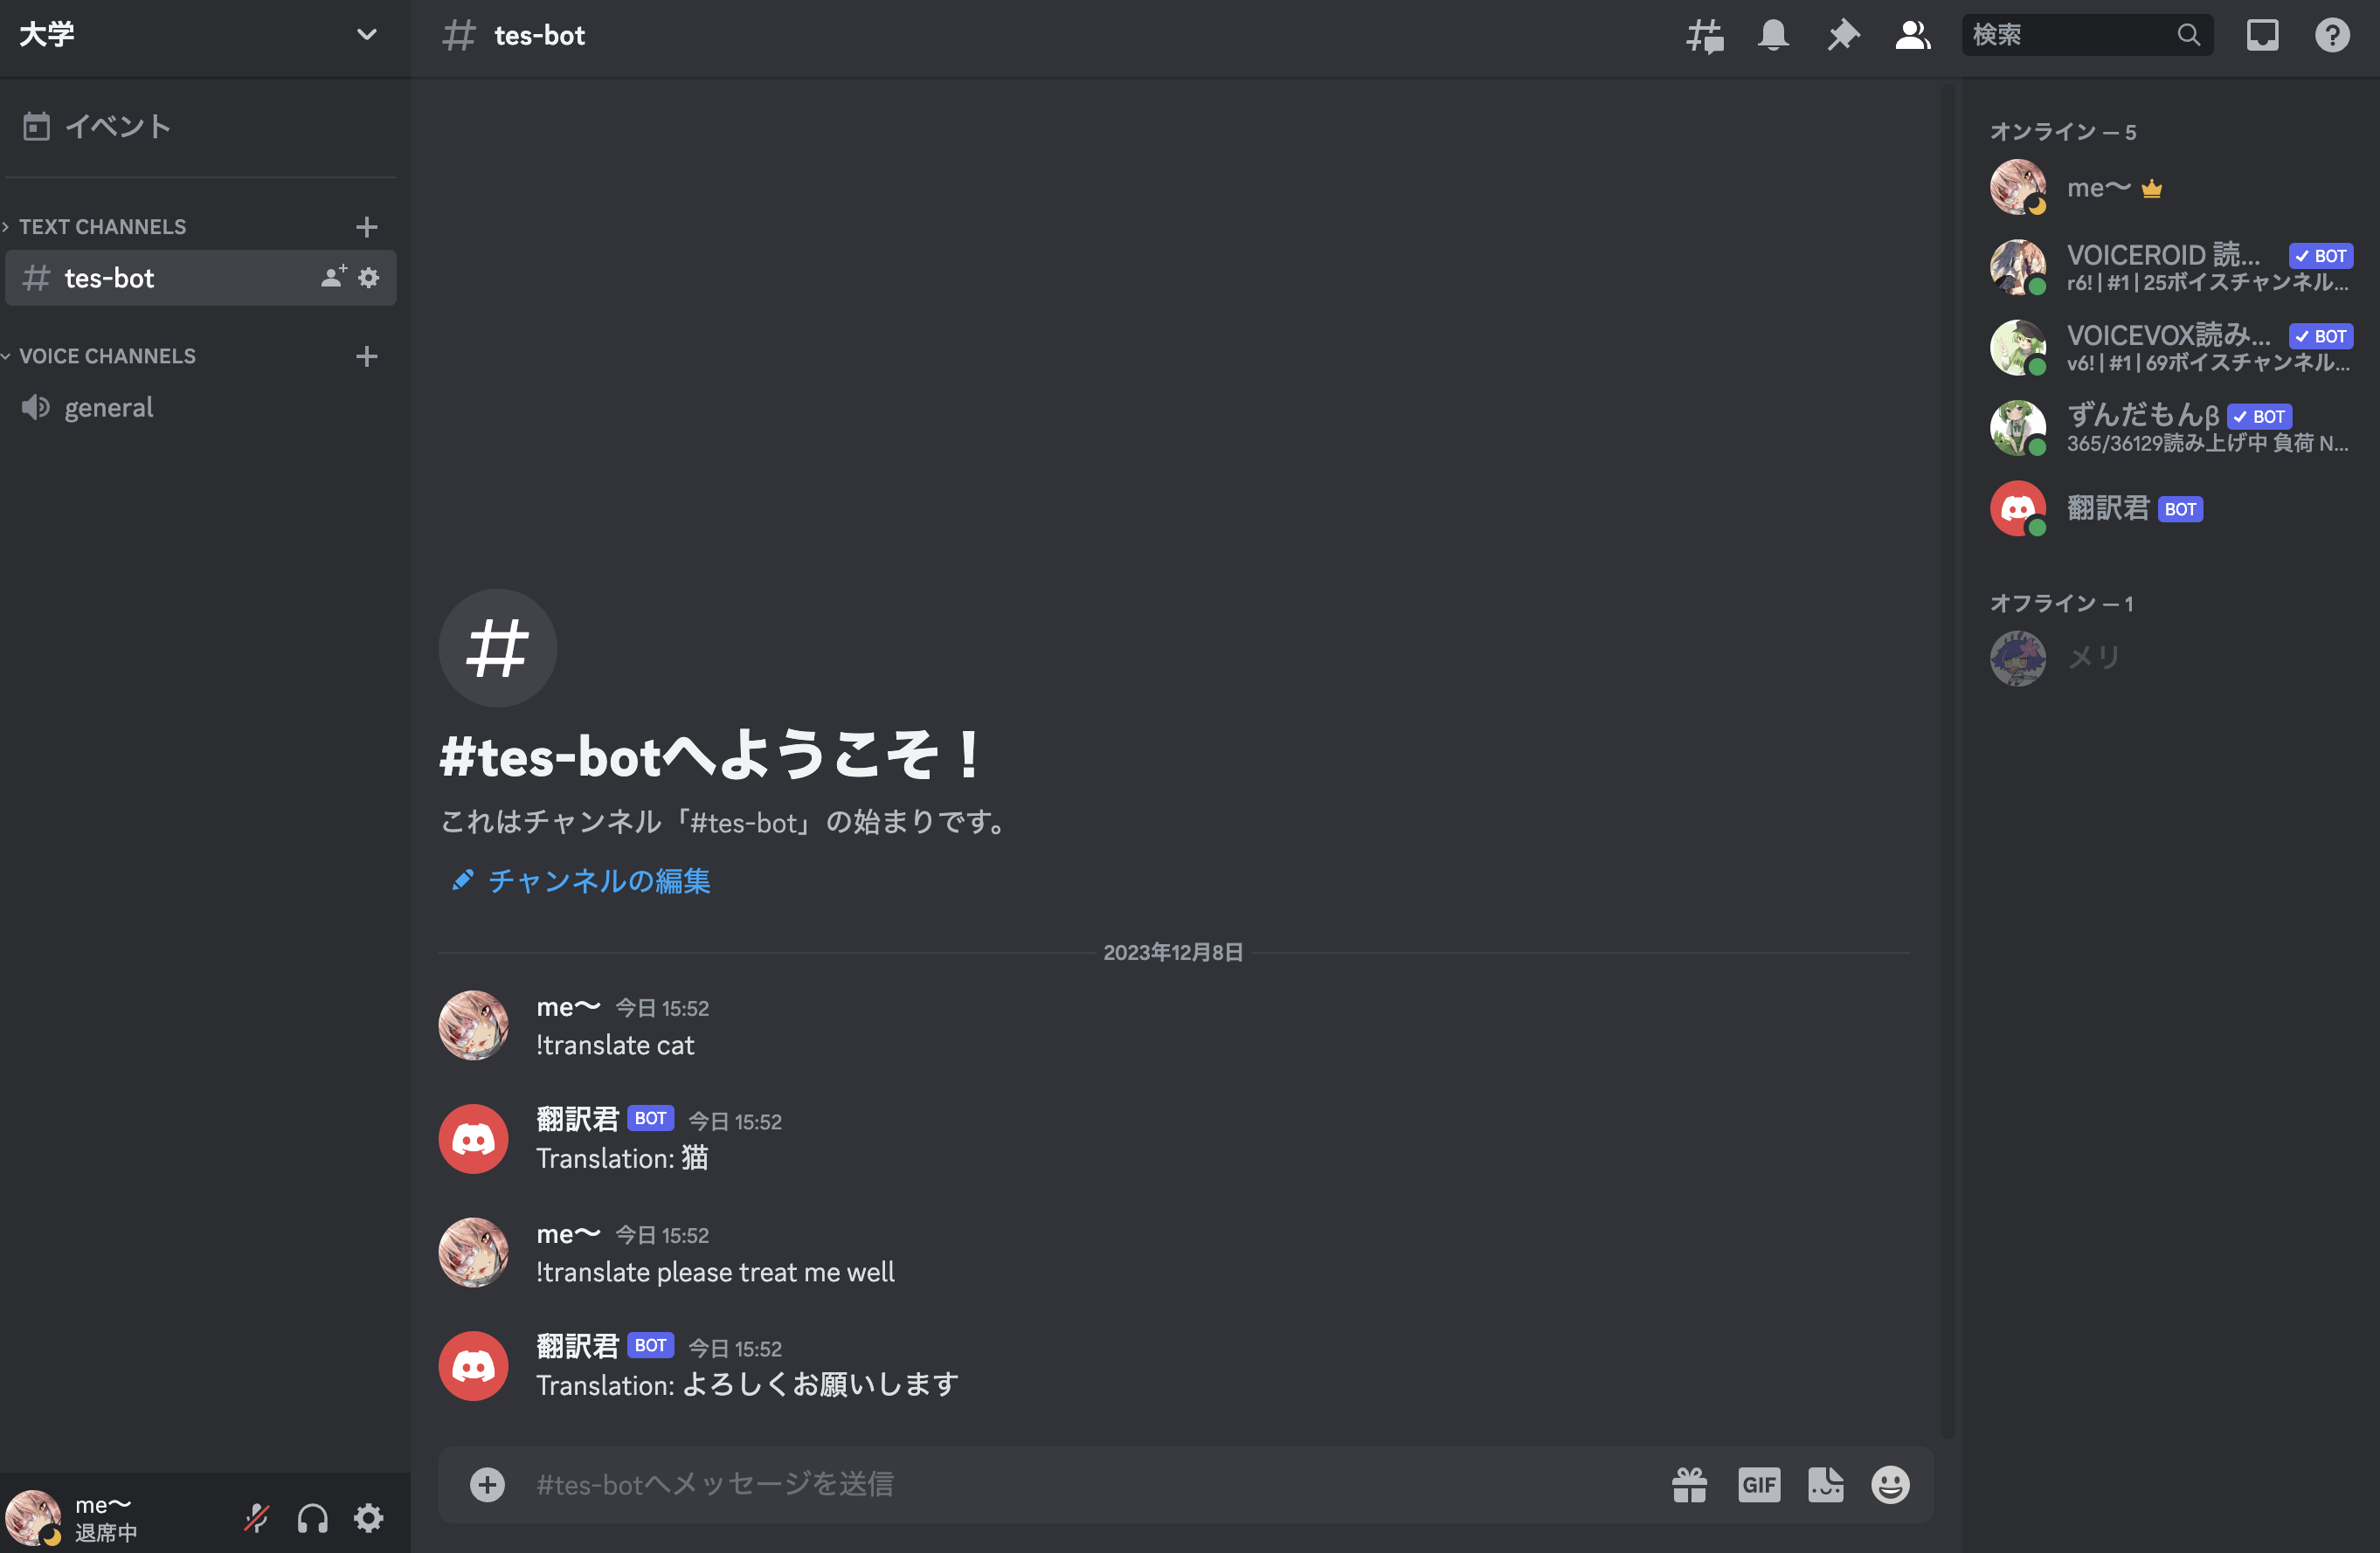
今回は、!translate の後に英語を入力したら翻訳してくれるように作成しました。
注意点
今回のbotは、4の実行で起動する仕組みになっているので実行した後にPCを落としてしまうとbotが使えなくなってしまいます。そのため、個人のサーバー以外で使う際には注意しましょう。
また、DeeplーAPIのFree Planでは、50万文字までになっているため注意しましょう。
まとめ
今回は、Deepl-APIを利用してDiscordのbotを作成してみました。
作成する前まで、Pythonなどプログラミング初心者で作れるか心配でしたが無事作成できてよかったです。
また機会があればDiscordのbotなどを作成してみたいと思います。
ここまで見て頂いてありがとうございました。
