やりたい事
- HipChat に通知を投げたい
- AWS Lambda (Python) でしたい
- AWS Lambda で requests (外部モジュール) を使いたい
HipChat API Token と ROOM ID
他にも方法がありますが、ここではユーザーの API Token と ROOM ID で通知をします。
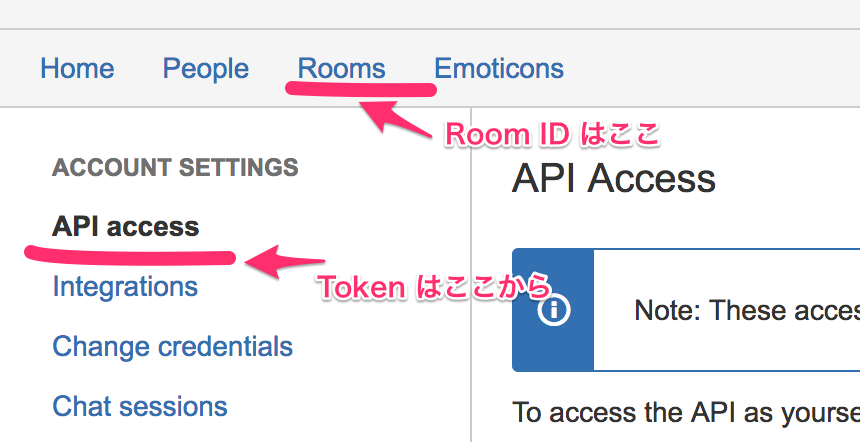
ROOM ID は 画面右上のMenuから↓で確認できます。 API ID (多分7桁の数字) がそれです。
- Account Settings --> Rooms --> {Room名}
API Token は↓で発行します。
- Account Settings --> API Access
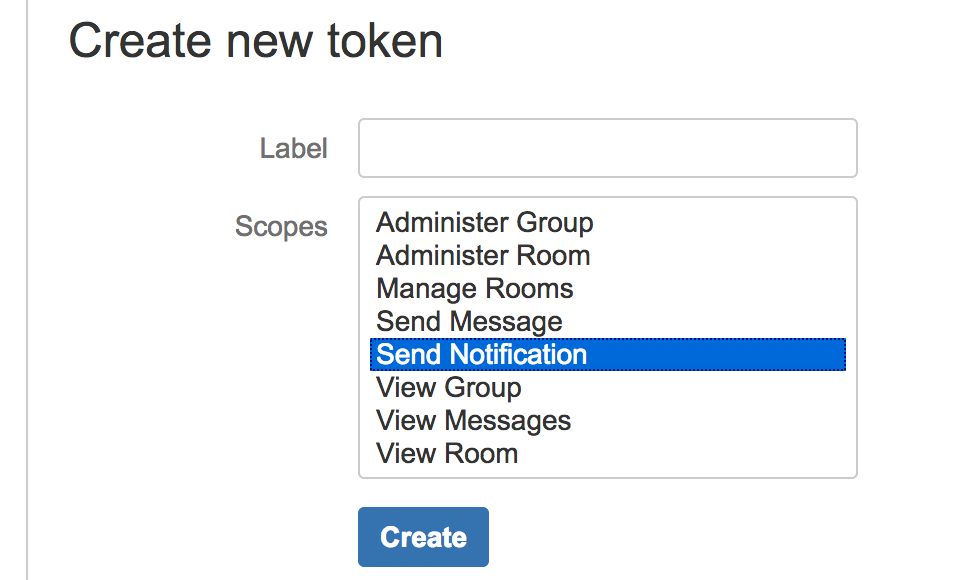
Labelは何でもいいです。 Scopesは Send Notification を選びました。 Createを押すと41字くらいの英数字のTokenが発行されます。
スクリプトを書いてアップロードする
普通は書いたスクリプトをAWS Consoleに貼って終わりですが、今回は requests を使うので、外部モジュールを同梱した .zip にしてアップロードします。
$ mkdir {your-project-dir}
requests を pip でインストールします。 -t Optionでインストール先を指定します。
$ pip install requests -t {your-project-dir}
スクリプト本文をファイル名 {your-project-dir}/lambda_function.py で保存します。
#!/usr/bin/env python
# encoding: utf-8

import json
import requests

def lambda_handler(event, context):
    # HipChat IDs.
    hipchat_token = u'{ここに41桁の英数字のToken}'
    hipchat_roomid = u'{ここに7桁のROOM ID}'

    # :see: https://developer.atlassian.com/hipchat/guide/sending-messages
    def _payload(message):
        return json.dumps({
            u'from': u'FROM',
            u'message_format': u'text',
            u'color': u'random',
            u'message': message
        })

    # :see: https://developer.atlassian.com/hipchat/guide/hipchat-rest-api?_ga=1.190068904.2037217368.1478496904
    headers = { u'Content-Type': u'application/json', u'Authorization': u'Bearer %s' % (hipchat_token) }

    # send a message to HipChat.
    res = requests.post(u'https://api.hipchat.com/v2/room/%s/notification' % (hipchat_roomid), data=_payload('hello world !'), headers=headers)

    return res.status_code
スクリプトと外部モジュールを .zip 化します。
$ zip -r lambda.zip {your-project-dir}/*
あとは、この lambda.zip をAWS Consoleからアップロードしたらいいです。

