この記事は リンク情報システム の「2020新春アドベントカレンダー TechConnect!」のリレー記事です。
TechConnect! は勝手に始めるアドベントカレンダーとして、engineer.hanzomon という勝手に作ったグループによってリレーされます。
(リンク情報システムのFacebookはこちらから)
こういうの使ったなーということで備忘。
脆弱性診断とは
「脆弱性は情報セキュリティ・サイバーセキュリティの用語で、安全性上の弱点を指す。」(wikipedia)
脆弱性診断の方法としては、Nessusなどの脆弱性検査ツールや脆弱性対策情報提供サービスを利用する等がある。
脆弱性収集の主な流れとしてはシステム上で動いているソフトウェアのバージョンを把握し、
手動チェックや、今回紹介するNessus等のツールを使ってCVE(共通脆弱性識別子)の検出を行う。

Nessusとは
脆弱性診断スキャナー。
公式によると47,000以上のCVEは業界で最も多く、より多くの脆弱性を発見できるのが売り。
非商用として無料で使用できる。AWSだとイメージにNessusがあるのでインストール作業不要。
インストール方法
〇環境
・RHEL8
・Nessus-8.8.0
1. アクティベーションコードを取得
※初期インストール画面時に入力する。
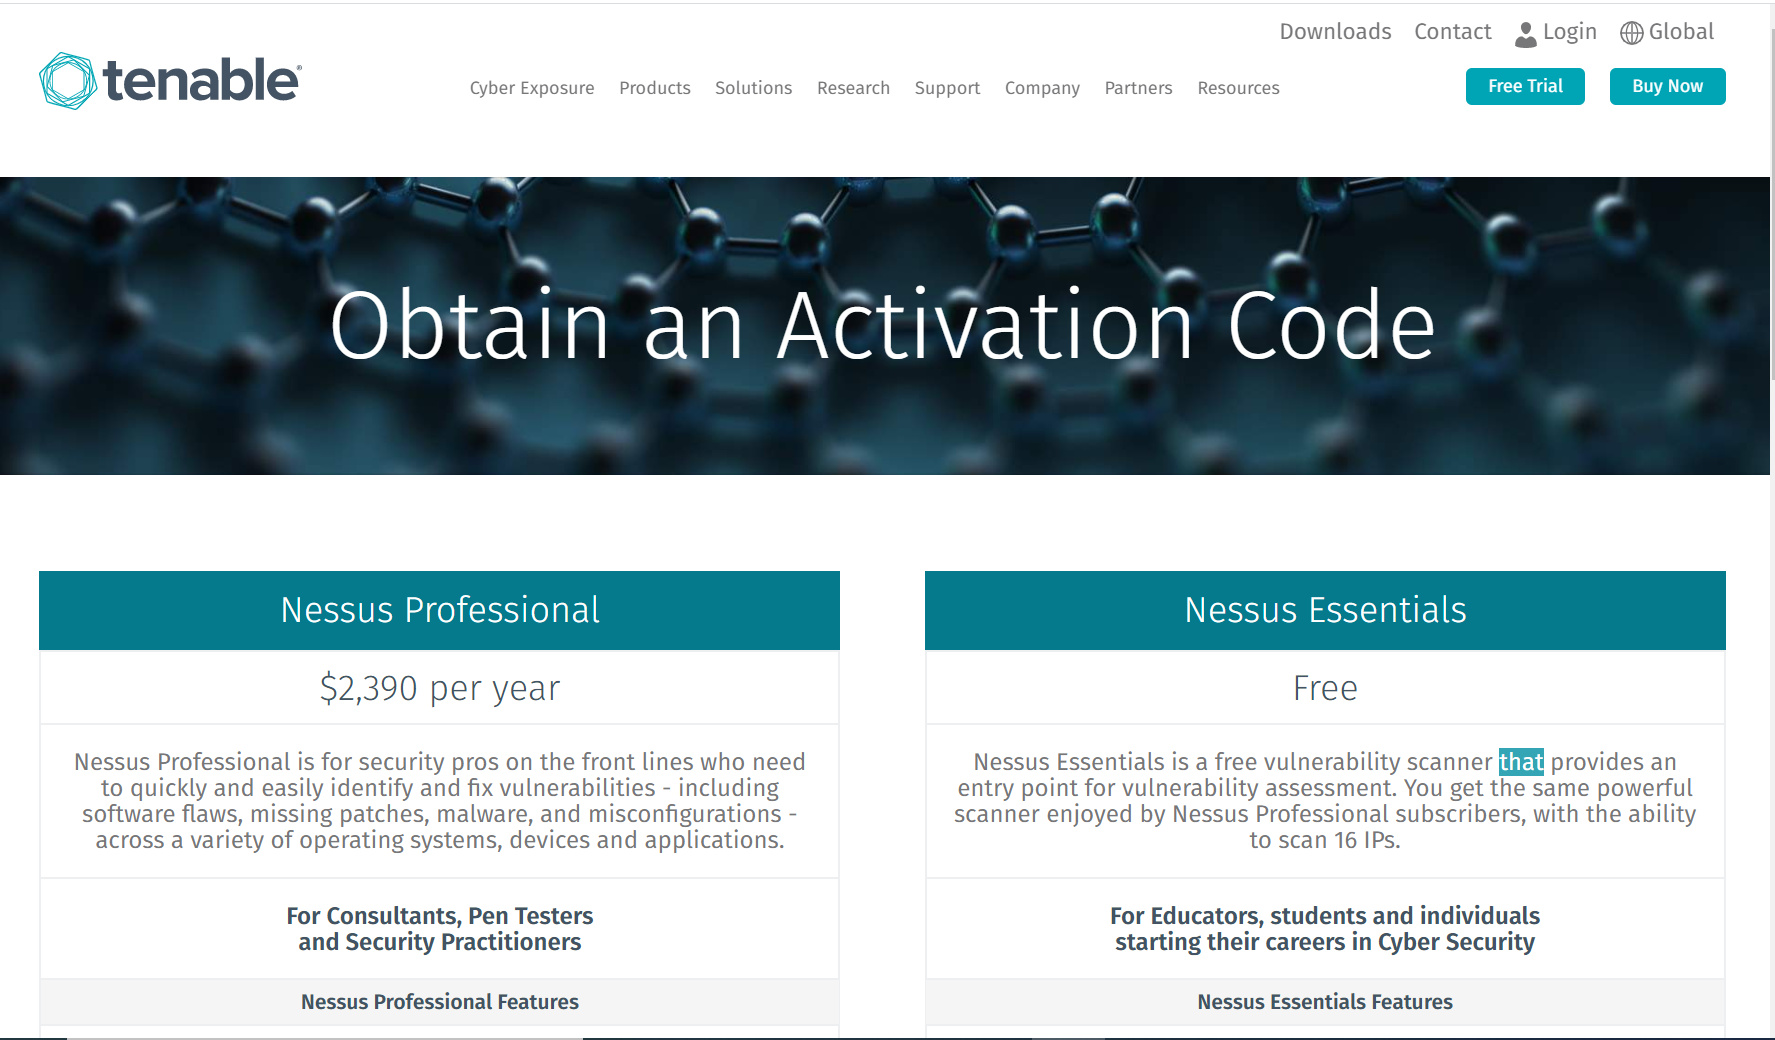
商用はNessus Professional、無料版はNessus Essentials。
| Nessus Professional | Nessus Essentials | |
|---|---|---|
| 値段 | $2,390/年 | 無料 |
| スキャン対象 | 無制限 | 16IPまで |
| 検出CVE | 無制限 | 数千 |
| サポート | メール問い合わせ可 | Community |
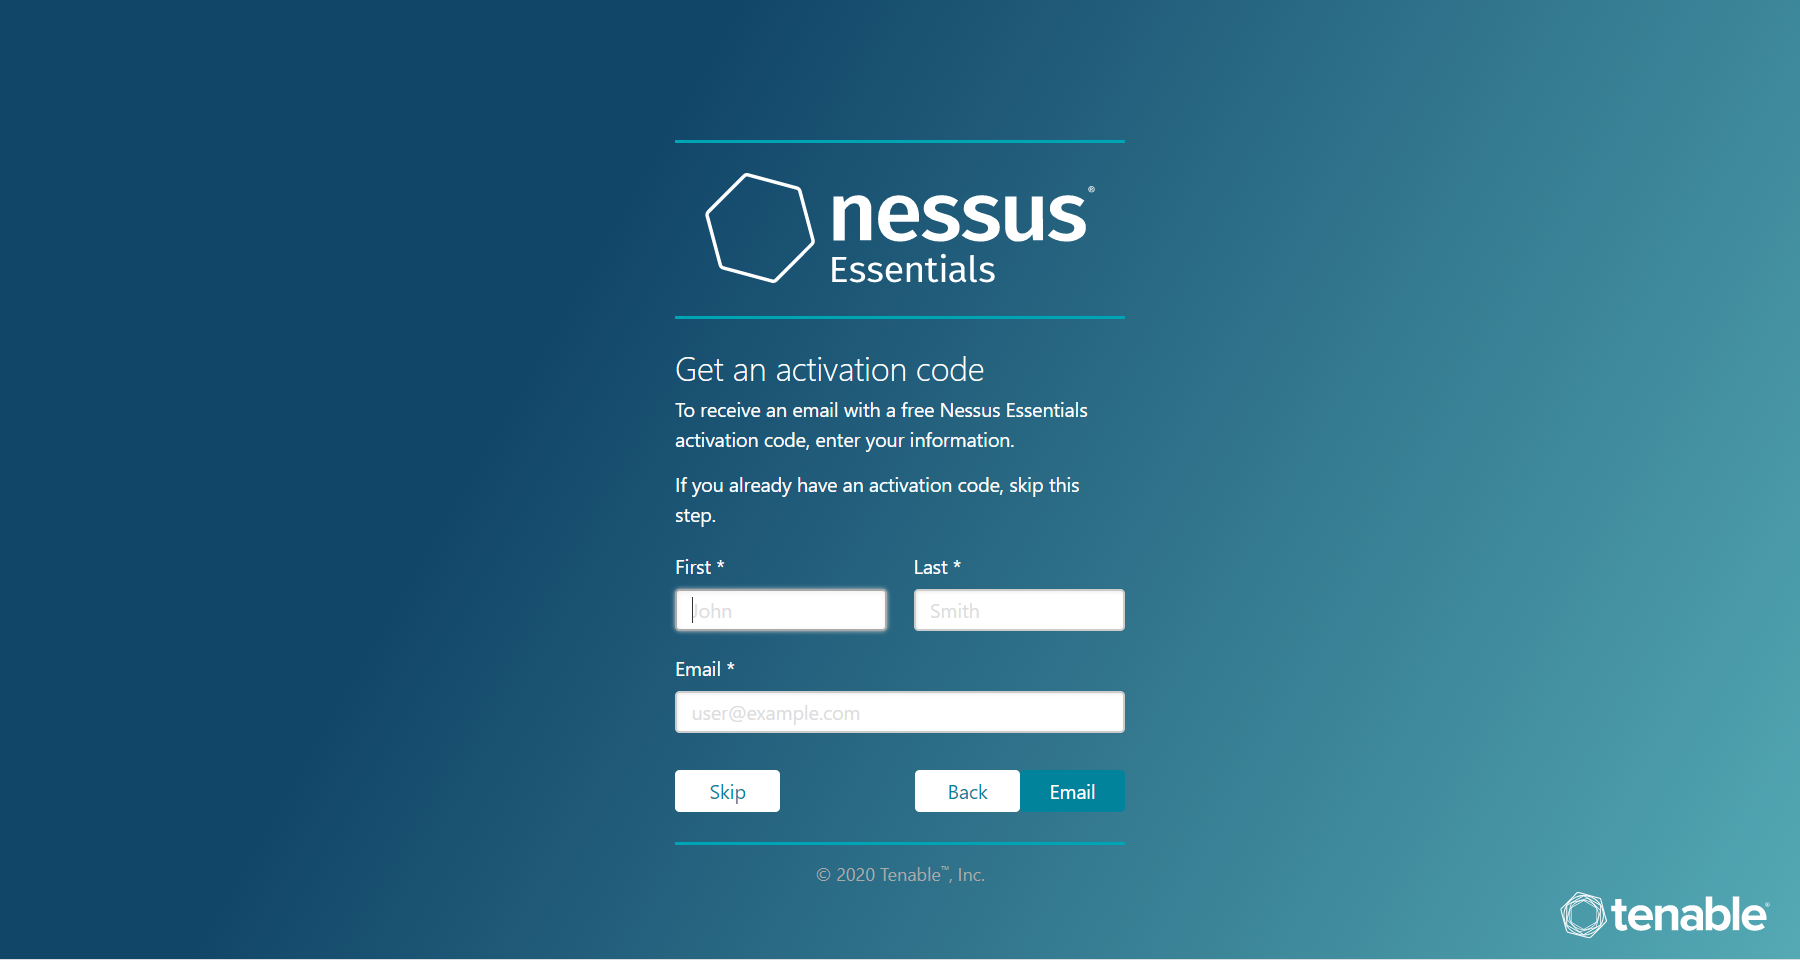
tenableにアクセス。Nessus Essentialsのアクティベーションコードを取得する。
氏名とメールアドレスを記載する。
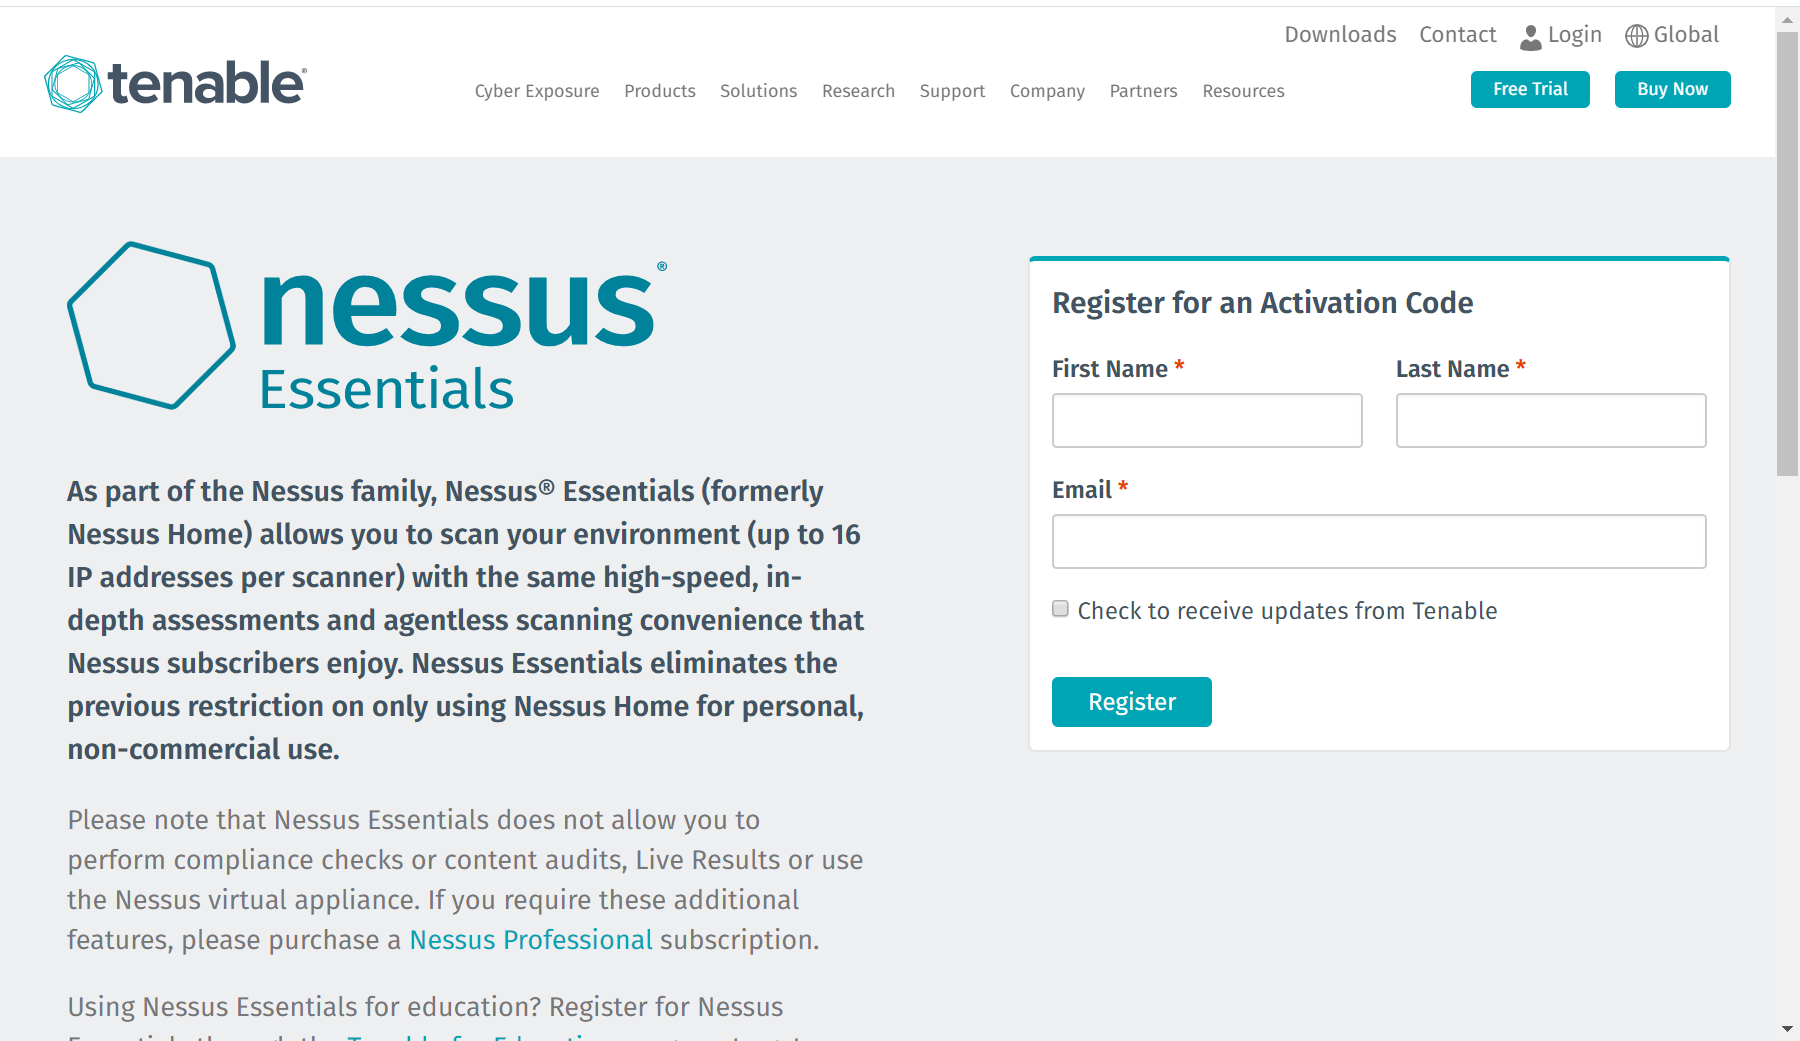
登録したメールアドレスにアクティベーションコードが送られてきていることを確認する。
2.Nessusマネージャーインストール
ダウンロードサイト>Nessusからrpmファイル取得
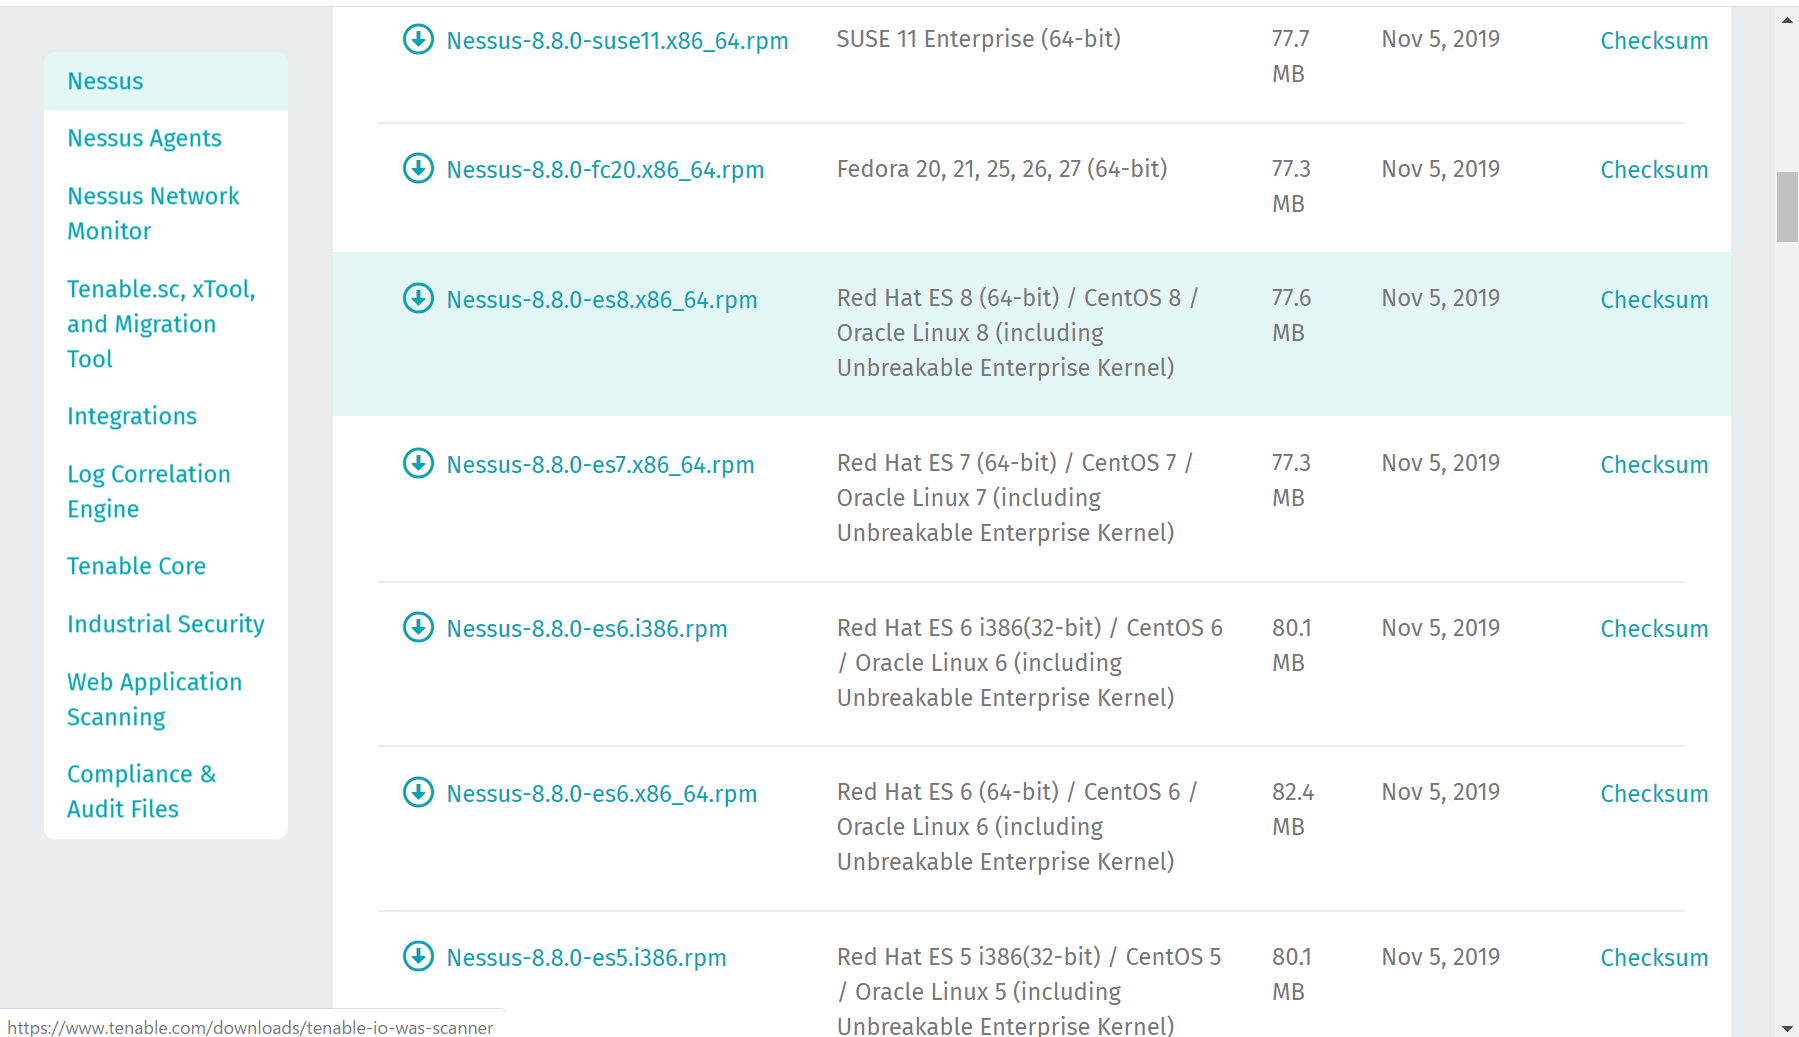
rpmファイルをサーバに格納してインストール
# rpm -ivh Nessus-8.8.0-es8.x86_64.rpm
warning: Nessus-8.8.0-es8.x86_64.rpm: Header V4 RSA/SHA256 Signature, key ID 1c0c4a5d: NOKEY
Verifying...                          ################################# [100%]
Preparing...                          ################################# [100%]
Updating / installing...
   1:Nessus-8.8.0-es8                 ################################# [100%]
Unpacking Nessus Core Components...
 - You can start Nessus by typing /bin/systemctl start nessusd.service
 - Then go to https://ip-XXX-XX-XX-XXX.ap-northeast-1.compute.internal:8834/ to configure your scanner
サービス起動
# systemctl list-unit-files -t service | grep nessus
nessusd.service                             enabled
# systemctl start nessusd.service
# systemctl status nessusd.service
● nessusd.service - The Nessus Vulnerability Scanner
   Loaded: loaded (/usr/lib/systemd/system/nessusd.service; enabled; vendor preset: disabled)
   Active: active (running) since Thu 2020-01-02 04:28:54 UTC; 5s ago
 Main PID: 6166 (nessus-service)
    Tasks: 11 (limit: 4998)
   Memory: 72.6M
   CGroup: /system.slice/nessusd.service
           ├─6166 /opt/nessus/sbin/nessus-service -q
           └─6167 nessusd -q

Jan 02 04:28:54 ip-XXX-XX-XX-XXX.ap-northeast-1.compute.internal systemd[1]: Started The Nessus Vulnerability Scanner.
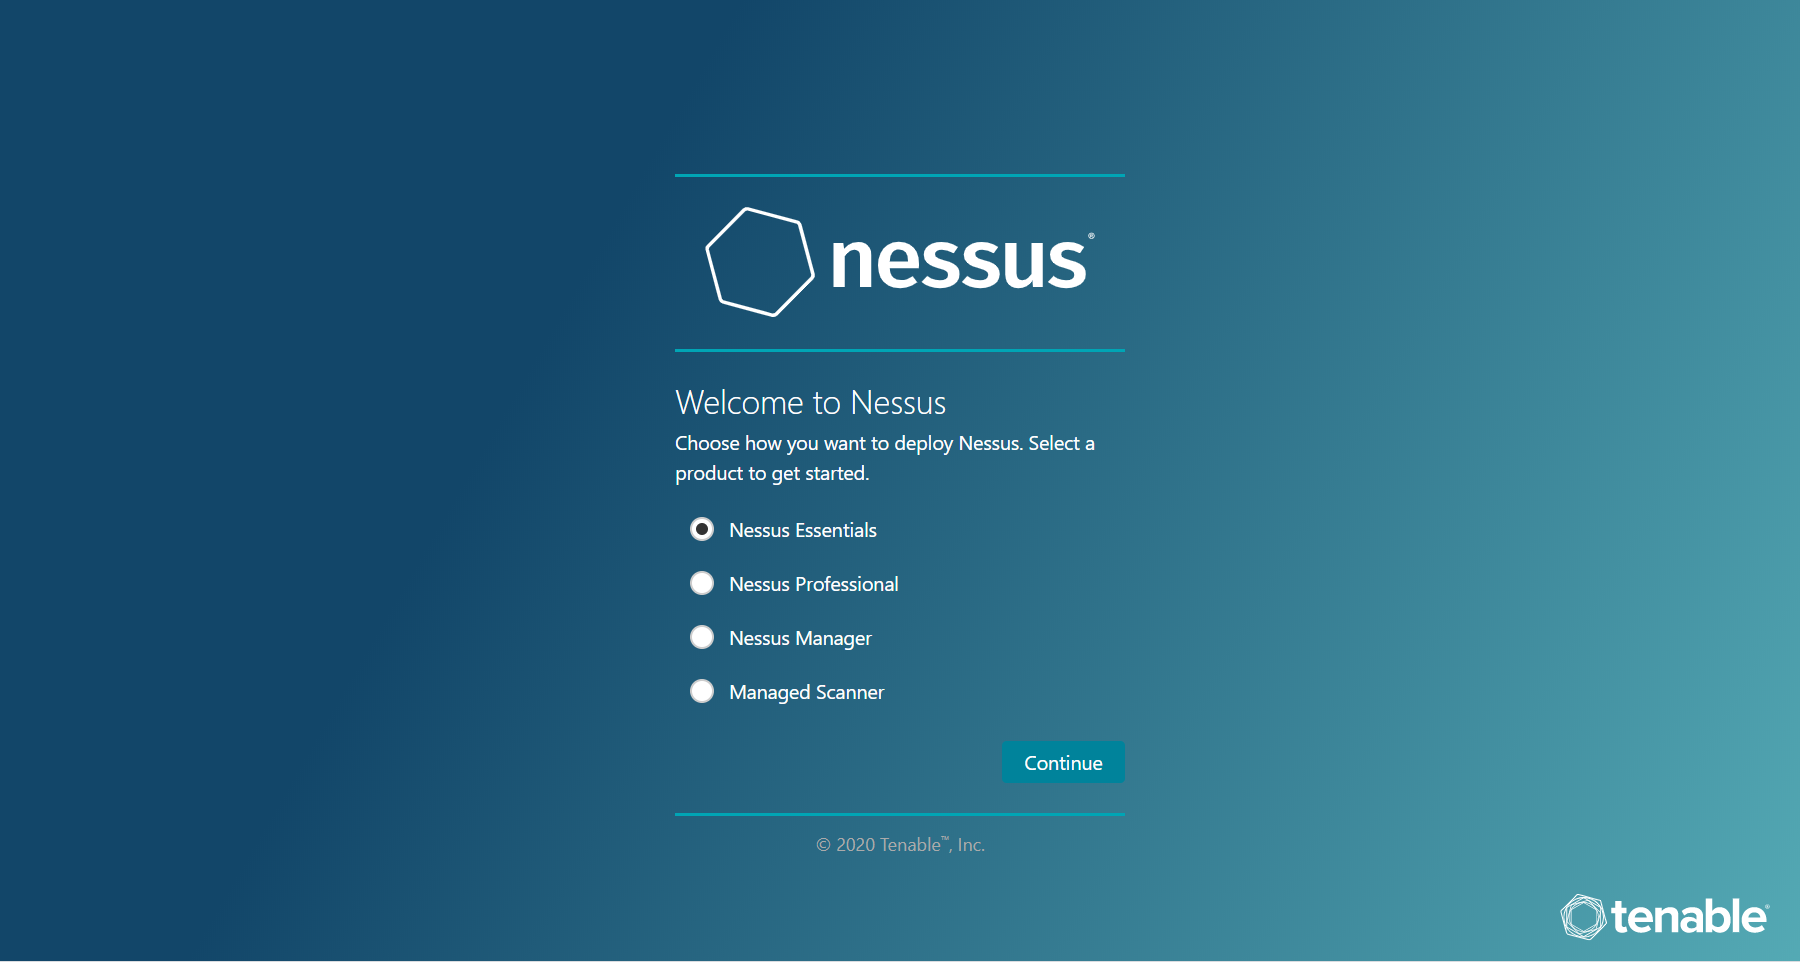
3.コンソール画面にアクセスし、初期インストールを実施。
下記URLにアクセスする。
https://(Nessusを立てたサーバ):8834/
初期インストール画面。Nessus Essentialsを選択しContinueを押下。
アクティベーションコードを登録するか聞かれるが、登録済みなのでスキップ。
取得したアクティベーションコードを記載。

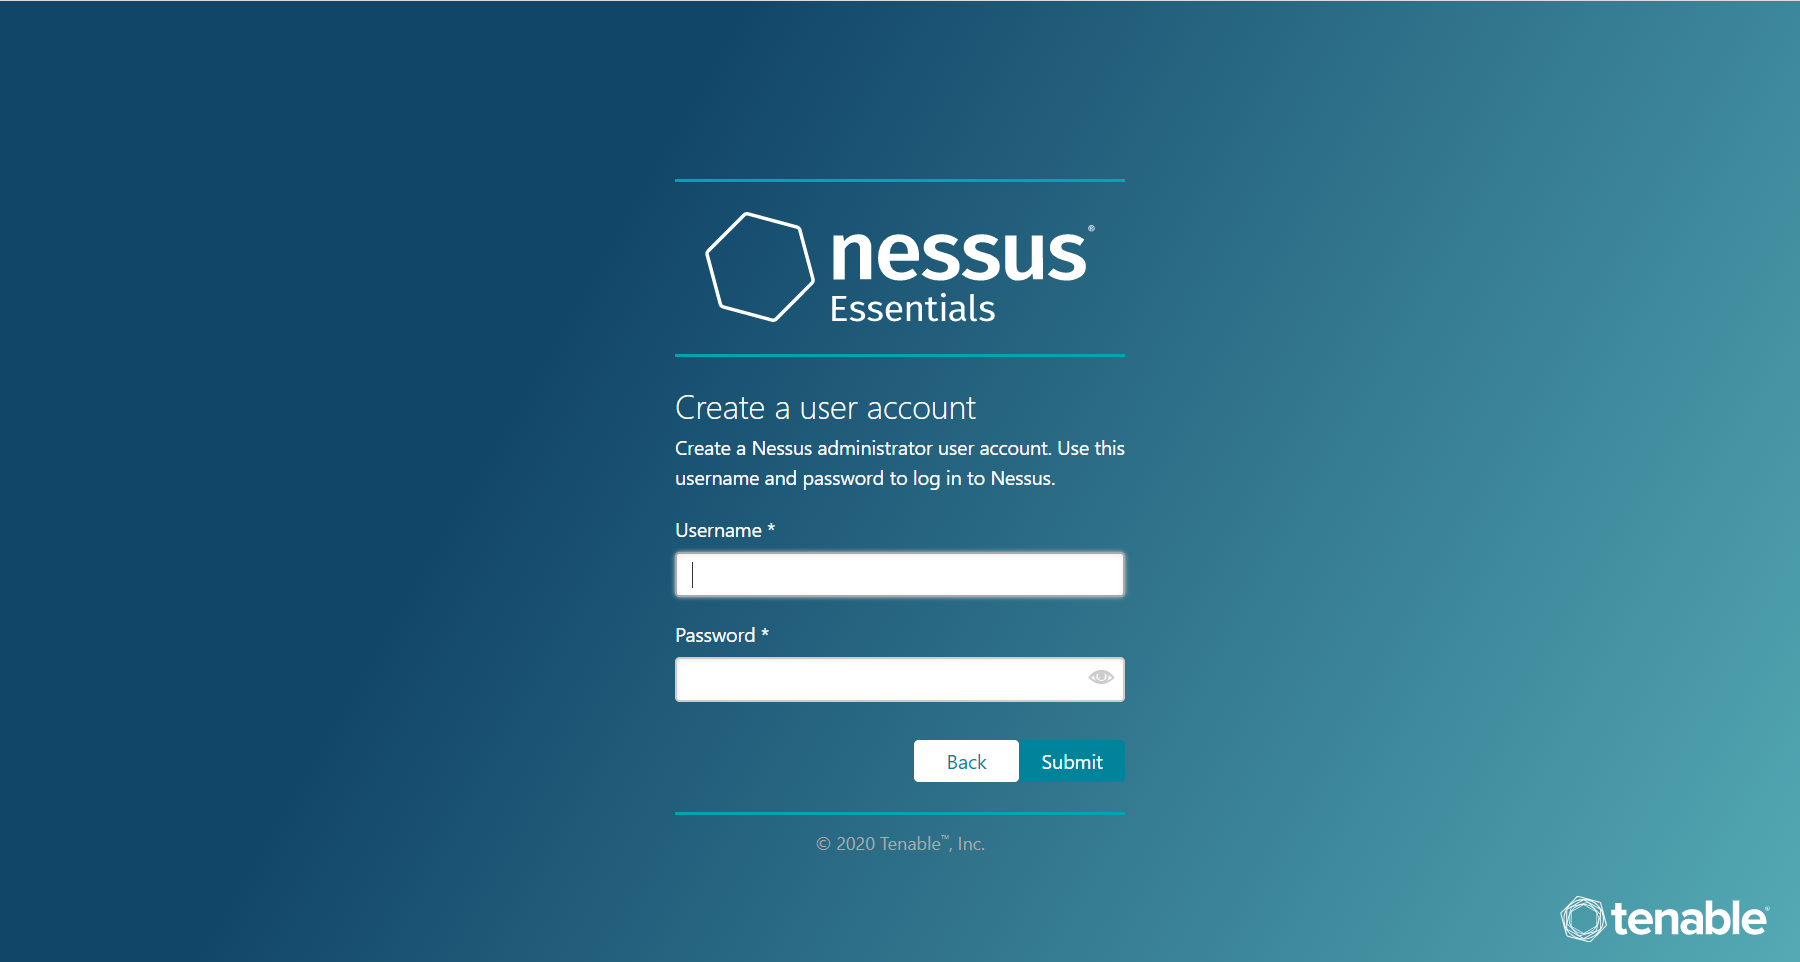
Nessus管理者用のアカウントを作成
plugin初期化画面に遷移。
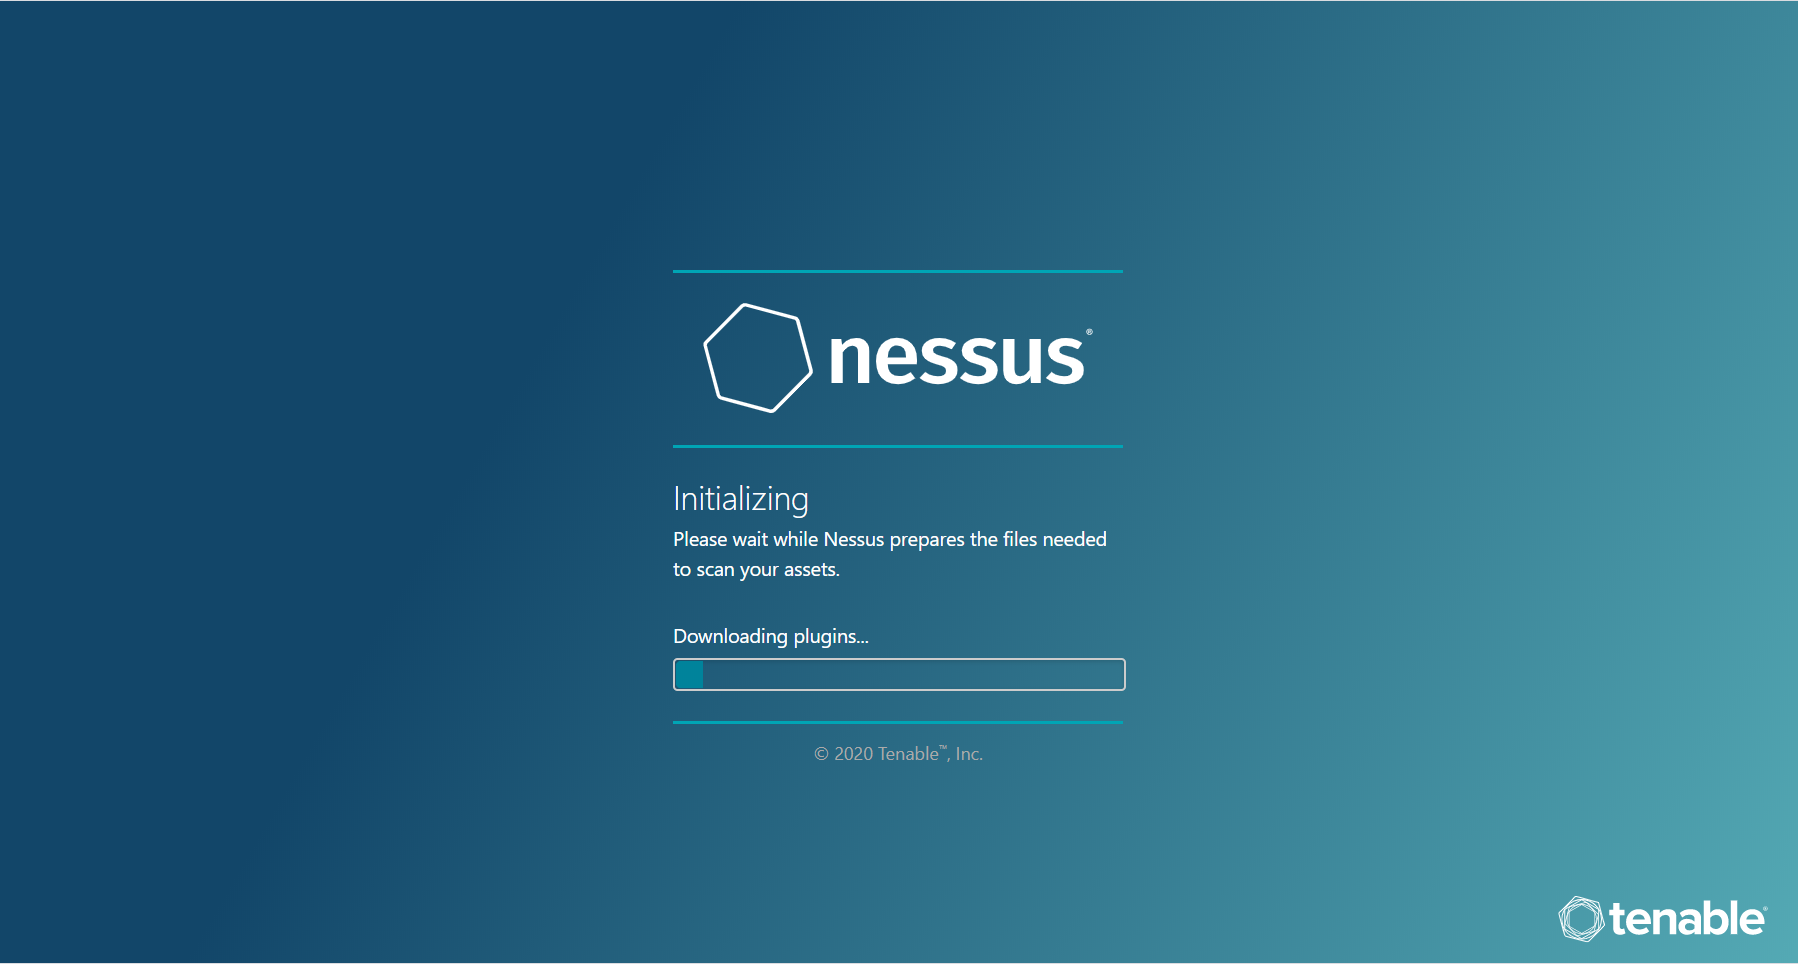
以上でインストールが完了。
基本的な使用方法
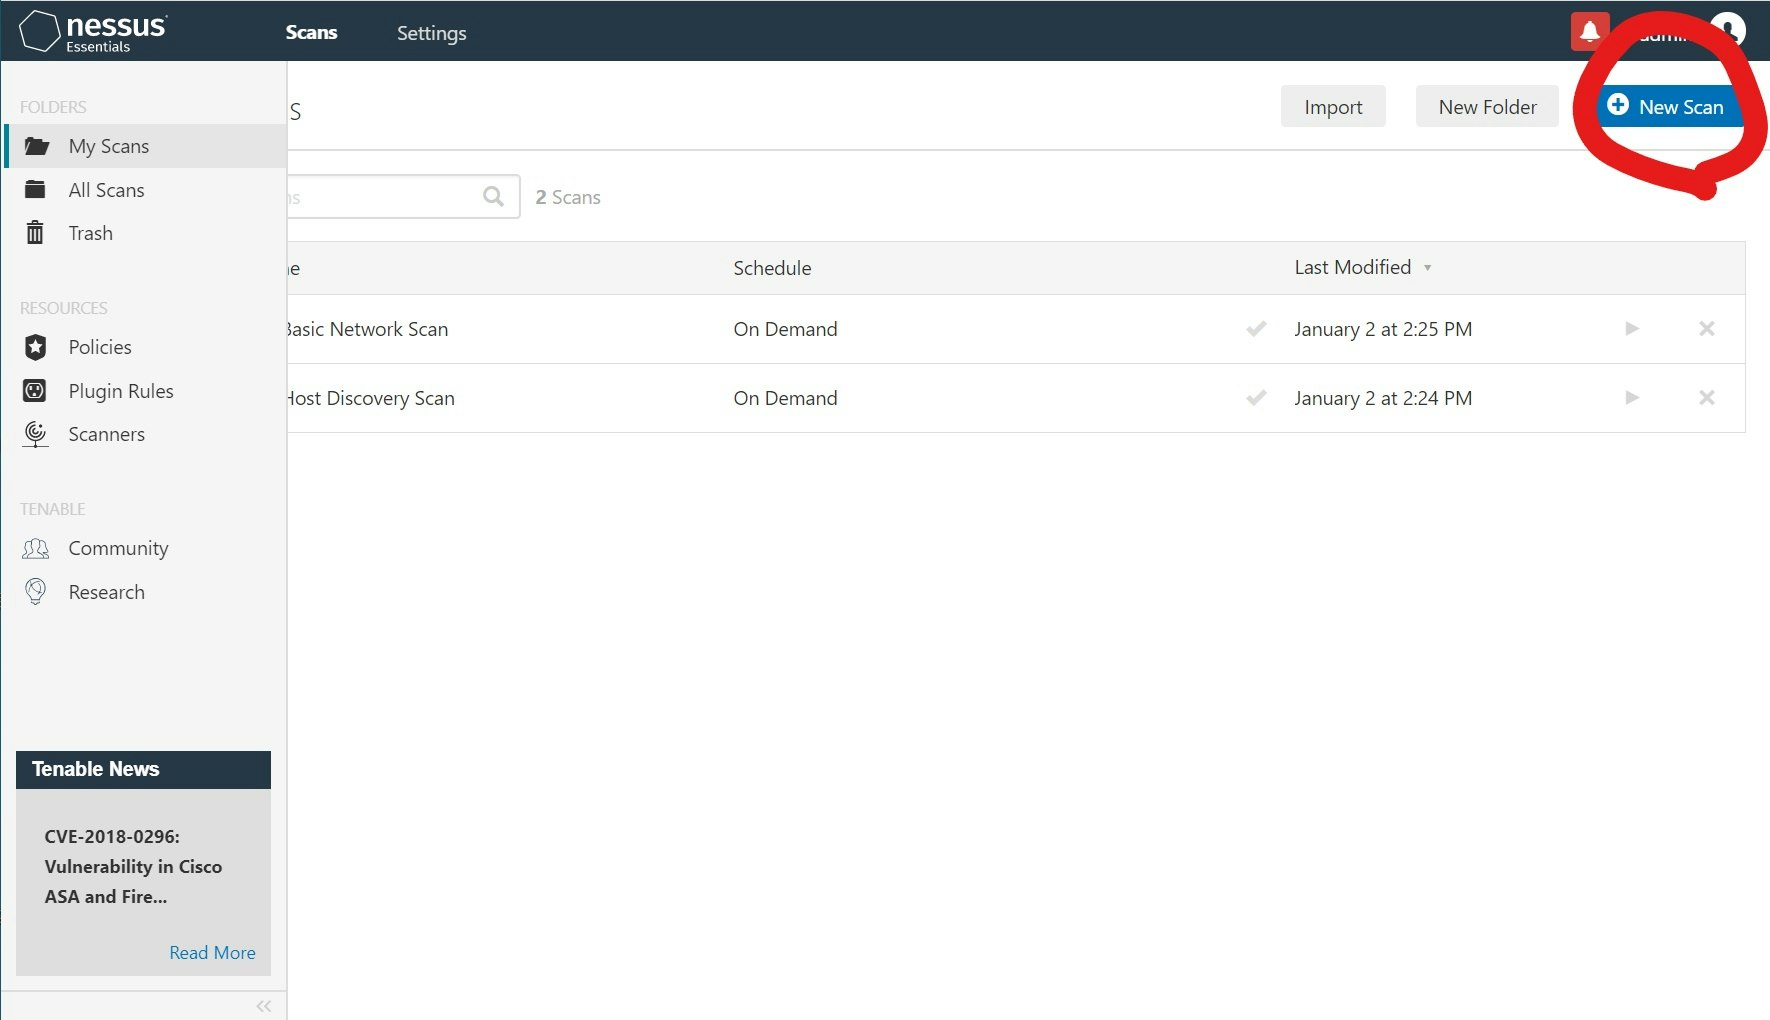
1.Scan作成
コンソール画面のScanタブから「New Scan」を選択する。
2.スキャンテンプレート選択
主なデフォルトのスキャンテンプレートは下記。種別は主に「Discovery(発見)」「Vulnerabilities(脆弱性)」「Compliance(コンプライアンス)」の三つ。
なお、「Compliance(コンプライアンス)」テンプレートは有料版のみ提供。
| 分類 | スキャン名 | 概要 |
|---|---|---|
| 発見 | Host Discovery | 稼働中のホストと開いているポートを検出する。 |
| 脆弱性 | Advanced Dynamic Scan | 推奨事項なしの高度なスキャン。特定の脆弱性に合わせてフィルターを行いながらプラグインを含めたり除外したりする。 |
| 脆弱性 | Advanced Scan | 推奨事項なしの高度なスキャンを実施する。 |
| 脆弱性 | Basic Network Scan | 基本的な脆弱性スキャンを実施する。 |
| 脆弱性 | Web Application Tests | 公開されたWeb Apllication の脆弱性をスキャンする。 |
| コンプライアンス | Audit Cloud Infrastructure | クラウドサービスの構成を監査する。 |

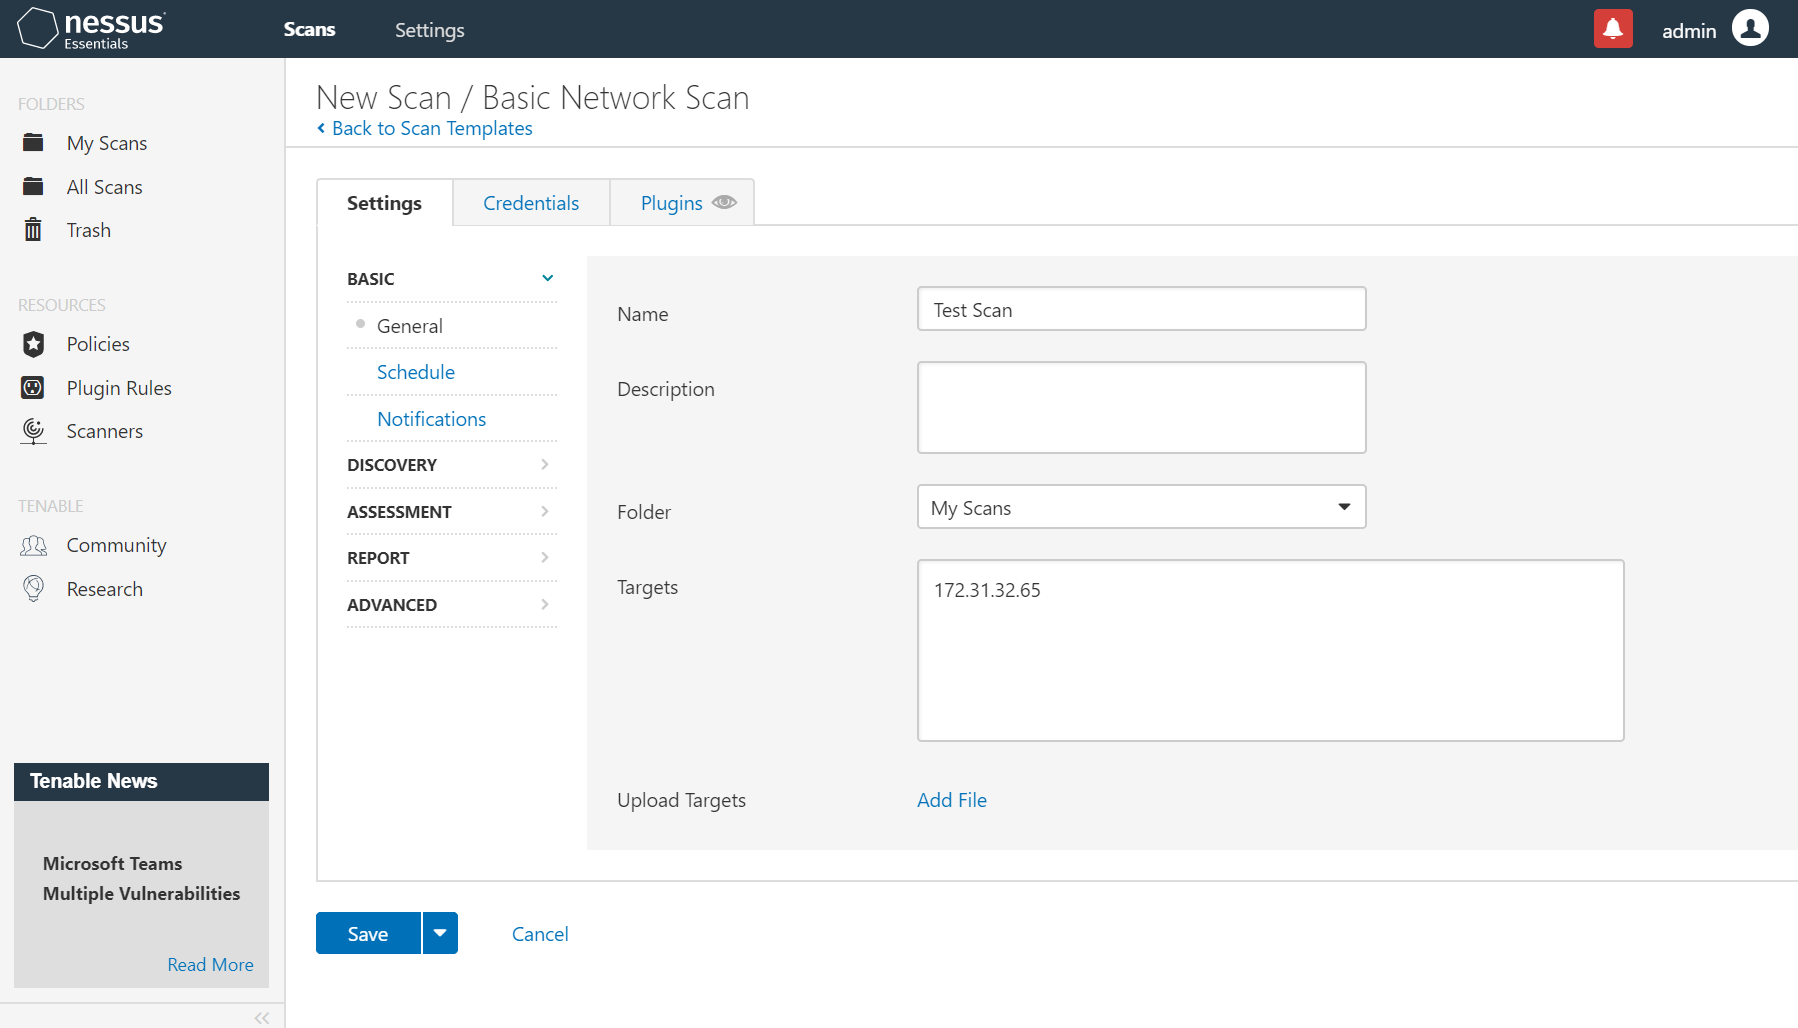
3.スキャン対象サーバの設定
Targetsにスキャン対象サーバのIPを設定する。
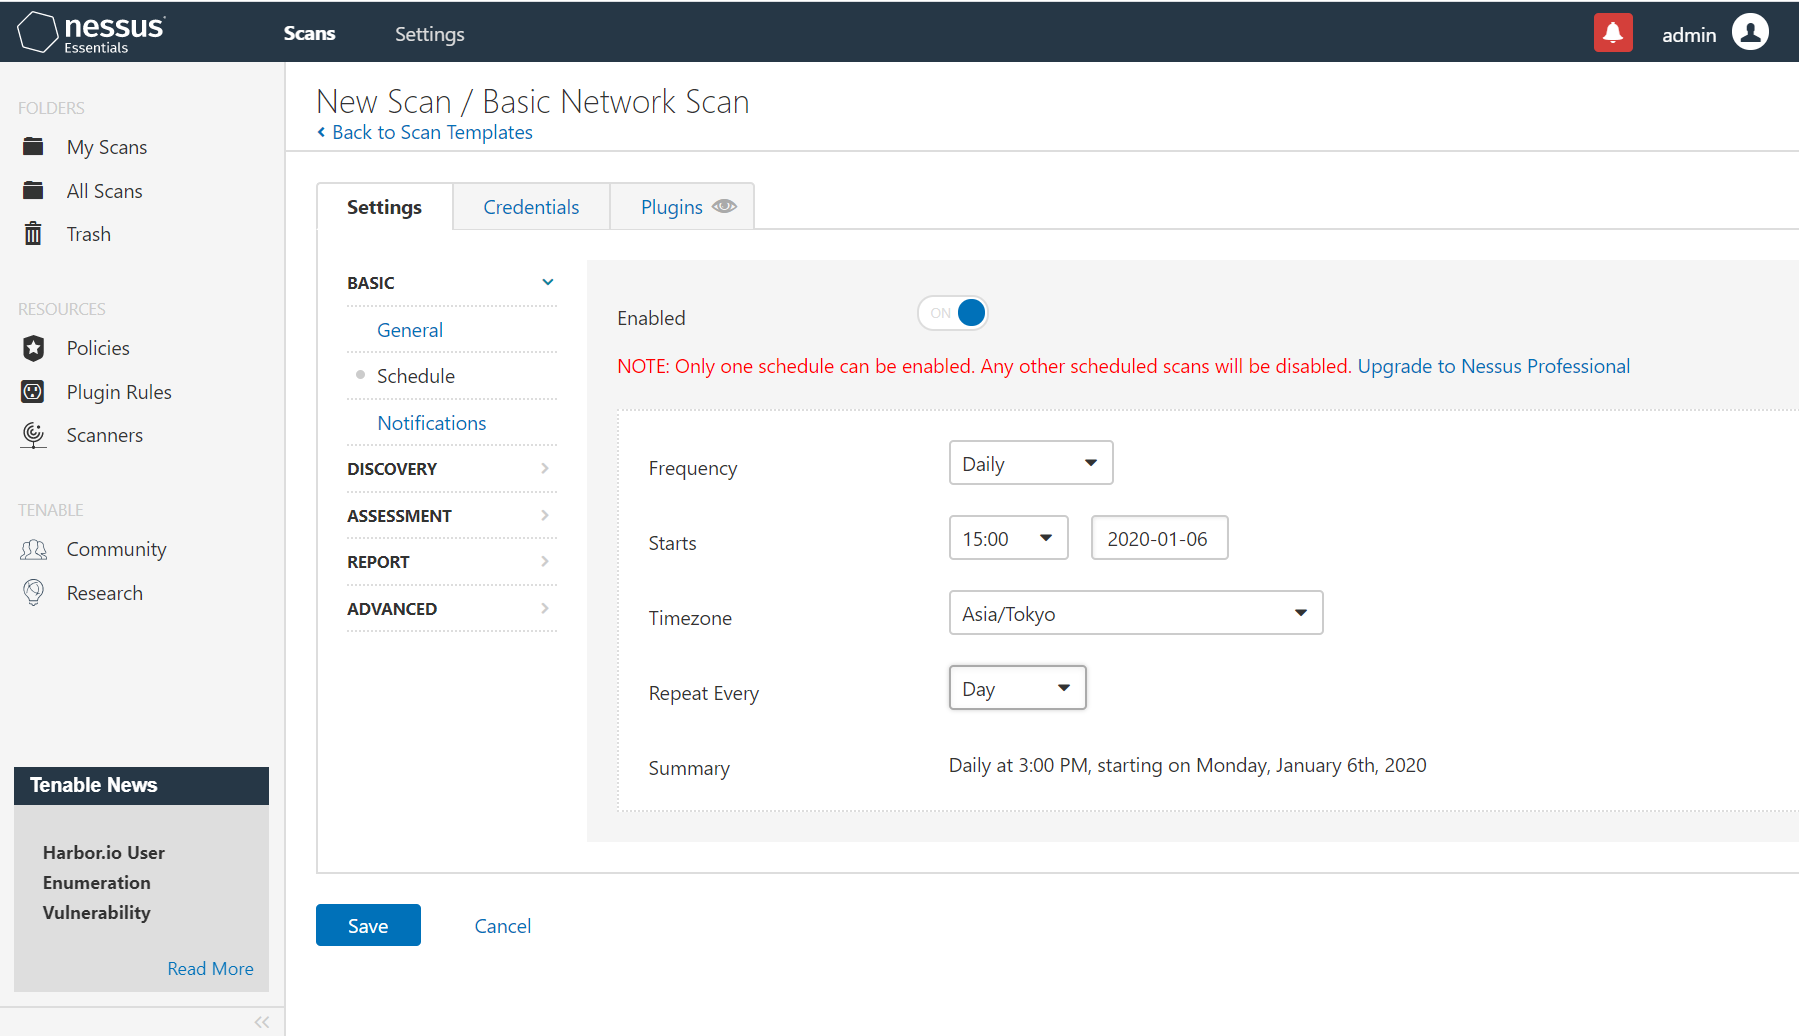
4.Schedule設定
Scheduleに実行時間を設定する。
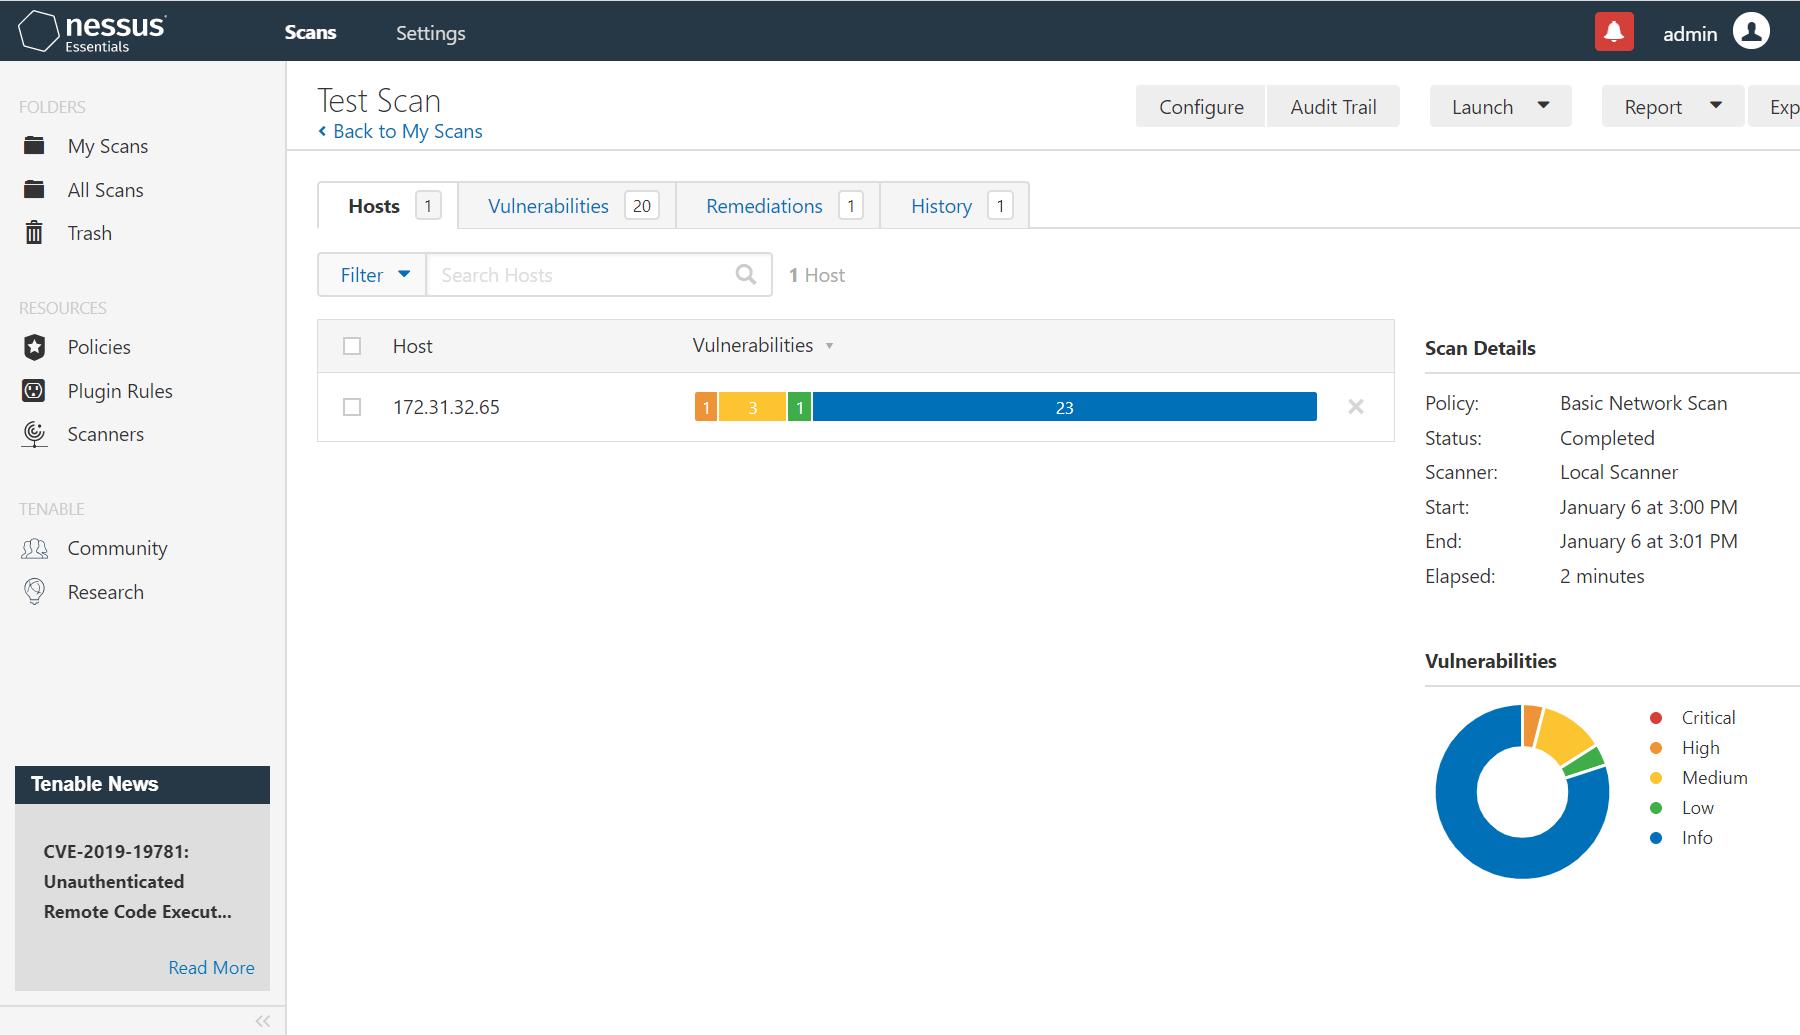
5.実行結果
指定時間にスキャンされ、実行結果が下記のように確認できる。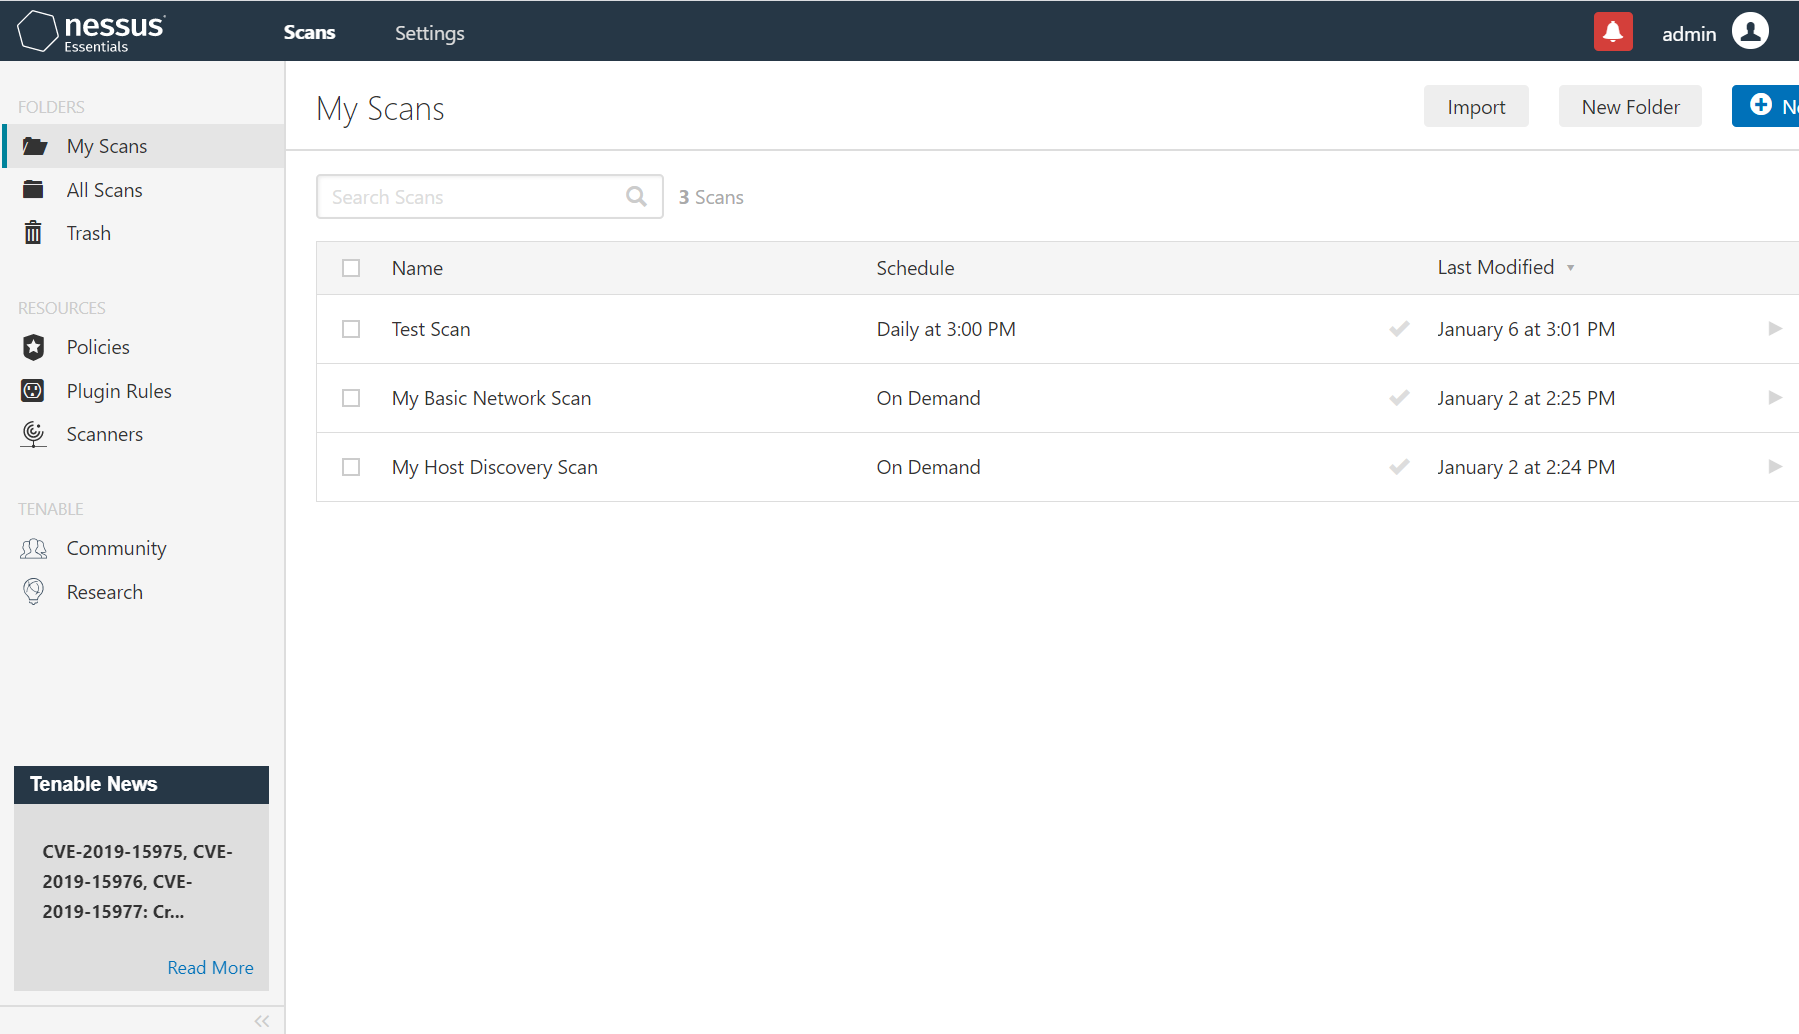
終わりに
アドベントカレンダーなので、やったことのないことをやろうと思ったけど力尽きました(笑)
次回は@n-tanimotoさんです。お楽しみに!!