概要
お仕事でGitHubにあるLaravelアプリをEC2に設置して動作確認することを試したので、記録として作業内容を書いていく
- 表示までを優先させたので、httpでの接続までを記載
- DBはRDSを使わずにEC2内で行うようにしている
前提
- GitHubでLaravelアプリをPushしている
- AWSアカウントを持っている
- 東京リージョンを使用
環境
nginx: 1.21.1
php: 8.1
Laravel 8.x
MySQL: 8.0.26
流れ
・EC2の作成と起動
・必要なツール(nginx,php,MySQL)をインストール
・DBの設定と作成
・LaravelアプリをEC2に置く
・各種設定、パッケージインストール
・php-fpm、nginx調整
・画面表示確認
・確認後のEC2終了
作業内容
EC2の起動
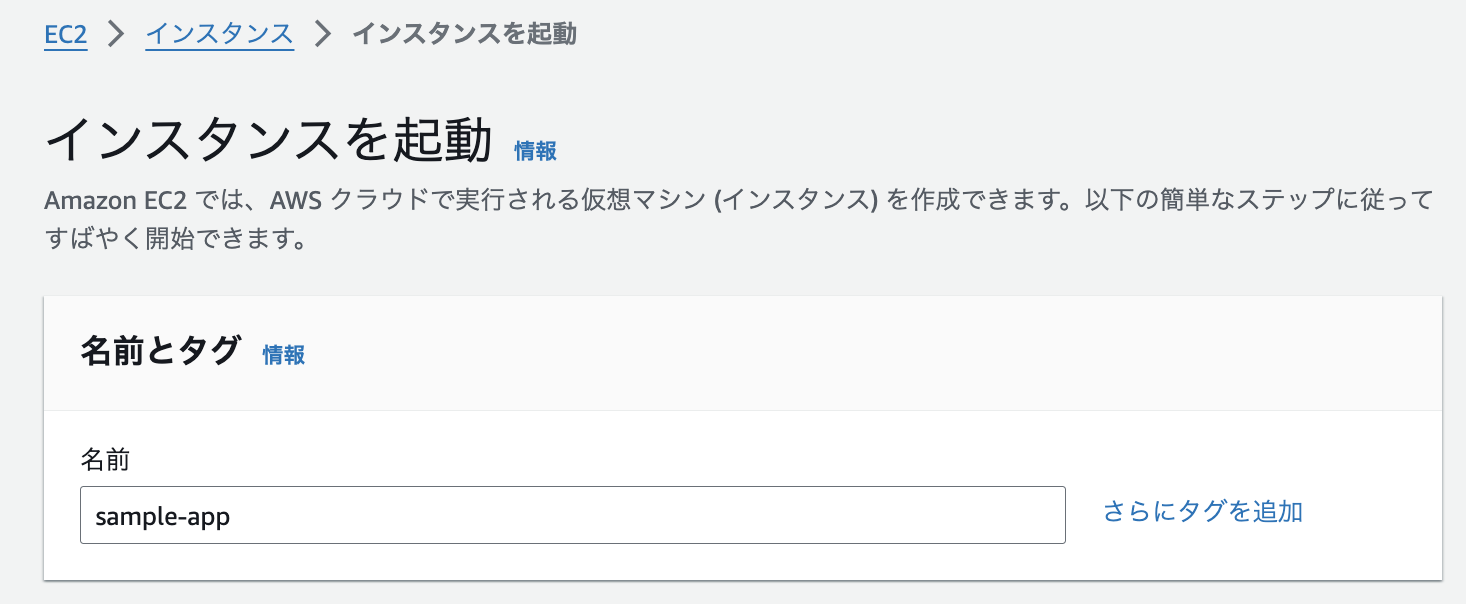
AWS管理コンソールにアクセスし、EC2ダッシュボードからインスタンスを起動を選択

名前
任意の名前を指定
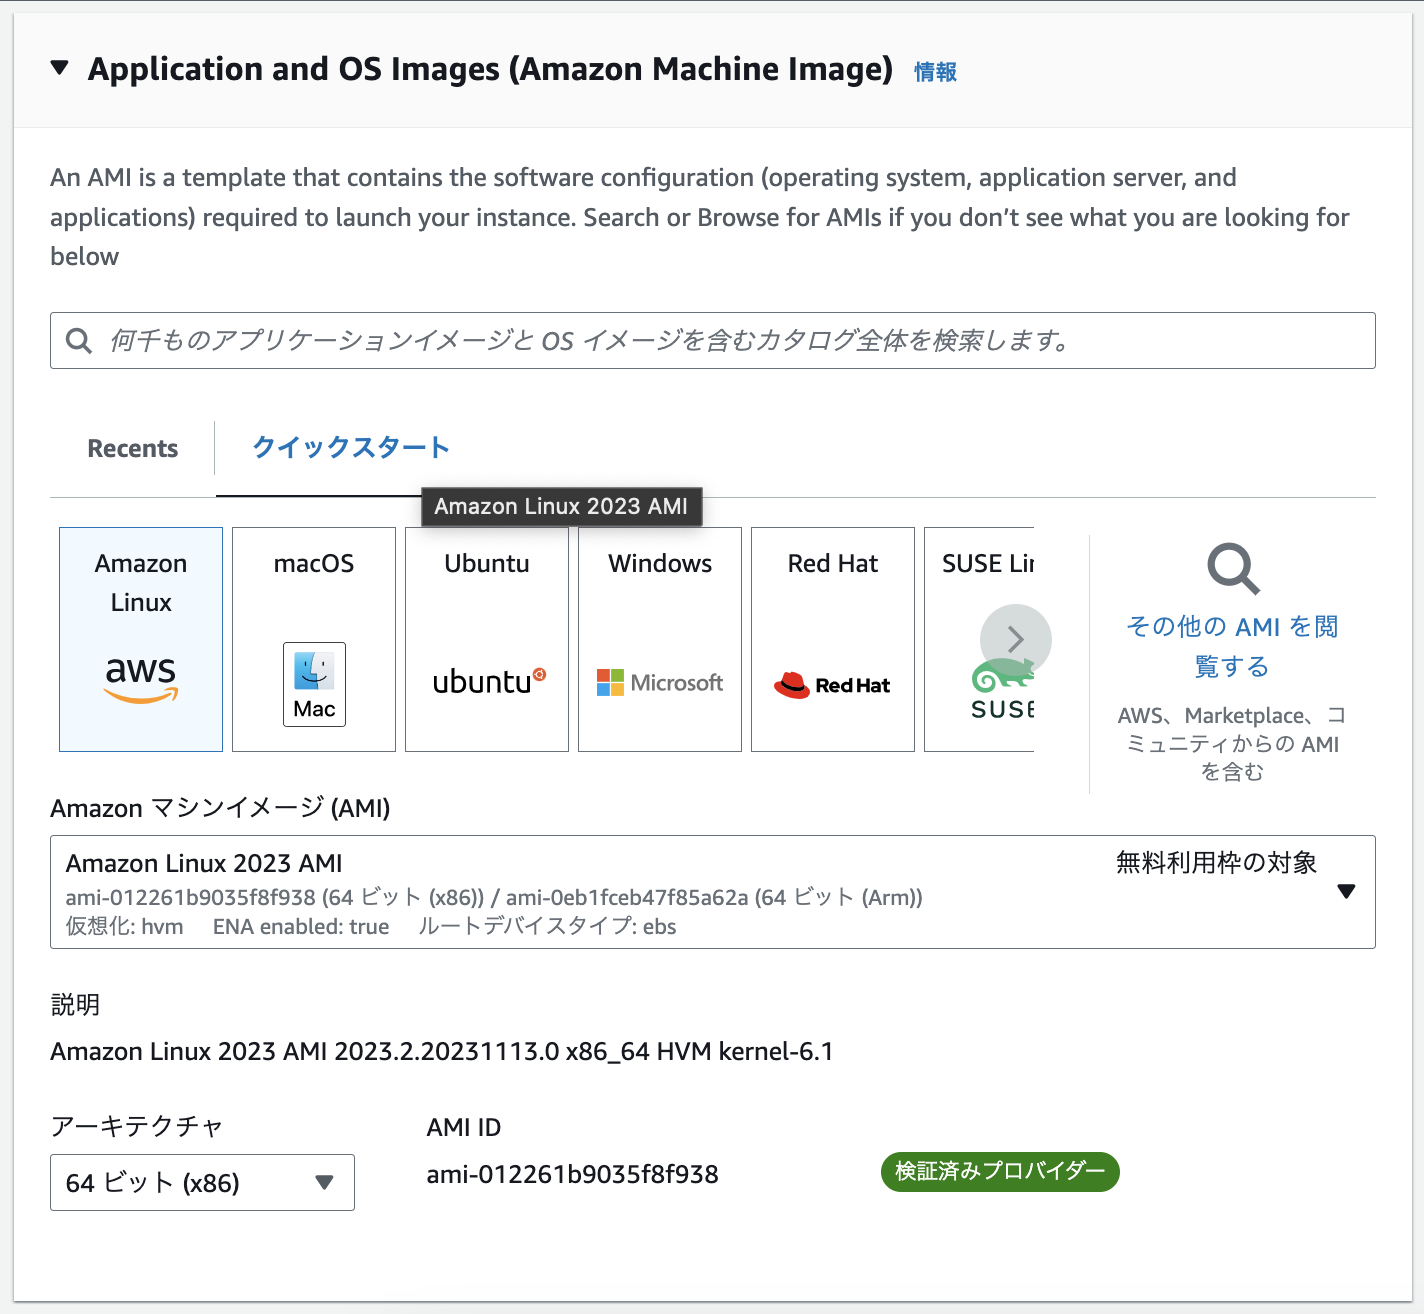
AMI
今回は確認用のためスペックは意識せず、無料枠対象のAmazon Linux2023 t2.microを指定
- AMI:Amazon Linux2023
- アーキテクチャ:64ビット(x86)
- インスタンスタイプ:t2.micro

キーペア
PCからSSHアクセスするためにキーペアを用意して選択する
作成方法はこちらを参照

ネットワーク設定
厳密な設定は今回実施しないので、初期設定の状態をそのまま利用
- VPCはデフォルトを指定
- サブネットは優先順位なしのままにする
- パブリックIPの自動割り当て:有効化
- セキュリティグループ:セキュリティグループを作成(普段利用している設定があれば、そちらを利用)
- Allow SSH traffic form:任意の場所
- 接続元のIPアドレスが固定であれば、自分のIPを指定したほうが良い
-
0.0.0.0/0のまま進める場合は、後でBasic認証などの制限を設定したほうが良い
- インターネットからのHTTPトラフィクを許可:チェックする

ストレージ
初期設定の状態をそのまま利用

確認と起動
設定内容を確認し、インスタンス起動を選択

起動後、EC2のパブリックIPv4アドレスをコピーしておく
必要なツールをインストール
サーバにSSHでアクセスし、以下のツールをインストールする
- アプリによっては他のツールのインストールが必要になる場合あり
接続準備
SSHに接続するマシンにEC2起動時に用意したキーペア(.pemファイル)を配置する
ダウンロードしたキーペアを~/.ssh/に移動
$ mv ~/Downloads/xxx.pem ~/.ssh/
キーペアの権限を600に設定する
$ chmod 600 ~/.ssh/keys/xxx.pem
SSH接続
EC2起動後にコピーしたパブリックIPv4アドレスを用意し、以下のコマンドを実行
ssh -i ~/.ssh/{キーペアファイル名} ec2-user@ {IPアドレス}
[xxx@xxx ~]$ ssh -i ~/.ssh/xxx.pem ec2-user@xx.xx.xx.xx
The authenticity of host 'xx.xx.xx.xx (xx.xx.xx.xx)' can't be established.
ED25519 key fingerprint is SHA256:n+YaQXvi4nHyqLvtfIjUgXL5XL0z+vmcqiOZfQei3Mc.
This key is not known by any other names.
Are you sure you want to continue connecting (yes/no/[fingerprint])? yes
Warning: Permanently added 'xx.xx.xx.xx' (ED25519) to the list of known hosts.
   ,     #_
   ~\_  ####_        Amazon Linux 2023
  ~~  \_#####\
  ~~     \###|
  ~~       \#/ ___   https://aws.amazon.com/linux/amazon-linux-2023
   ~~       V~' '->
    ~~~         /
      ~~._.   _/
         _/ _/
       _/m/'
[ec2-user@ip-172-31-13-3 ~]$
パッケージをupdateする
EC2作成直後なので最新だと思うが、念の為実施
$ sudo dnf update
nginxインストール、起動、自動起動設定
# インストール
$ sudo dnf install nginx

# バージョン確認
$ nginx -v
nginx version: nginx/1.24.0

# 自動起動設定
$ sudo systemctl enable nginx.service

# 起動
$ sudo systemctl start nginx.service

# 起動状態確認
$ sudo systemctl status nginx.service

# 動作確認
$ curl -s http://localhost | grep title

## 以下が表示されたらOK
<title>Welcome to nginx!</title>
この時点でブラウザでIPアドレスを指定すると、以下の画面が表示される

phpインストール
# phpと関連パッケージインストール
$ sudo dnf install  php-fpm php-mysqli php-json php php-devel

# バージョン確認
$ php -v
PHP 8.2.9 (cli) (built: Aug  3 2023 11:39:08) (NTS gcc x86_64)
Copyright (c) The PHP Group
Zend Engine v4.2.9, Copyright (c) Zend Technologies
    with Zend OPcache v8.2.9, Copyright (c), by Zend Technologies

$ php-fpm -v
PHP 8.2.9 (fpm-fcgi) (built: Aug  3 2023 11:39:08)
Copyright (c) The PHP Group
Zend Engine v4.2.9, Copyright (c) Zend Technologies
    with Zend OPcache v8.2.9, Copyright (c), by Zend Technologies
composerインストール
以下のページにあるコマンドを実行
https://getcomposer.org/download/
$ php -r "copy('https://getcomposer.org/installer', 'composer-setup.php');"
$ php -r "if (hash_file('sha384', 'composer-setup.php') === 'e21205b207c3ff031906575712edab6f13eb0b361f2085f1f1237b7126d785e826a450292b6cfd1d64d92e6563bbde02') { echo 'Installer verified'; } else { echo 'Installer corrupt'; unlink('composer-setup.php'); } echo PHP_EOL;"
$ php composer-setup.php
$ php -r "unlink('composer-setup.php');"

# パスを通す
$ sudo mv composer.phar /usr/local/bin/composer

# バージョン確認
$ composer --version
Composer version 2.6.5 2023-10-06 10:11:52
MySQLインストール
# MySQLインストール
$ sudo dnf localinstall https://dev.mysql.com/get/mysql80-community-release-el9-1.noarch.rpm -y
$ sudo dnf install mysql-community-server

# MySQL自動起動設定
$ sudo systemctl enable mysqld.service

# MySQL起動
$ sudo systemctl start mysqld.service

# MySQL起動確認
$ sudo systemctl status mysqld.service
警告
MySQLインストールでError: GPG check FAILEDが発生する場合がある
Error: GPG check FAILEDが発生した場合の対応
Public key for mysql-community-client-8.0.36-1.el9.x86_64.rpm is not installed. Failing package is: mysql-community-client-8.0.36-1.el9.x86_64
 GPG Keys are configured as: file:///etc/pki/rpm-gpg/RPM-GPG-KEY-mysql-2022
Public key for mysql-community-client-plugins-8.0.36-1.el9.x86_64.rpm is not installed. Failing package is: mysql-community-client-plugins-8.0.36-1.el9.x86_64
 GPG Keys are configured as: file:///etc/pki/rpm-gpg/RPM-GPG-KEY-mysql-2022
Public key for mysql-community-common-8.0.36-1.el9.x86_64.rpm is not installed. Failing package is: mysql-community-common-8.0.36-1.el9.x86_64
 GPG Keys are configured as: file:///etc/pki/rpm-gpg/RPM-GPG-KEY-mysql-2022
Public key for mysql-community-icu-data-files-8.0.36-1.el9.x86_64.rpm is not installed. Failing package is: mysql-community-icu-data-files-8.0.36-1.el9.x86_64
 GPG Keys are configured as: file:///etc/pki/rpm-gpg/RPM-GPG-KEY-mysql-2022
Public key for mysql-community-libs-8.0.36-1.el9.x86_64.rpm is not installed. Failing package is: mysql-community-libs-8.0.36-1.el9.x86_64
 GPG Keys are configured as: file:///etc/pki/rpm-gpg/RPM-GPG-KEY-mysql-2022
Public key for mysql-community-server-8.0.36-1.el9.x86_64.rpm is not installed. Failing package is: mysql-community-server-8.0.36-1.el9.x86_64
 GPG Keys are configured as: file:///etc/pki/rpm-gpg/RPM-GPG-KEY-mysql-2022
The downloaded packages were saved in cache until the next successful transaction.
You can remove cached packages by executing 'dnf clean packages'.
Error: GPG check FAILED
上記エラーが発生したら、こちらのコマンドを実施し、mysql-community-serverをインストール
$ sudo rpm --import https://repo.mysql.com/RPM-GPG-KEY-mysql-2023
MySQL接続
初期パスワードの確認
$ sudo grep 'temporary password' /var/log/mysqld.log

# root@localhostの後に記述されているのが初期パスワード
20xx-xx-xxThh:mm:ss.750138Z 6 [Note] [MY-010454] [Server] A temporary password is generated for root@localhost: {パスワード情報}
MySQL接続
# パスワード入力時は上で確認したパスワードを入力
$ mysql -u root -p
Enter password:
Welcome to the MySQL monitor.  Commands end with ; or \g.
Your MySQL connection id is 8
Server version: 8.0.35

Copyright (c) 2000, 2023, Oracle and/or its affiliates.

Oracle is a registered trademark of Oracle Corporation and/or its
affiliates. Other names may be trademarks of their respective
owners.

Type 'help;' or '\h' for help. Type '\c' to clear the current input statement.

mysql>
MySQLの接続が確認できたので次の操作をするため、MySQLから抜けておく
mysql> exit
Bye
DBの設定と作成
設定をウィザード形式で実施していく
- パスワードを変更する場合は、こちらで実施
$ mysql_secure_installation

Securing the MySQL server deployment.

Enter password for user root: {上で確認したパスワード}

The existing password for the user account root has expired. Please set a new password.

New password: {新しいパスワード}

Re-enter new password:
The 'validate_password' component is installed on the server.
The subsequent steps will run with the existing configuration
of the component.
Using existing password for root.

# パスワードの強度が表示、rootパスワードを変更するかの確認
Estimated strength of the password: 100
Change the password for root ? ((Press y|Y for Yes, any other key for No) : Y

New password: {新しいパスワード}

Re-enter new password: {新しいパスワード}

Estimated strength of the password: 100
Do you wish to continue with the password provided?(Press y|Y for Yes, any other key for No) : Y
By default, a MySQL installation has an anonymous user,
allowing anyone to log into MySQL without having to have
a user account created for them. This is intended only for
testing, and to make the installation go a bit smoother.
You should remove them before moving into a production
environment.

Remove anonymous users? (Press y|Y for Yes, any other key for No) : Y
Success.


Normally, root should only be allowed to connect from
'localhost'. This ensures that someone cannot guess at
the root password from the network.

Disallow root login remotely? (Press y|Y for Yes, any other key for No) : Y
Success.

By default, MySQL comes with a database named 'test' that
anyone can access. This is also intended only for testing,
and should be removed before moving into a production
environment.


Remove test database and access to it? (Press y|Y for Yes, any other key for No) : Y
 - Dropping test database...
Success.

 - Removing privileges on test database...
Success.

Reloading the privilege tables will ensure that all changes
made so far will take effect immediately.

Reload privilege tables now? (Press y|Y for Yes, any other key for No) : Y
Success.

All done!
設定した内容で再接続、DB作成
DB名:laravel_db
$ mysql -u root -p
Enter password:
Welcome to the MySQL monitor.  Commands end with ; or \g.
Your MySQL connection id is 12
Server version: 8.0.35 MySQL Community Server - GPL

Copyright (c) 2000, 2023, Oracle and/or its affiliates.

Oracle is a registered trademark of Oracle Corporation and/or its
affiliates. Other names may be trademarks of their respective
owners.

Type 'help;' or '\h' for help. Type '\c' to clear the current input statement.

mysql> show databases;
+--------------------+
| Database           |
+--------------------+
| information_schema |
| mysql              |
| performance_schema |
| sys                |
+--------------------+
4 rows in set (0.01 sec)

mysql> create database laravel_db;
Query OK, 1 row affected (0.01 sec)

mysql> show databases;
+--------------------+
| Database           |
+--------------------+
| information_schema |
| laravel_db         |
| mysql              |
| performance_schema |
| sys                |
+--------------------+
5 rows in set (0.00 sec)
DB作成が完了したらMySQLから抜けておく
mysql> exit
Bye
LaravelアプリをEC2に設置
-
/var/www配下にアプリを置く - GitHubにあるリポジトリからCloneして取り込む
git install
$ sudo dnf install git -y
フォルダ権限変更、実行権限変更
$ sudo chown ec2-user:nginx /var/www
$ sudo chmod 2775 /var/www
$ sudo usermod -a -G nginx ec2-user

# /var/wwwフォルダは以下の権限になる
drwxrwsr-x.  4 ec2-user nginx    xx Nov  x dd:mm www
git clone
$ cd /var/www/
$ git clone https://github.com/xxxx/{アプリ名}.git
各種設定、パッケージインストール
環境変数設定
-
/var/www/{アプリ名}/src/配下に.envが指定されている場合を想定
$ sudo vi /var/www/{アプリ名}/src/.env

# 主な変更箇所
DB_DATABASE=laravel_db
DB_USERNAME=root
DB_PASSWORD={DBパスワードを指定}
composer install(conoposer.lockがあるディレクトリに移動)
$ cd /var/www/{アプリ名}/src/
$ composer install --optimize-autoloader --no-dev
$ composer update
APP_KEY作成
$ php artisan key:generate
DBのマイグレーション、テストデータ取り込み
マイグレーション
$ php artisan migrate
テストデータ取り込み
$ php artisan migrate:refresh --seed
ディレクトリの権限変更
$ sudo chmod -R 777 storage
php-fpm、nginx調整
設定ファイルのため、変更前のコピーをしてから実施する
php-fpm調整
ディレクトリ移動してファイルコピー
# ディレクトリ移動
$ cd /etc/php-fpm.d/

# ファイルコピー
$ sudo cp www.conf www.conf_org
ファイル編集
$ sudo vi www.conf

---

(変更箇所)

# 24行目付近
user = nginx

# 26行目付近
group = nginx

# 48,49行目付近
listen.owner = nginx
listen.group = nginx
変更後フォーマットチェック
$ sudo php-fpm -t

# エラーがでなければOK
NOTICE: configuration file /etc/php-fpm.conf test is successful
nginx調整
ディレクトリ移動してファイルコピー
# ディレクトリ移動
$ cd /etc/nginx/

# ファイルコピー
$ sudo cp nginx.conf nginx.conf_org
ファイル編集
$ sudo vi nginx.conf

----
(変更箇所)

# 41行目付近のrootを変更(serverの括弧内)
:
    server {
:
:
        root         /var/www/{アプリ名}/src/public;
:

# 46行目付近にあるerror_pageの記述を削除(serverの括弧内)
       error_page 404 /404.html;
       location = /404.html {
       }

       error_page 500 502 503 504 /50x.html;
       location = /50x.html {
       }

# 45行目付近にlocationを追加(serverの括弧内)
        location / {
	      try_files $uri $uri/ /index.php?$query_string;
        }
変更後、フォーマットチェック
$ sudo nginx -t

# エラーがでなければOK
nginx: the configuration file /etc/nginx/nginx.conf syntax is ok
nginx: configuration file /etc/nginx/nginx.conf test is successful
nginx,php-fpmをrestartする
$ sudo systemctl restart php-fpm
$ sudo systemctl restart nginx
画面表示確認
ブラウザでIPアドレスを指定し、画面が表示されたら画面遷移をさせて表示を確認する
例:ログイン画面などを作成していた場合は以下のようになる
http://{IPアドレス}/login/
確認後のEC2終了
EC2を起動していると起動時間分料金が発生するため、確認後にEC2を終了させる
AWS管理コンソールにアクセスし、EC2ダッシュボードから対象のインスタンスをチェック
画面上部にあるインスタンスの状態からインスタンスを終了を選択

補足
フロントをVue.jsで構築している場合の追加設定
node,npmをインストールし、npm run buildを実施する
$ sudo yum install -y nodejs
$ npm install
$ npm run build
警告
npm run buildが完了しない場合がある
npm run buildが完了しない場場合の対応
Swap領域を確保する
2GのSwap領域を確保する例
$ sudo dd if=/dev/zero of=/swapfile bs=1M count=2048
$ sudo chmod 600 /swapfile
$ sudo mkswap /swapfile
$ sudo swapon /swapfile
メモリ確認
$ sudo swapon -s
$ free -h
最後に
とりあえず表示の確認まではできた
今後はRDSを使用したサーバでの設定や、https通信での表示などを試したい