Googleと、いろいろでてくるので、今更感がありありですが、せっかく立てたので、作業メモを残します。
目的
- 050電話の外線番号を、複数のスマホで待ち受けできること
- 着信を受けたスマホから、ほかのスマホへ転送できること
- どのスマホからでも、050電話から発信できること
- スマホ同士で、内線通話ができること
複数のスマホで待ち受けするなら、050plusソフトを複数インストールすればいいのですが、自分宛ではないものをピックした場合、正しい宛先へ転送したいので、ひと工夫することにしました。
ここの例は、16.3.0を使っています。
asteriskそのもののセットアップ
見栄え上、以下の順序で記載していますが、本当は以下の順番でビルドを進める。
- bcg729
- asterisk本体
- asterisk-g72x
g72xをビルドする際、asterisk本体が必要。また、asterisk本体をビルドする際は、bcg729があったほうがよいため。
asterisk本体のインストール
本家からgit cloneした後、以下の手順
$ git clone -b 16.3 https://github.com/asterisk/asterisk.git
$ ./configure --with-jansson-bundled
$ make
$ sudo make install
apt-getでも入りますが、後述の通り、g729を入れるためには、asteriskのヘッダファイルが必要なので、どのみちビルドすることになります。
ビルドツールが必要な場合
まっさらな環境ですと、以下のパッケージたちが必要
$ sudo apt-get install git curl wget libnewt-dev libssl-dev libncurses5-dev subversion libsqlite3-dev build-essential libjansson-dev libxml2-dev uuid-dev libedit-dev libtool autoconf
その他ツールのインストール
コーデックg729がないと、050plusでは通話できないので、g729をインストールします。
bcg729
$ wget http://download-mirror.savannah.gnu.org/releases/linphone/plugins/sources/bcg729-1.0.2.tar.gz
$ tar zxvf bcg729-1.0.2.tar.gz
$ cd bcg729-1.0.2/
$ ./configure
$ make
$ sudo make install
$ sudo ldconfig
$ sudo ldconfig -p | grep 729
asterisk-g72x
$ wget http://asterisk.hosting.lv/src/asterisk-g72x-1.4.3.tar.bz2
$ bunzip2 asterisk-g72x-1.4.3.tar.bz2
$ tar vxf asterisk-g72x-1.4.3.tar
$ cd asterisk-g72x-1.4.3
$ ./autogen.sh
$ ./configure --with-bcg729 --with-asterisk-includes=/home/debian/src/asterisk/include
$ make
$ sudo make install
確認
core show codecsコマンドで確認できます。
*CLI> core show codecs
Disclaimer: this command is for informational purposes only.
        It does not indicate anything about your configuration.
      ID TYPE  NAME         FORMAT           DESCRIPTION
------------------------------------------------------------------------------------------------
(snip)
      20 audio g729         g729             (G.729A)
(snip)
asterisk運用に関するセットアップ
050plusのアクセス情報入手
執筆時(2020年1月)では、googleに落ちている情報は、古いものが多くなっておりました。
情報を調べるwebサイトがありましたので、そちらを利用して入手します。ブラウザからアクセスして、ソースコードを見るで、必要な情報が出てきます。
証明書の作成
$ sudo mkdir /etc/asterisk/keys
$ sudo ast_tls_cert -d /etc/asterisk/keys
途中、パスフレーズが聞かれるので、適当に入力。4文字以上だそうです。
Confファイルの設定
sip.conf
[general]
context=default
maxexpirey=3600
defaultexpirey=3600
bindaddr=0.0.0.0
bindport=5060
localnet=192.168.0.0/24
nat=force_rport,comedia
srvlookup=yes
disallow=all
allow=ulaw
allow=alaw
allow=g729  ;<== 050plusに必要。ただし、g729だけだと、VoIPクライアントの制約を受けるので、ulawほかも生かしておく
allow=gsm
language=ja

tlsenable=yes
tlsbindaddr=0.0.0.0
tlscertfile=/etc/asterisk/keys/asterisk.pem   ; <==ast_tls_certで作成したものを指定する
tlscafile=/etc/asterisk/keys/ca.crt           ; なにもしなければ、デフォルトでOK
tlscipher=ALL
tlsclientmethod=tlsv1
tlsdontverifyserver=yes
register => tls://xxxxxxxx:xxxxxxxx:xxxxxxxx@kar2-f2fcp.050plus.com:443/1

[050plus]   ; <==extensions.confのDialで"@050plus"としている由来
type=friend
defaultuser=xxxxxxxx
secret=xxxxxxxx
fromuser=xxxxxxxx
host=kar2-f2fcp.050plus.com
port=443
fromdomain=050plus.com
context=default
insecure=invite,port
dtmfmode=inband
canreinvite=no
callgroup=1
transport=tls
encryption=yes

[10]
type=friend
username=10
secret=password
canreinvite=no
host=dynamic
dtmfmode=rfc2833
callgroup=1
pickupgroup=1
mailbox=10

[11]
type=friend
username=11
secret=password
canreinvite=no
host=dynamic
dtmfmode=rfc2833
callgroup=1
pickupgroup=1
mailbox=11

[12]
type=friend
username=12
secret=password
canreinvite=no
host=dynamic
dtmfmode=rfc2833
callgroup=1
pickupgroup=1
mailbox=12
extensions.conf
[globals]
usevoicemail=yes
writeprotect=yes
priorityjumping=no
OCNNUMBER=050AAABBBB

[default]
exten => 1,1,Dial(SIP/10&SIP/11&SIP/12,120,rt)
exten => 1,2,Hangup()

exten => 10,1,Dial(SIP/10,120,rtT)
exten => 10,2,Hangup()
exten => 10,102,Busy()

exten => 11,1,Dial(SIP/11,120,rtT)
exten => 11,2,Hangup()
exten => 11,102,Busy()

exten => 12,1,Dial(SIP/12,120,rtT)
exten => 12,2,Hangup()
exten => 12,102,Busy()

exten => _0.,1,Set(CALLERID(num)=${OCNNUMBER})
exten => _0.,2,Set(CALLERID(name)=${OCNNUMBER})
exten => _0.,3,Dial(SIP/${EXTEN}@050plus,180,rT)
exten => _0.,4,Congestion
r:着信音を鳴らす
t:呼び出し元ユーザに、転送操作を許可する
T:呼び出し先ユーザに、転送操作を許可する
_0: 0からスタートする呼び出しがトレースするコマンド群
features.conf
転送関係、あるいはダイアル操作を司る設定を行います。こだわりがなければ、デフォルトの設定でも、行けそう。
いくつかの操作は、Dialコマンドのオプション指定が必要です。
| キーアサイン | コマンド | 動作 | 注意事項 |
|---|---|---|---|
| *2 | atxfer | 保留にしたうえで、転送先と会話する。転送先が切ると転送される | "Tもしくはt"が"DialもしくはQueue"に設定されていること |
| # | blindxfer | 問答無用で転送 (転送後、転送元は勝手に切れる) | "Tもしくはt"が"DialもしくはQueue"に設定されていること |
| *8 | pickupexten | ほかの内線が鳴っているのを取る | なし |
| *(アスタリスク) | disconnect | Disconnect | "Hもしくはh"が"DialもしくはQueue"に設定されていること |
運用
asteriskのビルドの最後に、以下のコマンドを入力すると、サービスとして登録されます。
$ sudo make config
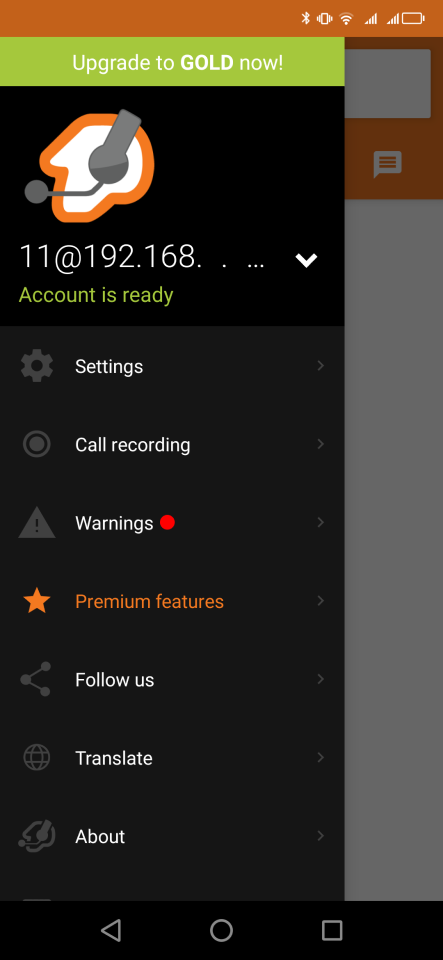
Android/iPhone/iPadなどに、Zoiperをいれて使っています。(複数のサーバを設定しない限り、無料版で十分です)
3台あれば、内線転送の試験までできます。
接続確認
sip show peersで確認することが可能。一番上に050plusが登録されていて、11番にスマホが登録されていることが見える。10番はつないでいないので、未登録(Unspecified)で見えている。
CLI> sip show peers
Name/username             Host                                    Dyn Forcerport Comedia    ACL Port     Status      Description
050plus/XXXXXXXX          XXX.XX.XXX.XX                               Yes        Yes            443      Unmonitored
10/10                     (Unspecified)                            D  Yes        Yes            0        Unmonitored
11/11                     192.168.0.XXX                            D  Yes        Yes            4XXX7    Unmonitored
最後に
外部環境を利用したお試しコール、通話確認まですると、課金されるので注意が必要です。
おまけ
ついでに、ひかり電話も収容しました。
変更点
NTTルータ
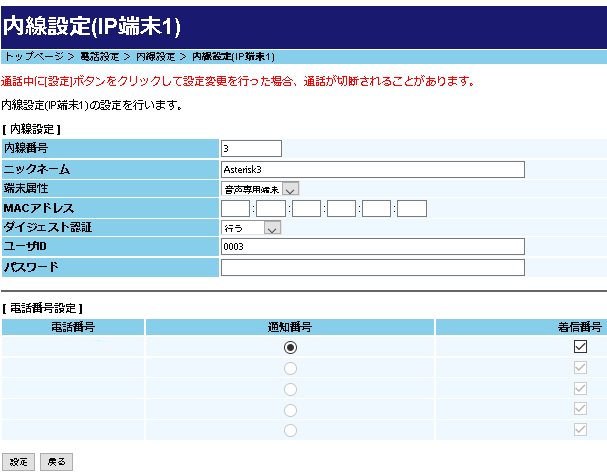
トップページ > 電話設定 > 内線設定 と進んで、IPhoneとなっているところの1つを利用します。
ユーザIDとパスワードは、sip.confで使うことを意識して設定します。
asteriskの設定
sip.conf
;for HikariD
register => 3:0003:0003@192.168.x.x/3
(snip)
[HikariD]
context=default
type=friend
username=0003
secret=0003
fromuser=3
host=192.168.x.x
fromdomain=192.168.x.x
insecure=invite,port
dtmfmode=inband
canreinvite=no
callgroup=1
extensions.conf
(末尾に)
exten => _9.,1,Set(CALLERID(num)=${NTTNUMBER})
exten => _9.,2,Set(CALLERID(name)=${NTTNUMBER})
exten => _9.,3,Dial(SIP/${EXTEN:1}@HikariD,180,rT)
exten => _9.,4,Congestion
"EXTEN:1"の":1"をつけると、9発信の"9"を取ってくれる。上述の050回線の発信は、"EXTEN"なので、0発信だけど、"00..."と0を2回入れる必要はない。
おまけ2
githubにDockerfileを登録しました。ざっくり記載事項をトレースして、ビルドしました。また、zoiperにて、動作確認までしました。記載事項は、こちらのほうが濃いです。
[おしまい]

