はじめに
Gradle でSpring Boot プロジェクトを作ってみたので手順を記載します。ライブラリは現在の最新バージョンを利用します。SpringBootのバージョン指定はGradleプラグインとBOMを使う方法の2パターンを試します。version catalog のtomlファイルでの設定もやってみました。
対象読者
- Gradle, Spring Boot で開発経験のある方
環境
- Gradle 7.5.1
- Java 18.0.2
- OS Windows11
プロジェクト作成
gradle init でたたき台となるプロジェクトを作成します。
$ gradle init --type java-application --test-framework junit-jupiter --dsl groovy --project-name SpringBootExample --package example

Generate build using new APIs and behavior (some features may change in the next minor release)? (default: no) [yes, no]


> Task :init
Get more help with your project: https://docs.gradle.org/7.5.1/samples/sample_building_java_applications.html

BUILD SUCCESSFUL in 3s
2 actionable tasks: 2 executed
コマンドのオプションは以下で確認できます。
$ gradle help --task :init
以下のファイルが作られます。
│  .gitattributes
│  .gitignore
│  gradlew
│  gradlew.bat
│  settings.gradle
│
├─.gradle
├─app
│  │  build.gradle
│  │
│  └─src
│      ├─main
│      │  ├─java
│      │  │  └─example
│      │  │          App.java
│      │  │
│      │  └─resources
│      └─test
│          ├─java
│          │  └─example
│          │          AppTest.java
│          │
│          └─resources
└─gradle
    └─wrapper
            gradle-wrapper.jar
            gradle-wrapper.properties
Springライブラリ追加
build.gradle に依存ライブラリを追加します。2つのバージョン指定方法を試しました。
Spring Boot Gradle Plugin を使う場合
id でorg.springframework.boot を指定します。プラグインで指定したバージョンがSpringの各ライブラリに反映されるようになります。マルチプロジェクト構成でビルドファイルが散在する場合なんかは管理が楽になりそうです。
今回は使っていませんがspring initializer で作られるプロジェクトはこの方式のようです。
plugins {
    id 'application'
    id 'org.springframework.boot' version '2.7.5'
    id 'io.spring.dependency-management' version '1.1.0'
}

dependencies {
    implementation 'org.springframework.boot:spring-boot-starter'
    implementation 'org.springframework.boot:spring-boot-starter-web'

    testImplementation 'org.junit.jupiter:junit-jupiter:5.8.2'
}

repositories {
    mavenCentral()
}

application {
    mainClass = 'example.App'
}

tasks.named('test') {
    useJUnitPlatform()
}
BOM を使う場合
implementation platform でBOMで指定するパターンです。大きなプロジェクトだとビルド時間に差が出るような記事をどこかで見かけましたが実際はどうなのか気になります。
plugins {
    id 'application'
}

dependencies {
    implementation platform('org.springframework.boot:spring-boot-dependencies:2.7.5')
    implementation 'org.springframework.boot:spring-boot-starter'
    implementation 'org.springframework.boot:spring-boot-starter-web'

    testImplementation 'org.junit.jupiter:junit-jupiter:5.8.2'
}

以下略..
動かなかったパターン
以下を使う方法もあるようですが、使い方がわかりませんでした。
dependencies {
	implementation platform(org.springframework.boot.gradle.plugin.SpringBootPlugin.BOM_COORDINATES)
}
こんな感じのエラーになります。バージョンの問題かそもそも使い方が間違ってるのか。。
* What went wrong:
A problem occurred evaluating project ':app'.
> Could not get unknown property 'org' for object of type org.gradle.api.internal.artifacts.dsl.dependencies.DefaultDependencyHandler.
version catalog でバージョン定義
version catalog の仕組みを使うとsettings.gradleやtomlファイルでのバージョン管理が可能になります。今回はtomlファイルを使うパターンを試してみます。
tomlファイルはgradleフォルダ直下にlibs.versions.tomlというファイル名で作ります。gradle initでは作られないので手動で作ります。
└─gradle
    libs.versions.toml
[versions]
spring  = "2.7.5"
spring-dependency = "1.1.0"

[libraries]
# プラグインを使う場合
spring-starter = {module = "org.springframework.boot:spring-boot-starter"}
spring-web = {module = "org.springframework.boot:spring-boot-starter-web"}

# BOM を使う場合
spring-bom = {module = "org.springframework.boot:spring-boot-dependencies", version.ref = "spring"}

[plugins]
spring-boot = { id = "org.springframework.boot", version.ref = "spring" }
spring-dependency = { id = "io.spring.dependency-management", version.ref = "spring-dependency" }
Spring Boot Gradle Plugin を使う場合は以下のように修正します。
plugins {
    id 'application'
    alias libs.plugins.spring.boot
    alias libs.plugins.spring.dependency
}

dependencies {
    implementation libs.spring.starter
    implementation libs.spring.web

    testImplementation 'org.junit.jupiter:junit-jupiter:5.8.2'
}
以下略..
tomlファイルでハイフン区切りのキーはピリオド区切りで参照しないとエラーになります。
例えば「spring-starter」は「spring.starter」で参照するイメージです。
BOM を使う場合は以下のように修正します。
plugins {
    id 'application'
}

dependencies {
    implementation platform(libs.spring.bom)
    implementation libs.spring.starter
    implementation libs.spring.web

    testImplementation 'org.junit.jupiter:junit-jupiter:5.8.2'
}
以下略..
applicationプラグインとJUnitライブラリは修正しませんでしたが、すべてtomlで定義することも可能です。
HelloWorld実装
HelloWorld画面を実装します。テストクラスの修正は省略します。
package example;

import org.springframework.boot.SpringApplication;
import org.springframework.boot.autoconfigure.SpringBootApplication;
import org.springframework.stereotype.Controller;
import org.springframework.web.bind.annotation.GetMapping;
import org.springframework.web.bind.annotation.ResponseBody;

@SpringBootApplication
@Controller
public class App {

    public static void main(final String[] args) {
        SpringApplication.run(App.class, args);
    }

    @GetMapping("/")
    @ResponseBody
    public String hello() {
        return "<h1>hello!</h1>";
    }
}
実行
コマンドで起動してみます。
$ gradle run
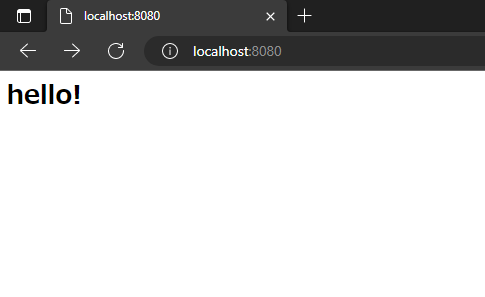
ブラウザからアクセスできれば完成です。
