機械学習モデルは1つでよい場合もあれば、複数必要になる場合もあります。
例えば、何かしらのセグメントごとに最適なモデルを組むことで精度を上げるといったことが考えられます。
最近業務で時系列データを扱うことがあったのですが、
顧客ごとの複数の変数に対して時系列予測をおこなう必要があったため、”顧客数×変数”の数のモデルが必要になり、モデル学習と予測の処理時間が大きくなるという問題がありました。
一般的に、時系列データは変数単位でモデル構築するため、モデルが多くなる傾向があると思います。
上記の例以外でも例えば、POSデータを扱う際は”店舗×商品数”の数だけ時系列データが存在するといったような。
そこで、Pythonの並列処理(Multiprocessing)を利用することで処理時間の短縮を図ります。
本記事における時系列分析にはFacebookが開発したProphetというライブラリを利用します。ここは自身が扱いたいライブラリに置き換えて考えてもらえるとよいです。
また使用するデータセットはProphetのチュートリアルで利用されているデータを扱います。
実行環境
Google Colaboratory
Prophet==1.1.1
Prophetのインストール
! pip install prophet
必要なライブラリをインポートします
import pandas as pd
import numpy as np
from prophet import Prophet
データ取得
# チュートリアル用のデータ
df = pd.read_csv('https://raw.githubusercontent.com/facebook/prophet/main/examples/example_wp_log_peyton_manning.csv')
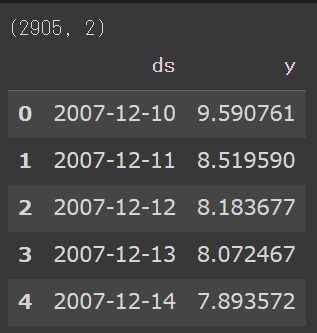
print(df.shape)
df.head()
データの中身はこんな感じです。
Prophetを使った時系列モデルを作るには、ds(時系列情報)とy(値)の2カラムを含むデータフレームをProphetに渡す必要があります。
今回は並列処理を行いたいので、とりあえず上記データフレームをリスト形式で100個持っておきます。
ts_table = [df for _ in range(100)]
直列に処理を繰り返す
並列処理の前に、1つずつ処理を繰り返した場合にどれくらいの時間がかかるかを確認します。
from time import time
from tqdm import tqdm

all_fit_time = 0
all_forecast_time = 0

for i in tqdm(range(100)):
  # Prophet
  m = Prophet()

  # 訓練
  start = time()
  m.fit(ts_table[i])
  fit_time = time() - start

  # 予測
  start = time()
  forecast = m.predict(ts_table[i])
  forecast_time = time() - start

  # かかった時間
  all_fit_time += fit_time
  all_forecast_time += forecast_time

print(f"学習にかかった時間: {all_fit_time}")
print(f"予測にかかった時間: {all_forecast_time}")
こちらのコードを実行すると、
処理時間は下記の通り260秒ほどかかりました。

並列処理
multiprocessingを利用した並列処理を行います。
import multiprocessing
from multiprocessing import Pool
コア数を確認します。私のGoogleColabの環境ですと2コアでした。
# 利用できるコア数
cpu_core_num = multiprocessing.cpu_count()
print(cpu_core_num)
並列処理を行うためのクラスを定義します。
class ProphetWithMultiprocessing:

  def __init__(self, dataset, cpu_core_num):
    self.dataset = dataset
    self.cpu_core_num = cpu_core_num
    self.work_table = [pd.DataFrame() for _ in range(100)] # 中間結果の格納用
    self.output_table = np.nan # 最終結果の格納用


  def prophet_fitting_and_forecast(self, idx):
    m = Prophet()
    m.fit(self.dataset[idx])
    forecast = m.predict(self.dataset[idx])
    return forecast


  def calc_prophet_forecast(self, idx):
    self.work_table[idx] = self.prophet_fitting_and_forecast(idx)
    return self.work_table[idx]


  def run(self):
    idxs = [idx for idx in range(100)]

    start = time()
    with Pool(processes=self.cpu_core_num) as pool:
      self.output_table = pool.map(self.calc_prophet_forecast, idxs)

    processing_time = time() - start

    print(f"処理時間: {processing_time}")
並列処理を実行します
pwm = ProphetWithMultiprocessing(dataset=ts_table, cpu_core_num=cpu_core_num)
pwm.run()
処理時間ですが、200秒ほどでした。
260秒→200秒なので20~25%ほど速度改善されました。

2コア使用したので処理時間も半分に・・・というわけにはいかなかったですが一定の効果はありそうです。
おわりに
並列処理(multiprocessing)を利用して学習&予測を並列処理することで処理時間を短縮することができました。
並列処理を使わずとも、学習と予測の処理を分離して、学習の頻度を下げるといったことも実際の運用では処理時間を短縮するのに効果があるかもしれません。
また、なんでもかんでも並列処理化すれば早くなるというわけではなく、たとえばLightGBM
で本記事でやったようなことをやると推論(predict)部分でフリーズしてしまいます。
これはLightGBMがもともとcpuをすべて使用するような処理になっているからのようです。
https://github.com/Microsoft/LightGBM/issues/989
このあたりは、ご自身が扱う機械学習しゅほうの特性・処理内容に応じた工夫が必要になりそうです。