はじめに
こんにちは
渋谷でiOSエンジニアとして働いているChikatoです!
自作アプリを作る過程でSpotify SDKを使ってみたくて、公式のチュートリアルとサンプルプロジェクトを参考にしましたが詰まってしまったところも多く、また日本語の資料も少ない(あっても少し古い)のでまとめてみたいと思います!
また、自分が詰まってしまったポイントも合わせて記載致します。
これからSpotify SDK iOSを使われる方のご参考になれば幸いです!
サンプルアプリとして、簡単に以下のアプリを作ってみました
このアプリでは、Spotifyで再生している曲の取得と、スキップができます。
コード:https://github.com/Take111/SportifyTutorial
開発環境
Xcode Ver.11.3.1
Swift 5.1.3
Spotify iOS SDK Ver.1.2.2
セットアップ
SDKのダウンロードやXcode上で設定が必要になるので、チュートリアルに従って進めてください
SceneDelegate
今回のSceneDelegateでは以下のことを行います。
-AccessTokenの取得
-端末にあるSpotifyとの接続
ただ、後述する認証を行う前だとAccesTokenは取得できません。
    private let clientID = ""
    private let redirectURL = URL(string: "SpotifyTutorial://spotify/callback")!

    lazy var appRemote: SPTAppRemote = {
        let configuration = SPTConfiguration(clientID: clientID, redirectURL: redirectURL)
        let appRemote = SPTAppRemote(configuration: configuration, logLevel: .debug)
        appRemote.connectionParameters.accessToken = self.accessToken
        appRemote.delegate = self
        return appRemote
    }()

    var accessToken = UserDefaults.standard.string(forKey: kAccessTokenKey) {
        didSet {
            let defaults = UserDefaults.standard
            defaults.set(accessToken, forKey: SceneDelegate.kAccessTokenKey)
            print("SceneDelegate: accessToken: \(accessToken)")
        }
    }

    func scene(_ scene: UIScene, openURLContexts URLContexts: Set<UIOpenURLContext>) {
        print("SceneDelegate: openURLContexts is called")
        guard let url = URLContexts.first?.url else {
            return
        }
        // authoricationParameters()これがAccessTokenかエラーを返す
        let parameters = appRemote.authorizationParameters(from: url)

        if let access_token = parameters?[SPTAppRemoteAccessTokenKey] {
            appRemote.connectionParameters.accessToken = access_token
            self.accessToken = access_token
        }
        else if let errorDescription = parameters?[SPTAppRemoteErrorDescriptionKey] {
            print("SceneDelegate: errorDescription has error: \(errorDescription)")
        }
    }
// ~~~~~~~~~~~~~~~~~~~~~~~~~~~~~~~~~~~~~~~~~~~~~~~~~~~~

    // 端末にあるSpotifyと接続
    func sceneDidBecomeActive(_ scene: UIScene) {
        print("SceneDelegate: sceneDidBecomeActive")
        appRemote.connect()
    }
詰まりポイント
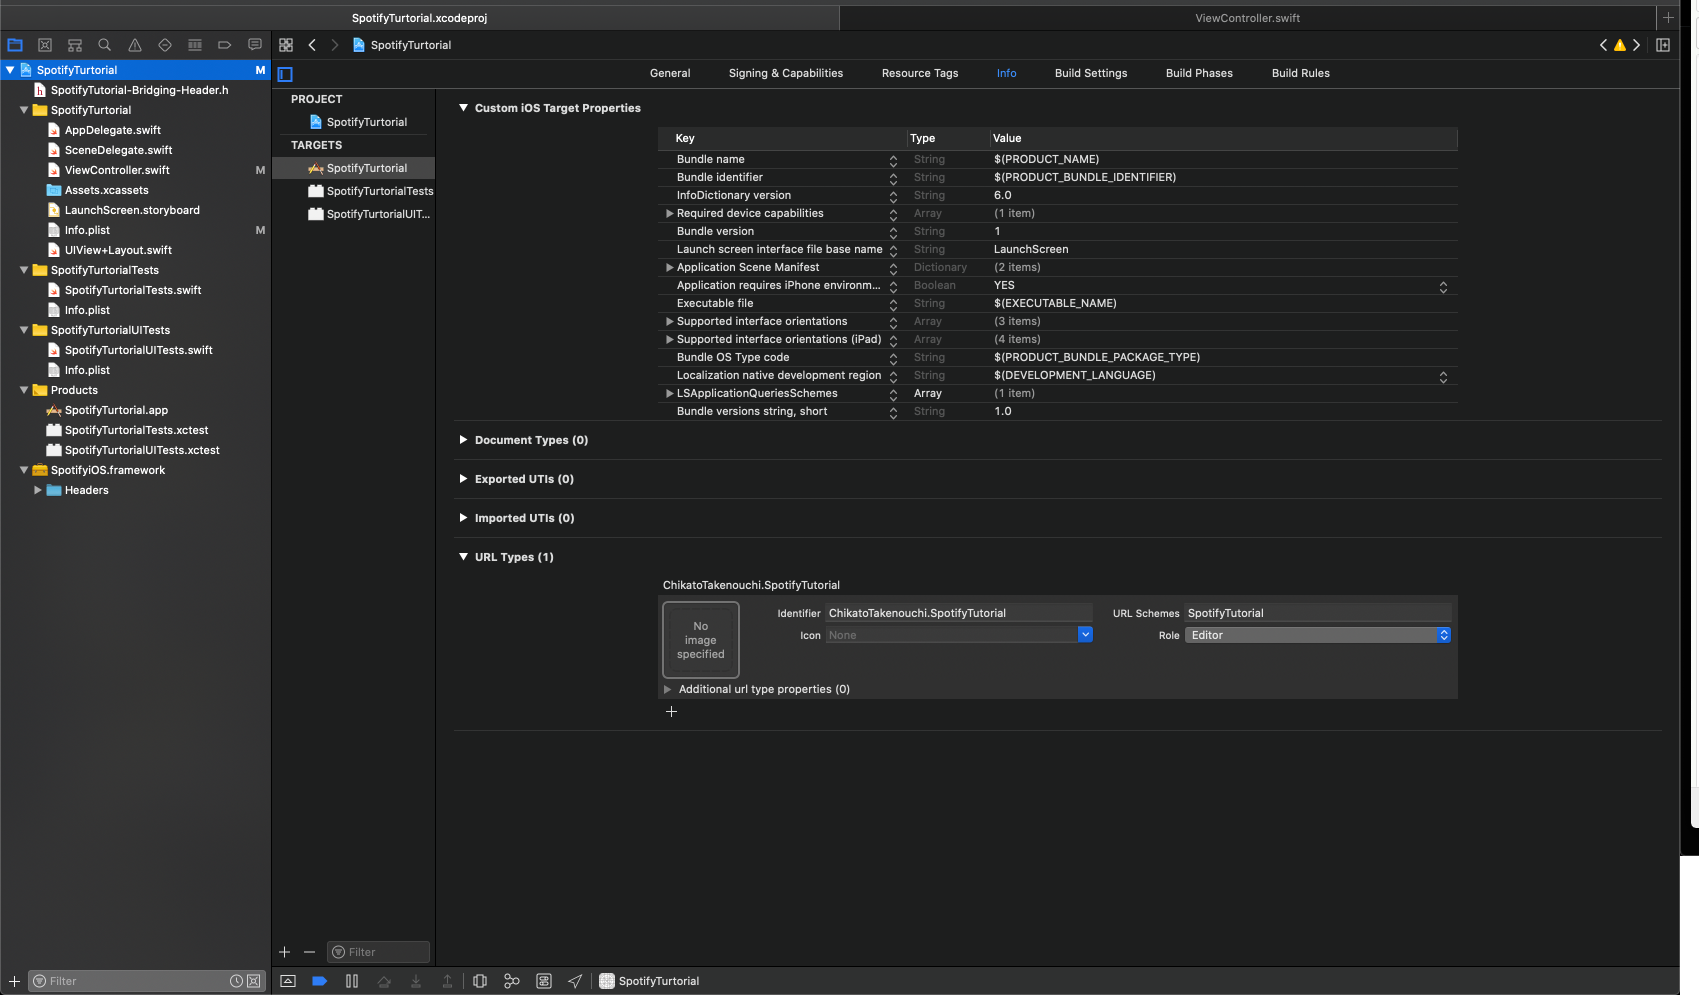
・途中でSpotifyのDashBoardでRedirect URlを設定しますが、ここで設定したURlとXcodeで設定するURlを間違えると認証に失敗して以下のようなエラーで返ってくるので注意してください
エラー:
AppRemote: Failed to authenticate with the Spotify app. AppRemote: Failed to establish a sesssion with error: Error Domain=com.spotify.app-remote.wamp-client Code=-1001 "wamp.error.authorization_failed" UserInfo={details={ message = "No token provided.";
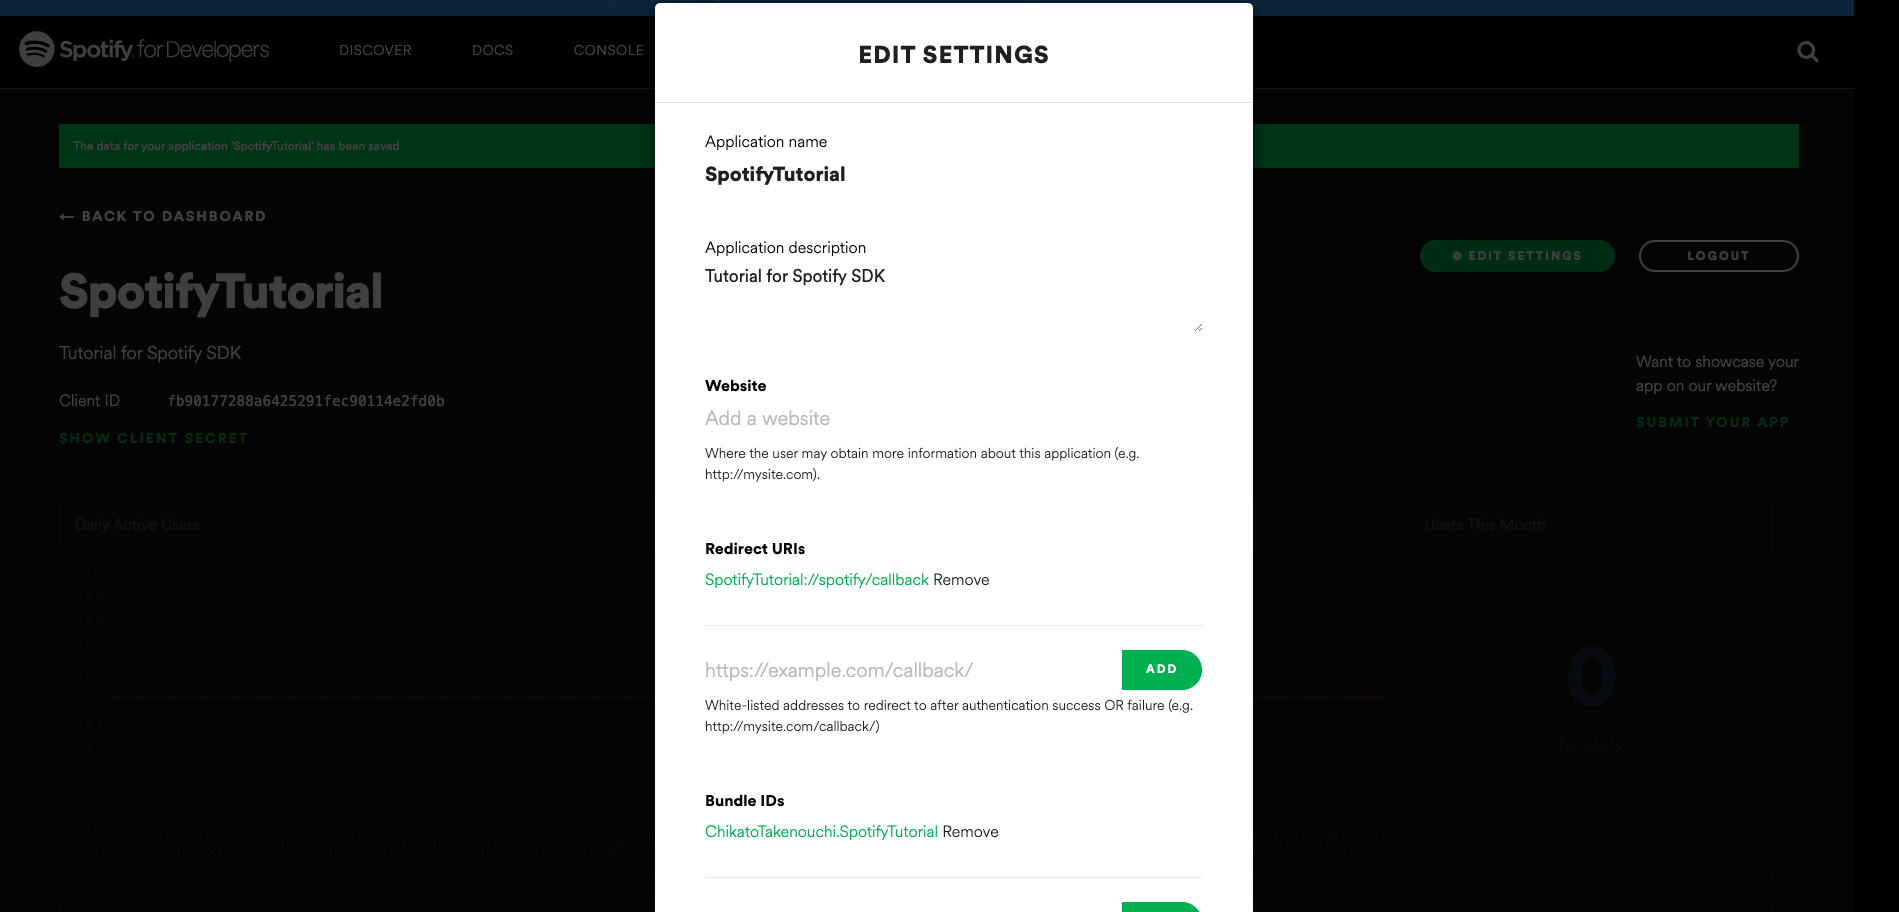
Xcodeで設定するところは、Projectファイル→Targetsのアプリ名→info→URL Typesにあります。
ViewController
ViewControllerでは主に以下を行っています。
-Spotifyへの認証
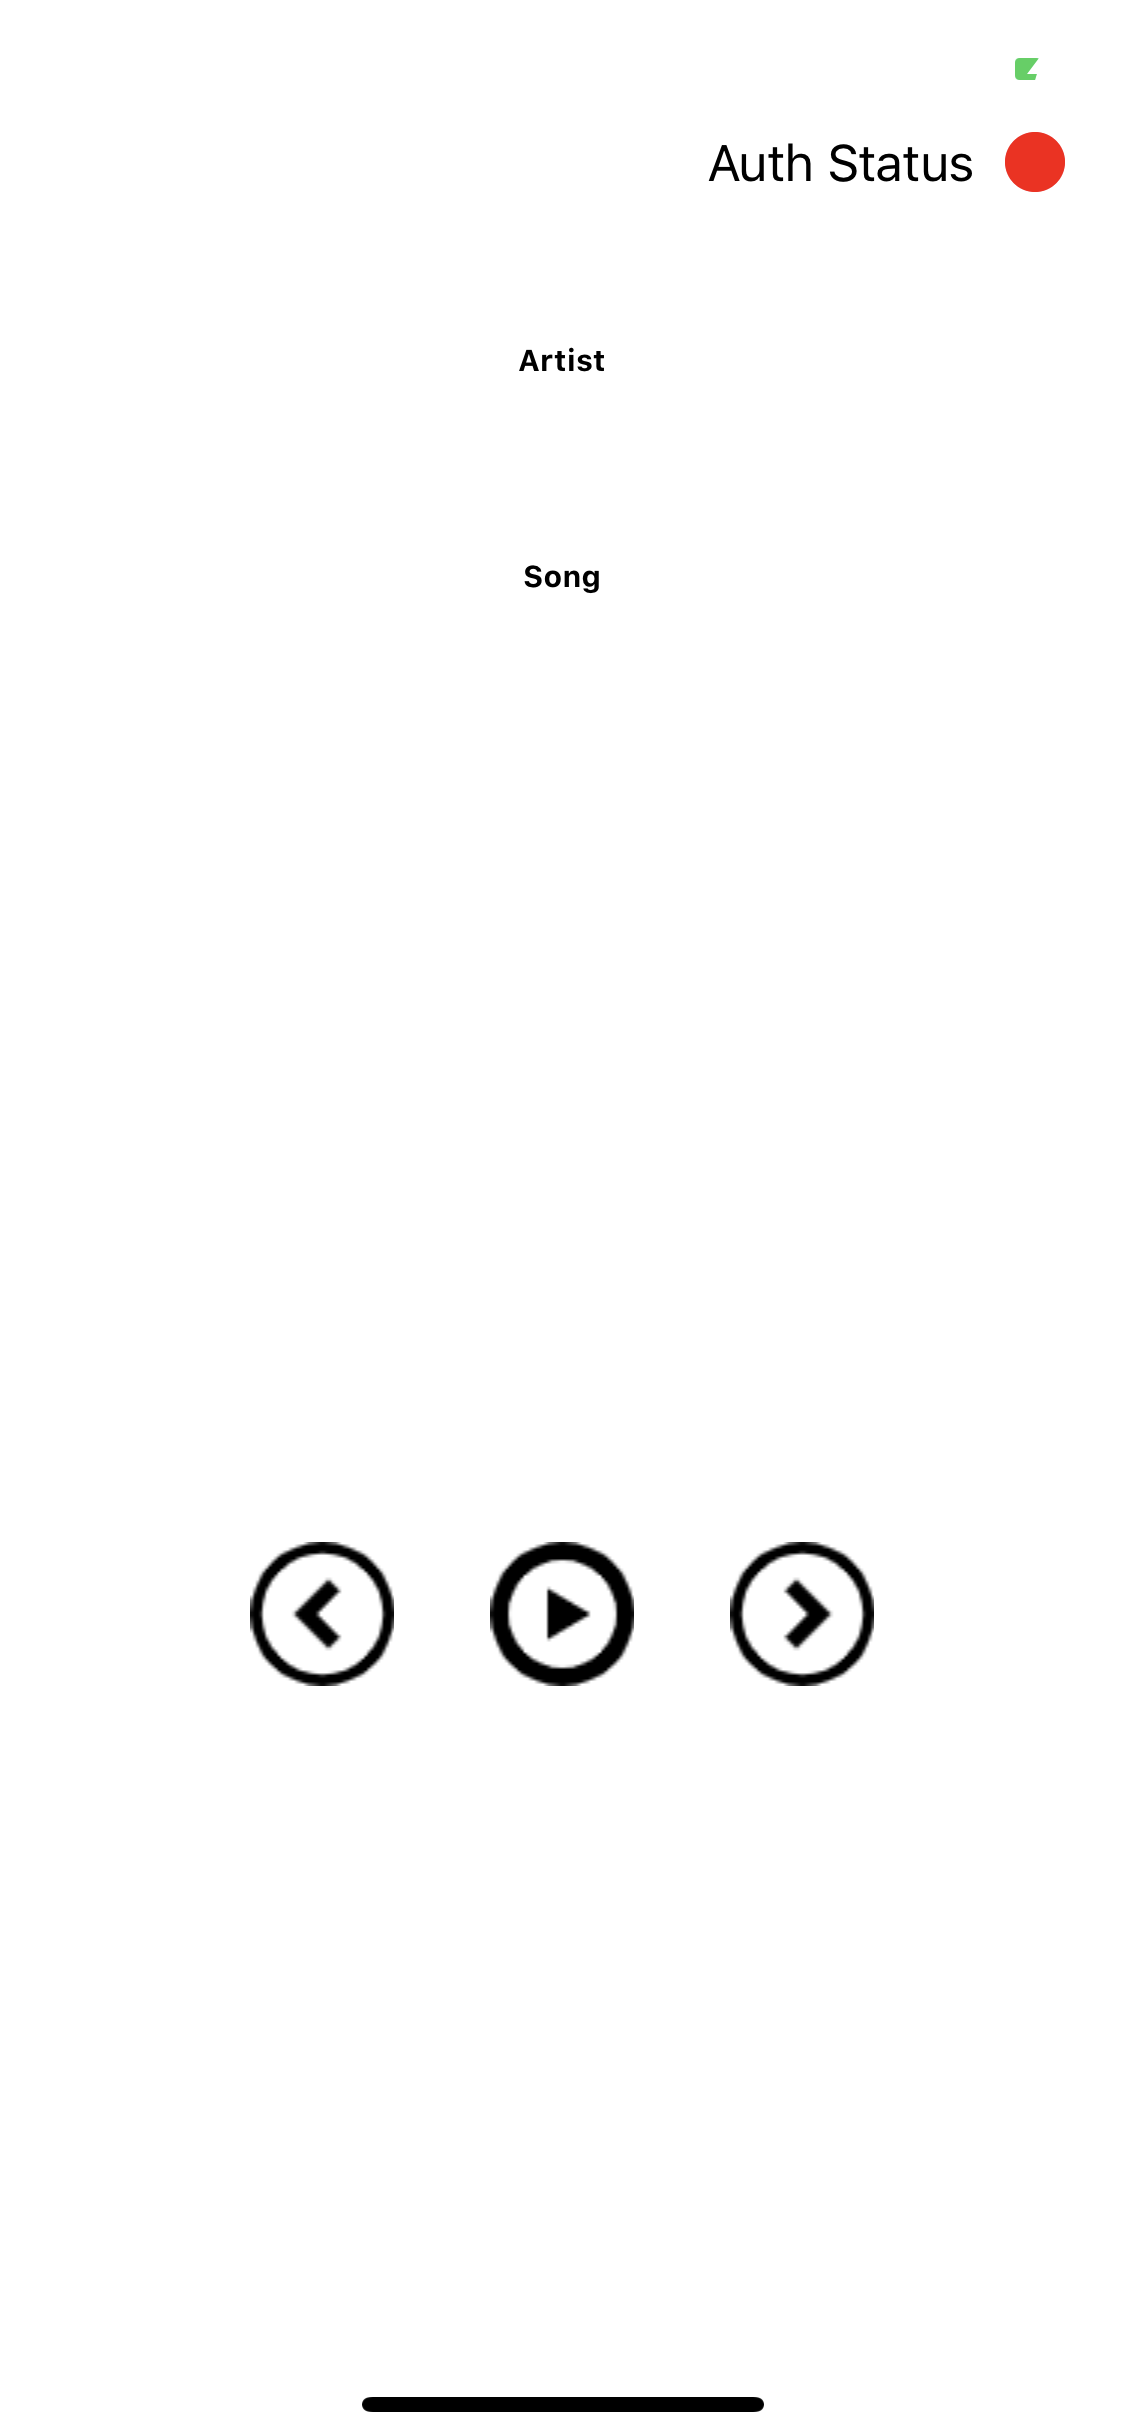
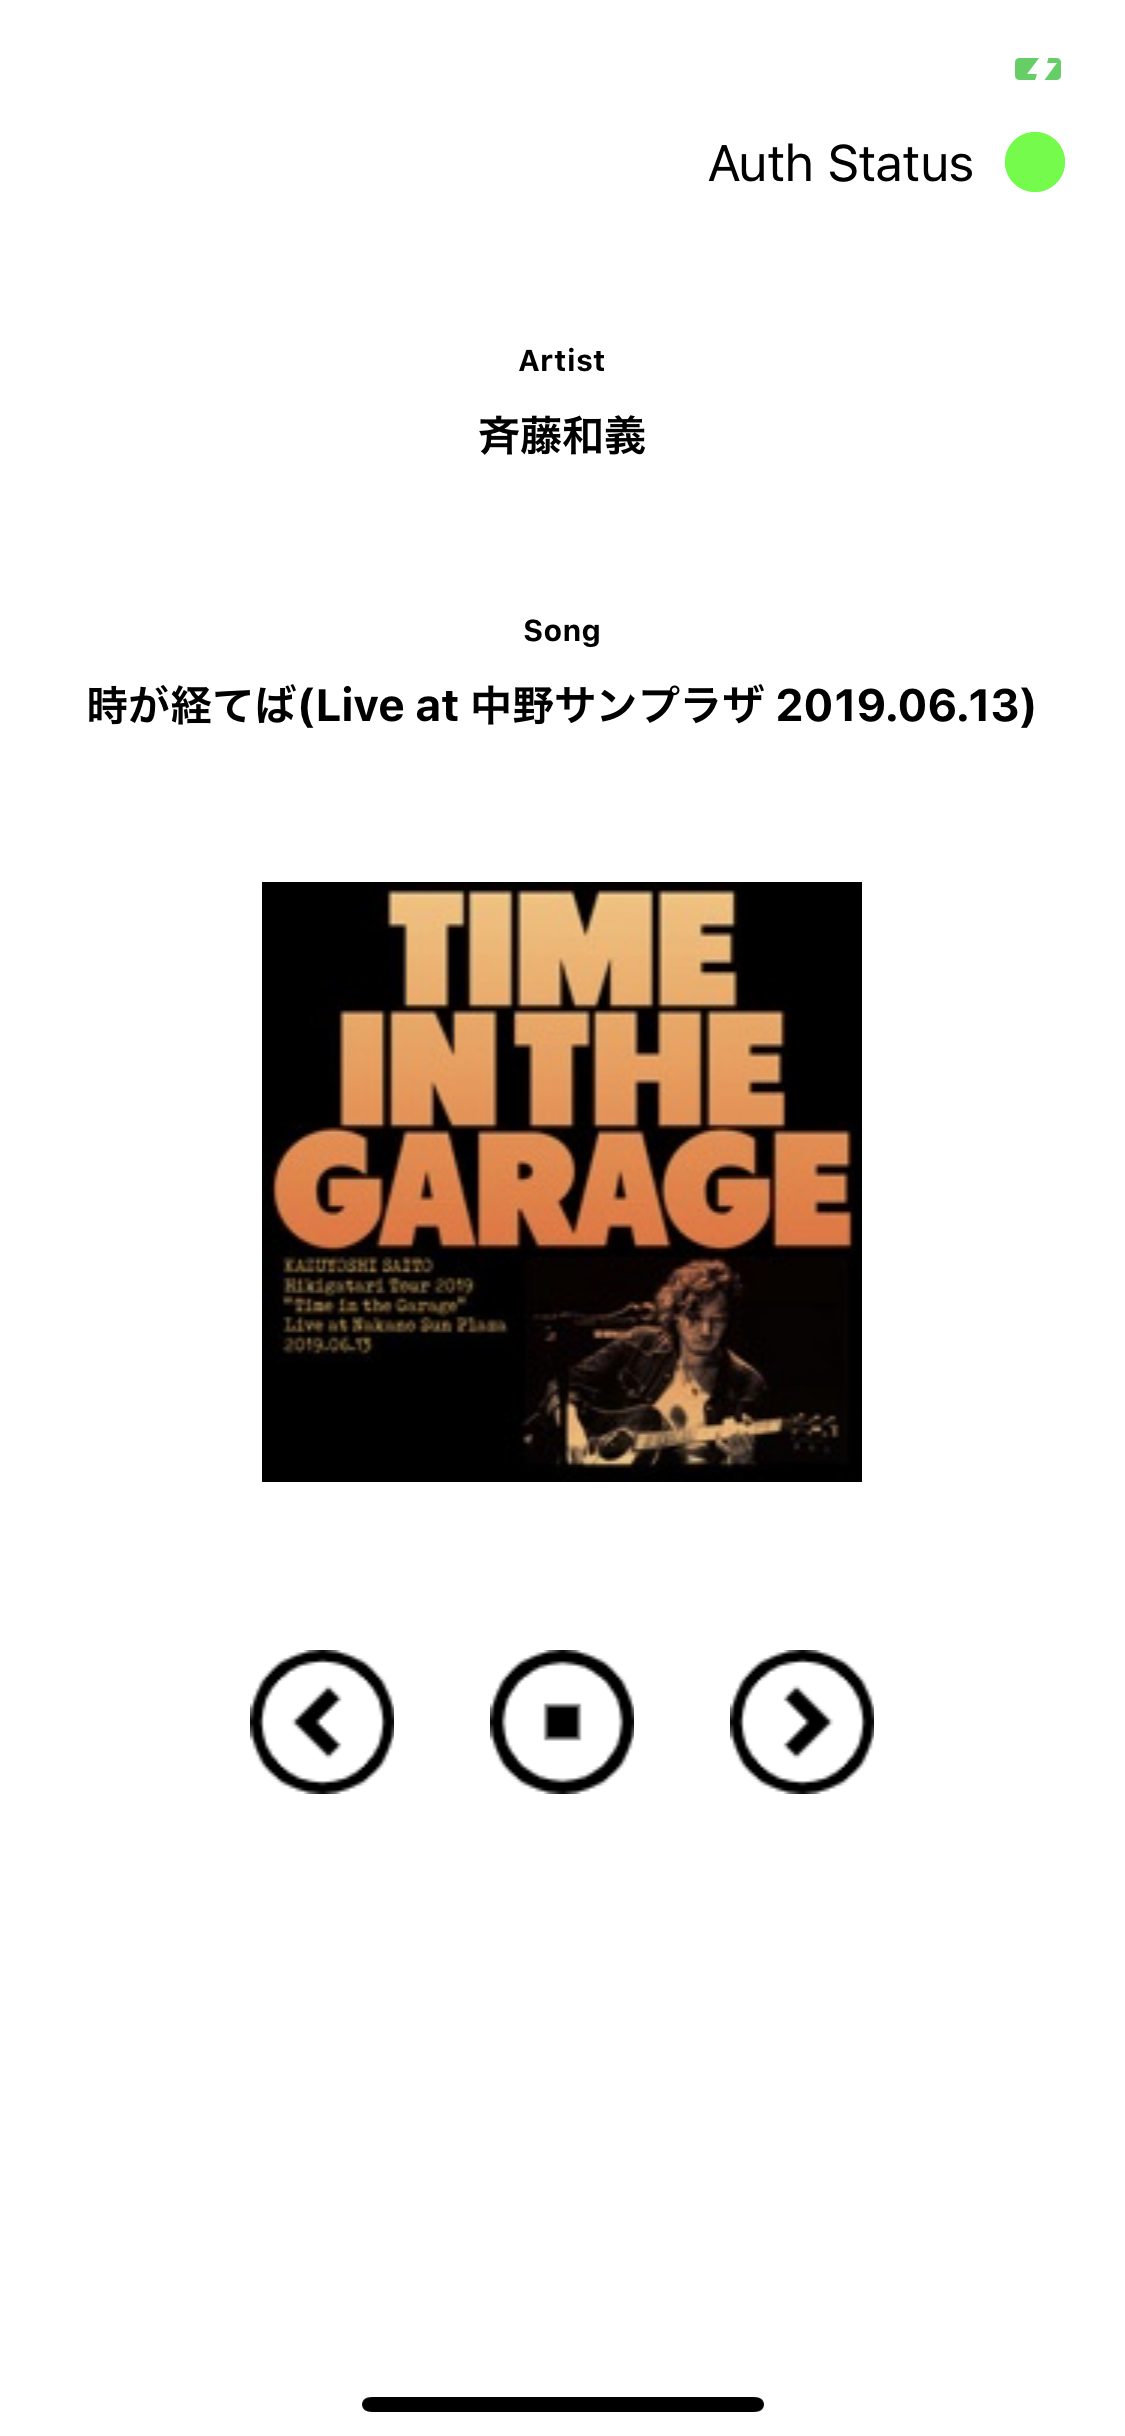
アプリを起動したときは以下の画面になっています。
Spotifyとの接続の状態を示すために右上に色のついたボタンを付けました。(赤: 未接続、青: 接続中、緑: 接続済)
今回はそのボタンを押すことでSpotifyへの認証ができるようにしました。
   // trackIdentifierは実際の曲のIDでも良い(Spotify URI) ""の場合は前回再生した曲を取得する
   private let trackIdentifier = ""

   // ボタンを押した時のアクション
   @objc func auth() {
        if appRemote?.isConnected == false  {
            print("ViewController: appRemote.is not Connected")
            // authorizeAndPlayURIでSpotifyが端末にインストールされているか認証ができるかを試す
            // asRadioで取得後にその曲を再生するかどうかを決める
            if appRemote?.authorizeAndPlayURI(trackIdentifier, asRadio: true) == false {
                // Spotifyがインストールされていないときは、インストール画面を出す
                showAppStroreInstall()
            }
            else {
                print("ViewController: appRemote: \(appRemote?.isConnected)")
            }
        }
        else {
            print("ViewController: appRemote?.isConnected == false: && appRemote?.playerAPI != nil")
        }
    }
上を実行することで、Spotifyへと遷移します。
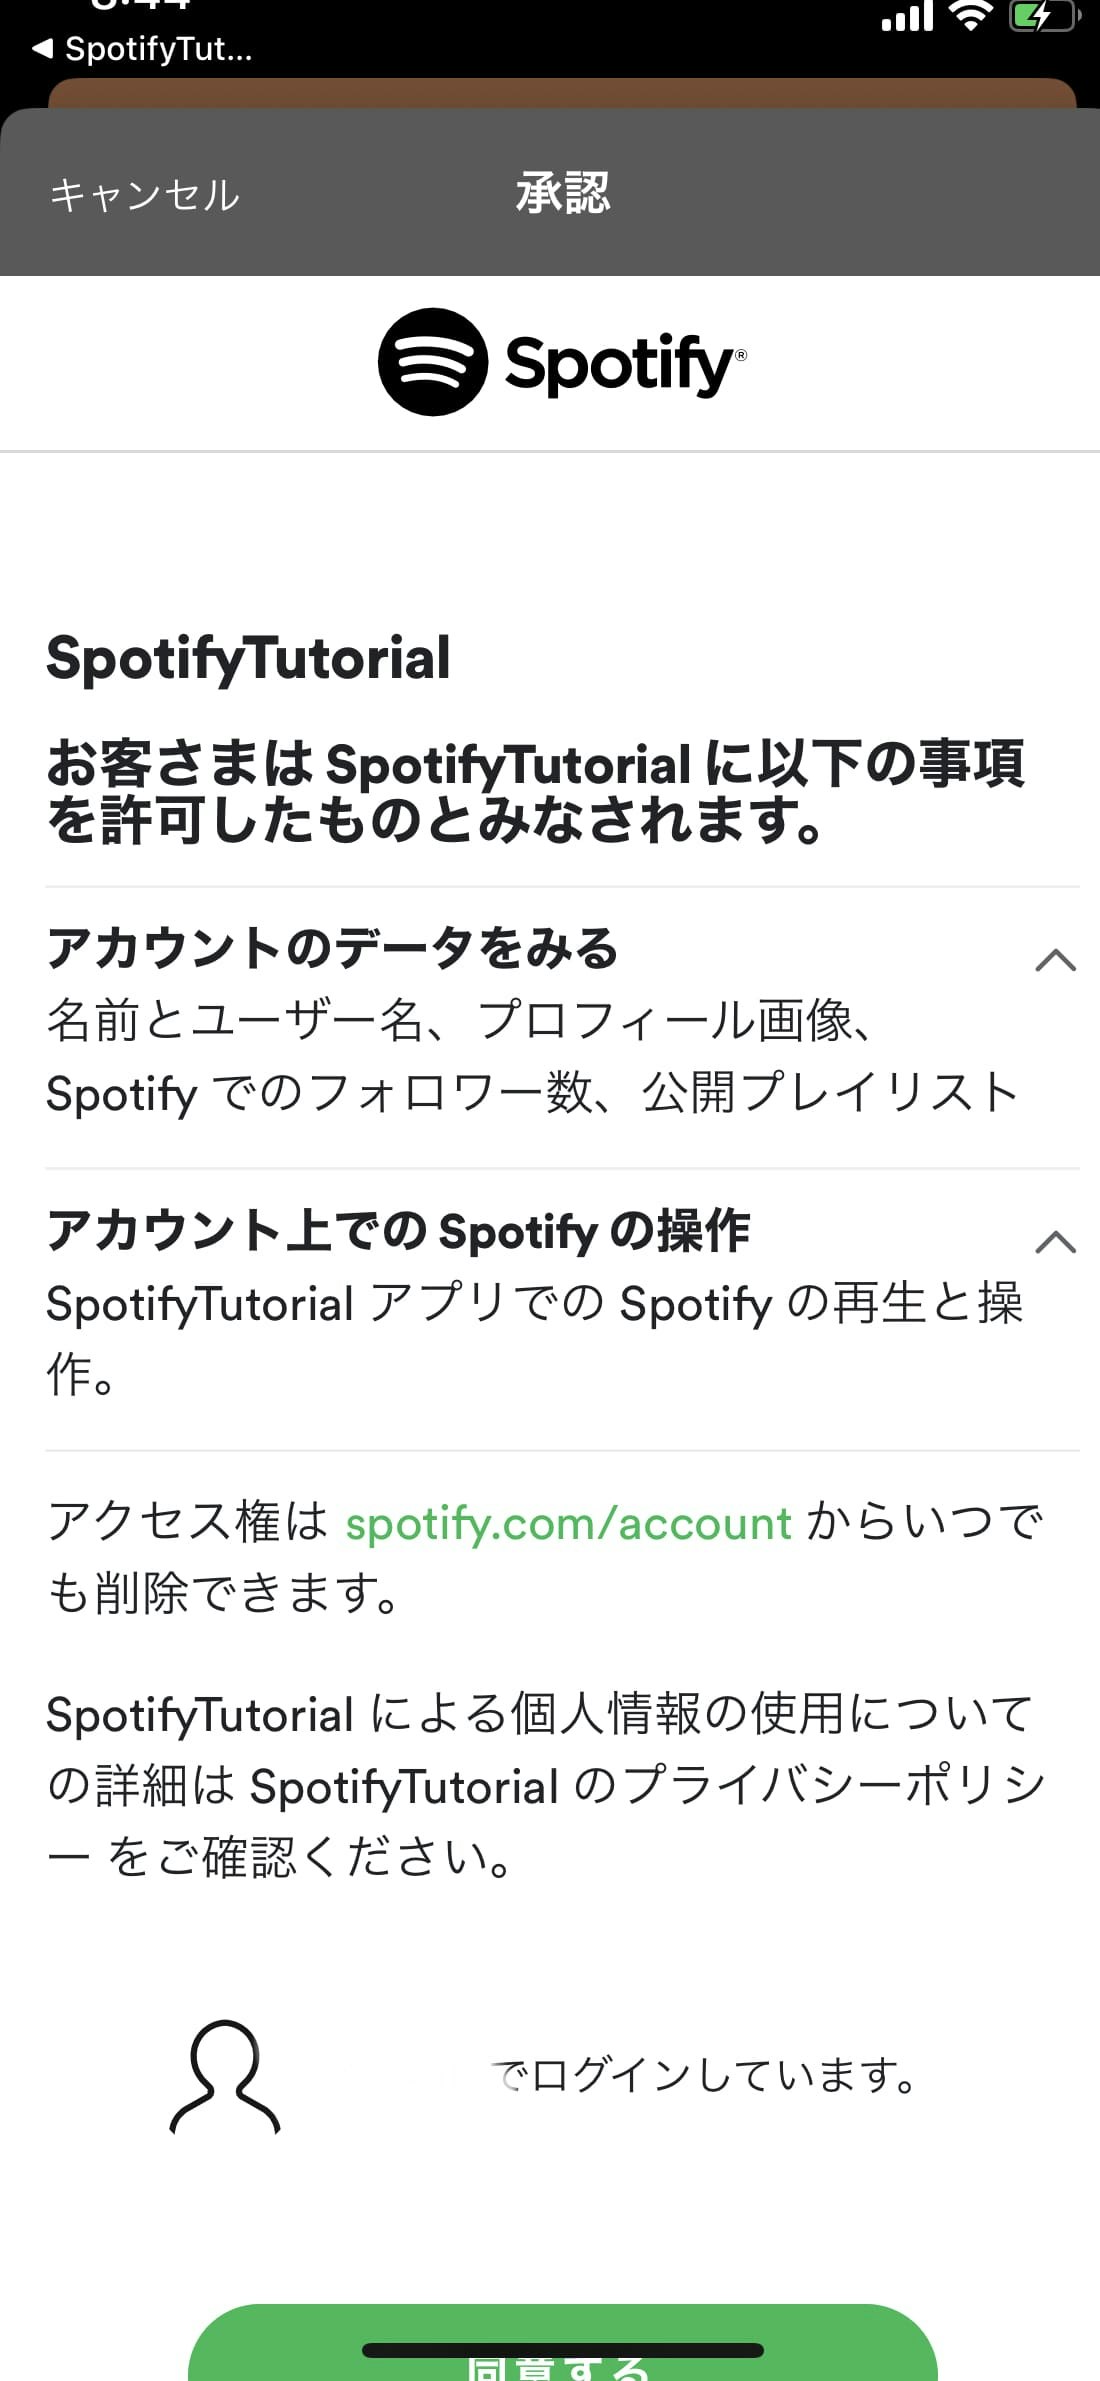
これに同意することで認証が完了して、アプリに戻ってきます。
戻ってきた際に、前述したSceneDelegateのメソッドが呼ばれて、AccessTokenが取得されます。
func scene(_ scene: UIScene, openURLContexts URLContexts: Set<UIOpenURLContext>) {}
 これでアプリ上でSpotifyの情報が取得できるようになりました!
ここまでできれば、あとは[サンプルプロジェクト](https://github.com/spotify/ios-sdk/tree/master/DemoProjects)を見ながら適宜作っていけるかと思いますが、今回作成したアプリで使用しているものメソッド等を以下にまとめます。
これでアプリ上でSpotifyの情報が取得できるようになりました!
ここまでできれば、あとは[サンプルプロジェクト](https://github.com/spotify/ios-sdk/tree/master/DemoProjects)を見ながら適宜作っていけるかと思いますが、今回作成したアプリで使用しているものメソッド等を以下にまとめます。
再生中の曲を取得
  func fetchPlayerState() {
     appRemote?.playerAPI?.getPlayerState({ [weak self] (result, error) in
        guard let self = self else { return }
        if let error = error {
                print("ViewController: fetchPlayerState is failure: error: \(error)")
        }
        else {
            guard let state = result as? SPTAppRemotePlayerState else {
                print("ViewController: fetchPlayerState: state is nil")
                return
            }
            print("ViewController: fetchPlayerState: state: \(state)")
            DispatchQueue.main.async {
                self.updateUserInfo(with: state)
            }
        }
      })
  }

  func fetchImage(track: SPTAppRemoteTrack, handler: @escaping (UIImage) -> Void) {
     appRemote?.imageAPI?.fetchImage(forItem: track, with: imageSize, callback: { (result, error) in
        if let error = error {
             print("ViewController: fetchImage is failure: error: \(error)")
        }
        else {
             guard let image = result as? UIImage else { return }
             handler(image)
        }
     })
  }

  func updateUserInfo(with item: SPTAppRemotePlayerState) {
     songNameLabel.text = item.track.name
     artistNameLabel.text = item.track.artist.name
     fetchImage(track: item.track) { [weak self] (image) in
       guard let self = self else { return }
            self.artworkImage.image = image
     }

     isPause = item.isPaused
     view.setNeedsLayout()
  }
曲の操作
  func changeSongStatus() {
       if isPause {
           appRemote?.playerAPI?.pause(defaultCallBack) // 再生
       }
       else {
           appRemote?.playerAPI?.resume(defaultCallBack) // 一時停止
       }
   }

   @objc func didTappedNextButton() {
       appRemote?.playerAPI?.skip(toNext: defaultCallBack) // 次の曲に進む
   }

   @objc func didTappedReturnButton() {
       appRemote?.playerAPI?.skip(toPrevious: defaultCallBack) // 一つ前に戻る
   }

   @objc func didTappedPlayButton() {
       isPause = !isPause
       changeSongStatus()
   }
Subscribeで曲変更を受け取る
Spotify iOS SDKではSubsribeが用意されており、状態の変更を簡単に受け取ることができます。
    // これでSubsribeを走らせることができる
    func subscribePlayerState() {
        appRemote?.playerAPI?.subscribe(toPlayerState: defaultCallBack)
    }
    // 解除はこれ
    func unSubsribePlayerState() {
        appRemote?.playerAPI?.unsubscribe(toPlayerState: defaultCallBack)
    }

// ~~~~~~~~~~~~~~~~~~~~~~~~~~~~~~~~~~~~~~~~~~~~~~~~~~
  // SPTAppRemotePlayerStateDelegateで曲(SPTAppRemotePlayerState)の変更を取得できる
  extension ViewController: SPTAppRemotePlayerStateDelegate {
    func playerStateDidChange(_ playerState: SPTAppRemotePlayerState) {
        updateUserInfo(with: playerState)
    }
  }
以上をアプリに使用しています。
他の細かい実装についてはGithubにコードを載せていますので、そちらをご覧ください。
調査が必要なもの
・アプリを操作しない状態が続くと認証が切れる。その度に認証の為にSpotifyに遷移する動きをする。
認証が切れた時に自動的に認証をするような動きがないか。
・認証中に以下のエラーが発生して、認証に失敗する
AppRemote: Failed connection attempt with error: Error Domain=com.spotify.app-remote.transport Code=-2000 "Stream error." UserInfo={NSLocalizedDescription=Stream error.,
Spotifyを再起動させると再認証すると直ることがある。
最後に
自分は認証のところでかなり詰まってしまいましたが、それ以外はすんなりと進むことができました。
これを組み合わせて色々アプリが作れそうですね!
また、何か間違っている箇所等ございましたら、何なりとお申し付けください。修正させていただきます。
ご覧いただきありがとうございました!