はじめに
本記事は with Advent Calendar 2021 1日目の記事です。
こんにちは with でAndroid エンジニアをしている石田です。withでは Jetpack Compose を段階的にプロダクトに導入しています。
本記事では、Compose の基本レイアウトである ColumnとRow で個人的によく使う 便利だなと感じたユースケースを3つ 紹介します。
Weightを設定しつつ可能ならば詰めてレイアウトする
Column/Row のスコープでは Modifier.weight で Weight を指定することができ、指定した値の比率で子の高さもしくは幅が決定されます。通常は内容に関係なくその比率の分だけ領域が確保されるますが、可能ならば詰めてレイアウトしたい場合はどうすればいいでしょうか。
実は Modifier.weight() は 第2引数に fill: Boolean 取ることができて 、 fill=false を指定することで必要なだけ高さもしくは幅を取るという挙動にすることができます。これは ConstraintLayout で言うところの app:layout_constraintHeight_default="wrap" に相当します。
サンプルコード
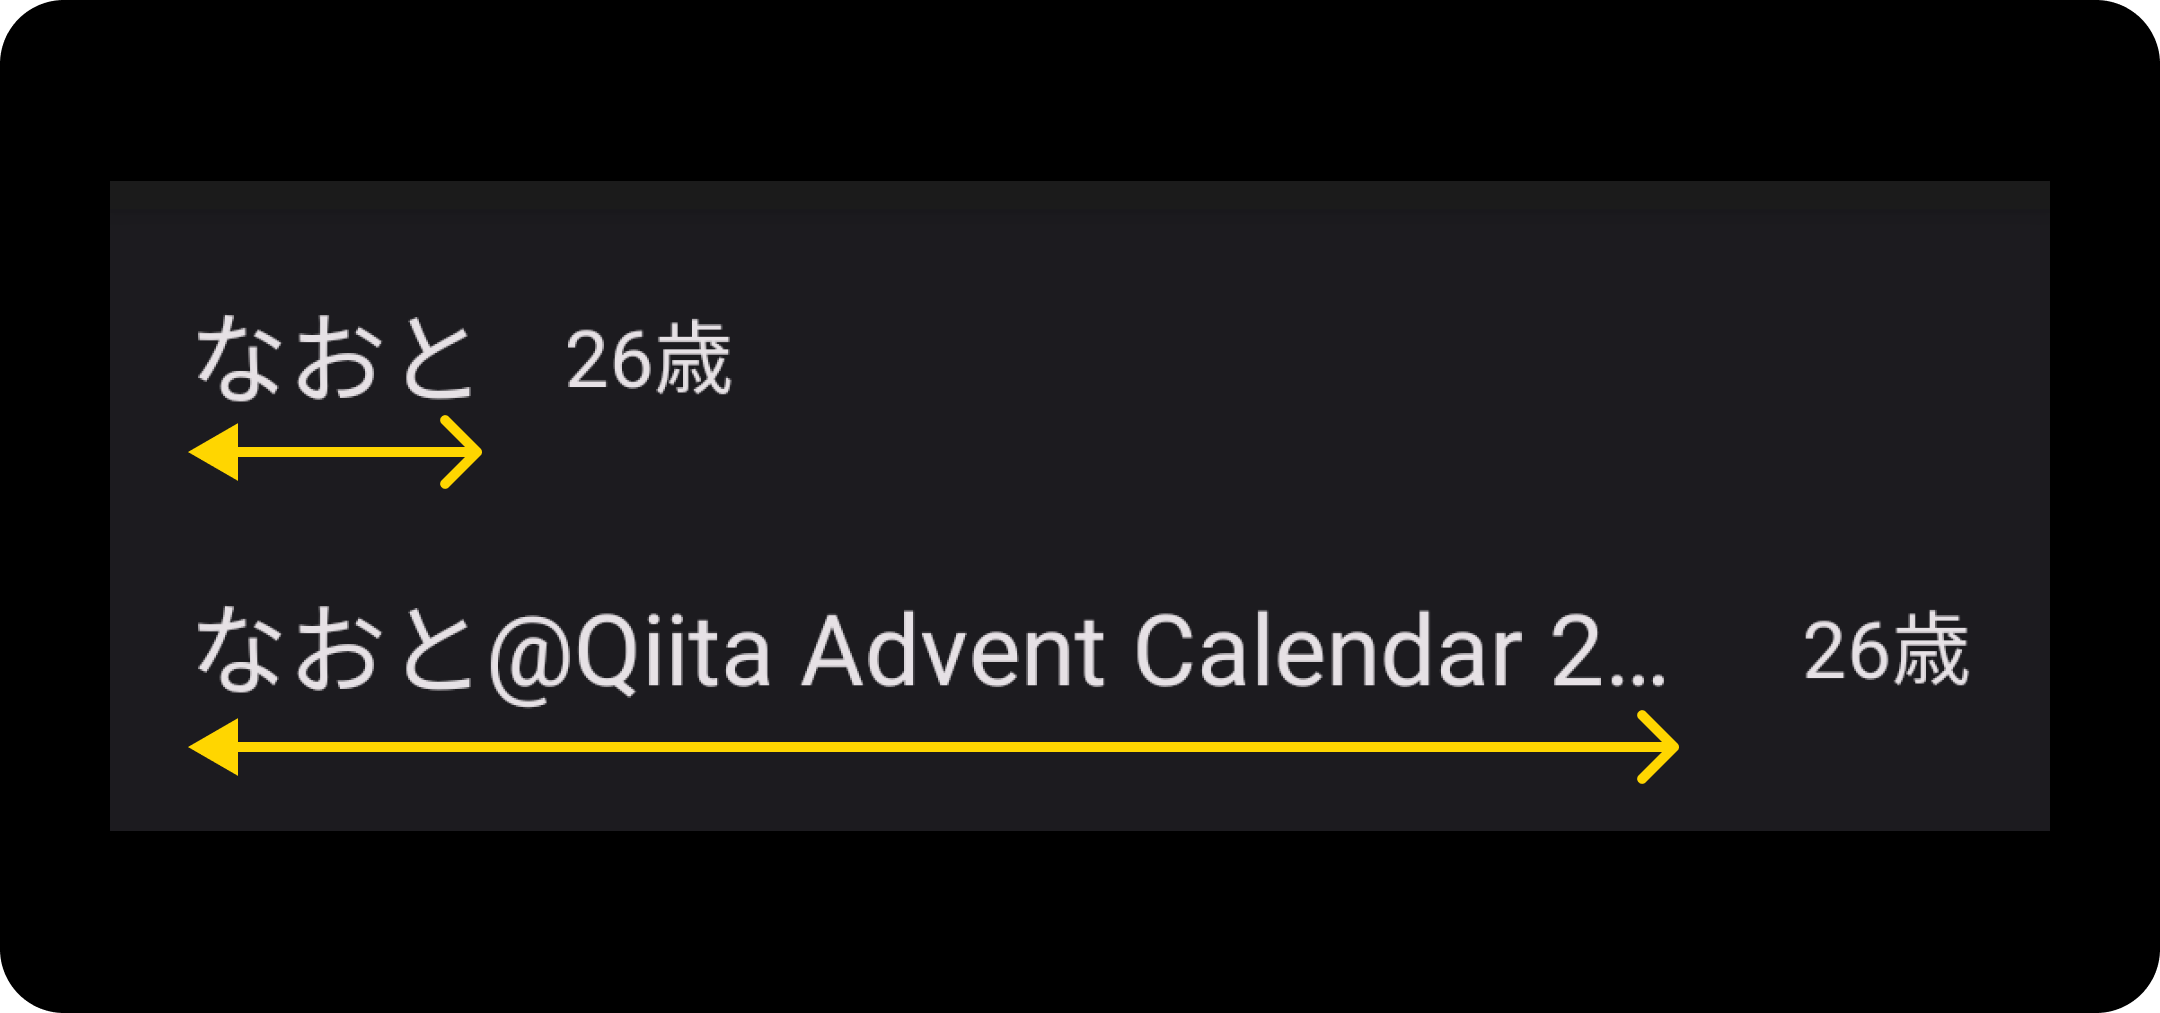
以下の要件を満たすサンプルを示します。
- 名前の幅は伸縮し、年齢は名前の横に詰めてレイアウトする
- 名前が長い場合は末尾を省略する
- 年齢は常に省略されない
@Composable
fun WeightFillFalseExample() {
    Column {
        UserItem("なおと", 26)
        UserItem("なおと@Qiita Advent Calendar 2021参加中", 26)
    }
}

@Composable
private fun UserItem(
    name: String,
    age: Int,
) {
    Row(
        verticalAlignment = Alignment.CenterVertically,
        modifier = Modifier.padding(16.dp)
    ) {
        Text(
            text = name,
            modifier = Modifier.weight(weight = 1f, fill = false), // < -- ココ!
            style = MaterialTheme.typography.bodyMedium,
            maxLines = 1,
            overflow = TextOverflow.Ellipsis,
        )
        Spacer(modifier = Modifier.width(16.dp))
        Text(
            text = "${age}歳",
            style = MaterialTheme.typography.bodySmall,
        )
    }
}
子の間に均等にスペースを空けたい
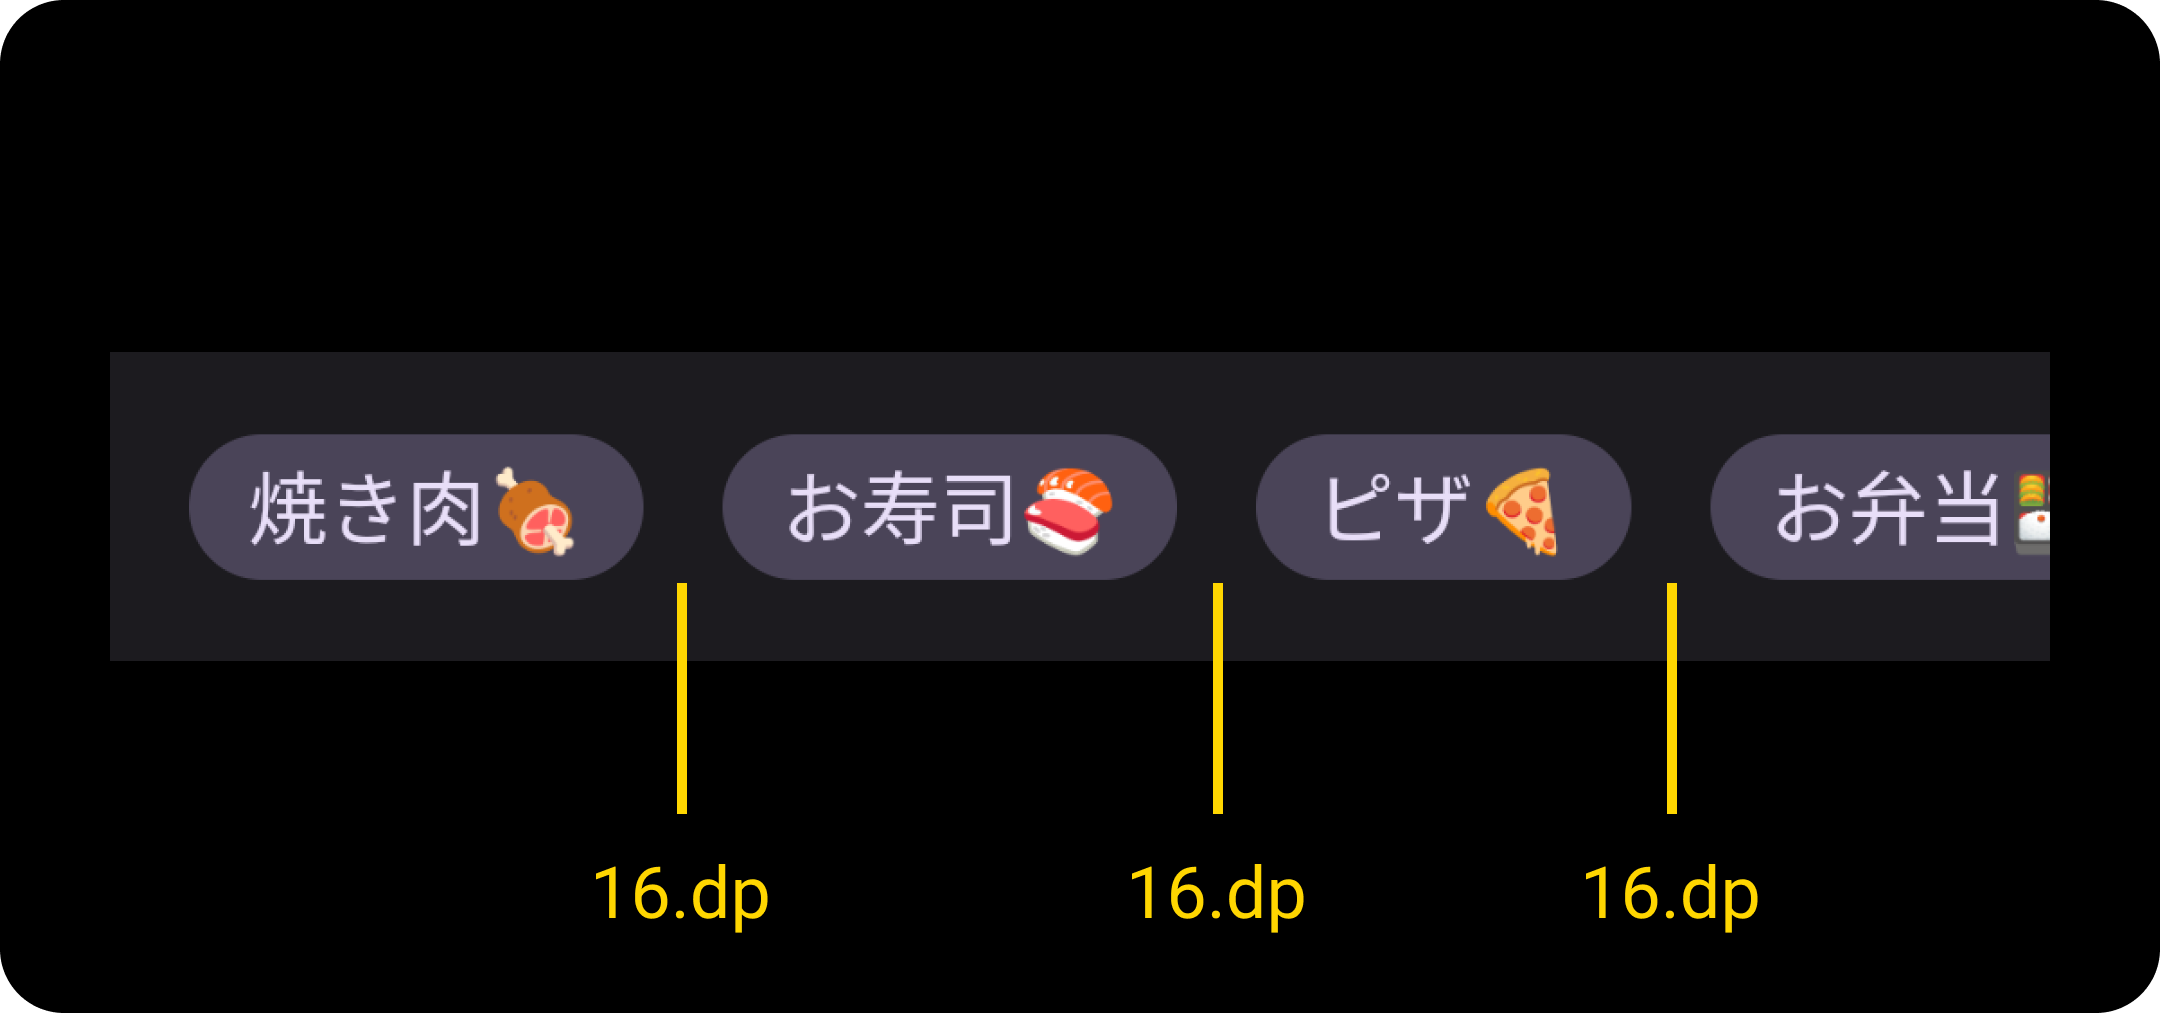
ColumnやRowで子をスペースを空けながら等間隔に並べたい場合は Arrangement.spacedBy を使うと便利です。これは ConstraintLayout の Flow で言うところのapp:flow_horizontalGap / app:flow_verticalGap に相当します。 Modifier.padding や Spacer を使う方法に比べて コンポーザブルのツリー構造をシンプルに保つことができ、コードの見通しも良くなると思います。
サンプルコード
サンプルを示します。 LazyRowに対して Arrangement.spacedBy を使ってますが、 Row でも同様です。Columnの場合は horizontalArrangement の部分が verticalArrangement になります。
@Composable
fun ArrangementSpacedbyExample() {
    LazyRow(
        contentPadding = PaddingValues(all = 16.dp),
        horizontalArrangement = Arrangement.spacedBy(16.dp),     // < -- ココ!
    ) {
        item { Tag(text = "焼き肉🍖") }
        item { Tag(text = "お寿司🍣") }
        item { Tag(text = "ピザ🍕") }
        item { Tag(text = "お弁当🍱") }
    }
}

@Composable
private fun Tag(text: String) {
    Box(
        modifier = Modifier
            .clip(RoundedCornerShape(100))
            .background(MaterialTheme.colorScheme.secondaryContainer)
            .padding(horizontal = 12.dp, vertical = 4.dp),
    ) {
        Text(
            text = text,
            style = MaterialTheme.typography.bodySmall,
            color = MaterialTheme.colorScheme.onSecondaryContainer,
        )
    }
}
子を右から左に配置したい
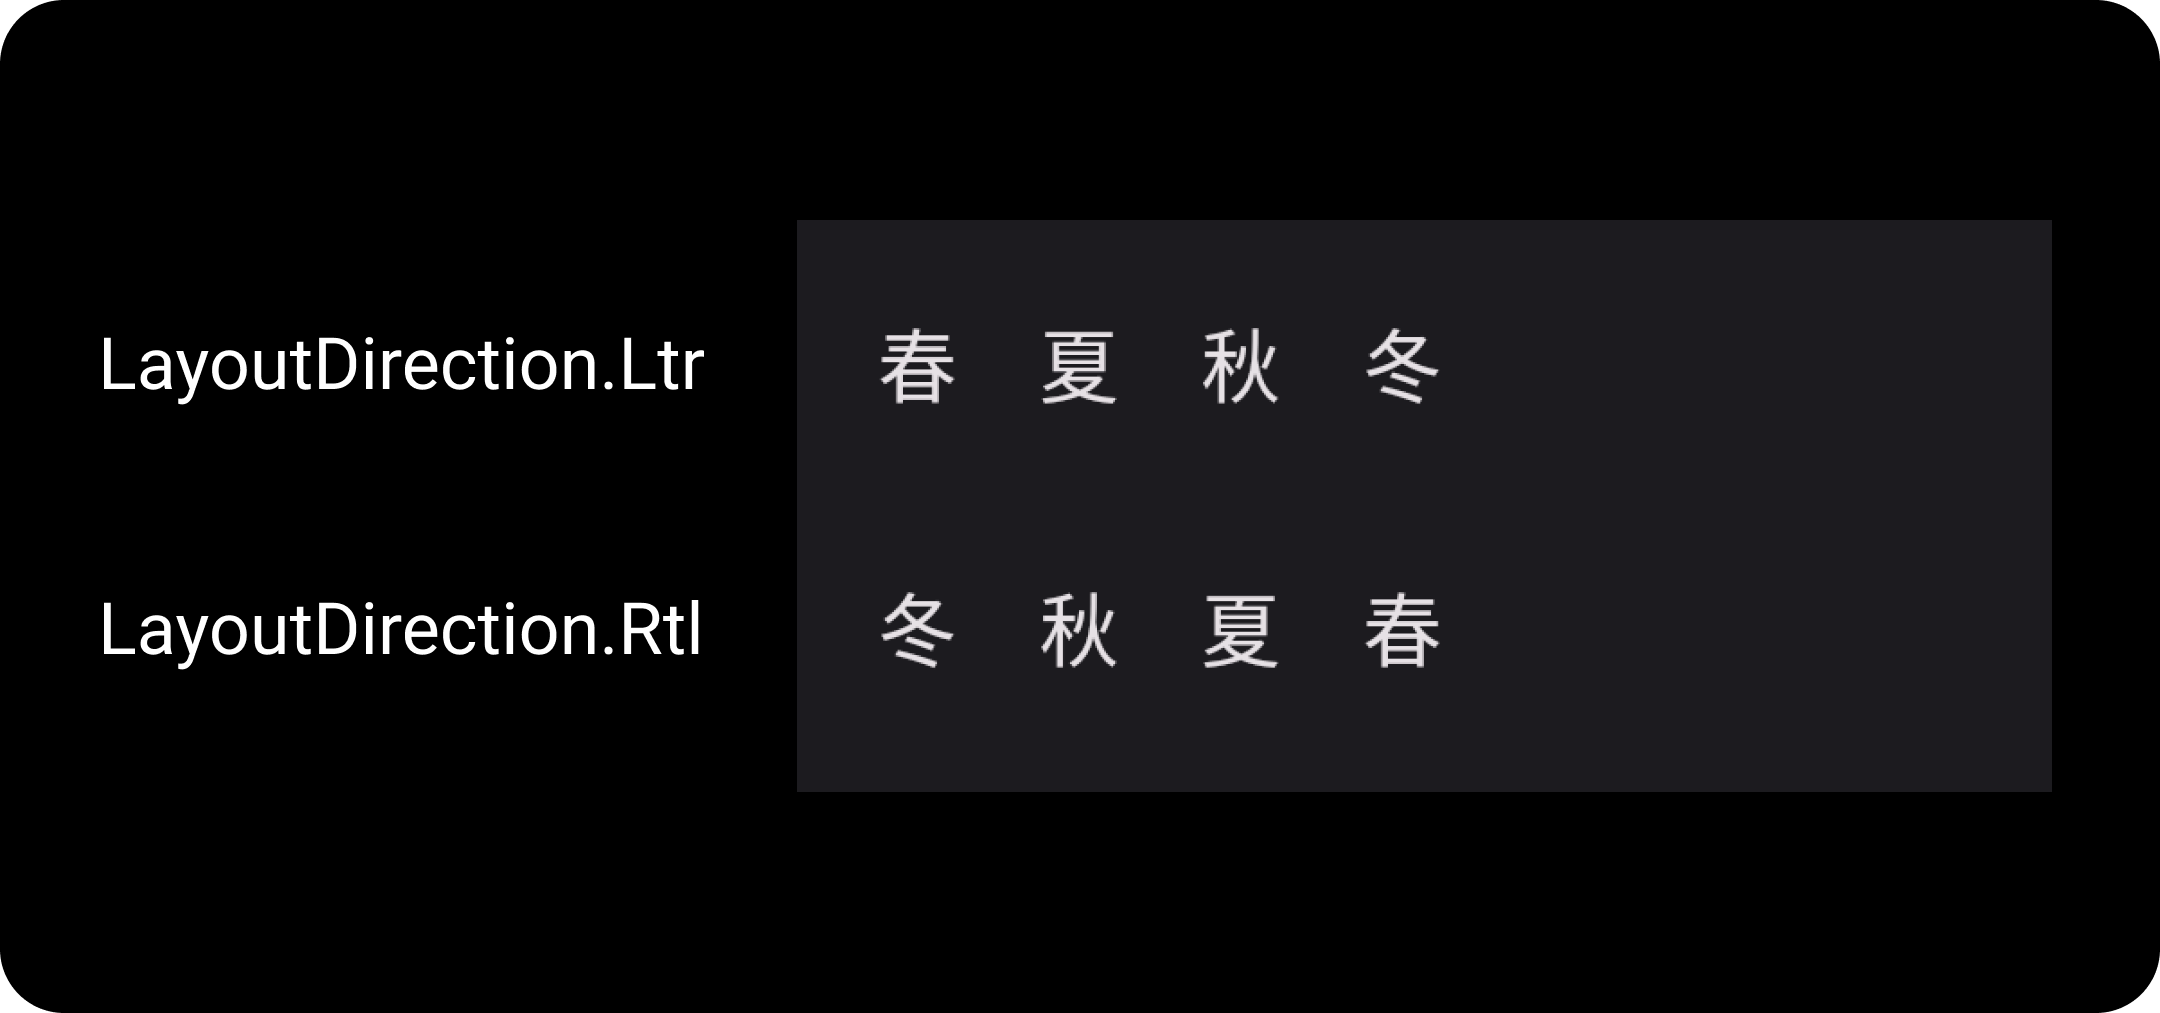
Rowは通常 子を左から右に配置していきますが、右から左に配置することも可能です。配置の方向を変えるには LocalLayoutDirection の値を設定します。
サンプルコード
サンプルを示します。 LocalLayoutDirection の値は CompositionLocalProvider を使って指定します。
@Composable
fun LayoutDirectionExample() {
    Column {
        ProvideLayoutDirection(layoutDirection = LayoutDirection.Ltr) {
            Seasons()
        }

        ProvideLayoutDirection(layoutDirection = LayoutDirection.Rtl) {
            Seasons()
        }
    }
}

@Composable
private fun ProvideLayoutDirection(
    layoutDirection: LayoutDirection,
    content: @Composable () -> Unit,
) {
    CompositionLocalProvider(
        LocalLayoutDirection provides layoutDirection, // < -- ココ!
        content = content,
    )
}

@Composable
private fun Seasons() {
    Row(
        modifier = Modifier.padding(16.dp),
        horizontalArrangement = Arrangement.spacedBy(16.dp),
    ) {
        Text(text = "春")
        Text(text = "夏")
        Text(text = "秋")
        Text(text = "冬")
    }
}
まとめ
ColumnとRow で個人的によく使う便利だなと感じたユースケースを3つ紹介しました。
動作可能なサンプルコードをGitHubで公開している のでこちらも併せてご参照ください。


