なぜデバッグメニューを仕込むのか
アプリを作っている時
コードを修正→ビルド→端末上でポチポチしてテスト
というサイクルを繰り返しますが、特に開発中は少しだけ設定を変えてテストしたいケースが多々あります。
例えばこんなとき...
* APIサーバーを切り替えたい
* 一部のAPIだけモックを使いたい
* 違うユーザーでログインしたい
* ユーザー状態をプレミアムユーザーに切り替えたい
* 何かしらのフラグを立てたい
これらの条件を変えるためだけにコードを書き換えてビルドし直してを繰り返すと時間がもったいないです。
ということでアプリを再ビルドすることなく簡単に設定を変更できるようにデバッグメニューを作ってみましょう。
デバッグメニューライブラリ Beagle
今回はデバッグメニューを簡単に作ることができるBeagleというライブラリを使います。

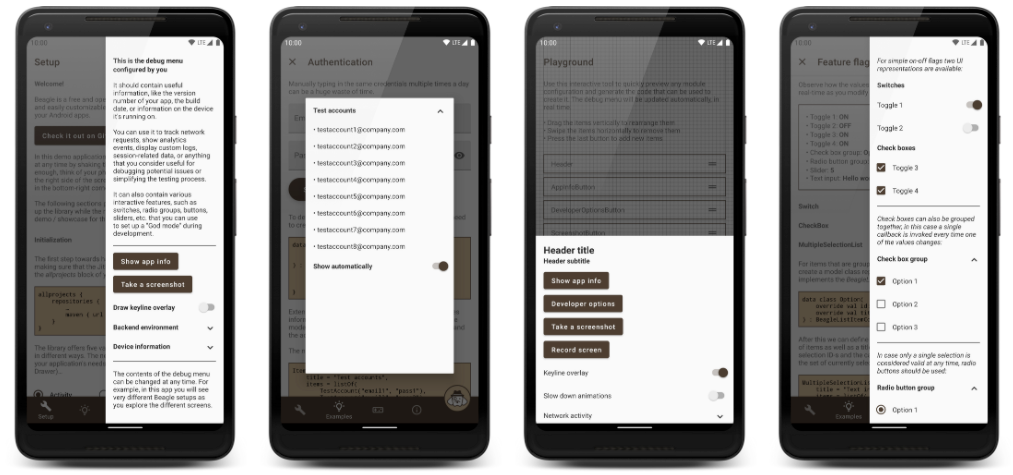
どんなことができるのか手っ取り早く知りたい人はデモアプリが用意されているので、そちらをポチポチしてみるのがいいです!
Beagle Showcase - Debug menu library demo - Apps on Google Play
サンプル
サンプルとして、2つのユースケースを考えます。
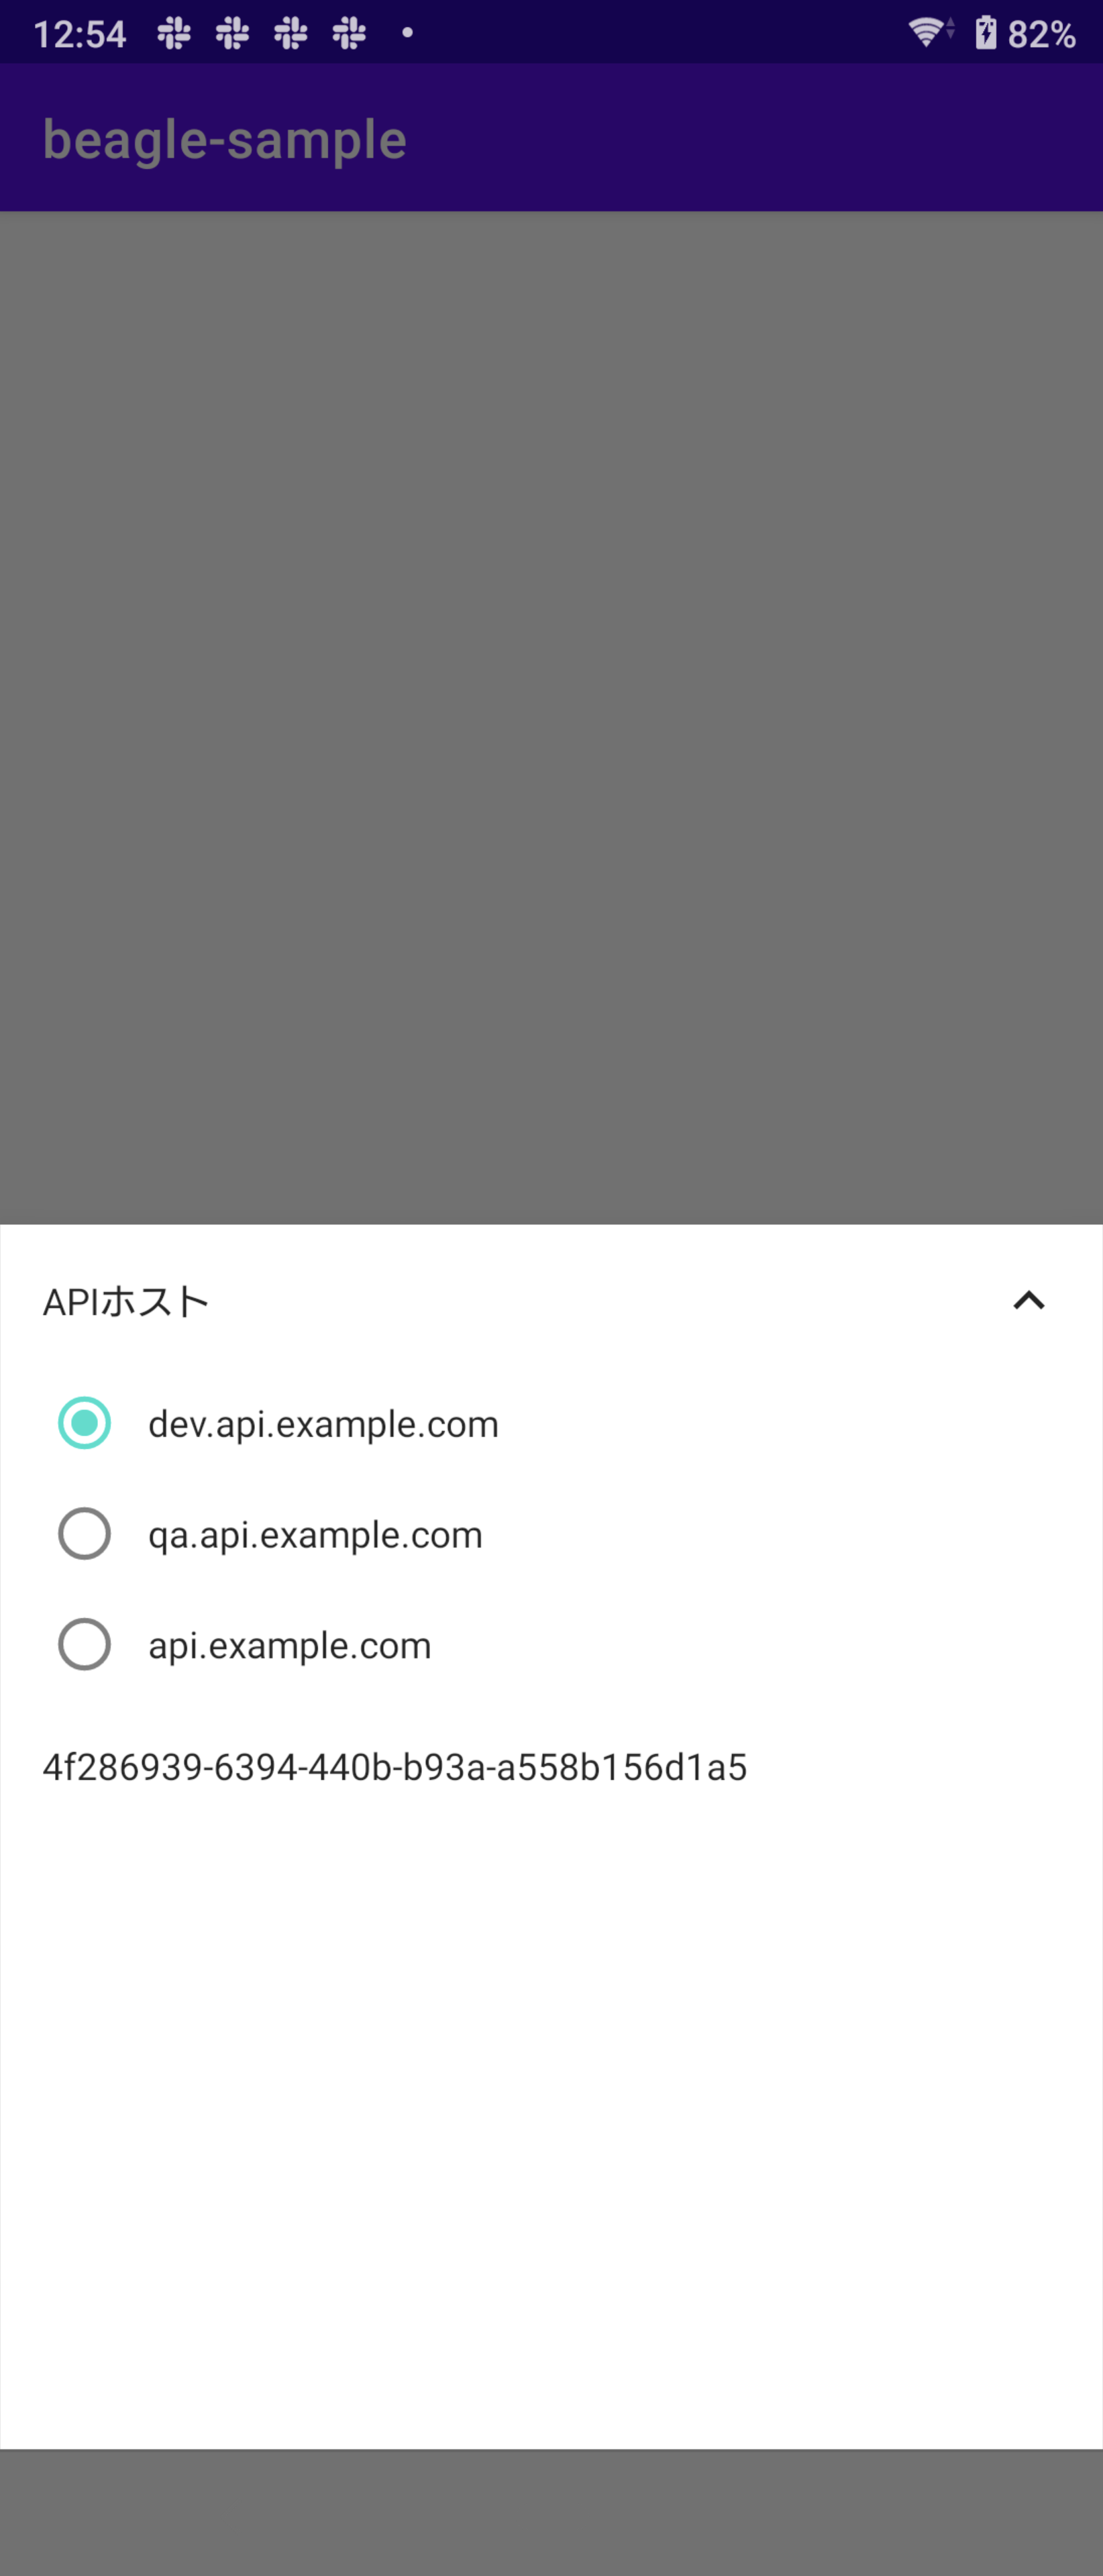
- APIサーバーを切り替えたい (dev/qa/prod)
- ユーザーIDを変更したい
完成するとこんな感じ。さっそく作っていきます。
| ホーム | デバッグメニュー |
|---|---|
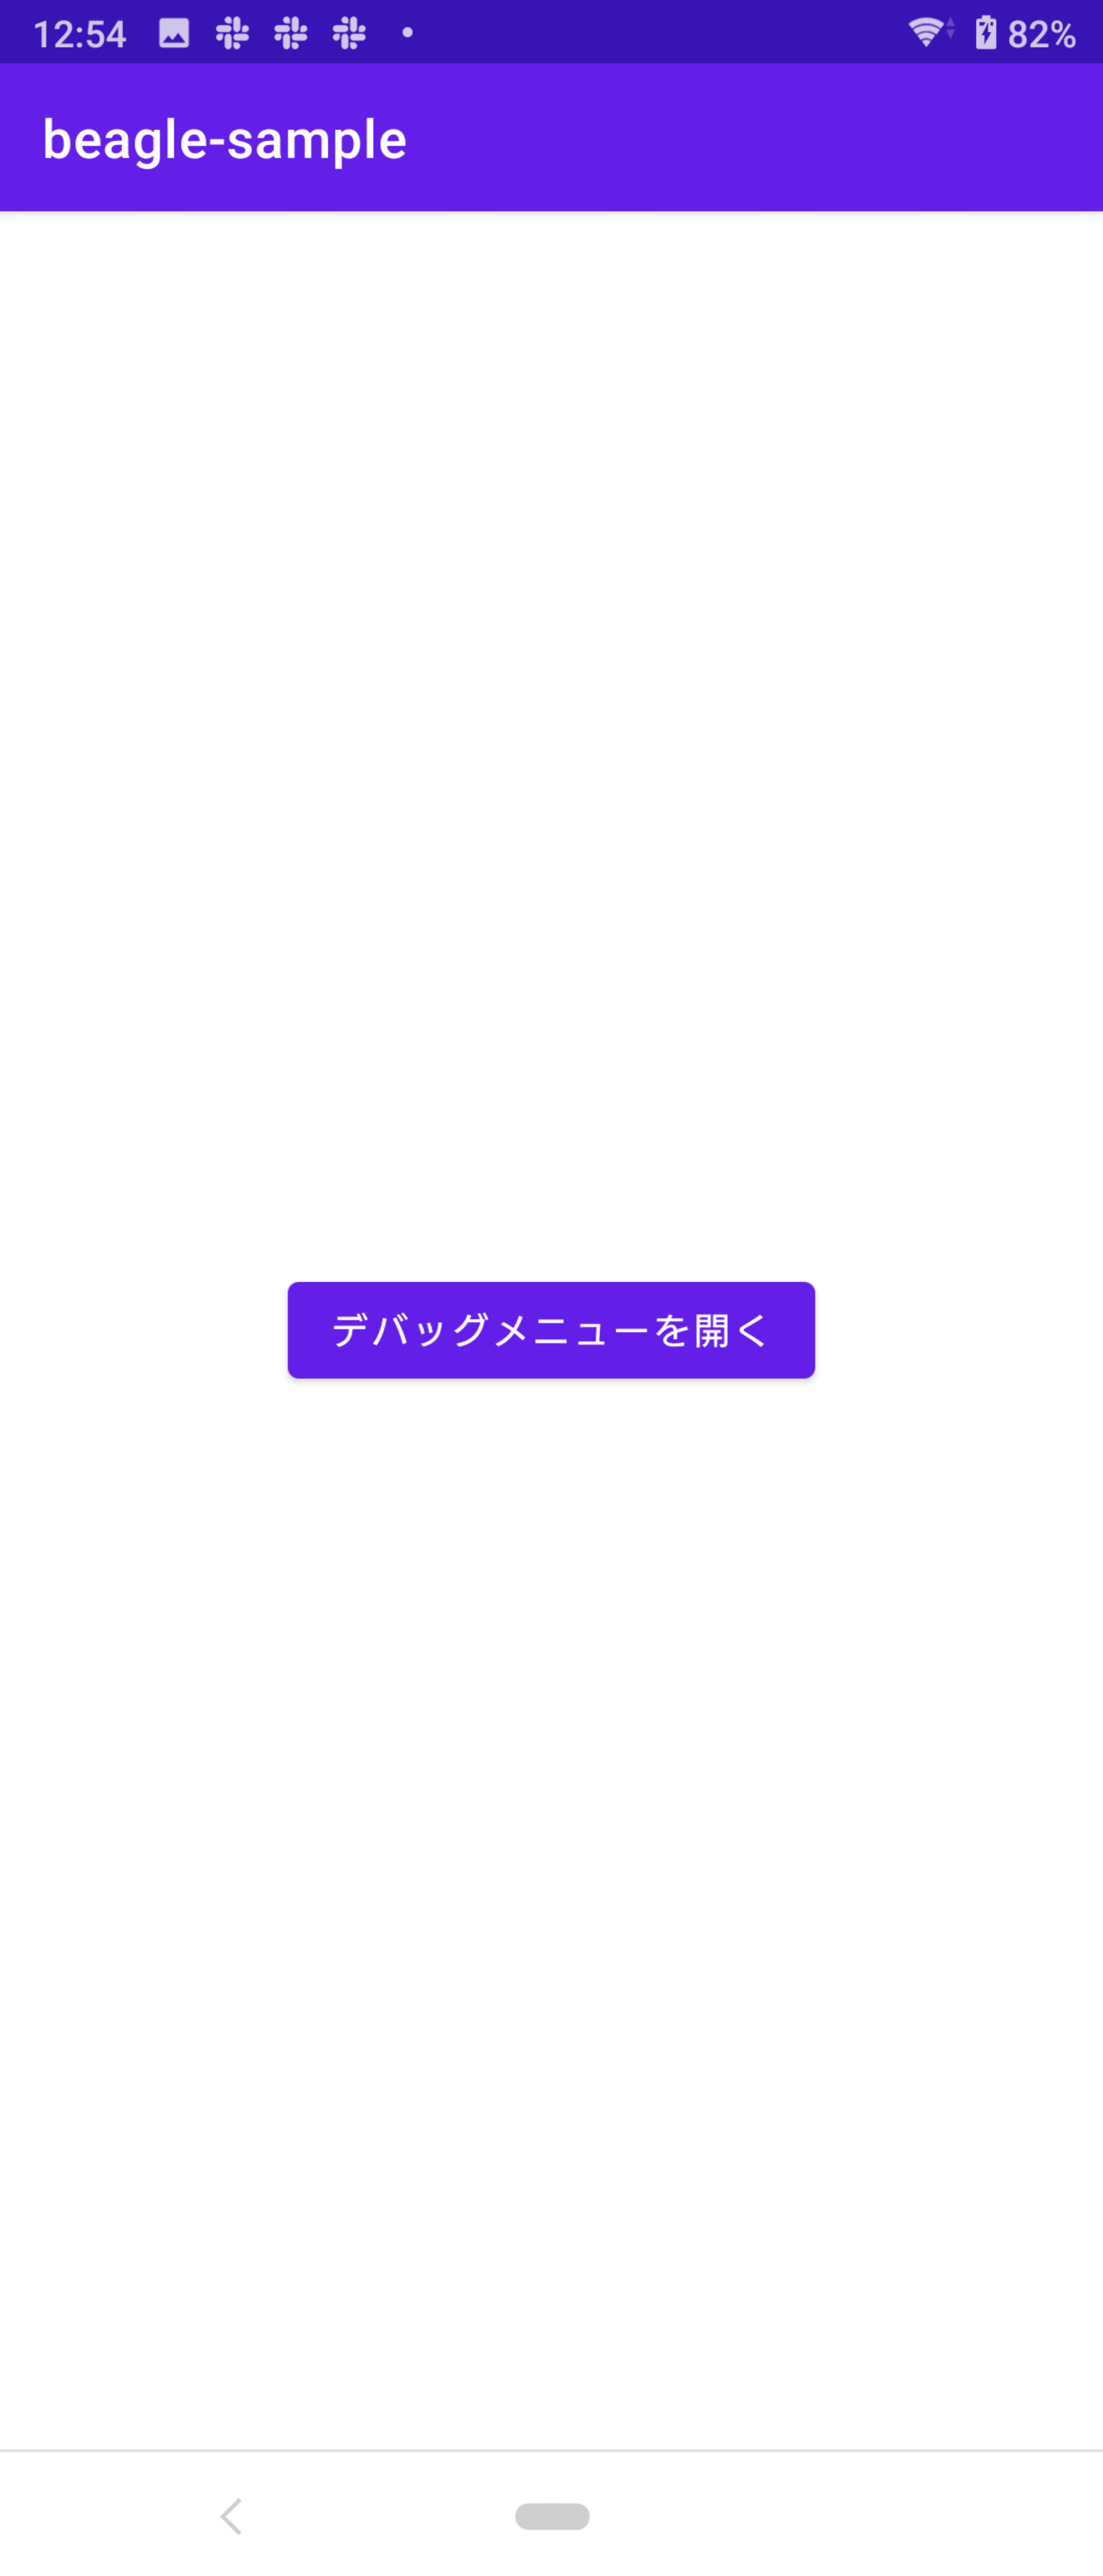 |
 |
下準備
Beagleを使う前にまずは下準備から。
アプリ再起動で設定した値が揮発してほしくないので、SharedPreferenceに永続化するために以下のようなクラスを用意しました。
class PersistDataAccessor(
    context: Context,
    private val props: DataProps
) {
    private val prefs = context.getSharedPreferences("debug_menu", Context.MODE_PRIVATE)

    fun getValue(): String = prefs.getString(props.key, props.defaultValue)!!

    fun setValue(value: String) = prefs.edit().putString(props.key, value).apply()
}

enum class DataProps(
    val key: String,
    val defaultValue: String
) {
    API_HOST(
        key = "api_host",
        defaultValue = ""
    ),
    USER_ID(
        key = "user_id",
        defaultValue = ""
    )
}
次にデバッグ時とデバッグ時以外で値の取得元を変えるために、以下のクラスを用意します。
class ConfigurableString(
    private val accessor: PersistDataAccessor,
    private val defaultValue: String
) {
    fun getValue(): String = when {
        BuildConfig.DEBUG -> accessor.getValue()
        else -> defaultValue
    }

    fun setValue(value: String) = accessor.setValue(value)
}
次にデバッグメニューから設定をどのように書き換えるのかを定義します。今回はAPIホストは選択肢から選び、ユーザーIDは手入力することを想定しています。
enum class ConfigurableStringDefinition(
    val displayName: String,
    val type: Type,
    private val props: DataProps,
    private val defaultValue: String
) {
    API_HOST(
        "APIホスト",
        Type.Options(
            listOf(
                Option("dev", "dev.api.example.com"),
                Option("qa", "qa.api.example.com"),
                Option("prod", "api.example.com"),
            )
        ),
        DataProps.API_HOST,
        BuildConfig.API_HOST
    ),
    USER_ID(
        "ユーザーID",
        Type.ManualInput,
        DataProps.USER_ID,
        "user_id"
    );

    sealed class Type {
        object ManualInput : Type()
        data class Options(val options: List<Option>) : Type()
    }

    data class Option(val id: String, val value: String)

    fun create(context: Context): ConfigurableString =
        ConfigurableString(PersistDataAccessor(context, props), defaultValue)
}
デバッグメニューの組み立て
依存を追加します。
repositories {
    google()
    jcenter()
+   maven { url "https://jitpack.io" }
}
dependencies {
+   def beagle_version = '2.4.0'
+   implementation "com.github.pandulapeter.beagle:ui-bottom-sheet:$beagle_version"
}
Beagle#initialize()を呼んでBeagleを初期化します。
次にBeagle#set()でモジュールをセットします。
ここで言うモジュールとは、デバッグメニューの部品のことです。
object DebugMenu {
    fun setup(application: Application) {
        Beagle.initialize(application)

        Beagle.set(
            *ConfigurableStringDefinition.values().map { definition ->
                module(application.applicationContext, definition)
            }.toTypedArray()
        )
    }
}
Beagleでは豊富な種類のモジュールが用意されています。
今回は値を手入力できるTextInputModuleとラジオボタンから1つだけ値を選択するSingleSelectionModuleを使用しています。
object DebugMenu {
    private fun module(
        context: Context,
        definition: ConfigurableStringDefinition
    ): Module<*> = when (definition.type) {
        ConfigurableStringDefinition.Type.ManualInput -> {
            val configurable = definition.create(context)
            TextInputModule(
                text = Text::CharSequence,
                initialValue = configurable.getValue(),
                onValueChanged = configurable::setValue,
                areRealTimeUpdatesEnabled = false
            )
        }
        is ConfigurableStringDefinition.Type.Options -> {
            val configurable = definition.create(context)
            val (options) = definition.type
            val currentValue = configurable.getValue()
            val initialItem = options.find { it.value == currentValue }

            SingleSelectionListModule(
                title = definition.displayName,
                items = options.map { ListItem(it.id, it.value) },
                initiallySelectedItemId = initialItem?.id,
                onSelectionChanged = { option ->
                    if (option != null) {
                        configurable.setValue(option.value)
                    }
                }
            )
        }
    }
最後にDebugMenu#setupをApplicationのonCreate()内で呼び出せばOKです。
class MyApplication : Application() {
    override fun onCreate() {
        super.onCreate()
        DebugMenu.setup(this)
    }
}
結果
実行するとこんな感じで動きます。
わかりやすさのために「デバッグメニューを開く」ボタンを配置していますが、端末をひと振りすることでもデバッグメニューを表示することができます。

サンプルのリポジトリ
完全なコードはこちらを参照してください。
参考リンク
- pandulapeter/beagle: A smart, reliable, and highly customizable debug menu library for Android apps that supports screen recording, network activity logging, and many other useful features.
- Beagle — A smart and reliable companion library for debugging your Android apps
この記事を読んで「面白かった」「学びがあった」と思っていただけた方、よろしければ Twitter や facebook、はてなブックマークにてコメントをして頂けると嬉しいです。
また DeNA 公式 Twitter アカウント @DeNAxTech では、 Blog記事だけでなく色々な勉強会での登壇資料も発信してます。こちらもぜひフォローして頂けると嬉しいです。
Follow @DeNAxTech