前提
Misskeyの構築済みで管理者権限を持っている
cloudflareのアカウントを持っている。
Cloudflareでドメインが使用できる状態。
Cloudflareの設定
Cloudflare Dashboardを開きます。
左のバーのR2を押します。
右上にある Manage R2 API Tokens を押します。
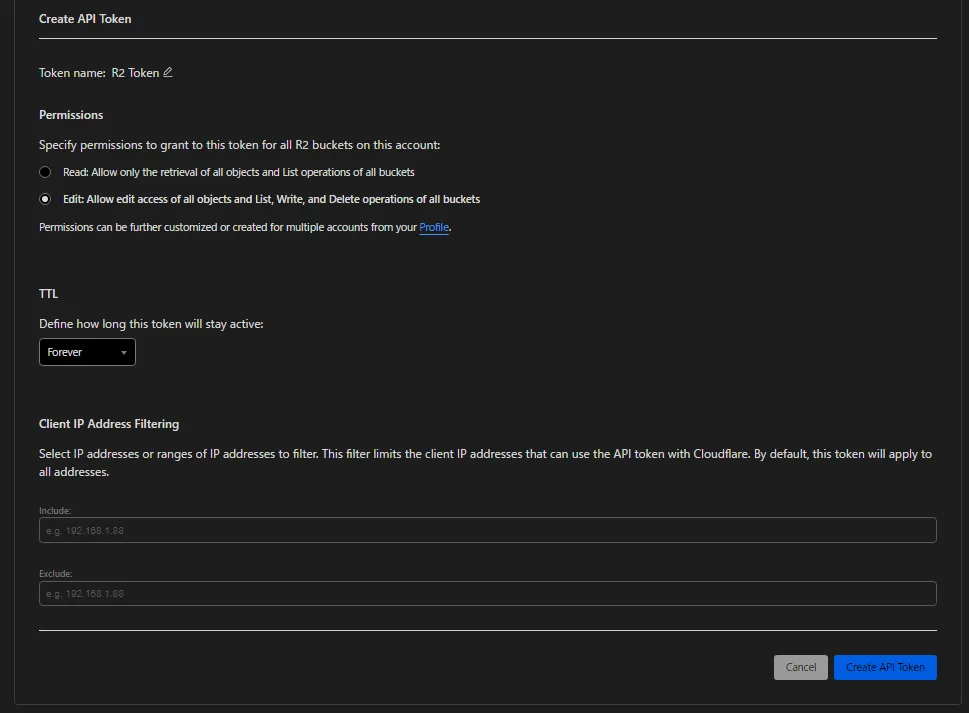
Create API token を押します。
Permissions は Edit にします。
TTLは Custom となっているところを押して Forever にします
IP Filteringは空欄でおk もしかけたいのならIPを入力
大体画像のようになってたら Create API Token を押します
押すと Access Key ID と Secret Access Key が出てくるのでメモる
終わったら Finishを押して左上にあるR2を押します。
次にCreate Bucket を押します。
Bucket name を決めて Create bucket
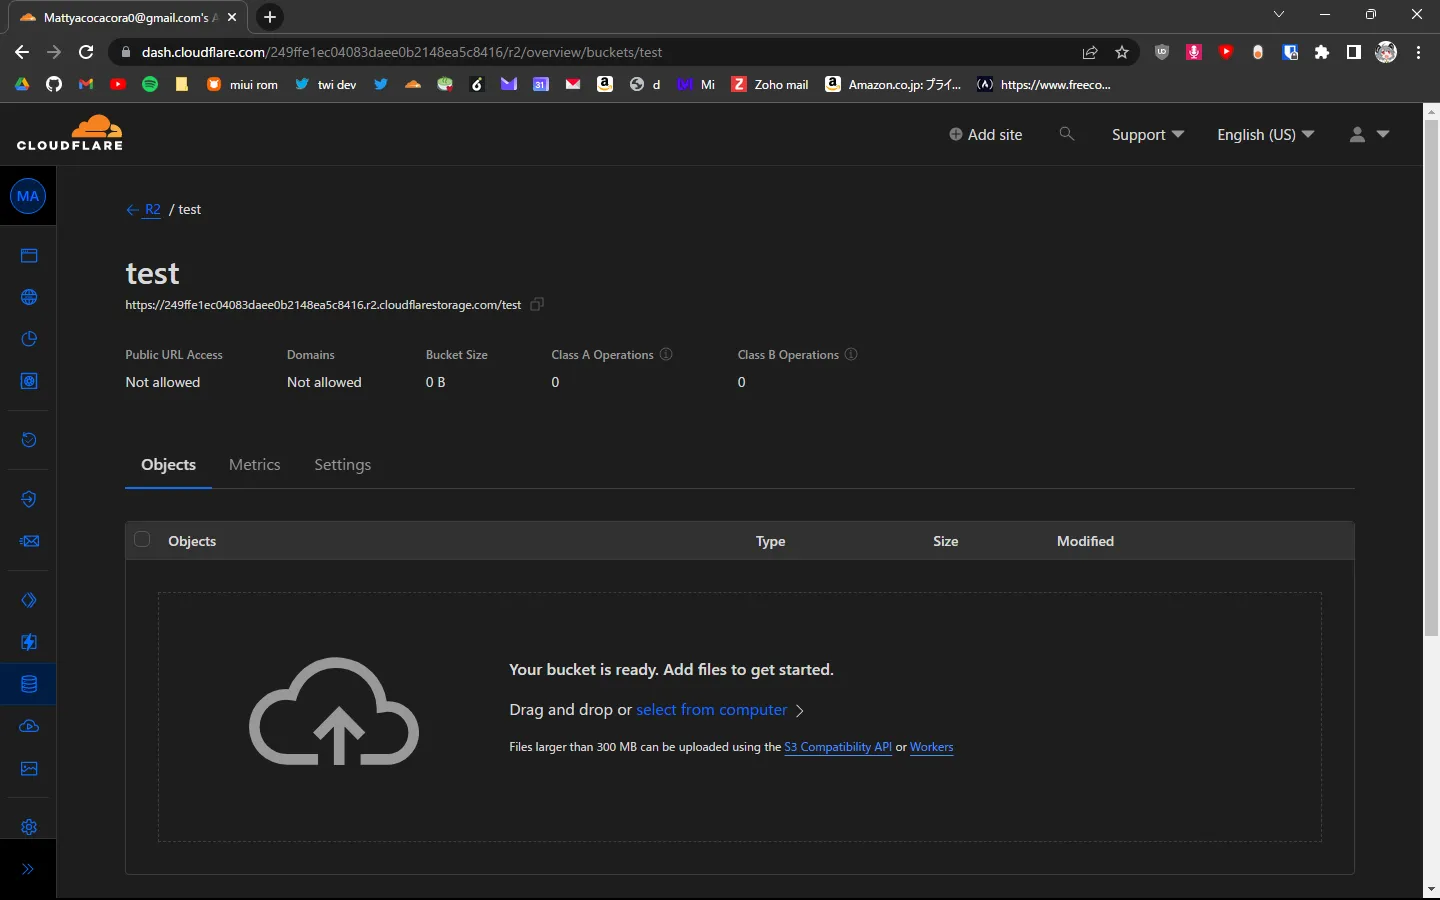
無事に終わると下のような画面になる
URLは使うのでメモる
Settingsのタブに行く。
Custom Domainsを追加する。
Connect Domainを押してファイル鯖のDomainとして使いたいドメインを入力してContinueを押してConnect domain
これでおk
Misskeyの設定
次にMisskeyを開く。
コントロールパネルを押してオブジェクトストレージを押す
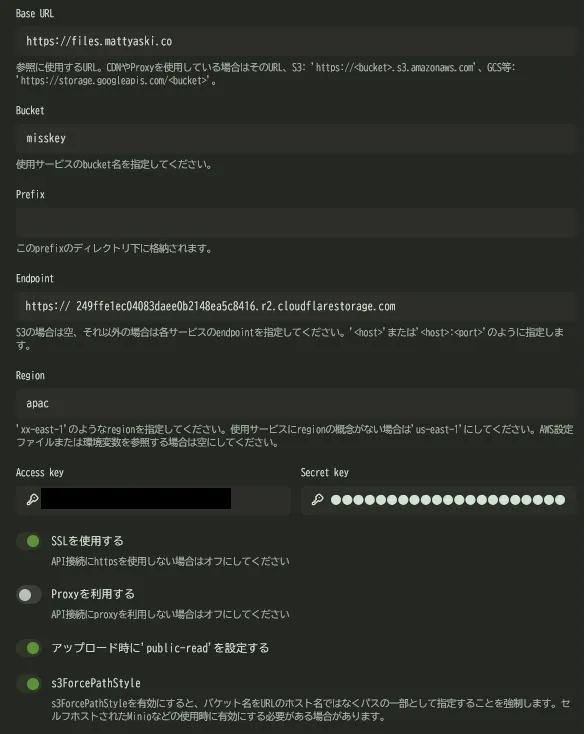
Base URL に https://さっき入力したドメイン
Bucket に さっき決めたBucket name
Prefix はそのまま
Endpoint にさっきメモしたURLを貼るが、.com以降はいらない。
Region はapac
Access key はさっきメモしたAccess keyを
Secret key はさっきメモしたSecret keyを
SSLを使用する はオンに
Proxyを利用する は任意 困ったらoffでおk
アップロード時に’public-read’を設定する は 必ずオンに
s3ForcePathStyle はオンに
画像のようになっていることを確認して保存を押す。
終わったら適当な画像を上げてみて使えるか確認する
以上です。


