はじめに
AWS初心者です。AWSの基本知識をキャッチアップすべく、色々触りながら学習中です。
これまでLambdaを使った実装をいくつか行ってきましたが、今回はAPI Gatewayと組み合わせてREST APIを実装を試してみました。初心者向けの内容となっておりますので、温かい目で見て頂ければ幸いです。
想定読者
AWS初心者で、基本機能を色々触ってみたい方
概要
本ページでは、API Gateway、Lambdaの機能を利用するための手順を一から記載しています。サンプルコードも用意していますので、本チュートリアル通りに実施すれば10分程度で実行結果まで確認できるようになっています。興味がある方は、ぜひお試しください。
作ったもの
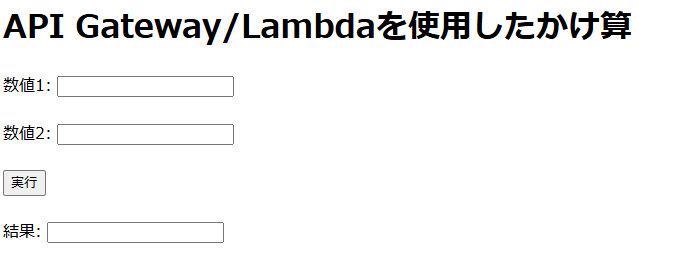
ブラウザ上で入力したテキスト(二つの数値)を乗算した結果を返すAPIを作成しました。

事前準備
※AWSアカウントが必要になります。私は12ヵ月無料枠の環境を利用しました。
実装してみる
Lambda関数の作成
AWSコンソールでLambdaにアクセスし、関数を作成します。
今回はPythonでプログラムを書くため、ランタイムは「python 3.13」を選択します。

コードエディタを開き、以下のサンプルコードを貼り付けてデプロイします。
サンプルコード
import json

def lambda_handler(event, context):
    try:
        # リクエストボディを取得
        body = event

        # 必要な値を取得
        num1 = body.get("num1")
        num2 = body.get("num2")

        if num1 is None or num2 is None:
            return {
                "statusCode": 400,
                "body": json.dumps({"error": "num1 and num2 are required."})
            }

        # 数値の型変換と計算
        result = float(num1) * float(num2)

        # 成功レスポンス
        return {
            "statusCode": 200,
            "body": json.dumps({"result": result})
        }
    except Exception as e:
        return {
            "statusCode": 500,
            "body": json.dumps({"error": "Internal server error.", "details": str(e)})
        }
これでLambda関数の設定は完了です。
API Gatewayの作成
AWSコンソールでAPI Gatewayへアクセスし、APIを作成します。
APIタイプは「REST API」を選択します。

APIの詳細では、「新しいAPI」を選択し、API名を入力して作成します。APIエンドポイントタイプはデフォルトのままでOKです。

メソッドタイプは「POST」、統合タイプには「Lambda関数」を選択します。作成済みのLambda関数を選択できるようになるため、上述で作成した関数を選択します。

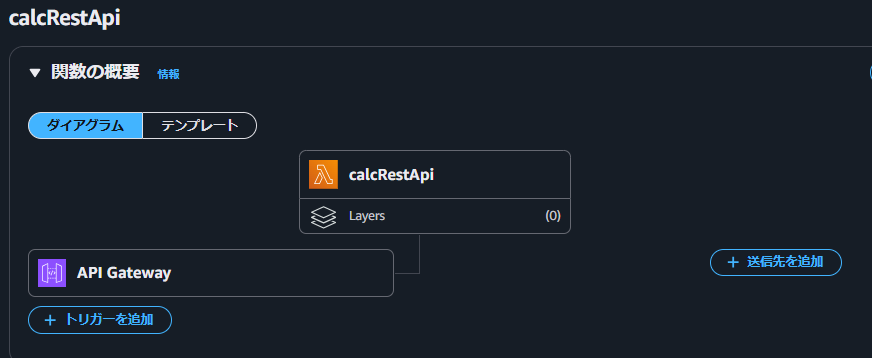
これで、API GatewayとLambdaが結合されました。Lambda関数の概要を見てみると以下の通りトリガーに「API Gateway」が設定されていることが分かります。

左のツリーから「ステージ」から先ほど作成したステージを選択し、ステージの詳細に表示されているURLを取得します。

※Clientから指定するエンドポイントとして使用するので、メモ帳などにコピーしておきます。
フロントの作成
二つの入力と結果を表示するテキスト、ボタンを配置したページを用意します。以下のサンプルコードを貼り付けてください。
サンプルコード
<!DOCTYPE html>
<html lang="ja">
<head>
    <meta charset="UTF-8">
    <meta name="viewport" content="width=device-width, initial-scale=1.0">
    <title>API Gateway/Lambda - かけ算プログラム</title>
    <script>
        // APIエンドポイントを設定
        const apiEndpoint = "API Gatewayにデプロイした時に表示されていたURLを書いてください。";

        async function callApi() {
            // 入力値を取得
            const num1 = document.getElementById("num1").value;
            const num2 = document.getElementById("num2").value;

            // 入力値のバリデーション
            if (!num1 || !num2) {
                alert("二つの数値を入力してください。");
                return;
            }

            try {
                // APIを呼び出す
                const response = await fetch(apiEndpoint, {
                    method: "POST",
                    headers: {
                        "Content-Type": "application/json"
                    },
                    body: JSON.stringify({
                        num1: parseFloat(num1),
                        num2: parseFloat(num2)
                    })
                });

                const data = await response.json();
                const parsedBody = JSON.parse(data.body);

                // 成功時の結果を表示
                if (response.ok) {
                    document.getElementById("result").value = parsedBody.result;
                } else {
                    // エラー時のメッセージを表示
                    alert(`エラー: ${data.error || "不明なエラーが発生しました。"}`);
                }
            } catch (error) {
                // 通信エラー時の処理
                alert(`通信エラー: ${error.message}`);
            }
        }
    </script>
</head>
<body>
    <h1>API Gateway/Lambdaを使用したかけ算</h1>
    <form onsubmit="event.preventDefault(); callApi();">
        <label for="num1">数値1:</label>
        <input type="text" id="num1" name="num1" step="any" required><br><br>

        <label for="num2">数値2:</label>
        <input type="twxt" id="num2" name="num2" step="any" required><br><br>

        <button type="submit">実行</button><br><br>

        <label for="result">結果:</label>
        <input type="text" id="result" name="result" readonly><br>
    </form>
</body>
</html>
実行結果
おわりに
シンプルですが、一通りの動作を確認することができました。今回は触れませんでしたが、API GatewayではAPI実装するうえでの基本的な制御(認証、認可、カスタムドメイン、ポリシー、CORSなど)をGUIで設定できるなど多くの機能が提供されているようなので、次回はもっと色々触ってみようと思います。


