はじめに
この記事は**「Zoomライセンスの切り替えをSlackでやってみた」**の一環で投稿した記事です。
この記事では、ZoomAPI(JWT)の利用準備から、ZoomAPIでユーザ情報を取得、実際にライセンスの切替するところまでを説明します。
本記事で使っている環境
- Windows10
- VSCode
- Python 3.7.1
ZoomAPIとは
ZoomAPIは、APIを通してZoomを操作できるものです。ユーザ情報の取得や、ユーザ情報の変更、会議の作成などなど、様々なことがAPIでできます。
ZoomAPIを利用するのには、APIリクエストをZoomで認証される必要があり、認証方法としてOAuth と JWT がサポートされています。
この記事ではSlack経由でAPIを利用することを想定しているので、JWTについて説明します。
公式ドキュメンもあるので、詳細はこちらも参照してみてください。
ZoomAPIの利用準備
ZoomAPIを使うにあたり、事前にZoomAPPを作成します。
ZoomAPIを作成することで、API認証に必要なKey情報が生成されます。
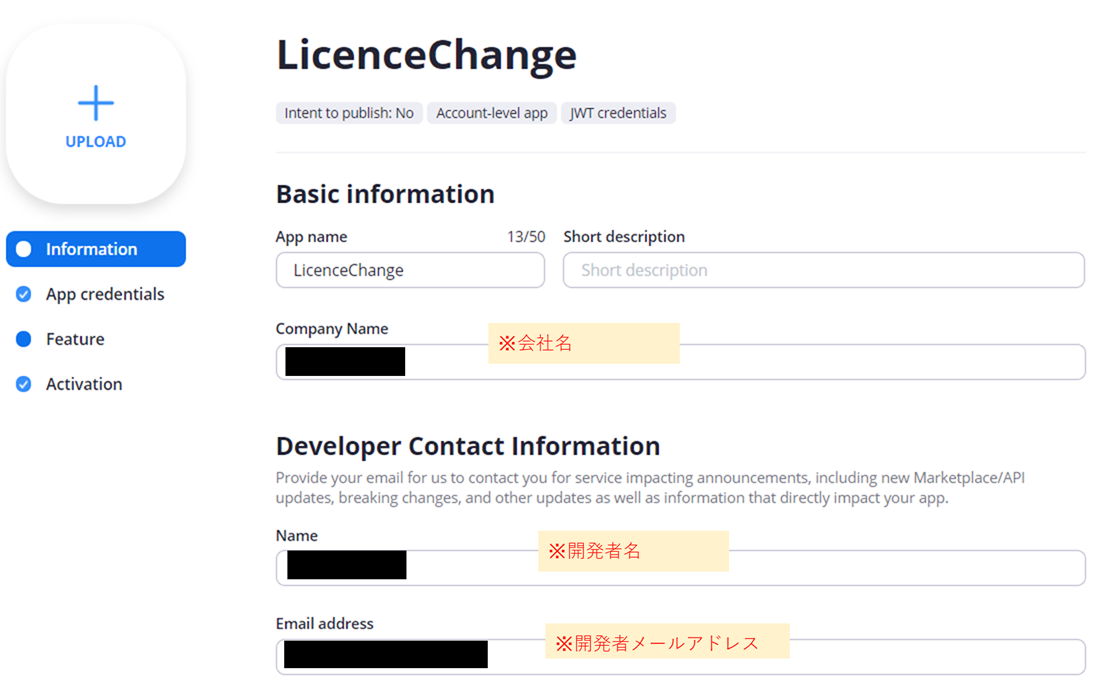
以下の流れで作成します。
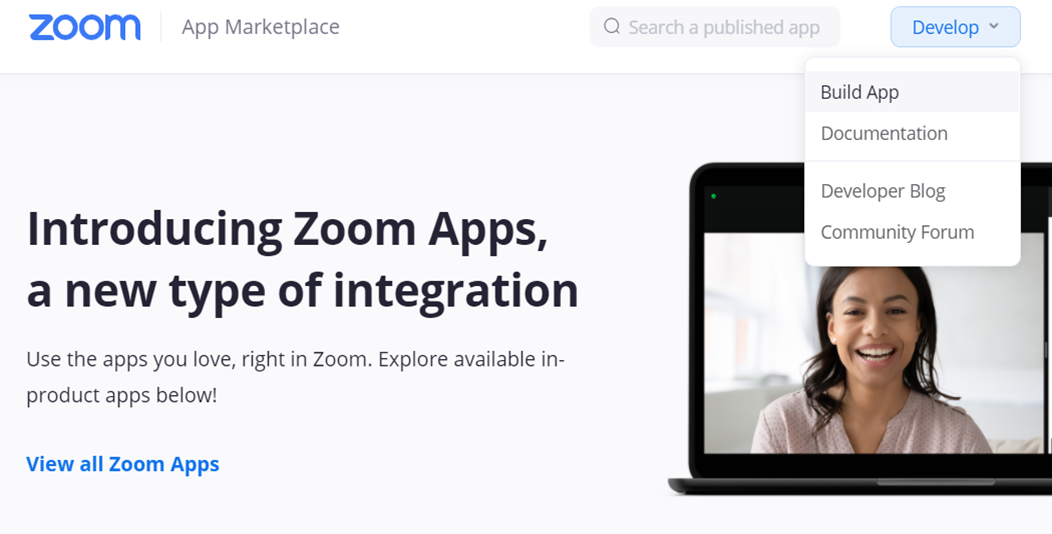
(1) Zoomマーケットプレイスにアクセス
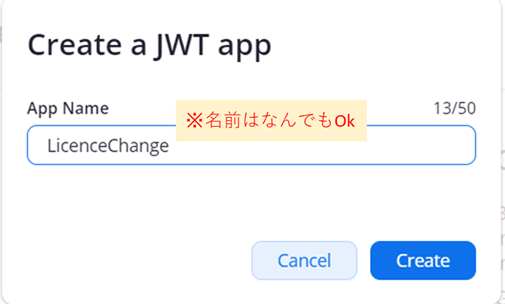
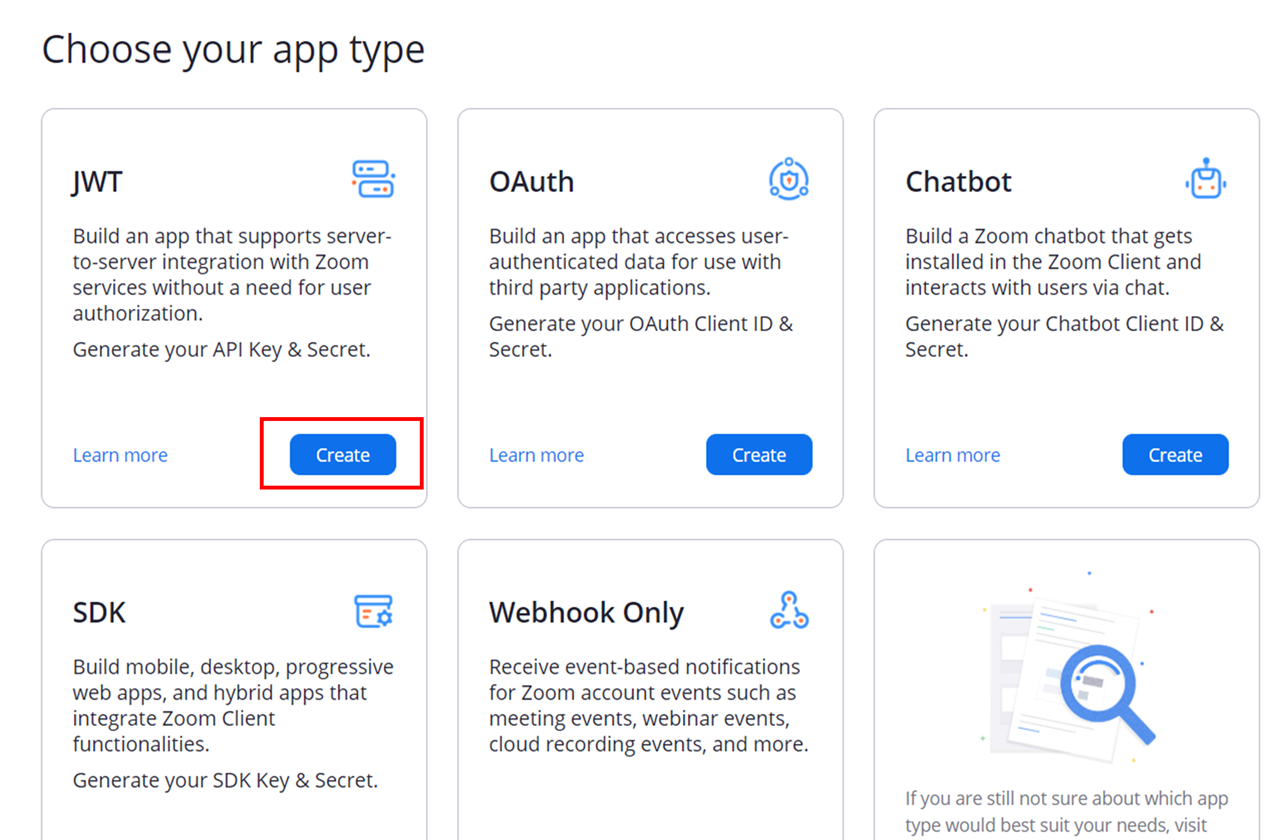
(3) 作成するAPPタイプを選択する。今回はJWTを使うのでJWTのCreateを選択
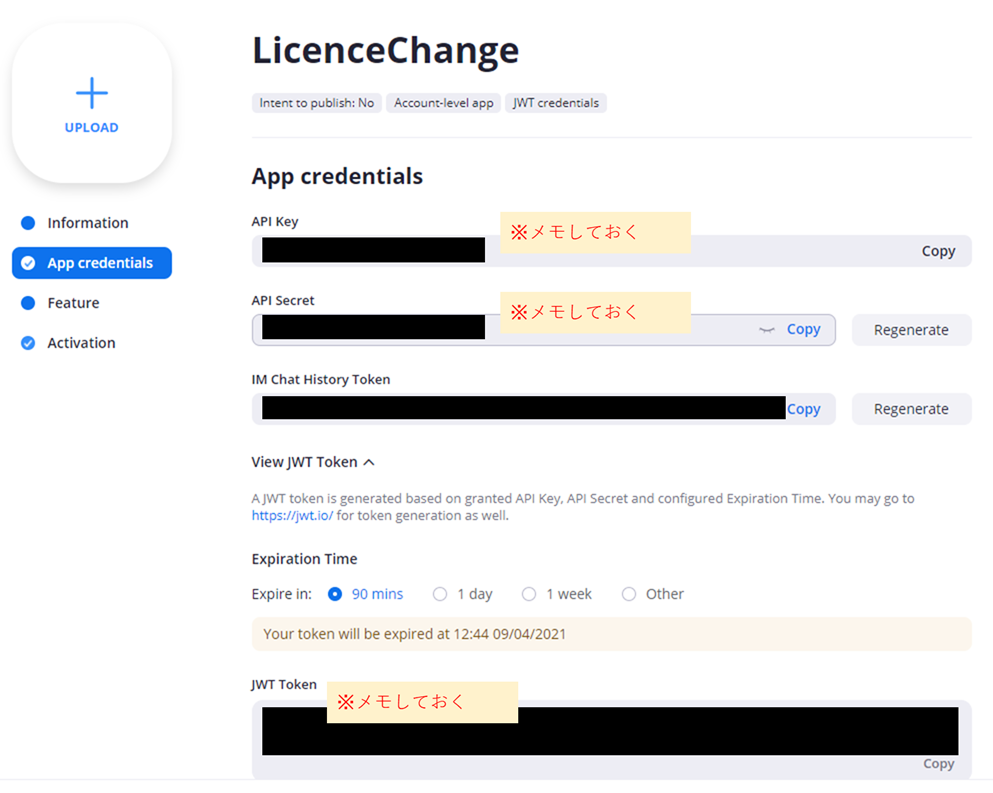
(5)API Key、API Secret、JWT Tokenをメモ
APIアクセステスト
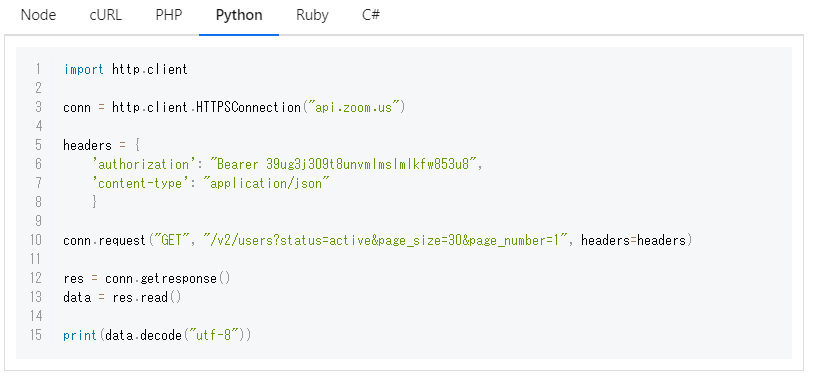
Zoomの公式ドキュメントにサンプルプログラムが用意されているので、Pythonのプログラムを参考にAPIを叩いてみます。
import http.client

def zoom_api_test():
    conn = http.client.HTTPSConnection("api.zoom.us")

    jwt = "★ZoomAPPの設定画面から取得したJWTを指定★"
    headers = {
        'authorization': "Bearer " + jwt,
        'content-type': "application/json"
        }

    conn.request("GET", "/v2/users?status=active&page_size=30&page_number=1", headers=headers)

    res = conn.getresponse()
    data = res.read()

    print(data.decode("utf-8"))

# APIテスト
zoom_api_test()
以下のように情報が取得できたらOKです。
{"page_count":1,"page_number":1,"page_size":30,"total_records":1,"users":[{"id":"rgj8IZo5RIqWJd06******","first_name":"******","last_name":"******","email":"******@gmail.com","type":1,"pmi":**********,"timezone":"","verified":0,"created_at":"2021-09-04T02:05:46Z","last_login_time":"2021-09-04T02:05:53Z","last_client_version":"5.7.4.804(win)","pic_url":"https://lh3.googleusercontent.com/a/******-***********************-************","language":"jp-JP","phone_number":"","status":"active","role_id":"0"}]}
なお、JWT Tokenが期限切れになっていたら以下のようにレスポンスが返ってきますので、APPの設定からJWT Tokenを再発行してください。
{"code":124,"message":"Access token is expired."}
APIアクセステストはこんな感じです。
ただ、実際使うときは長期間のJWT Token を発行して使うのはセキュリティ観点から良くなく、毎回生成して使うのがベターなので、次の章でJWT Tokenを生成してみます。
JWT Tokenの生成
JWT生成に入る前に、「JWT」ってなんぞや?って方は以下の記事を一読することをオススメします!
また、ZoomのJWT仕様については以下の公式ドキュメントを一読を。
では、早速 JWTの生成に入ります。
まず、必要なライブラリをインストールします。
pip install PyJWT
以下のようにjwtとdatetimeをインポートしてJWTを生成します。
※iss と secret はZoomAPPの設定画面から取得した情報を設定してください
import datetime
import jwt

def get_jwt():
    current_time = datetime.datetime.now().timestamp()

    iss = "★ZoomAPPの設定画面から取得したAPI Keyを指定★"
    exp = current_time + 60 # 1分有効
    secret = "★ZoomAPPの設定画面から取得したAPI Secretを指定★"

    jwstoken = jwt.encode(
        {
            "iss": iss,
            "exp": exp
        }, secret, algorithm="HS256")

    return jwstoken

# JWT生成
print(get_jwt())
以下のような文字列が出力されたらOKです。
これを毎回APIを叩く際に生成すれば期限切れを起こすこともなく利用することができます。
eyJ0eXAiOiJKV1QiLCJhbGciOiJIUzI1NiJ9.eyJpc3MiOiJcdTI2MDVab29tQVBQXHUzMDZlXHU4YTJkXHU1YjlhXHU3NTNiXHU5NzYyXHUzMDRiXHUzMDg5XHU1M2Q2XHU1Zjk3XHUzMDU3XHUzMDVmQVBJIEtleVx1MzA5Mlx1NjMwN1x1NWI5YVx1MjYwNSIsImV4cCI6MTYzMDc2NTMwMS41NTM5ODR9.dqYbLhSe4AWCgwCUVKvSid2NY-l9z-fe5GETlQp0W2Y
ライセンス切替
JWTも生成できたので、ライセンスの切替をやってみます。
ライセンスの切替はZoomAPIのUpdate a userAPIを使います。
このAPIにtypeパラメータを渡してライセンスタイプ切り替えることが可能です。
- type 1:basciユーザ
- type 2:ライセンスユーザ
このAPIを使う際にユーザIDを指定する必要があるので、全体の処理の流れとしては以下のようになります。
-
List User APIを実行し、ユーザ一覧情報の取得。操作対象ユーザのユーザIDを取得 -
Update a userAPIを実行し、ユーザタイプを更新する。
実装ですが、以下のサイトにとてもわかり易いコードが載っておりましたので流用させていただくことにします(ありがとうございます)。
import http.client
import datetime
import jwt
import json

# ライセンス更新モジュール
def zoom_userlicence_change(target_email, lic_type):

	# zoomにアクセス
    conn = http.client.HTTPSConnection("api.zoom.us")

    # JWT tokenによる認証を含むリクエストヘッダの設定
    jwt = get_jwt()
    headers = {
        'authorization': "Bearer " + jwt,
        'content-type': "application/json"
        }

    # List User APIによるユーザ一覧情報の取得。page_sizeはデフォルト30なので、アカウント登録数に見合う最大値を設定する
    conn.request("GET", "/v2/users?page_size=200", headers=headers)

    # レスポンスを変数に格納
    res = conn.getresponse()

    # utf-8で読み出し
    res_string = res.read().decode("utf-8")

    # json(辞書)型として抽出
    res_dict = json.loads(res_string)

    # usersの格納値をリストとして抽出
    user_list = res_dict["users"]

    # 引数で指定したemailを持つユーザのuseridを取得
    for user in user_list :
        if user['email'] == target_email:
            target_id = user['id']
            print(f'target id:{target_id}')
            break

    # Update a User APIに渡すペイロードの設定。変更箇所のみでよい。
    # lic_type 1:basciユーザ
    # lic_type 2:ライセンスユーザ
    payload = f'{{"type":{lic_type}}}'

    # Update a User APIによるライセンス割り当ての変更
    url = f'/v2/users/{target_id}'

    # 変更前のユーザデータ確認
    conn.request("GET", url , headers=headers )
    res = conn.getresponse()
    data = res.read()
    print("変更前データ")
    print(data.decode("utf-8"))

    ## 変更
    conn.request("PATCH", url, payload, headers)
    res = conn.getresponse()
    data = res.read()
    print(data.decode("utf-8"))

    # 変更後のユーザデータ確認
    conn.request("GET", url , headers=headers )
    res = conn.getresponse()
    data = res.read()
    print("変更後データ")
    print(data.decode("utf-8"))

def get_jwt():
    #エポックタイム取得
    current_time = datetime.datetime.now().timestamp()

    iss = "★ZoomAPPの設定画面から取得したAPI Keyを指定★"
    exp = current_time + 600 # 10分有効
    secret = "★ZoomAPPの設定画面から取得したAPI Secretを指定★"

    jwstoken = jwt.encode(
        {
            "iss": iss,
            "exp": exp
        }, secret, algorithm="HS256")

    return jwstoken

# ライセンス切替
# lic_type 1:basciユーザ
# lic_type 2:ライセンスユーザ
lic_type = 2
zoom_userlicence_change("<Emailアドレス>",lic_type )
このプログラムを実行し、変更後データのtypeが2になっていたら成功です!
