まえがき
SAP NetWeaver AS ABAP Developer Edition 7.52のインストールを実施を試みたところ、1つの参考サイトだけでは達成できず、複数のサイトを参考にする必要があった。
① 家でABAPができる環境を作る
② SAP NetWeaver AS ABAP トライアル版構築 (1)概要
③ Adjusting installer script for SAP NetWeaver Dev Edition for distros with kernel version 5.4 or higher
①、②は日本語のブログ、③はmac osにインストールを試みた英語圏ユーザのSAP Community投稿記事となっている。基本的には①と②を参考にすることで突き進めるが、③で実施しているshファイルの一部エスケープを行わないと、SAP環境のインストールで躓くことが分かった。③を実施している日本語サイトを見つけられなかったので本記事を投稿するに至った。
手順①:事前準備
Virutalboxをダウンロードする

リンク:https://www.oracle.com/virtualization/technologies/vm/downloads/virtualbox-downloads.html
私はver7.0.22を使ったが、最新版であれば問題ないと思う。①と②ではver6を使っていた。
Windowsの64-bitをダウンロードすること
opeSUSEをダウンロードする
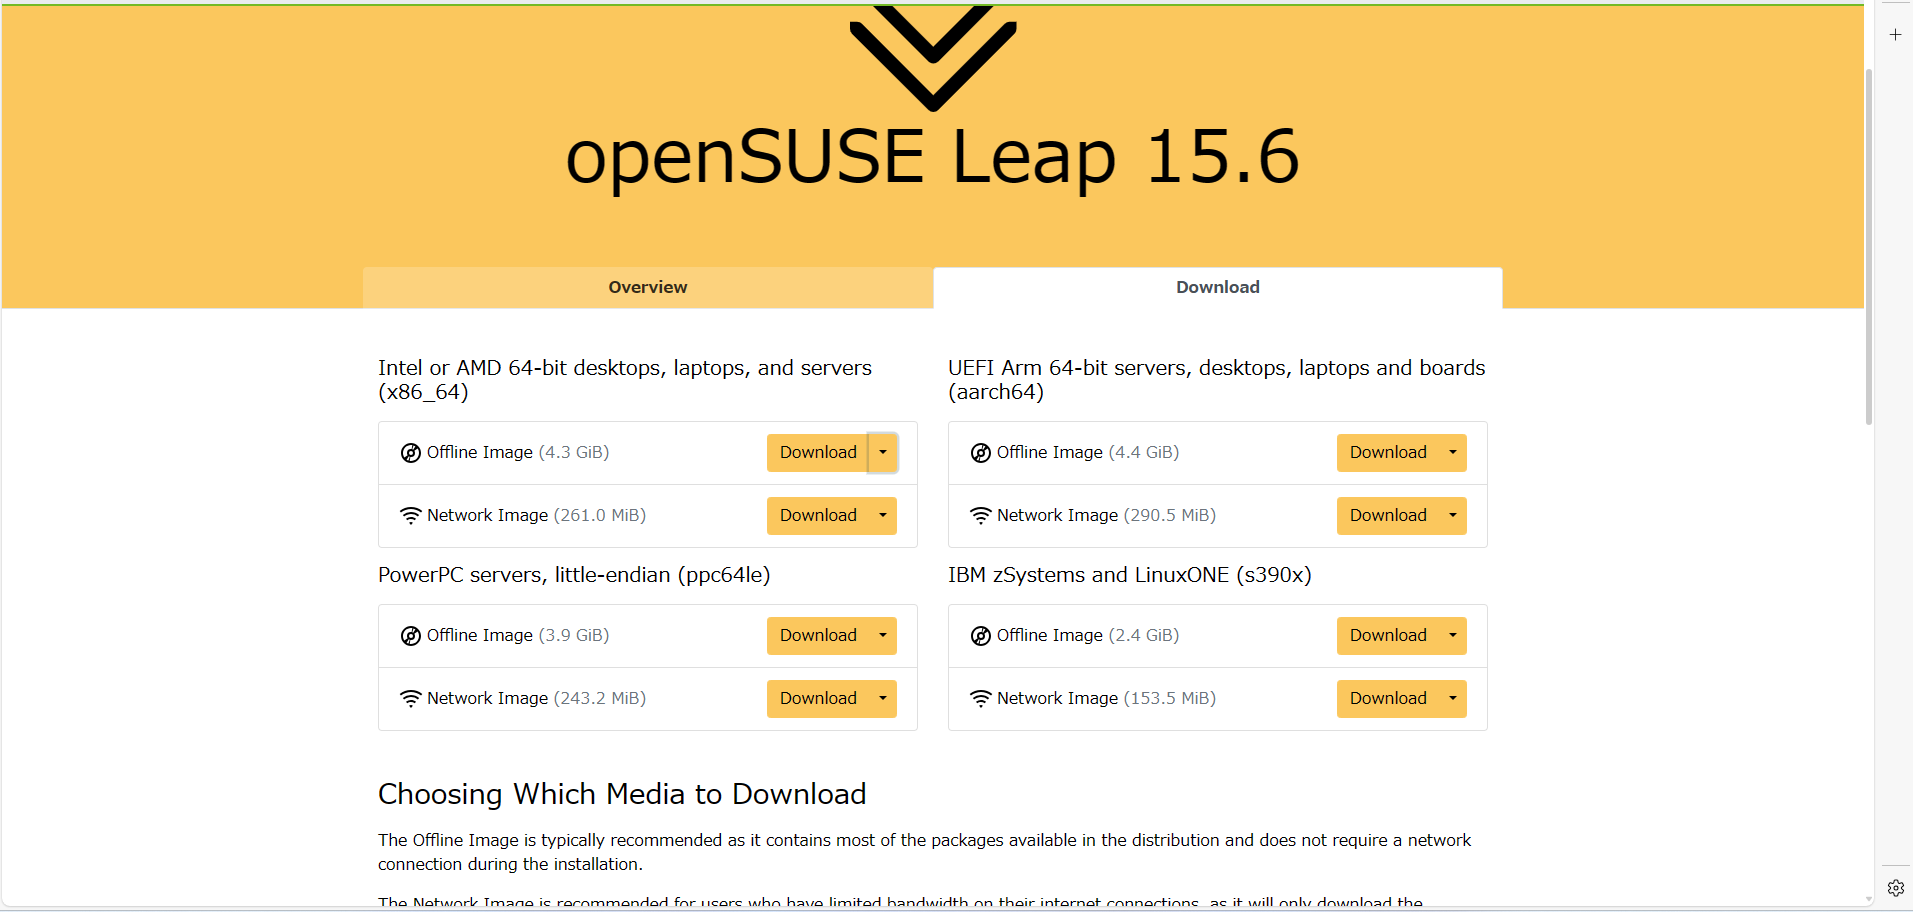
リンク:https://get.opensuse.org/leap/15.6/
・Intel or AMD 64-bit desktops, laptops, and servers (x86_64)
・Offline Image
をダウンロード
SAP NetWeaver AS ABAP Developer Edition 7.52をダウンロード

リンク:https://developers.sap.com/trials-downloads.html?search=7.52
・Part1~11
・License
をダウンロード
・アカウントログインを求められるので持ってない人は登録が必要
7-zip file managerをダウンロード
リンク:https://7-zip.opensource.jp/
・Part1~11
・License
の解凍を行っておく
手順②:仮想マシンの作成

virtualboxをインストールし、「新規」から仮想マシンを作成

・名前:任意
・フォルダー:任意
・ISOイメージ:手順①でダウンロードしたopeSUSEのディスクイメージを選択
「次へ」を押す
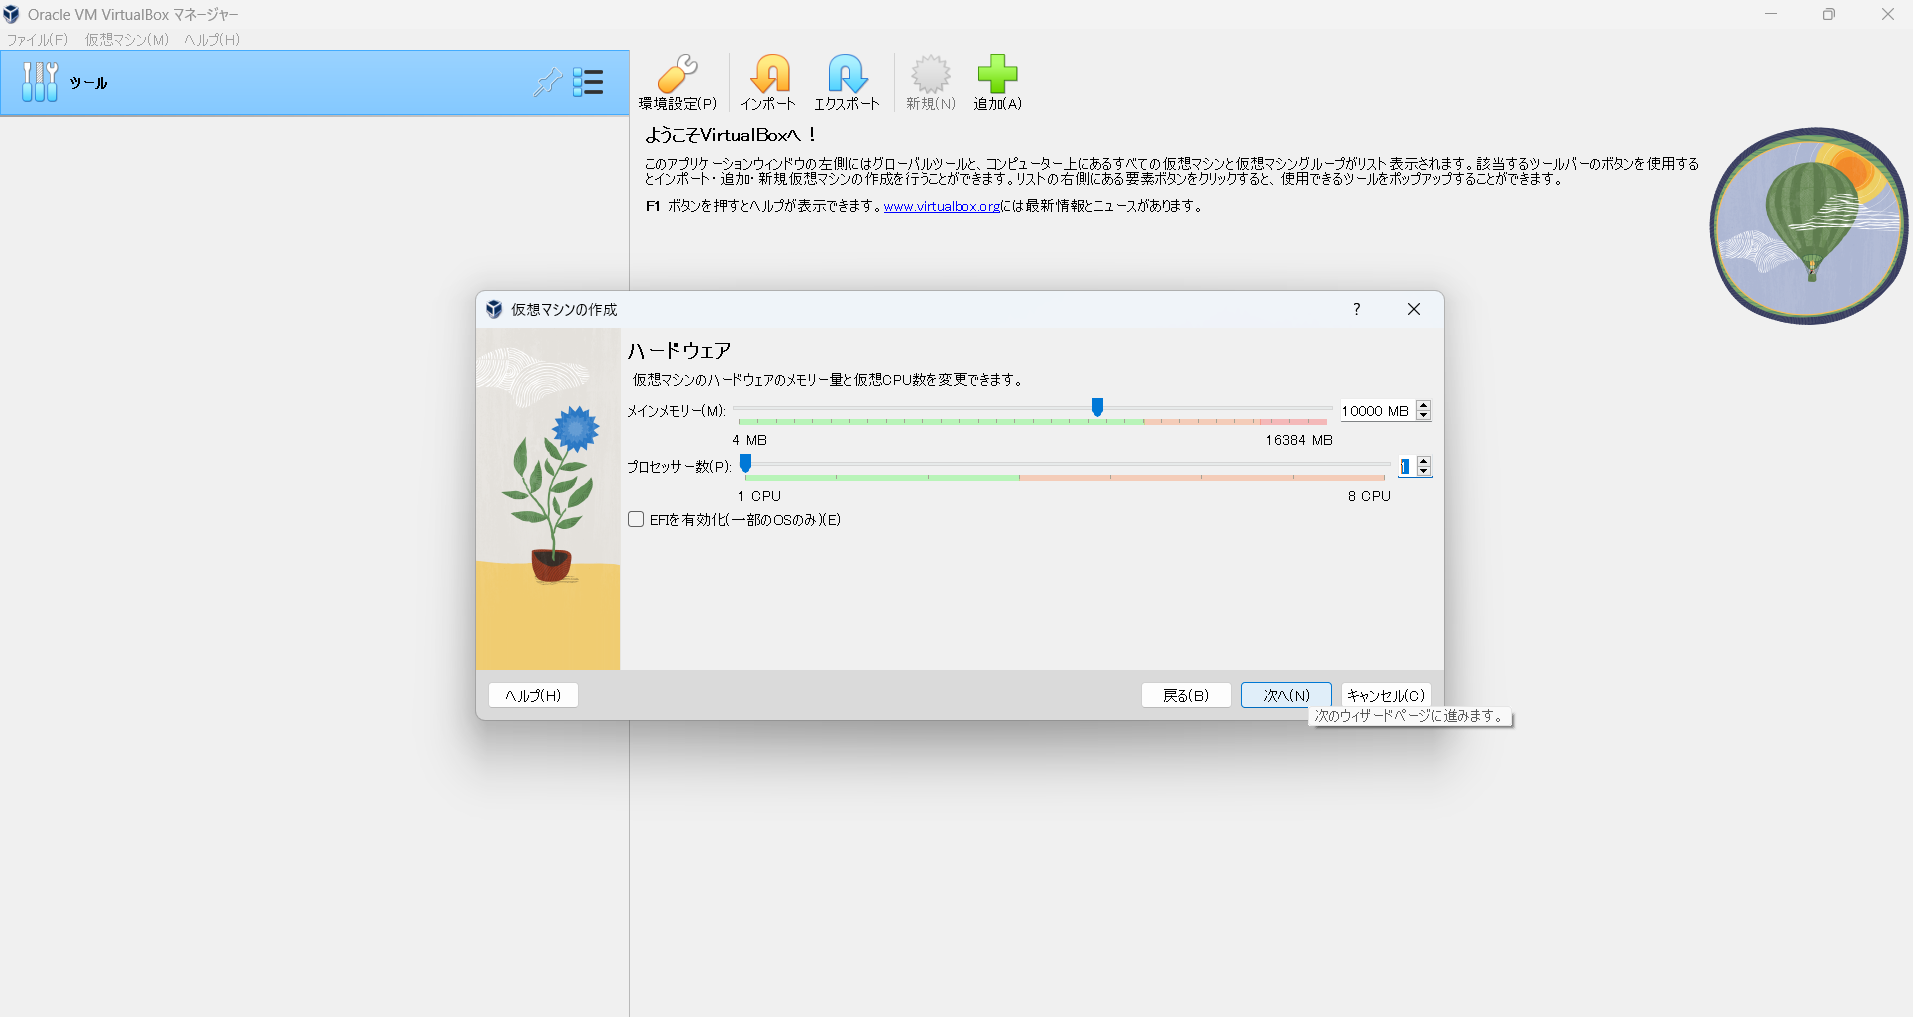
メモリの割り当て:10000から MB (8G~B以上が必要とのこと)
プロセッサー数:1
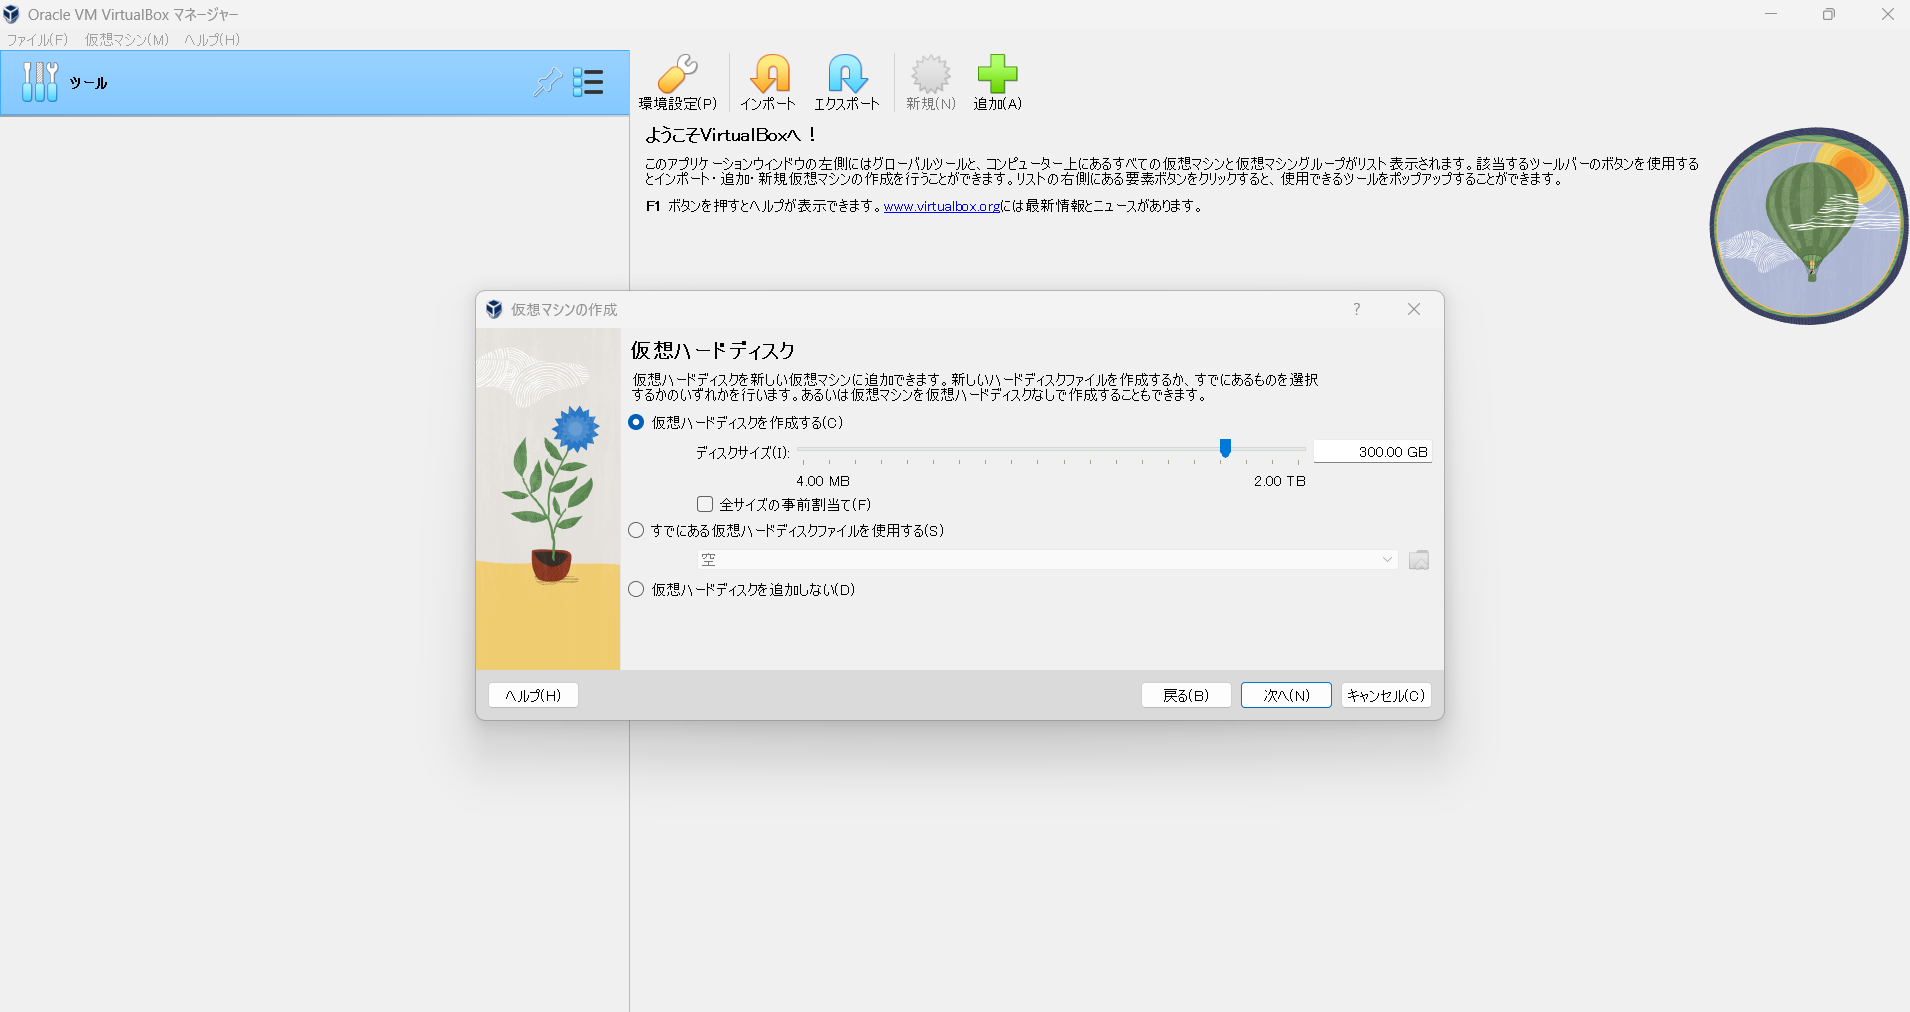
・仮想ハードディスクを作成するを選択
・300 GB (100 GB以上が必要とのこと)
「次へ」を押す

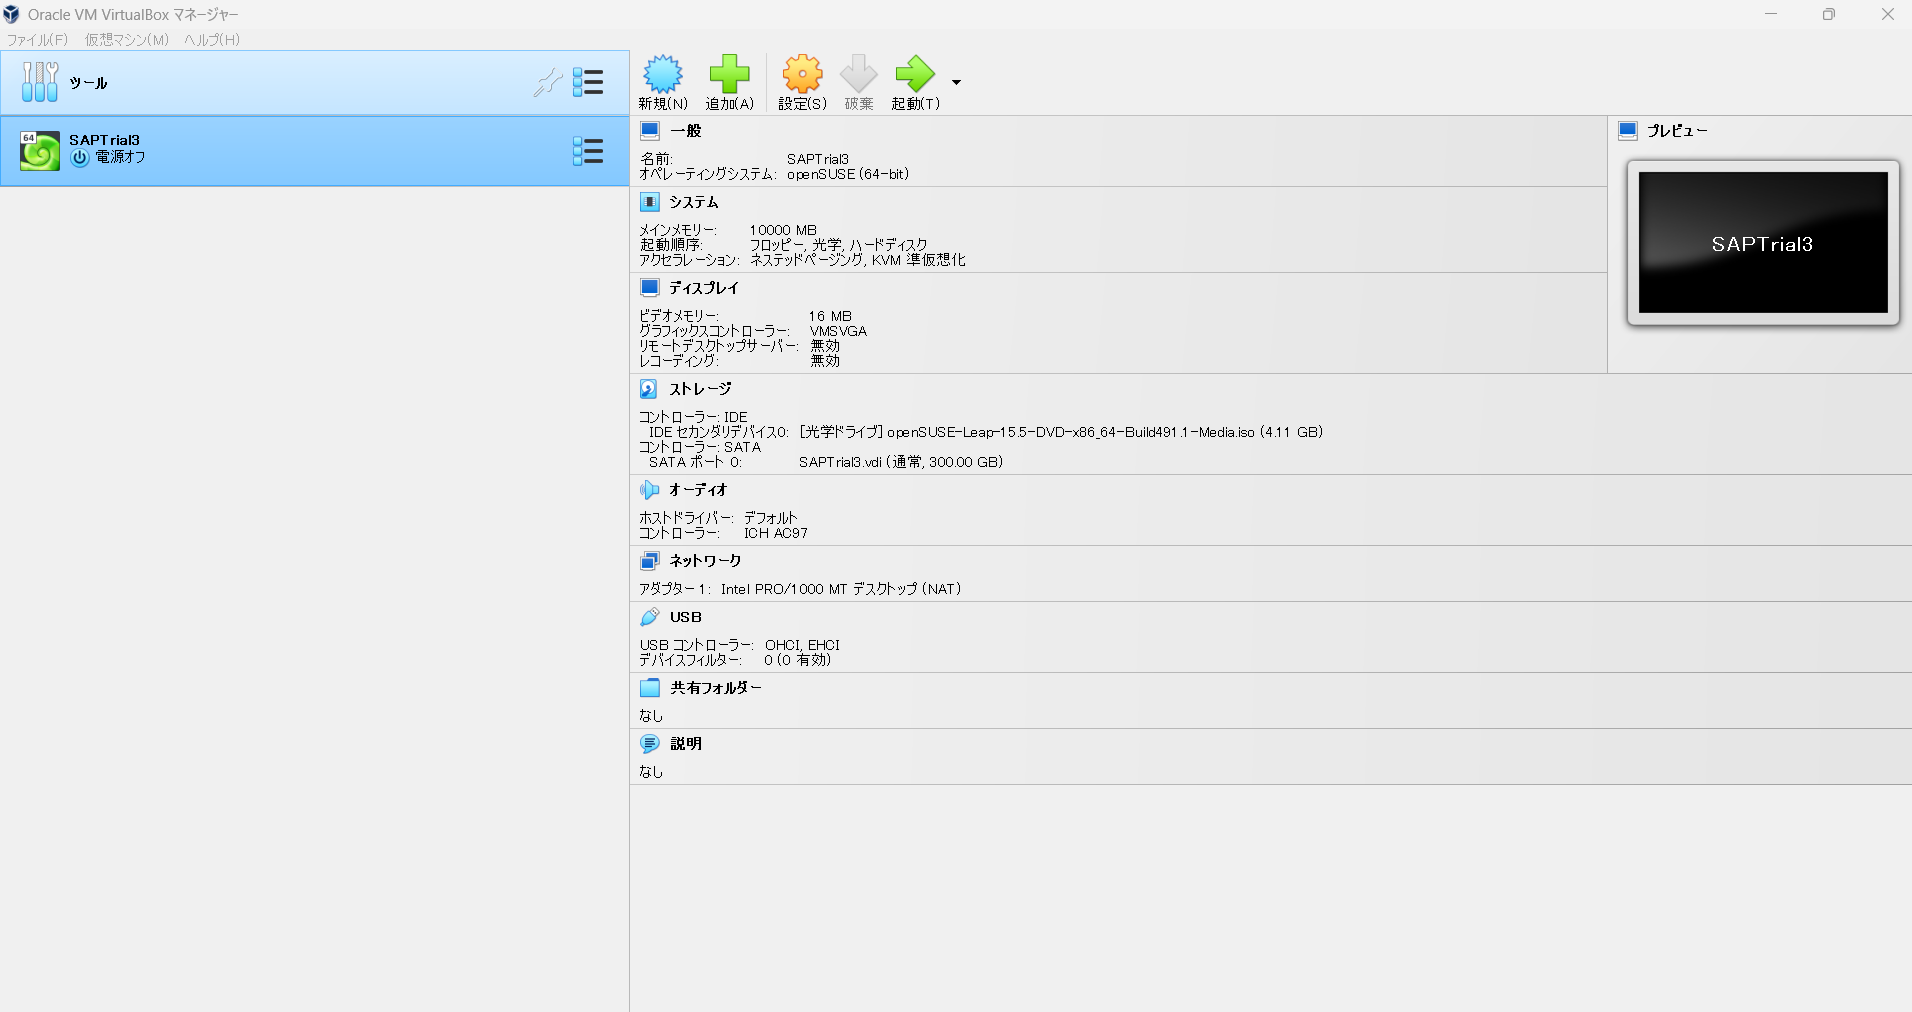
「完了」を押す
手順③:OSのインストール
「起動」を押す

installationを選択しEnter(マウス選択できないときはキーボードの↓で選択)

・English(US)/English(US)
を選択
「Next」を押す

オンラインレポジトリは有効化する →「YES」
※画像が日本語になっているのは気にしないでください、私のミスです
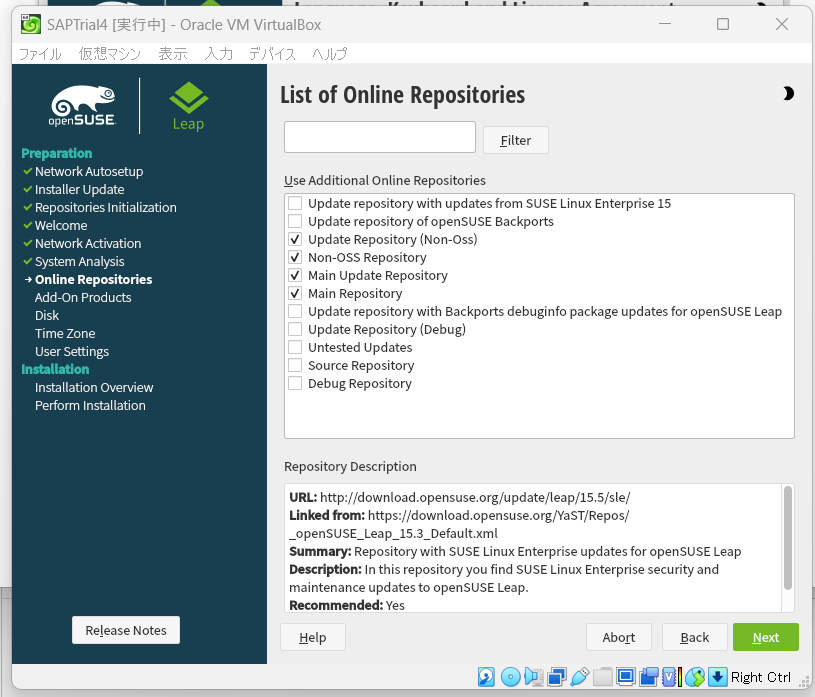
キャプチャの通り、4つチェックし、Nextを押す

GNOMEを選択、Nextを押す
※画像が日本語になっているのは気にしないでください、私のミスです

Expert Partitionerを選択 → Edit Partition

sda2を選択
Edit
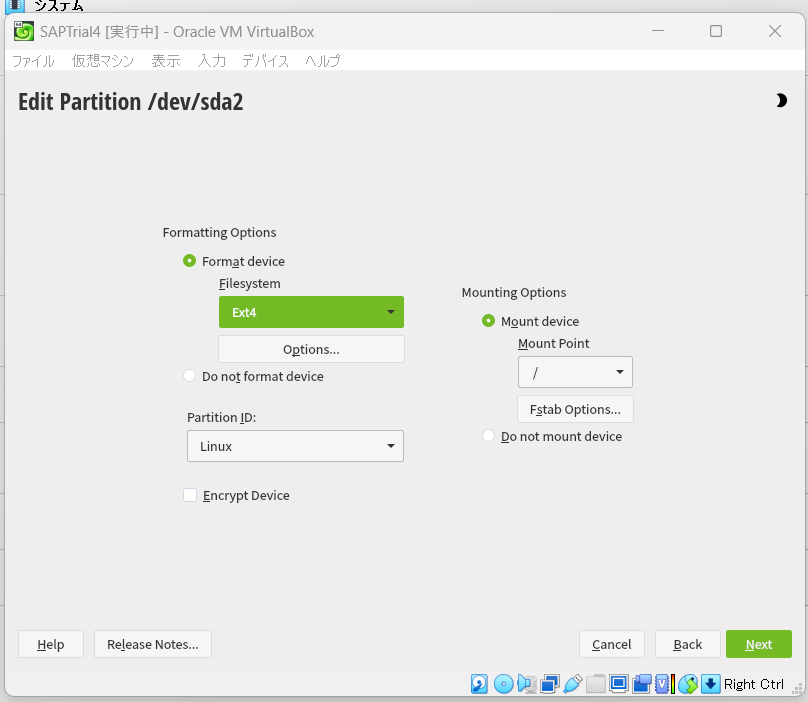
Ext4
Next

Accept
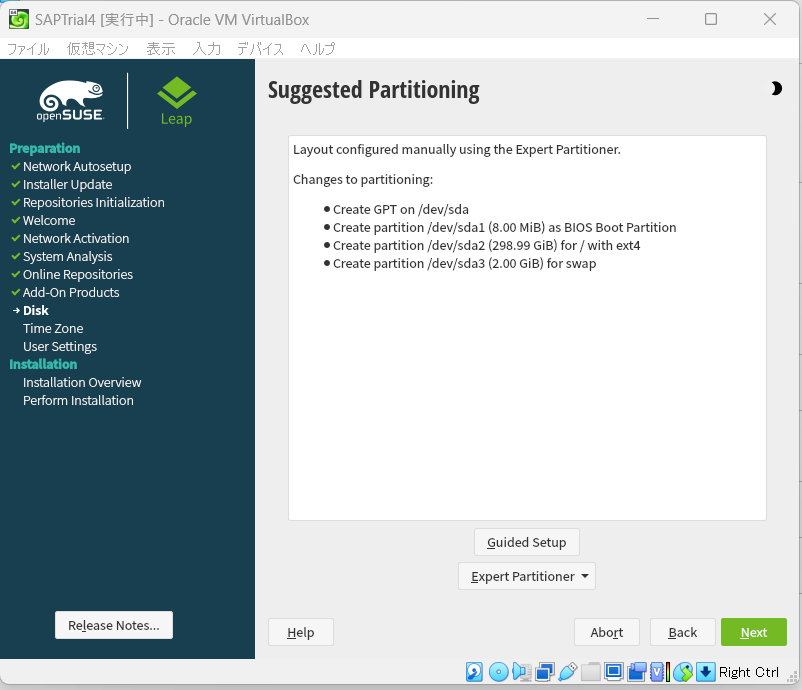
Next
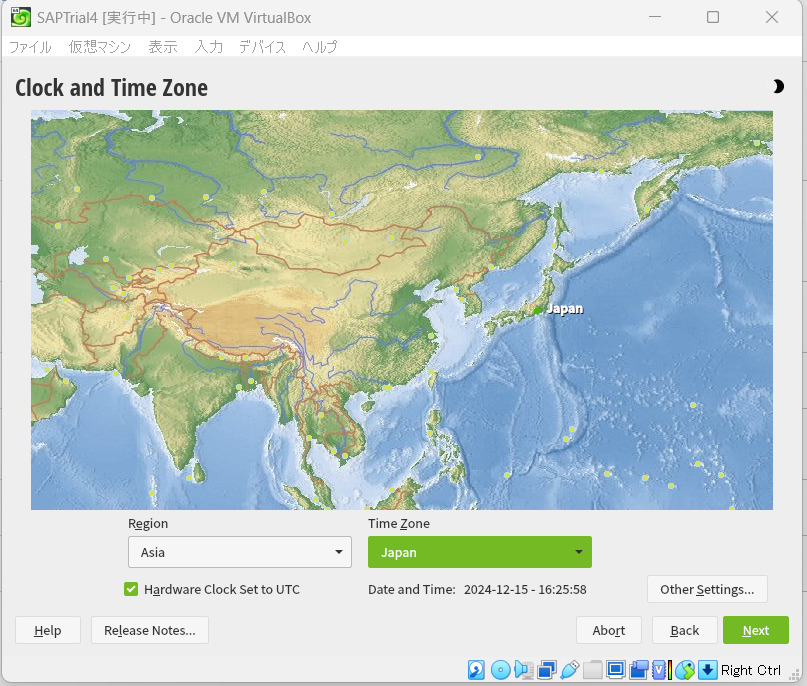
Japan
Next
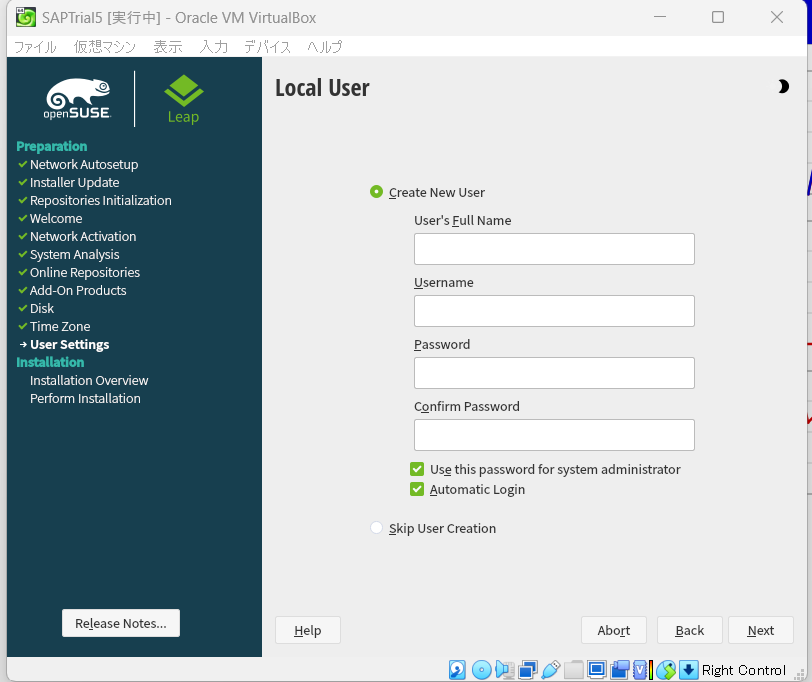
ユーザ名
パスワードを入力

・Firewall will be desabled
・SSH Service will be enabled
(enable/disable)で切り替えが可能
Install

インストール成功
このまま openSUSE Leap 15.5 でEnter

YaSTを開く

パスワードを入力。
OK

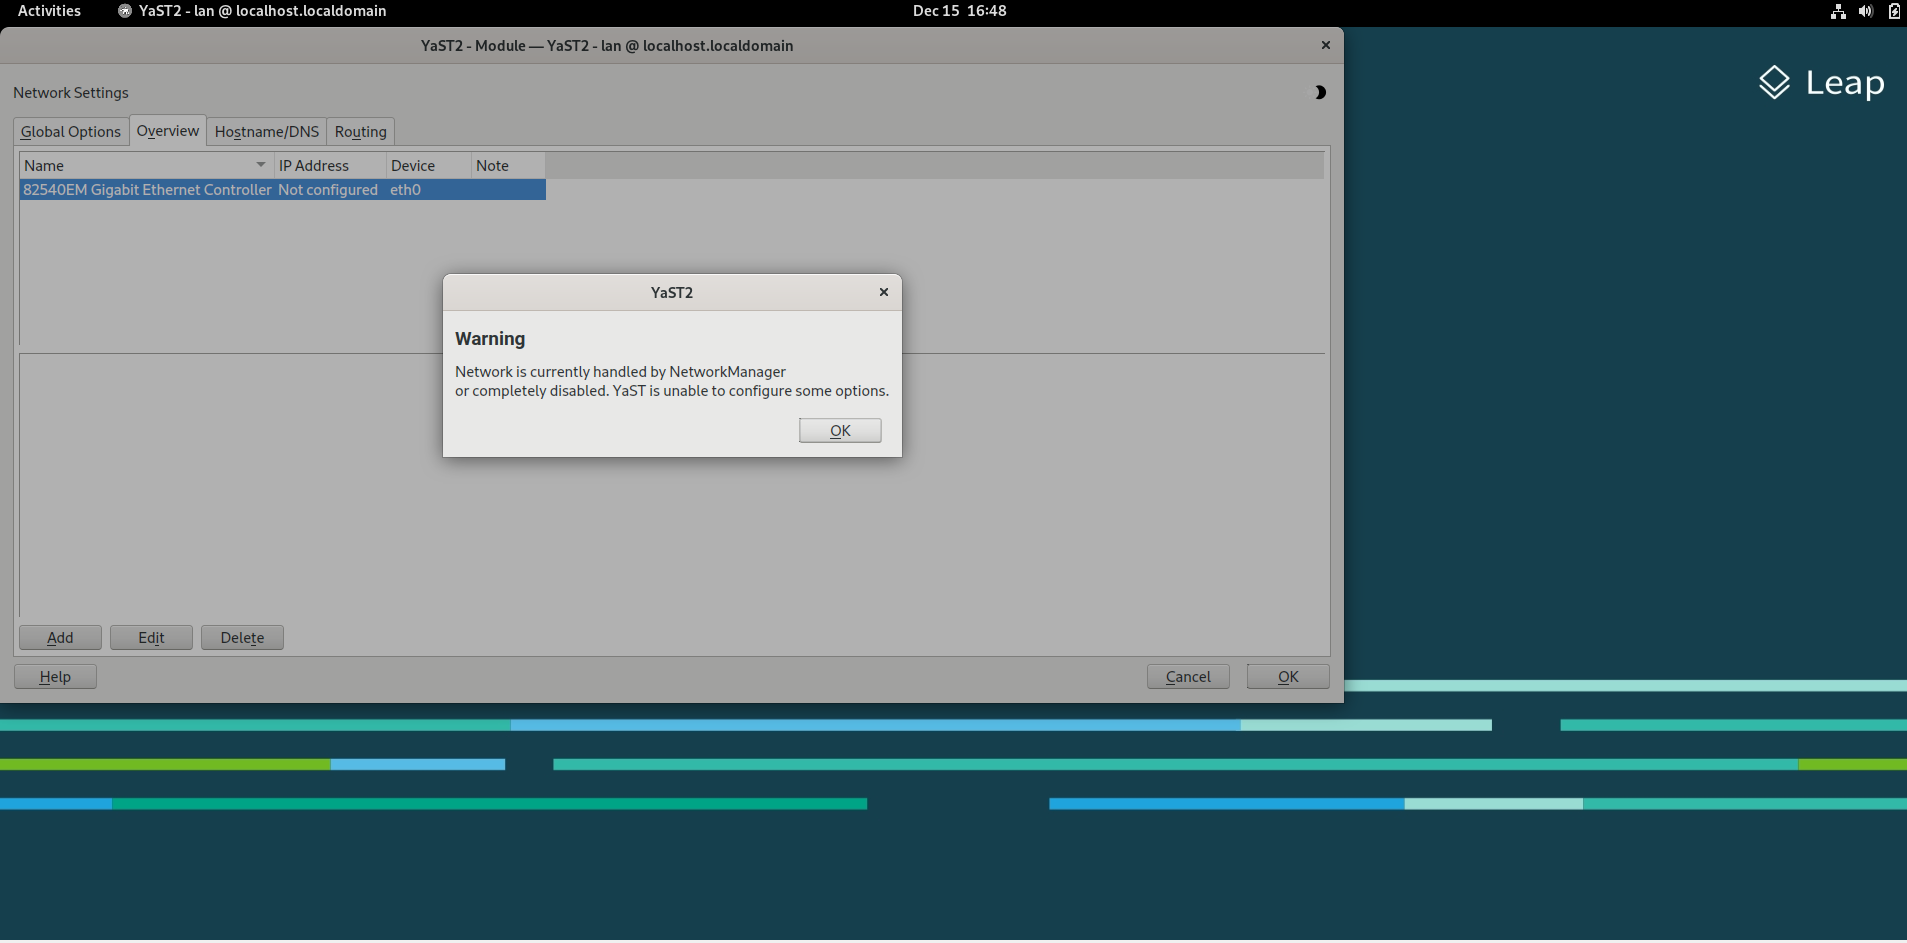
Hostname/DNSのタブで、~DHCPがYESになっている場合はnoに変えておく

Software/Online Update
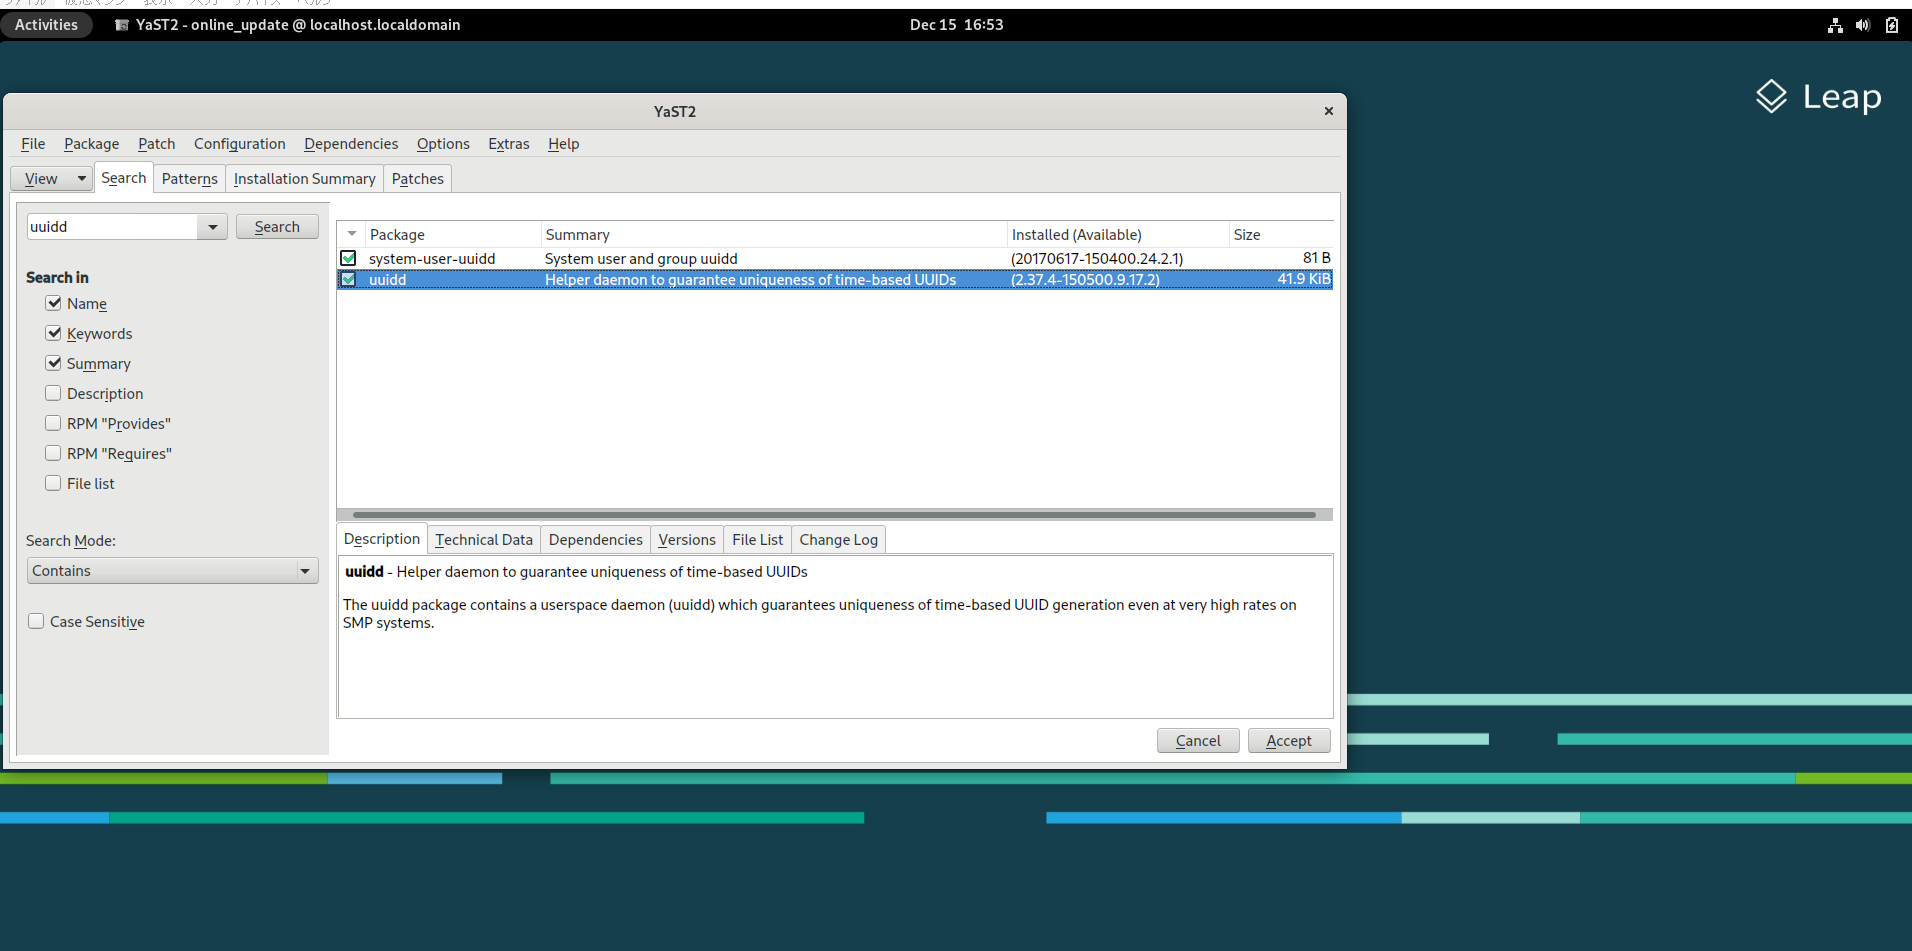
「uuidd」と検索し、2つチェックし、Accept

Continue

完了したら、Accept
手順④:共有フォルダーの設定
Linuxは立ち上げたままにしておいて

設定

・共有フォルダー
・フォルダーのパス:手順①でダウンロード&解凍したファイルが入っているフォルダーを選択
・読み込み専用:□
・自動マウント:☑
・永続化する:☑
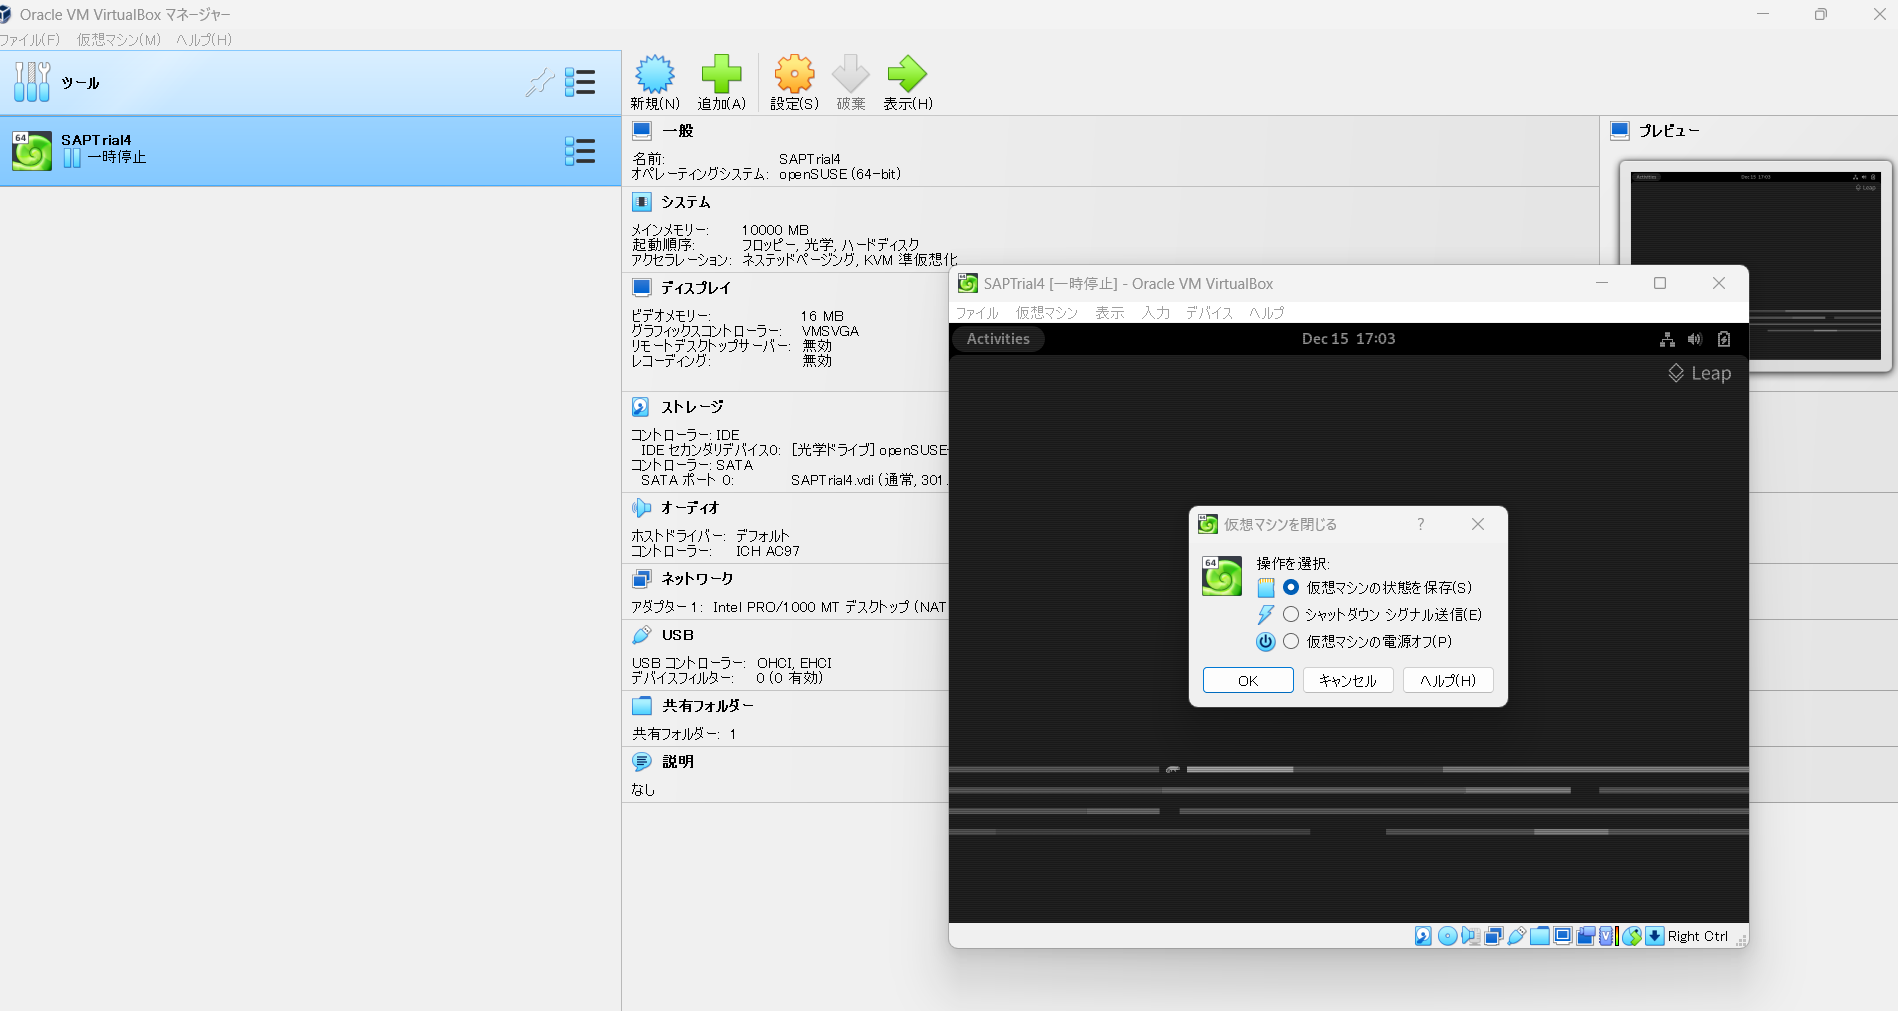
一度電源を切る
手順⑤:SAPインストール

XTERM
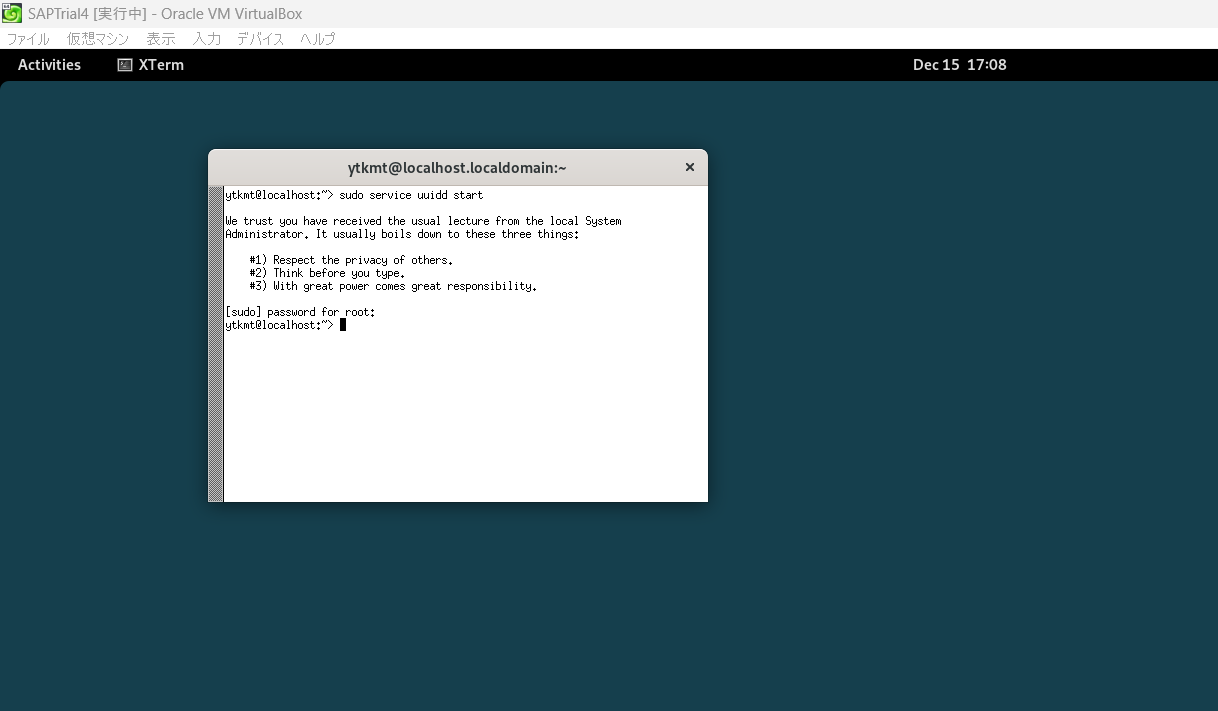
sudo service uuidd start

sudo service –status-all |grep uuidd
※画像にはついていないですが、sudoをつけてください
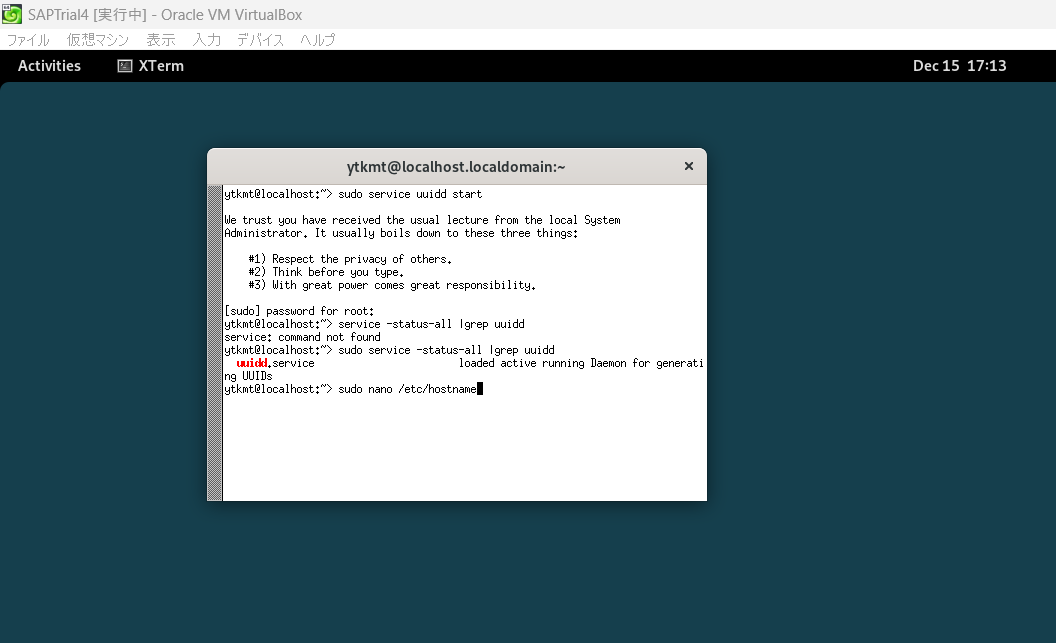
sudo nano etc/hostname

vhcalnplci
を追記。
Ctrl + O でWrite Out
Enterで確定
Crtl + X でExit

catコマンドでホスト名の変更を確認
※仮想マシンを再起動するとウィンドウの上部に書いてあるlocalhost.localdomainがvhcalnplciに変更される
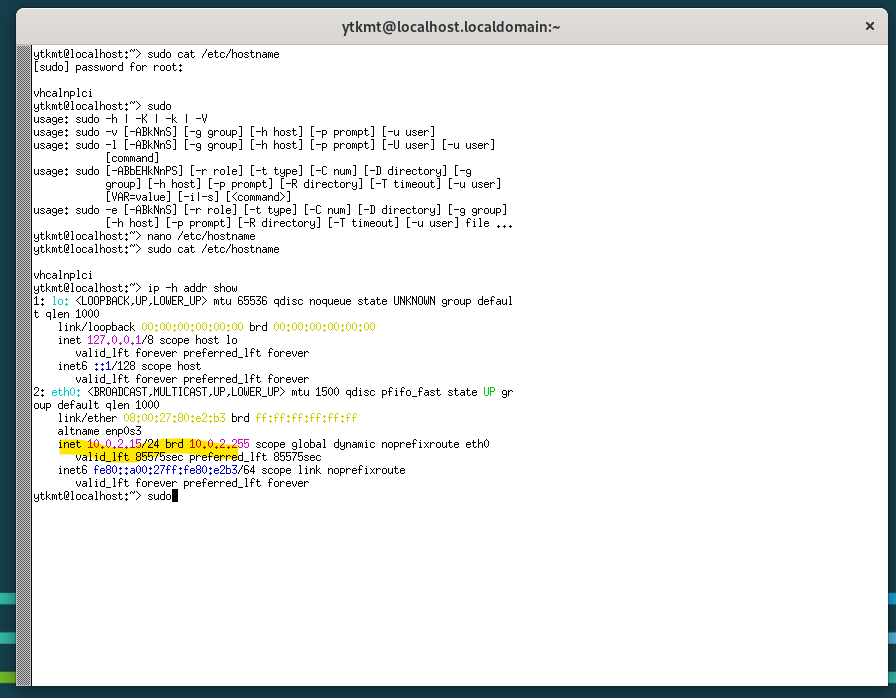
sudo ip -h addr show
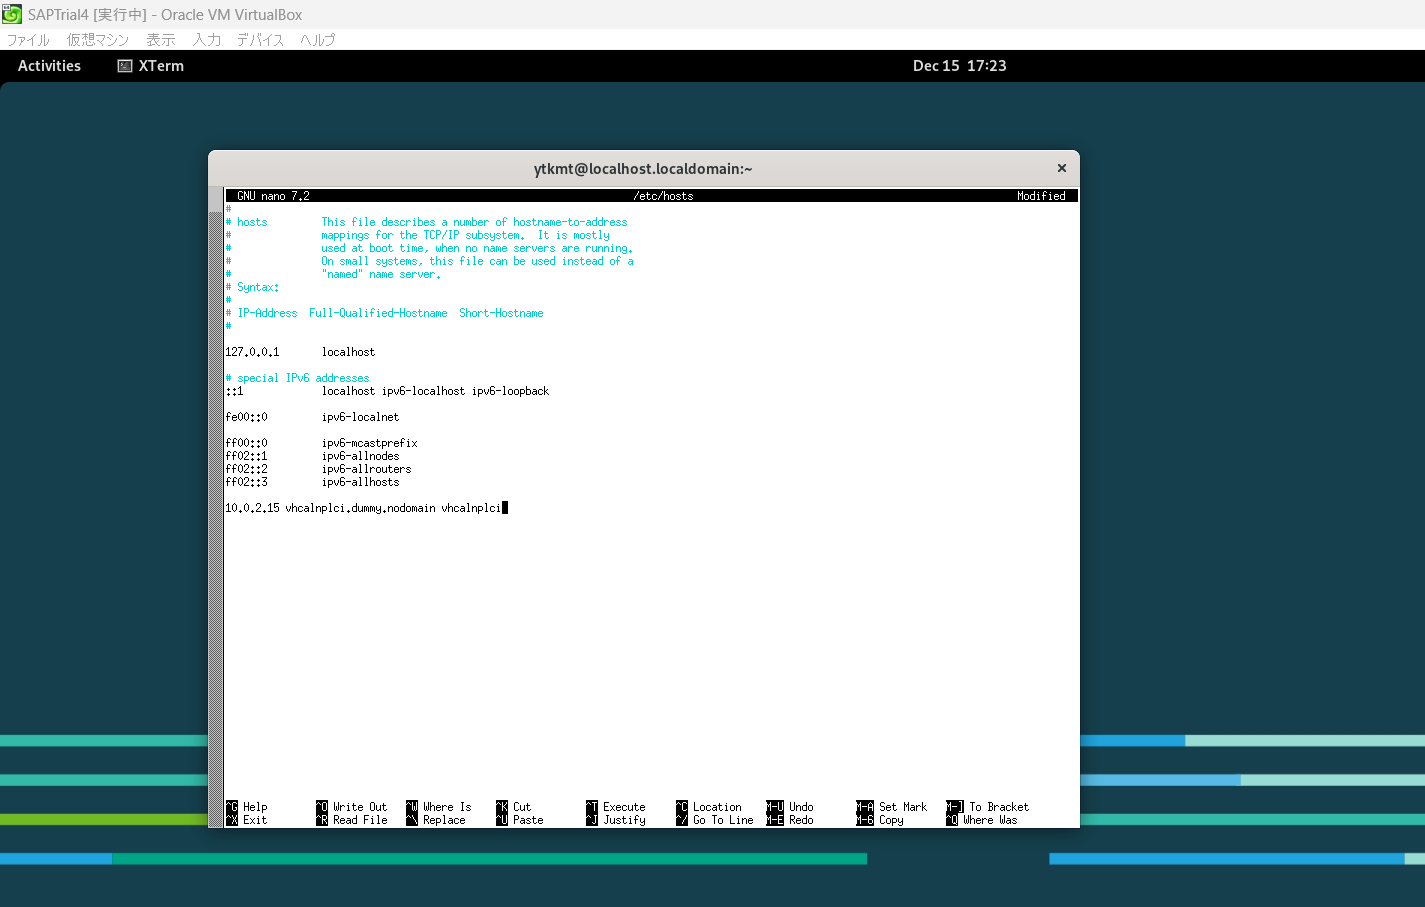
sudo nano /etc/hosts
10.0.2.15 vhcalnplci.dummy.nodomain vhcalnplci
を最終行に追記
Ctrl + O でWrite Out
Enterで確定
Crtl + X でExit
----------重要!install.shの一部をエスケープする---------------
./saphostexec -install || do_exit $ERR_install_saphost

# TODO: is it ok to remove /tmp/hostctrl?
cd /
rm -rf /tmp/hostctrl || log_echo "Failed to clean up temporary directory"
この記載を
 #Replace this line with one which tries to continue (this) main script using ‘&’:
    #./saphostexec -install || do_exit $ERR_install_saphost
    ./saphostexec -install &

#Wait for a while so that hopefully the asynchronous call ends:
    log_echo "Waiting 30 seconds for asynchronous call to /tmp/hostctrl/saphostexec -install to complete..."
    sleep 30
    log_echo "30 seconds are up, continuing the main script."

    # TODO: is it ok to remove /tmp/hostctrl?
    cd /
#Let's not remove the temporary directory, in case saphostexec command
#is still executing. So commenting out:
    # rm -rf /tmp/hostctrl || log_echo "Failed to clean up temporary directory"

# Now we modify the RUN_NPL executable (executable permissions are for sybnpl user):
FILENPL=/sybase/NPL/ASE-16_0/install/RUN_NPL
if test -f "$FILENPL"; then
    echo "$FILENPL exists. Adding the -T11889 option to config in that file:"
    sed -i 's/NPL.cfg \\/NPL.cfg -T11889 \\/g' /sybase/NPL/ASE-16_0/install/RUN_NPL
    cat $FILENPL
    echo "-T11889 config option added"
    sleep 15
else
    echo "$FILENPL does not exist. Not modifying what doesn't exist, ontologically seems ok."
fi
↑これに書き換える
私は元のファイルは残しておいて「install_updated.sh」として別途保存しておいた
ーーーーーーーーーー重要部分終了ーーーーーーーーーーーーーー

sudo -i
cd ../..
cd media
cd [手順①でダウンロード&解凍したフォルダ]
※画像の中ではlsコマンドでファイル名を確認しています。その際メモ帳やエラーメッセージフォルダが映りこんでいますが筆者が作ったものなのでお気になさらず。
chmod +x install_updated.sh
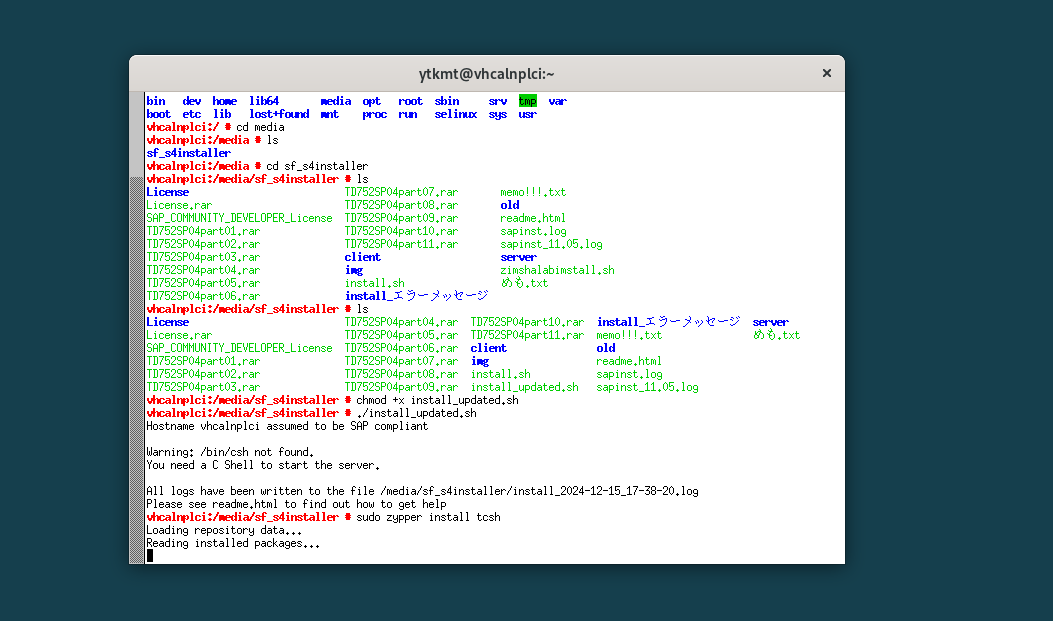
sudo zypper install tcsh

./install_updated.sh

説明書をSPACEで最終文まで進ませる
qを押す
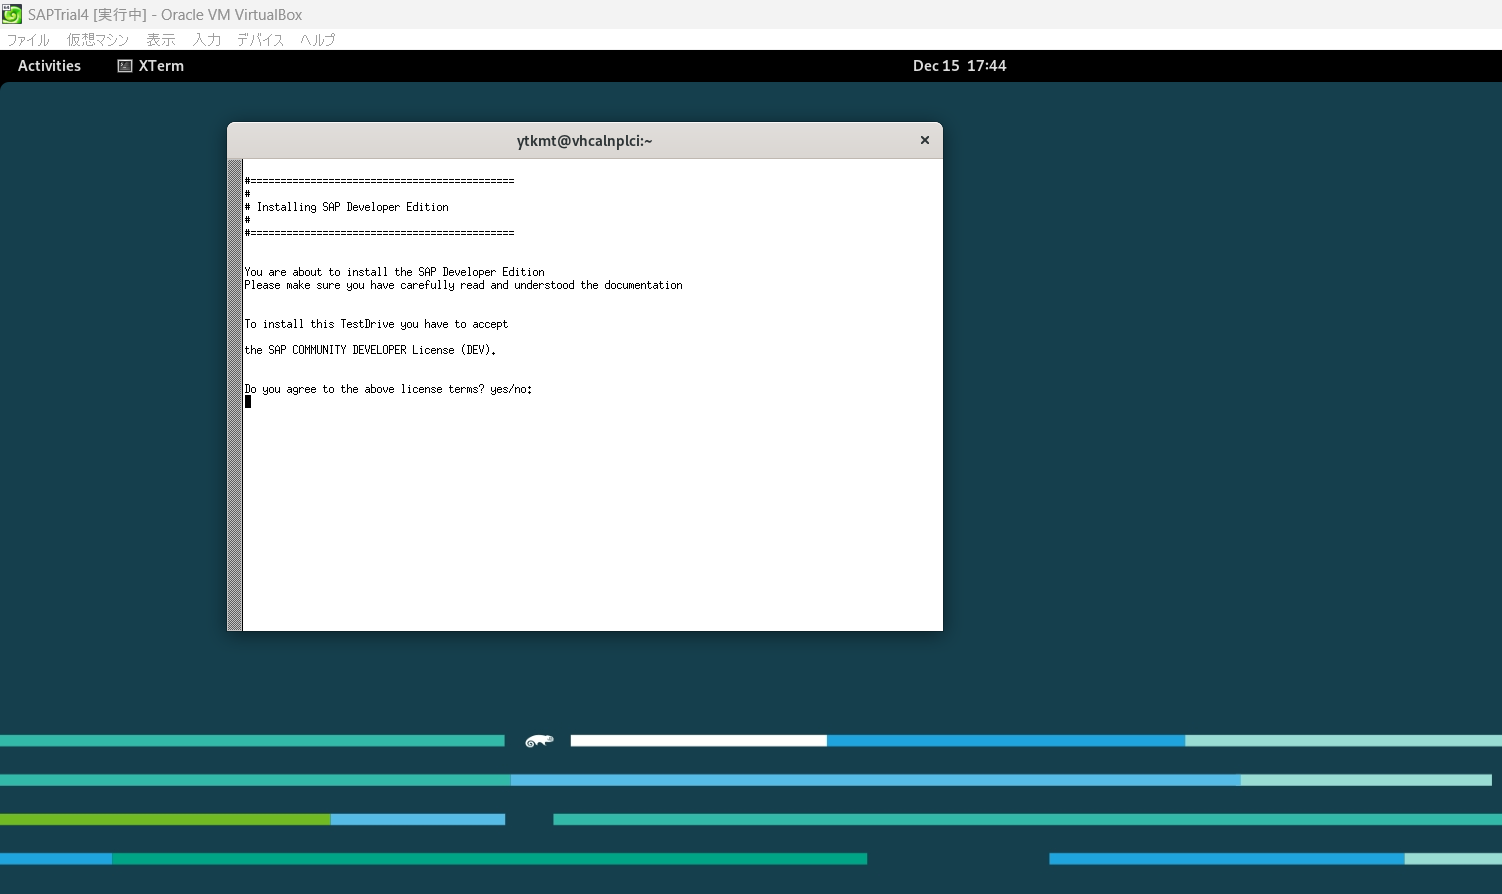
yes
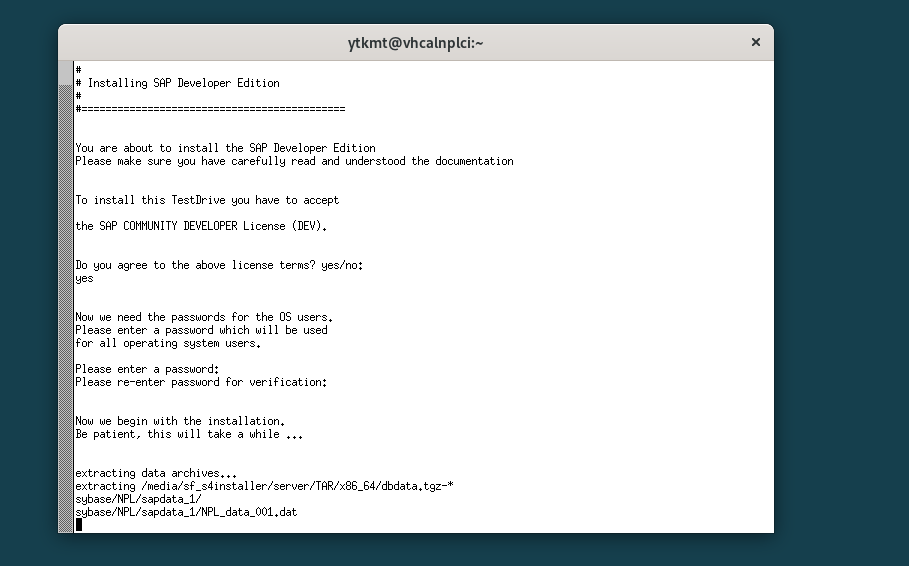
パスワードを入力

インストール成功
おまけ①:GUI設定
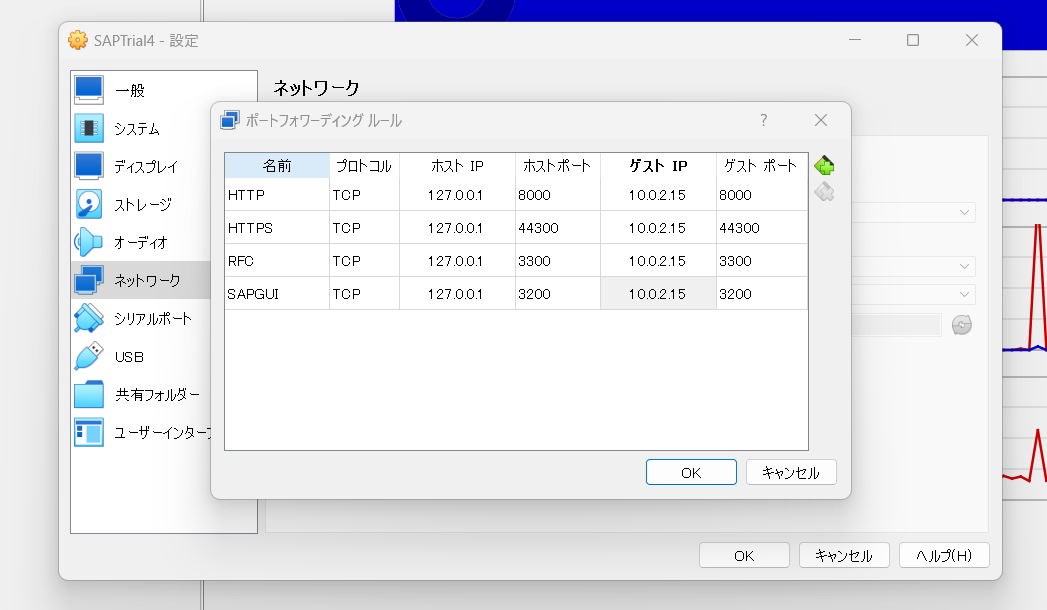
あとは参考サイト①と②のほうが充実しているのでそちらを参照してください。
おまけ②:ライセンス切れの場合

仮想マシンごと除去してください
おまけ③:PCのスペック
8GBのメモリが求められる中で、私はSAPのインストール用に以下を購入した。
本PCは16GBで価格3万円台のスペック。なお中華製。一応インストールできた
https://www.amazon.co.jp/dp/B0BWMRFYG5?ref=ppx_yo2ov_dt_b_fed_asin_title