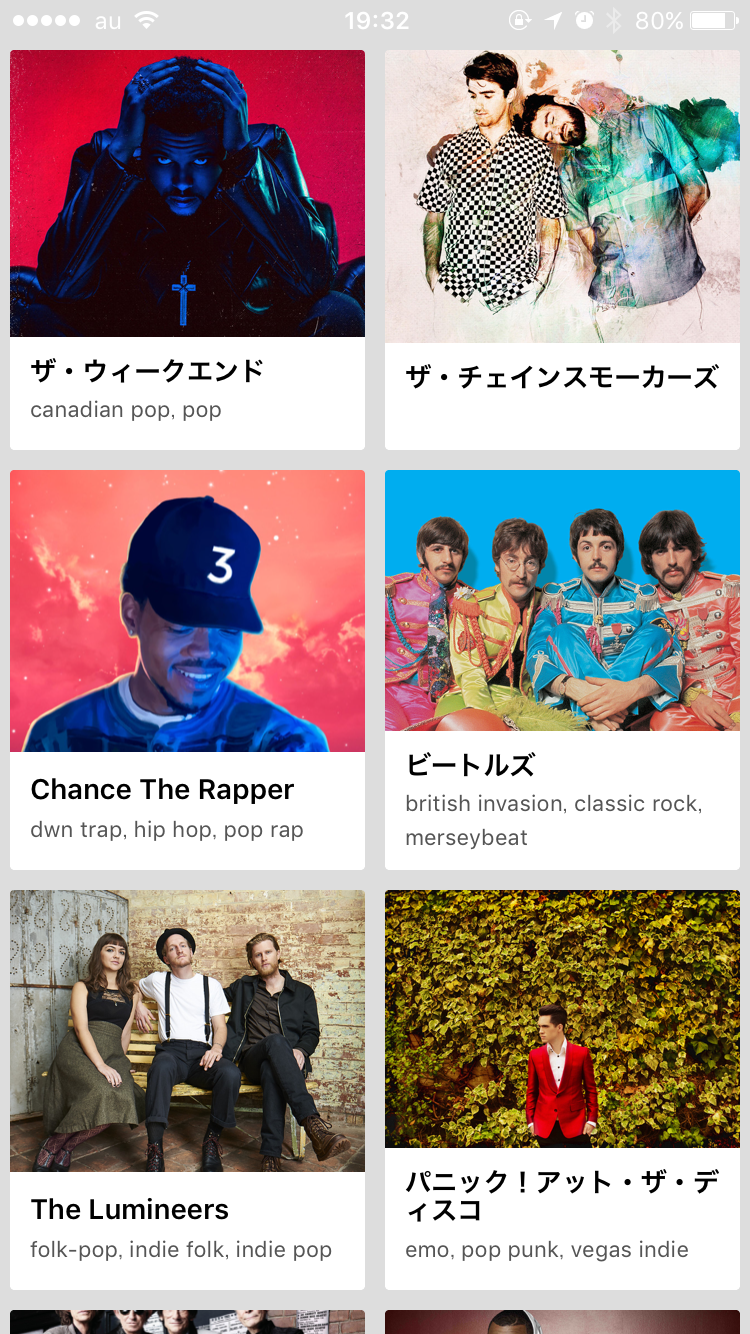
こんな感じのものをReactNativeでさくっと作る方法です。

Spotify の API を叩いて the のつくアーティスト一覧を表示しています。
コードはこちらにおいているので適宜参照いただければと思います。
https://github.com/mataki/react-native-listvew-two-column
まずはシンプルなリストビューとして表示する段階

  renderRow(data) {
    return (
      <View style={{ padding: 10, backgroundColor: 'white', margin: 5 }}>
        <Text>{data.name}</Text>
      </View>
    )
  }

  render() {
    return (
      <ListView
        style={{ flex: 1, paddingTop: 20, backgroundColor: '#dddddd' }}
        dataSource={this.state.dataSource}
        renderRow={this.renderRow}
        />
    );
  }
基本的な ListView のサンプルだと思います。アーティスト名を一覧表示しています。
横にならぶようにする
こんな感じ

diff --git a/main.js b/main.js
index 8b09616..00fdb1f 100644
--- a/main.js
+++ b/main.js
@@ -34,7 +34,7 @@ class App extends React.Component {
   renderRow(data) {
     console.log(data)
     return (
-      <View style={{ padding: 10, backgroundColor: 'white', margin: 5 }}>
+      <View style={{ padding: 10, backgroundColor: 'white', margin: 5, width: 100, height: 100 }}>
         <Text>{data.name}</Text>
       </View>
     )
@@ -51,6 +51,7 @@ class App extends React.Component {
     return (
       <ListView
         style={{ flex: 1, paddingTop: 20, backgroundColor: '#dddddd' }}
+        contentContainerStyle={{ flexDirection: 'row', flexWrap: 'wrap' }}
         dataSource={this.state.dataSource}
         renderRow={this.renderRow}
         />
ポイントは、 contentContainerStyle の属性の追加です。これで横向きにアイテムをならるように指定します。ここでは、リストの内容は適当に 100x100 のサイズにしています。
2カラムに横幅を調整する
では、横幅をいい感じに調整してみましょう。こんな感じです。

diff --git a/main.js b/main.js
index 00fdb1f..d203fe5 100644
--- a/main.js
+++ b/main.js
@@ -5,6 +5,7 @@ import {
   Text,
   View,
   ListView,
+  Dimensions,
 } from 'react-native';

 class App extends React.Component {
@@ -17,6 +18,9 @@ class App extends React.Component {
       isLoading: true,
       dataSource: ds.cloneWithRows([1, 2]),
     };
+
+    this.itemWidth = (Dimensions.get('window').width - 20) / 2;
+    this.renderRow = this.renderRow.bind(this)
   }

   componentWillMount() {
@@ -34,7 +38,7 @@ class App extends React.Component {
   renderRow(data) {
     console.log(data)
     return (
-      <View style={{ padding: 10, backgroundColor: 'white', margin: 5, width: 100, height: 100 }}>
+      <View style={{ padding: 10, backgroundColor: 'white', margin: 5, width: this.itemWidth, height: 100 }}>
         <Text>{data.name}</Text>
       </View>
Dimensions を使って画面の横幅を取得し、マージン分を調整して半分にします。
完成
あとは、画像を入れるなりして完成ですね。

diff --git a/main.js b/main.js
index d203fe5..682f529 100644
--- a/main.js
+++ b/main.js
@@ -4,6 +4,7 @@ import {
   StyleSheet,
   Text,
   View,
+  Image,
   ListView,
   Dimensions,
 } from 'react-native';
@@ -36,10 +37,14 @@ class App extends React.Component {
   }

   renderRow(data) {
-    console.log(data)
+    const image = data.images[0]
     return (
-      <View style={{ padding: 10, backgroundColor: 'white', margin: 5, width: this.itemWidth, height: 100 }}>
-        <Text>{data.name}</Text>
+      <View style={{ backgroundColor: 'white', margin: 5, width: this.itemWidth, height: 200, borderRadius: 2, overflow: 'hidden' }}>
+        <Image source={{ uri: image.url }} style={{ flex: 1, height: 50 }}/>
+        <View style={{ padding: 10 }}>
+          <Text style={{ fontSize: 14, fontWeight: '600', marginBottom: 5 }}>{data.name}</Text>
+          <Text style={{ fontSize: 11, color: '#555555'}}>{data.genres.slice(0, 3).join(', ')}</Text>
+        </View>
       </View>
     )
   }
まとめ
とても簡単に横並びの一覧表示が出来たと思います。Flexboxの表現力ならではかなと思います。Flexboxに慣れていない段階だと ReactNative のレイアウトはなかなか勘所が難しいですが、慣れてくると気持ちよく出来るようになってくると思います。Flexboxいいよ!
React Native Advent Calendar 2016 3日目 の Exponent で React Native のサンプルをさくっと公開する で紹介した Exponent でサンプルを公開しています。こちらも触ってみていただけると動きも見れてよいかと思います。タップすると Spotify のページが開くようにもしてみました。差分