2
4

Delete article

Deleted articles cannot be recovered.

Draft of this article would be also deleted.

Are you sure you want to delete this article?

More than 3 years have passed since last update.

UVLayoutを使ってオブジェクトを敷き詰める

Posted at

UVlayout00.jpg
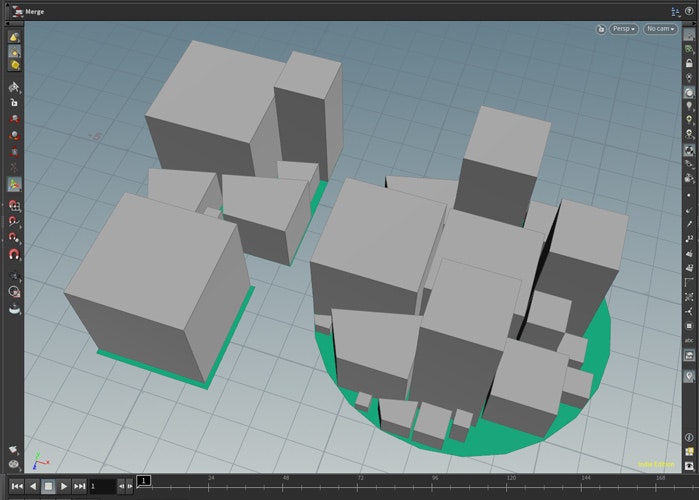
UVLayoutはUVだけでなく裏技的な使い方で、オブジェクトを敷き詰めるのに使えます。

参考:
「Houdini 17 Quicktip: (Ab)Using The UV Layout SOP For Geometry Packing」
https://vimeo.com/296292351

Entagmaさんのチュートリアルを参考に試してみました。
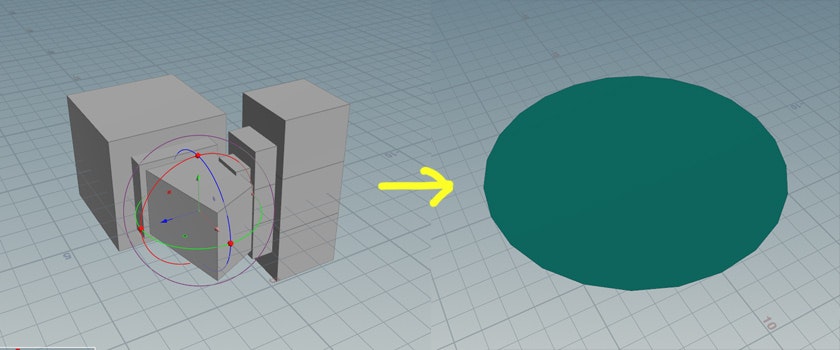
UVlayout02.jpg
こんな感じのオブジェクト(重なっているので実際はもっとたくさんあります)を円形の地面に敷き詰めます。
オブジェクトは平面でなくても、なんでも良いようです。適当に並べておけばOKです。
node.jpg
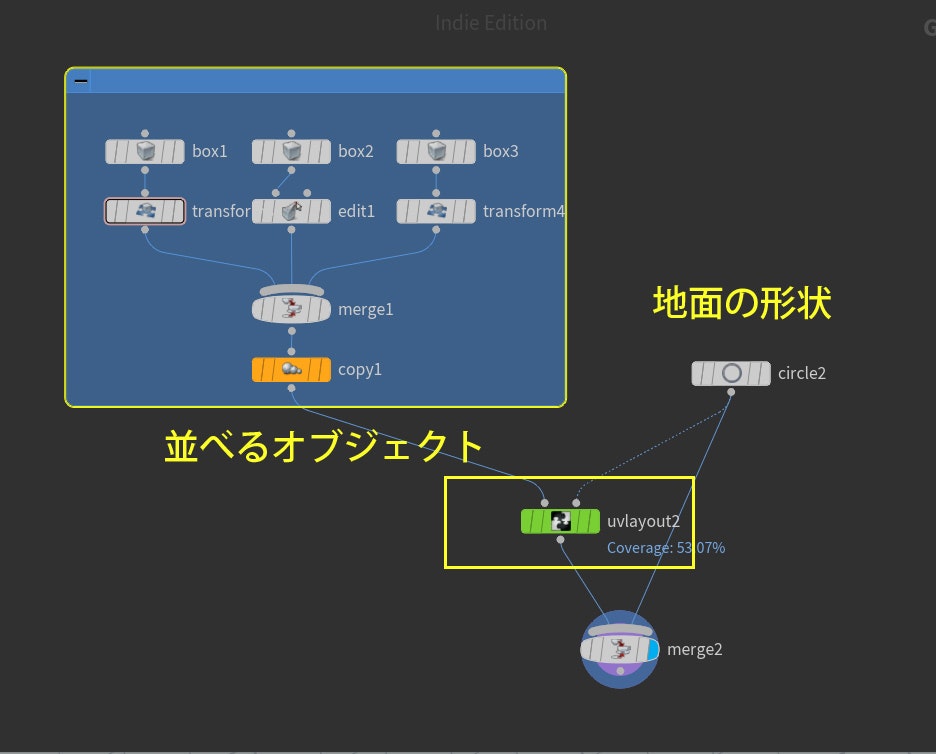
ノードはこんな感じ。
敷き詰めるオブジェクトを第1インプット、地面の形状(ここでは円形)を第2インプットに繋ぎます。

UVlayout01.jpg

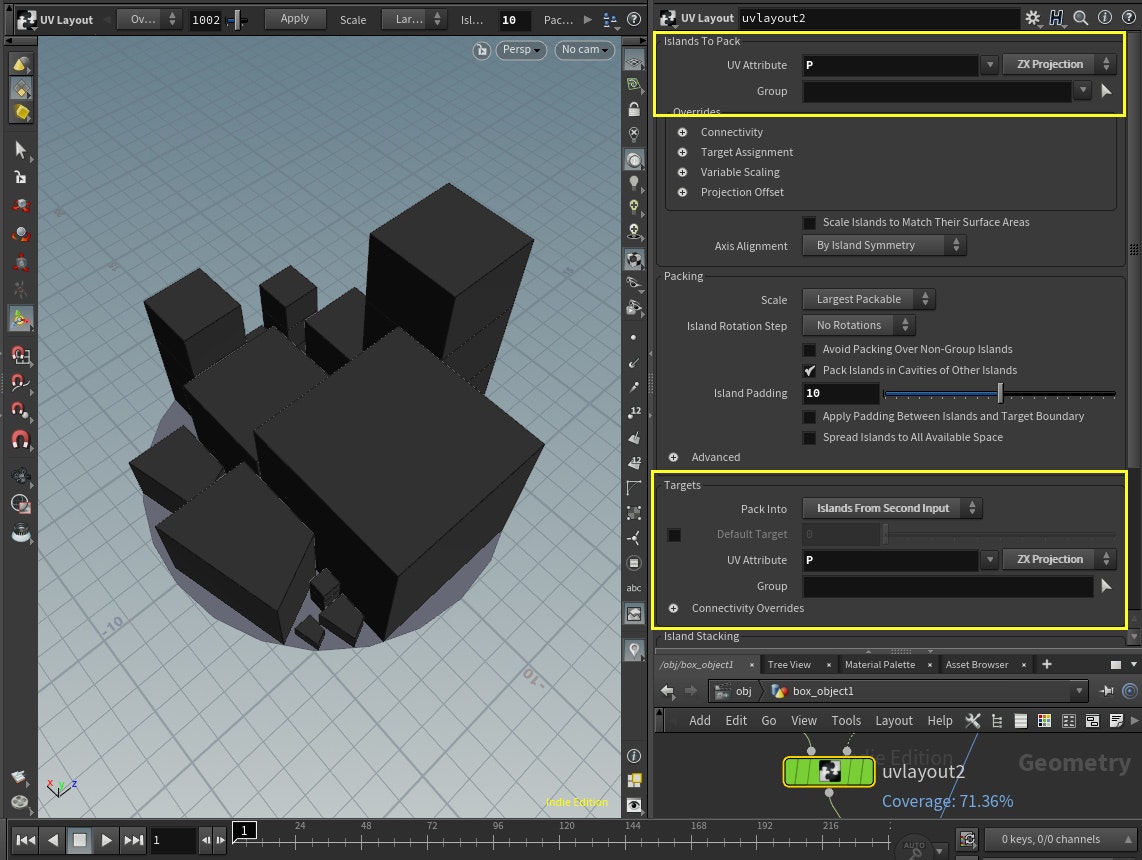
UVLayoutの**UV Attributeの「uv」を「P」に変える。**その横の「XY Projection」を変えることで向きを指定。
ここでは「ZX Projection」に変えて上を向くようにします。

これだけだと1x1の大きさの正方形に収まるように調整されるので、第2インプットの形状にあわせて並べるように設定します。

「Targets」 の「Pack Into」を「Islands From Second Input」に設定。
その下のUV Attributeも「P」に変え、その横の「XY Projection」を「ZX Projection」に変えます。
2
4
0

Register as a new user and use Qiita more conveniently

  1. You get articles that match your needs
  2. You can efficiently read back useful information
  3. You can use dark theme
What you can do with signing up
2
4

Delete article

Deleted articles cannot be recovered.

Draft of this article would be also deleted.

Are you sure you want to delete this article?