TF2とPytorchの勉強のために、Convolutional Autoencoderを両方のライブラリで書いてみた
はじめに
Autoencoderは、特徴量抽出や異常検知などに使われるニューラルネットのモデル
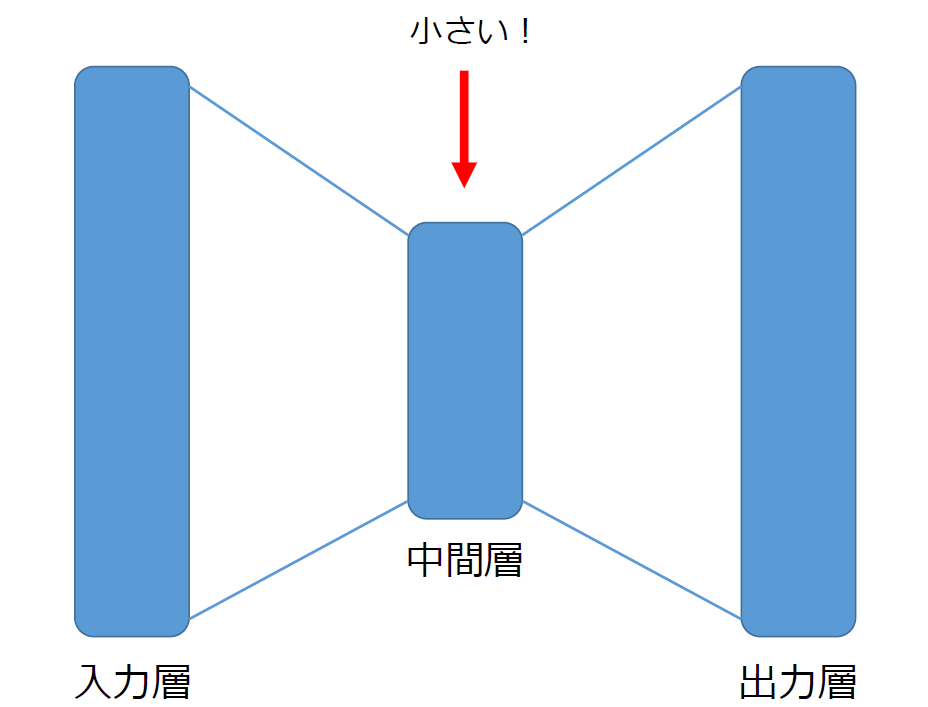
大きな特徴として入力と出力の形が同じで、それより低い次元の中間層を組み込んでいる
入力と出力が同じになるように学習させることで、中間層にて低い次元で画像の特徴を表せるようになる
また、学習したデータと大きく異なるデータは上手く出力で再構成出来ないため、破損などの異常検知にも使える(らしい)
通常のAutoencoderは基本的にどの層も全結合層を利用しているが、今回使用したConvolutional Autoencoderはその名の通り畳み込み層によって次元を減らしている
モデルの構成
今回は畳み込み層3層で小さくしてからの全結合層、そして復元に転置畳み込み層3層の構成でモデルを組んだ
再構成画像の綺麗さを重視するなら、batch normalization入れたり中間層の全結合層をぬいたりした方がlossは下がるらしいが、中間層の次元を低くしつつ再構成画像もそこそこというところを目指したのでこのような形となった
TF2とPytorchにおいてサイズなど同じになるようパラメータを調整したが、全く同じパラメータでは微妙に中間層のサイズなどが変わってしまったのでpytorchの転置畳み込みはpaddingとoutput_paddingでサイズを揃えることとなった
このあたりの処理で微妙に変化があるのかもしれないが、今ひとつ理解不足なので有識者の方がいれば教えていただきたい
データセット
学習にはcifar10を使用した
どっちのライブラリーにも、自動でダウンロードしてくれる機構があるのでデータの用意は比較的簡単
注意点は、初回はダウンロードが必要なことと、Pytorchの方は今いる場所にディレクトリを作ってそこにデータをダウンロードして展開すること
TF2
import tensorflow as tf
(train_data, train_label), (test_data, test_label) = tf.keras.datasets.cifar10.load_data()
Pytorch
import torchvision
import torchvision.transforms as transforms
transform = torchvision.transforms.ToTensor()
trainset = torchvision.datasets.CIFAR10(root='./data', train=True, download=True, transform=transform)
tensorflow2での実装
tf.keras.Sequentialでencoderとdecoderをそれぞれ構成して、callで出力(生成画像)と中間層の値を返すようにした
class CAE(Model):
    def __init__(self):
        super(CAE,self).__init__()
        self.encoder = tf.keras.Sequential([
            Conv2D(16, 3, strides=(2,2), padding='same', activation=tf.nn.tanh), # 16x16x16
            Conv2D(32, 3, strides=(2,2), padding='same', activation=tf.nn.tanh), # 8x8x32
            Conv2D(32, 3, strides=(2,2), padding='same', activation=tf.nn.tanh), # 4x4x32
            Flatten(),
            Dense(4*4*8, activation=tf.nn.tanh), # 128 dim.
        ])
        self.decoder = tf.keras.Sequential([
            Dense(4*4*32, activation=tf.nn.tanh),
            Reshape((4,4,32)),
            Conv2DTranspose(32, 3, strides=2, padding='same', activation=tf.nn.tanh), # 8x8x32
            Conv2DTranspose(16, 3, strides=2, padding='same', activation=tf.nn.tanh), # 16x16x16
            Conv2DTranspose(3, 3, strides=2, padding='same', activation=tf.nn.sigmoid), # 32x32x3
        ])

    def call(self, x):
        z = self.encoder(x)
        x_pred = self.decoder(z)
        return x_pred, z
元画像と生成画像
Pytorchでの実装
nn.Sequentialでencoderとdecoderをそれぞれ構成して、forwardで出力(生成画像)と中間層の値を返すようにした
class CAE(nn.Module):
    def __init__(self):
        super(CAE, self).__init__()
        self.encoder = nn.Sequential(
            nn.Conv2d(3, 16, kernel_size=3, stride=2, padding=1), nn.Tanh(),
            nn.Conv2d(16, 32, kernel_size=3, stride=2, padding=1), nn.Tanh(),
            nn.Conv2d(32, 32, kernel_size=3, stride=2, padding=1), nn.Tanh(),
            nn.Flatten(),
            nn.Linear(4*4*32, 128), nn.Tanh(),
        )

        self.decoder = nn.Sequential(
            nn.Linear(128, 4*4*32), nn.Tanh(),
            Reshape(-1, 32, 4, 4),
            nn.ConvTranspose2d(32, 32, kernel_size=3, stride=2, padding=1, output_padding=1), nn.Tanh(),
            nn.ConvTranspose2d(32, 16, kernel_size=3, stride=2, padding=1, output_padding=1), nn.Tanh(),
            nn.ConvTranspose2d(16, 3, kernel_size=3, stride=2, padding=1, output_padding=1), nn.Sigmoid(),
        )

    def forward(self, x):
        z = self.encoder(x)
        x_pred = self.decoder(z)
        return x_pred, z
元画像と生成画像
感想
全体として似ているので、微妙に異なる点でうっかりミスをしそう(Sequential()の中に[]が必要かどうかなど)
これくらいならモデルよりも学習回したりデータ用意したりするコードを書くほうが大変
コード全文はgithubのコードを参照


