この記事では、独自のGPTチャットAIをゼロからトレーニングするプロセスについて説明します。
- 注:この記事の焦点は、既存のAIモジュールを微調整(Fine-Tuning)することではなく、あなたの入力テキストから会話スキルを学習するAIを訓練することです。
- OpenAIは多くのリソースと新しい技術を投入しているため、ChatGPTに近いものを訓練することを期待すべきではありません。(笑
十分なデータ(例:Wikipediaのすべてのコンテンツ)があれば、GPT-2に似たモデルをトレーニングすることが可能です。
本記事では、日本語で書かれた 自分の88本のQiita記事 をデータソースとしてAIをトレーニングします(笑
このデータセットは非常に限られており、結果は最適ではありませんのでご注意ください。
この記事では、AIに関する経験がなくても手順に従って進められるように、段階的に説明します。
最終結果
88のQiita記事だけを使って 1万回(Mac miniで約1時間) のトレーニングを繰り返した後:

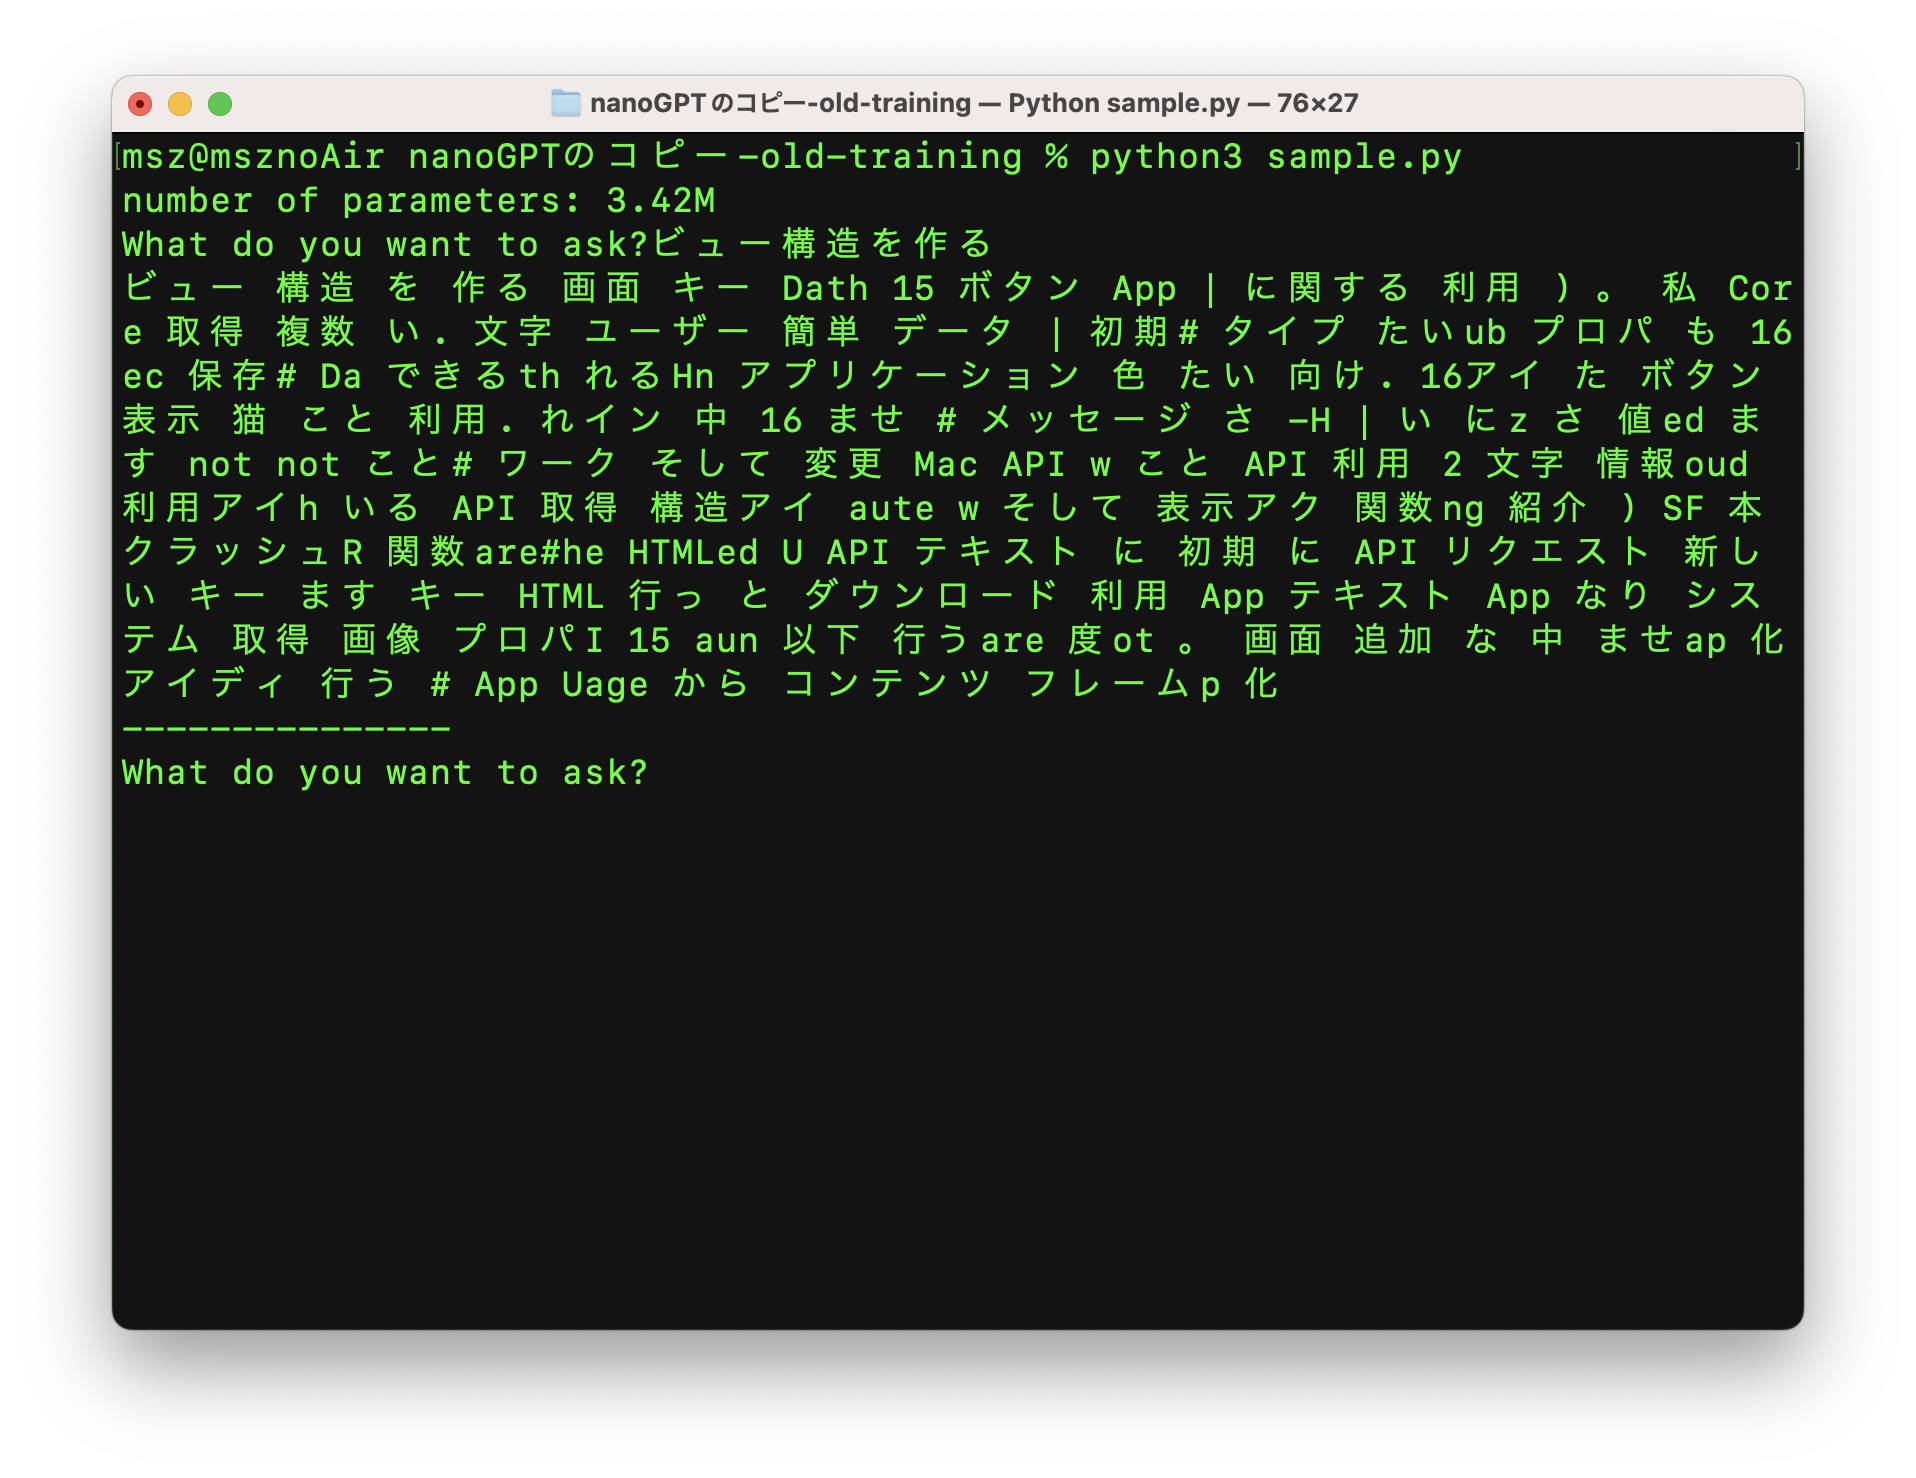
200回の繰り返し学習しかしていない最初のうちは、正しい文章を作ることはできません:
しかし、使っている言葉は、私がQiitaで公開した88本の記事の中から選んだもので、それしか知識がありません。
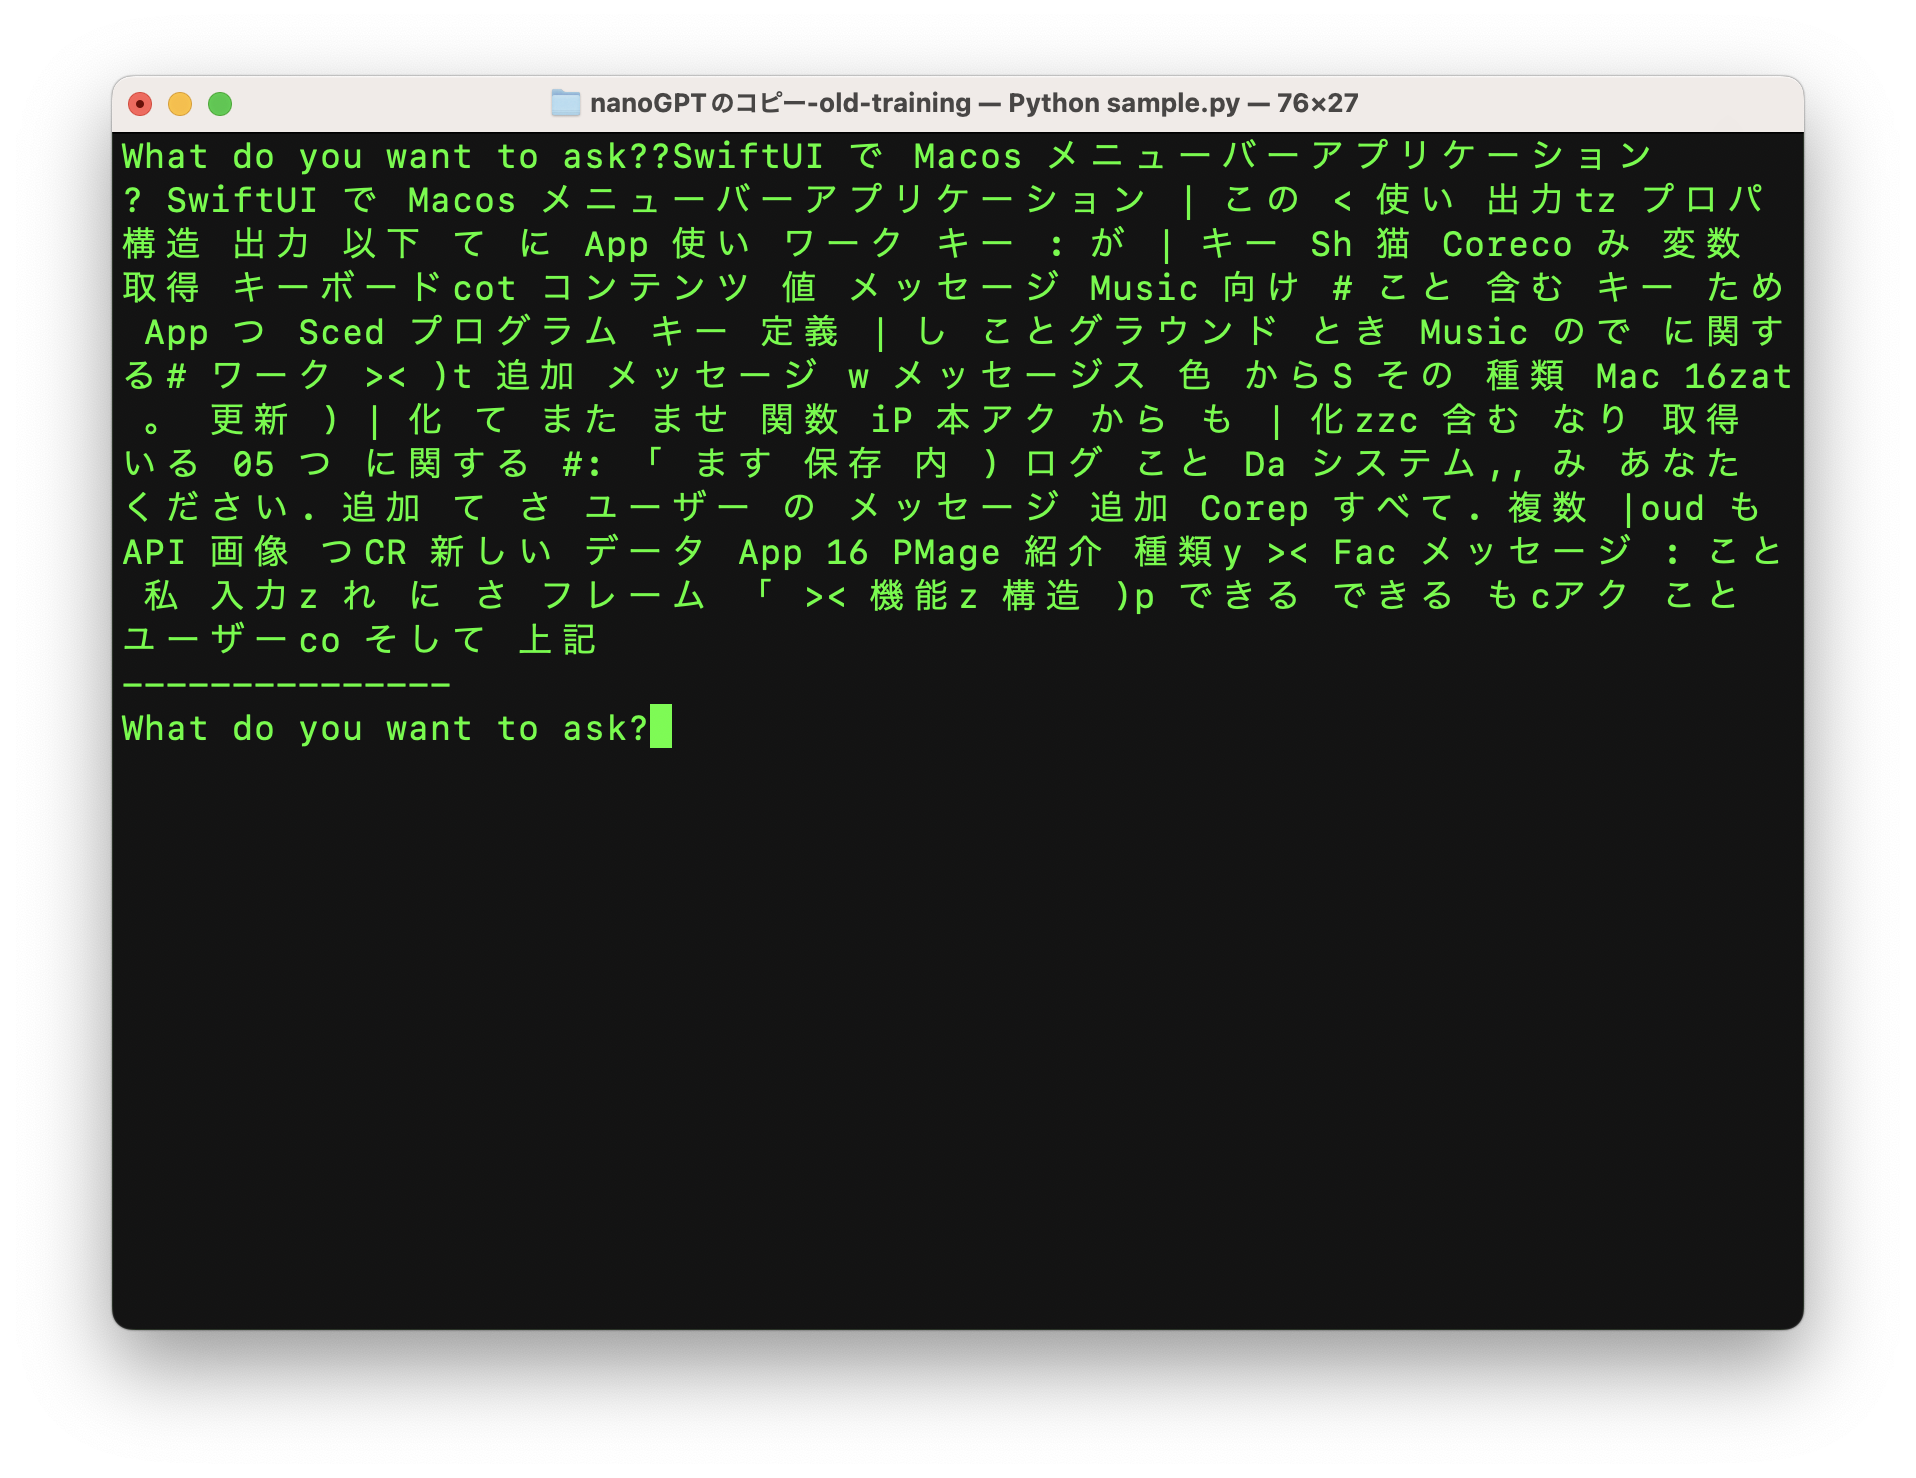
これが2000回のトレーニング後の結果です:
約8000回のトレーニングの後
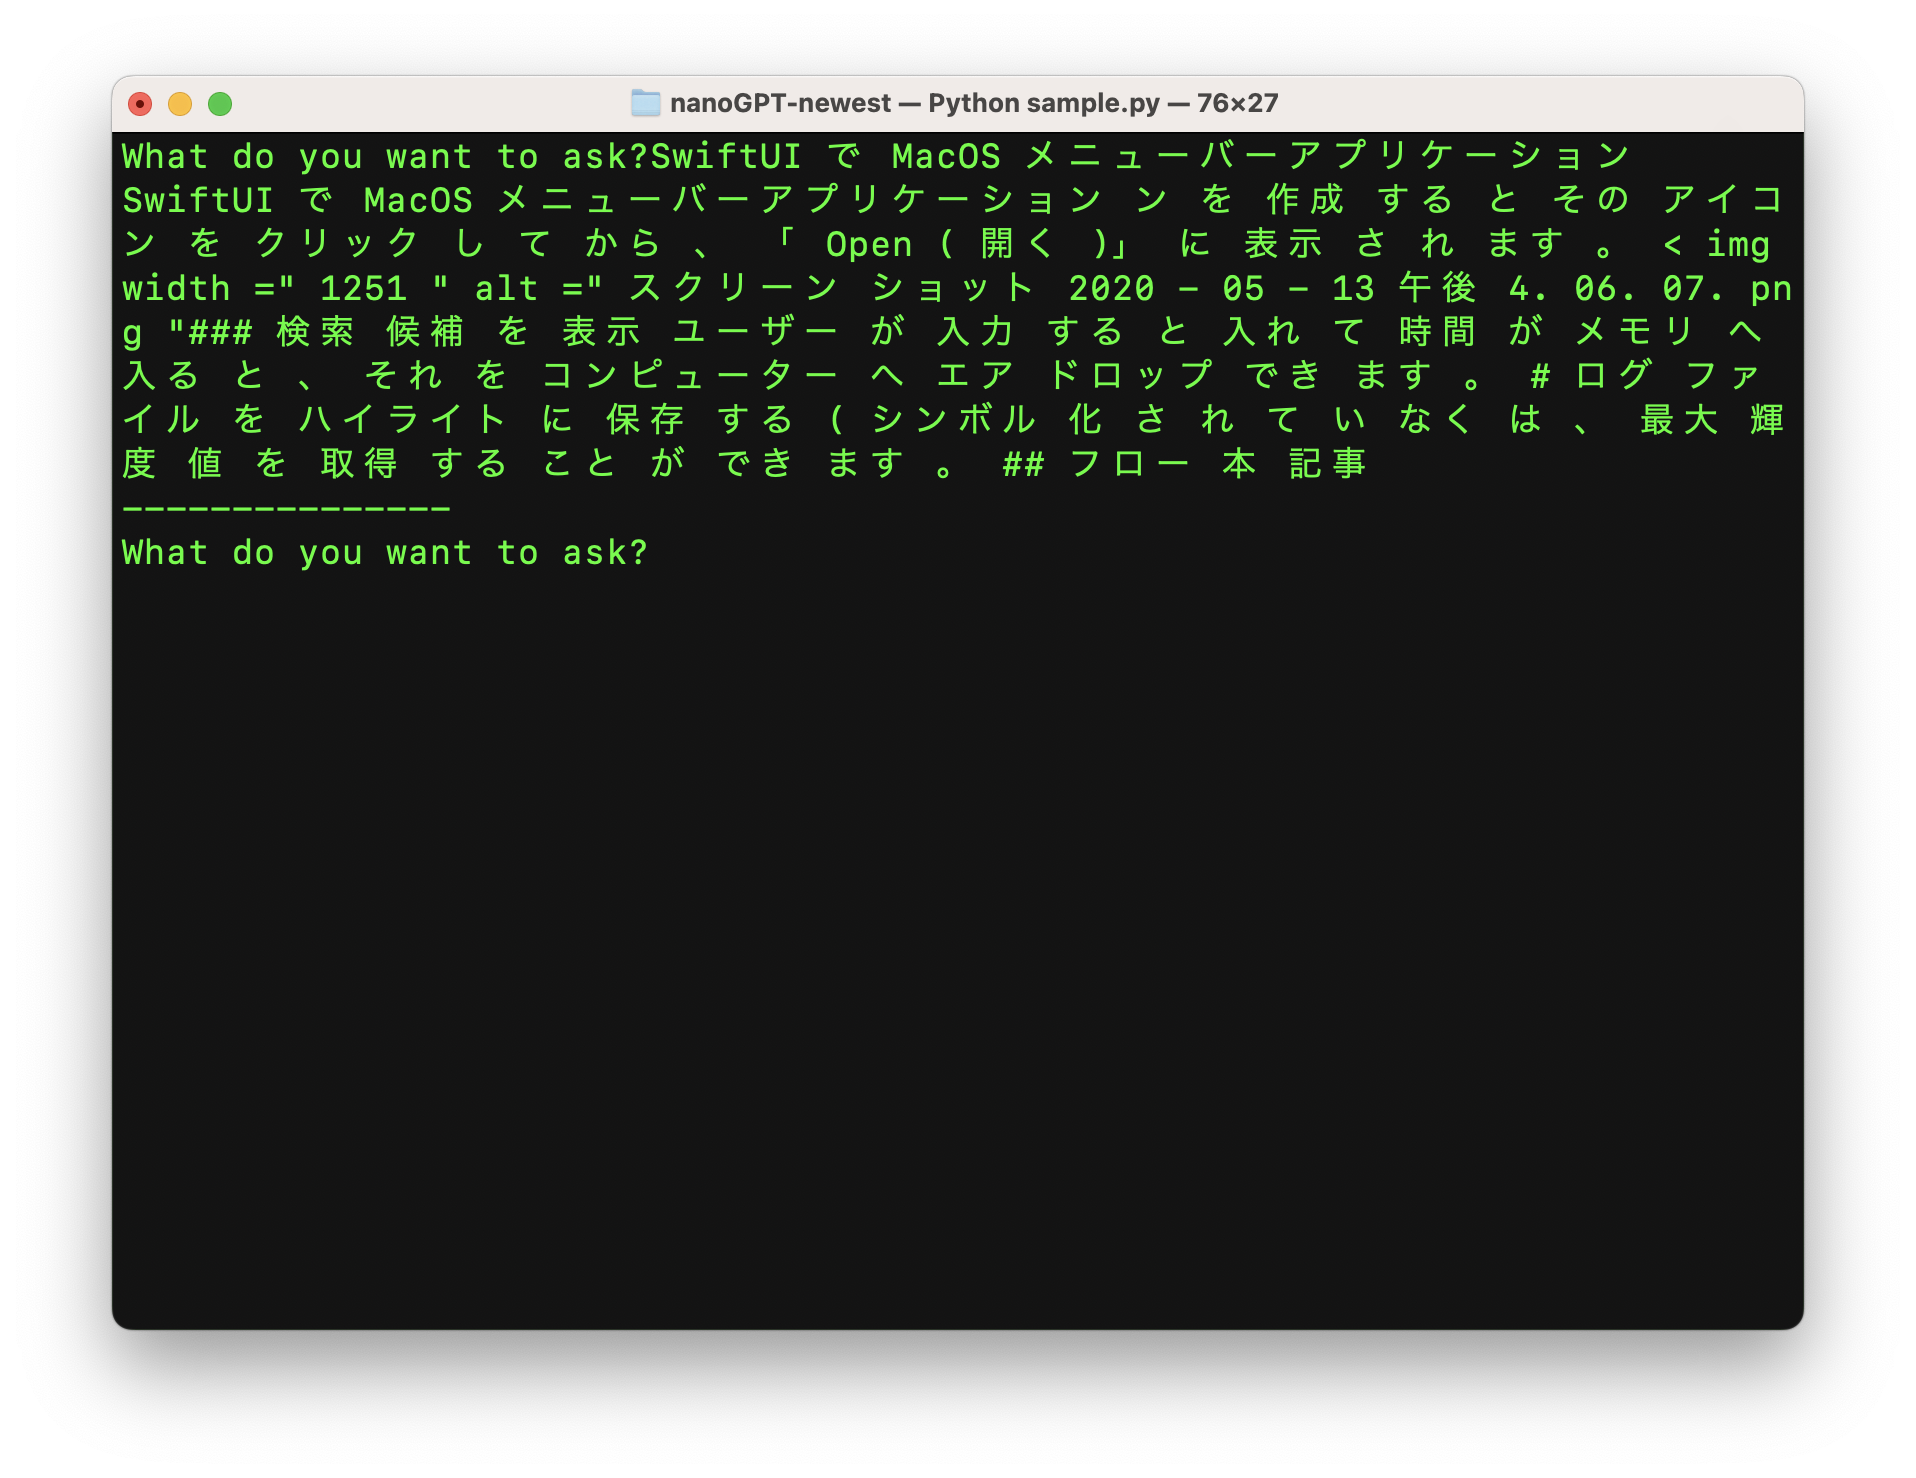
より多くの回数を訓練することで、より正確な結果を得ることができます。
ただし、Qiitaの記事88件しか提供していないので(笑
(GPT-2はWebTextという約45テラバイトのテキストデータを含む大規模データセットで学習させた)
この記事では、そんなAIを一からトレーニングする方法を紹介します。
環境設定
nanoGPT を使用して、AIチャットモジュールの学習を行うことになります。
リポジトリには、シェイクスピアのようなトレーニング用英語モジュールのコードも含まれています。
https://github.com/karpathy/nanoGPT/tree/master/data/shakespeare
日本語のテキスト入力を受けて日本語を出力するようにカスタマイズし(トークナイザーを置き換える)、
サンプリング機能(質問して回答を得る機能)も変更して、いつでも回答を入力できるようにします(上のスクリーンショットにあるような)。
以下のコマンドはMacOSで実行されていますが、他のシステムでも動作するはずです。
nanoGPTのリポジトリをクローン
git clone https://github.com/karpathy/nanoGPT
MacOSをお使いの場合は、HomeBrewをインストールして:
この記事で使用するすべての必要なライブラリをインストールするコードは次のとおりです:
python3 -m ensurepip

pip3 install transformers datasets tiktoken tqdm wandb numpy fugashi ipadic

pip3 install \
  --pre torch torchvision torchaudio \
  --extra-index-url https://download.pytorch.org/whl/nightly/cpu

brew install mecab mecab-ipadic
トークナイザ
トークナイザとは何ですか?
AIモジュールは、トークンによって言語を理解します。テキストを入力すると、トークナイザを使用してこれらをトークンに変換します。AIが出力を生成するとき、トークンが生成されます。
そのトークンを、(モジュールのトレーニング時に使用した)同じトークナイザを使ってテキストに戻す必要があります。
デフォルトで nanoGPT が使用するトークナイザは gpt-2 で、日本語についての理解はそれほど高くありません。そこで、ここでは日本語用のオープンソースのトークナイザを使用します:
Pythonで上記のトークナイザを使う
Pythonで上記のトークナイザをすぐに使うことができます。例えば、以下のコードを.pyファイルに入れます。
def read_markdown_file(file_path):
    if file_path.endswith(".DS_Store"):
        return ""
    with open(file_path, mode="r", encoding="utf-8") as md_file:
        print("Reading", file_path)
        content = md_file.read()
    return content

datasetFolderPath = "/Users/office/Desktop/MyOwnGPT/dataset/"
dataSetFileNames = os.listdir(datasetFolderPath)

entries = ""
for filename in dataSetFileNames:
    file_path = datasetFolderPath + filename
    print("Processing ", file_path)
    markdown_content = read_markdown_file(file_path)
    for line in markdown_content.split("\n"):
        if len(line) > 5:
            entries += line + "\n\n"

n = len(entries)
print("Total input entry length", n)
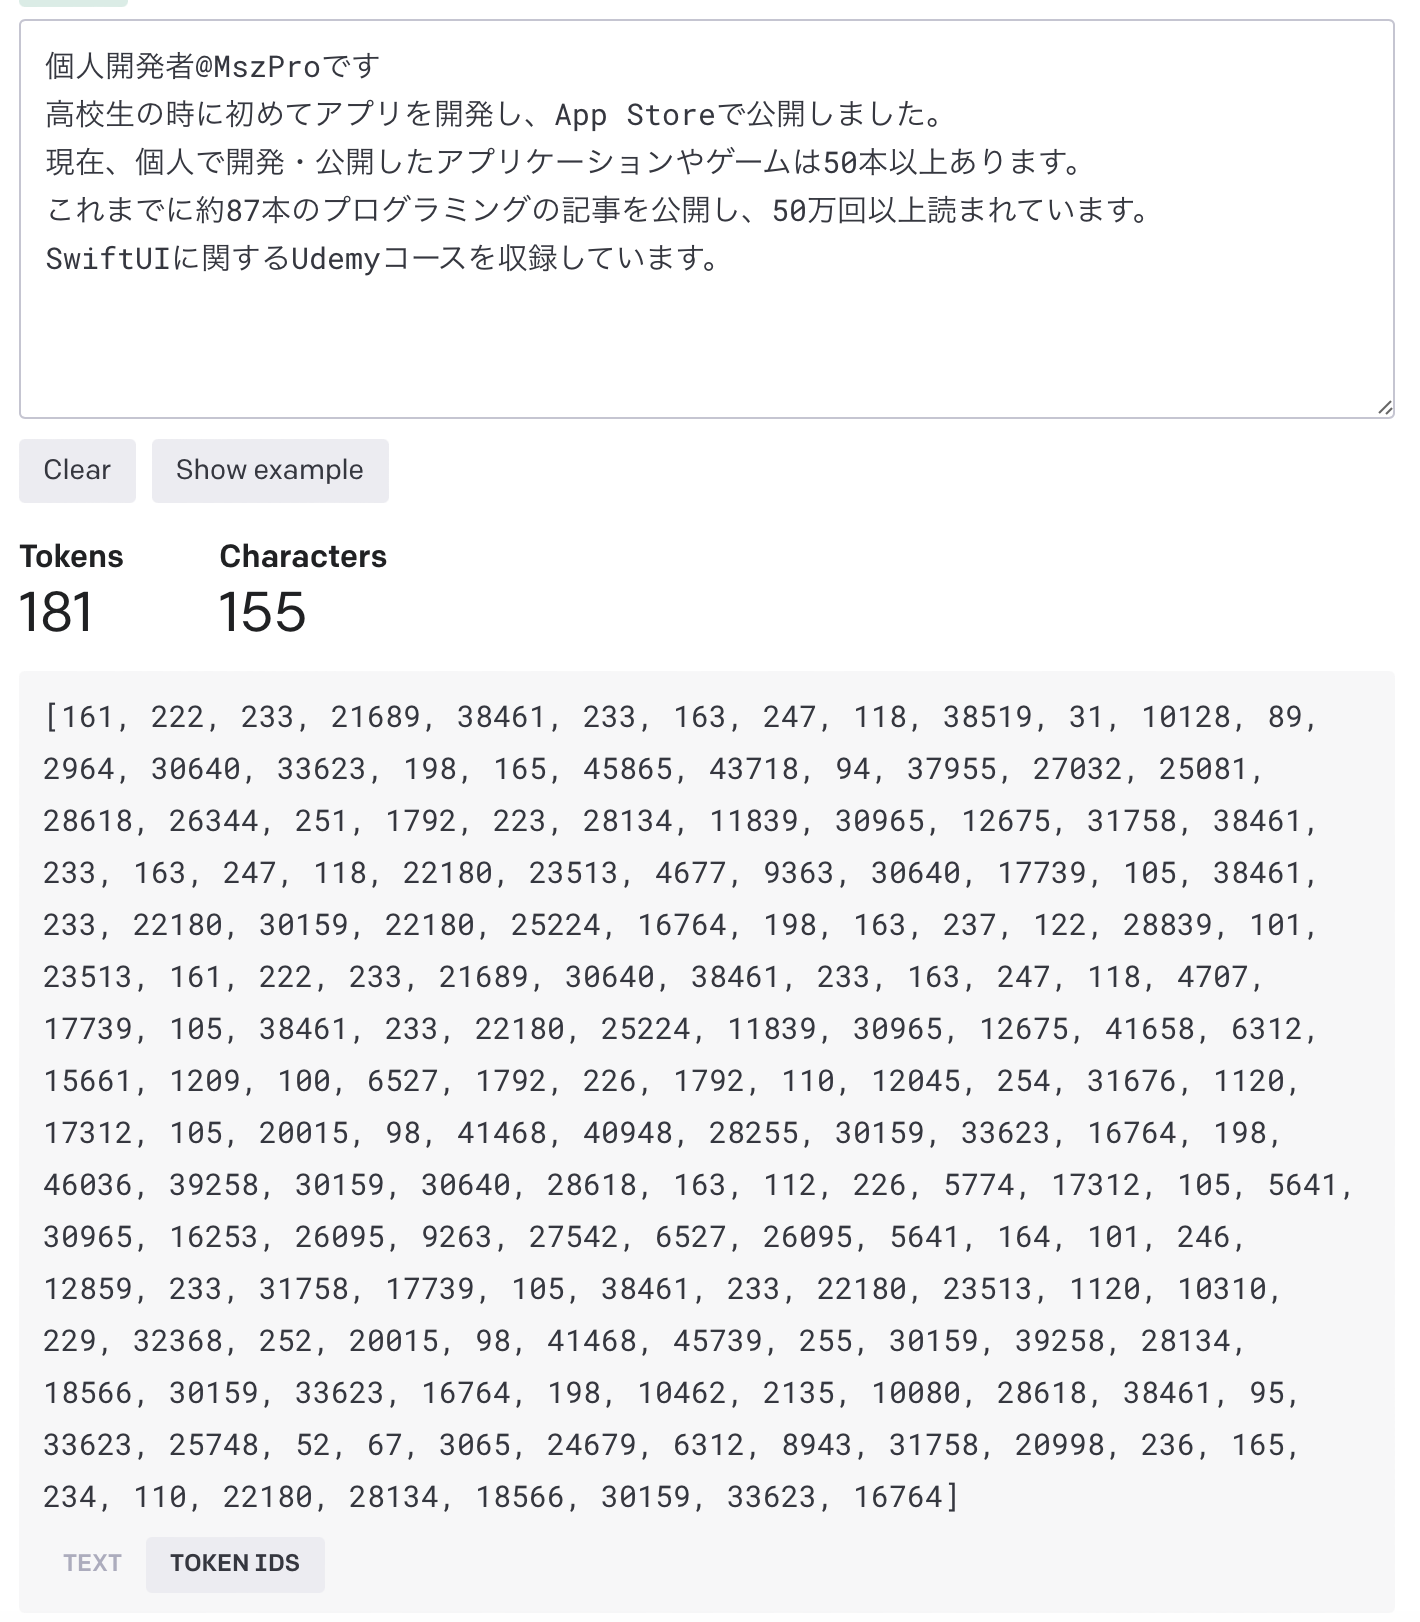
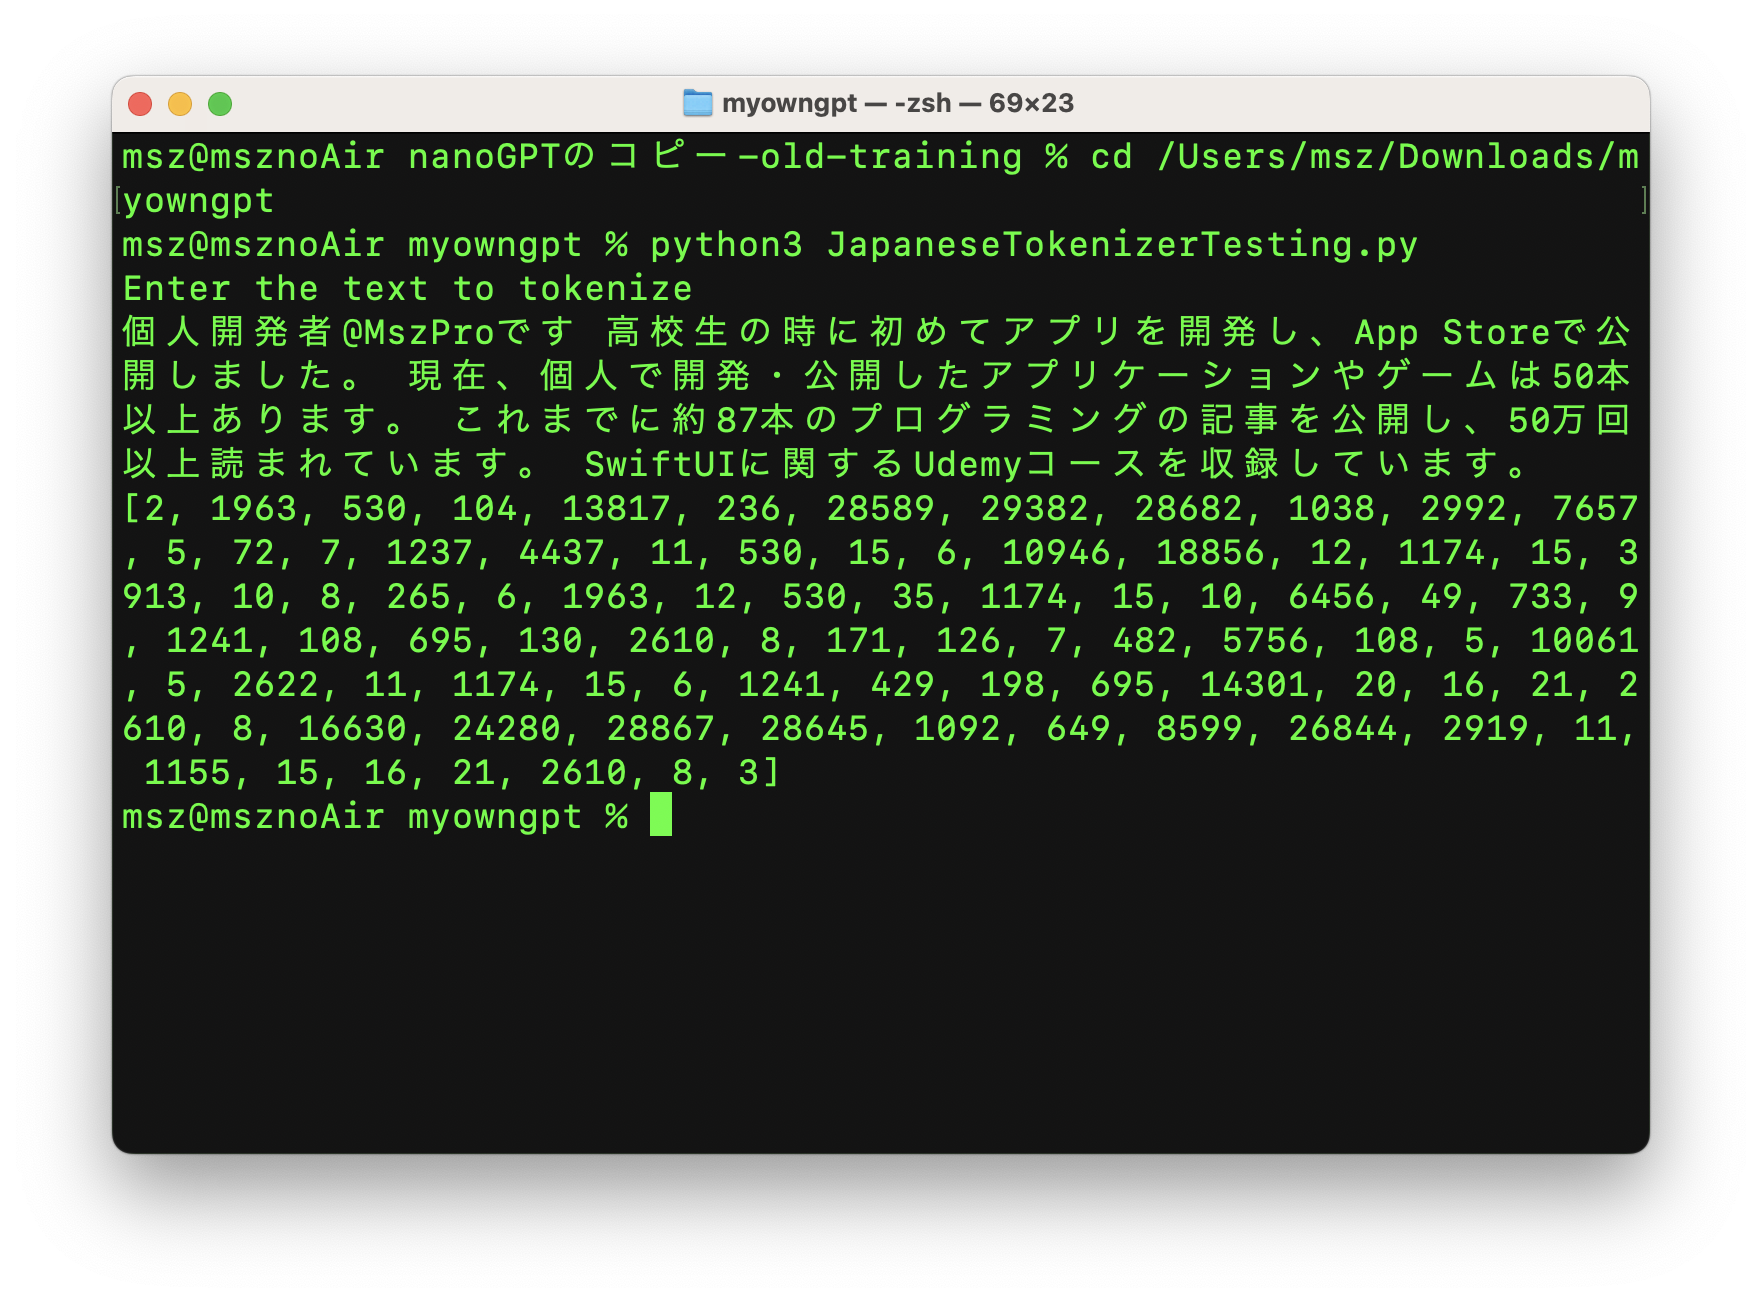
これで、実行してトークナイズされた日本語テキストを確認できます。トークナイザモジュールは自動的にHugging faceからダウンロードされます。
また、トークナイズされたテキストを元の文字列に戻すこともできます:
trainEntries = input("Enter the text to de-tokenize\n")

token_ids = [int(x) for x in trainEntries.strip("[]").split(", ")]
decoded_text = tokenizer.decode(token_ids)

print(decoded_text)
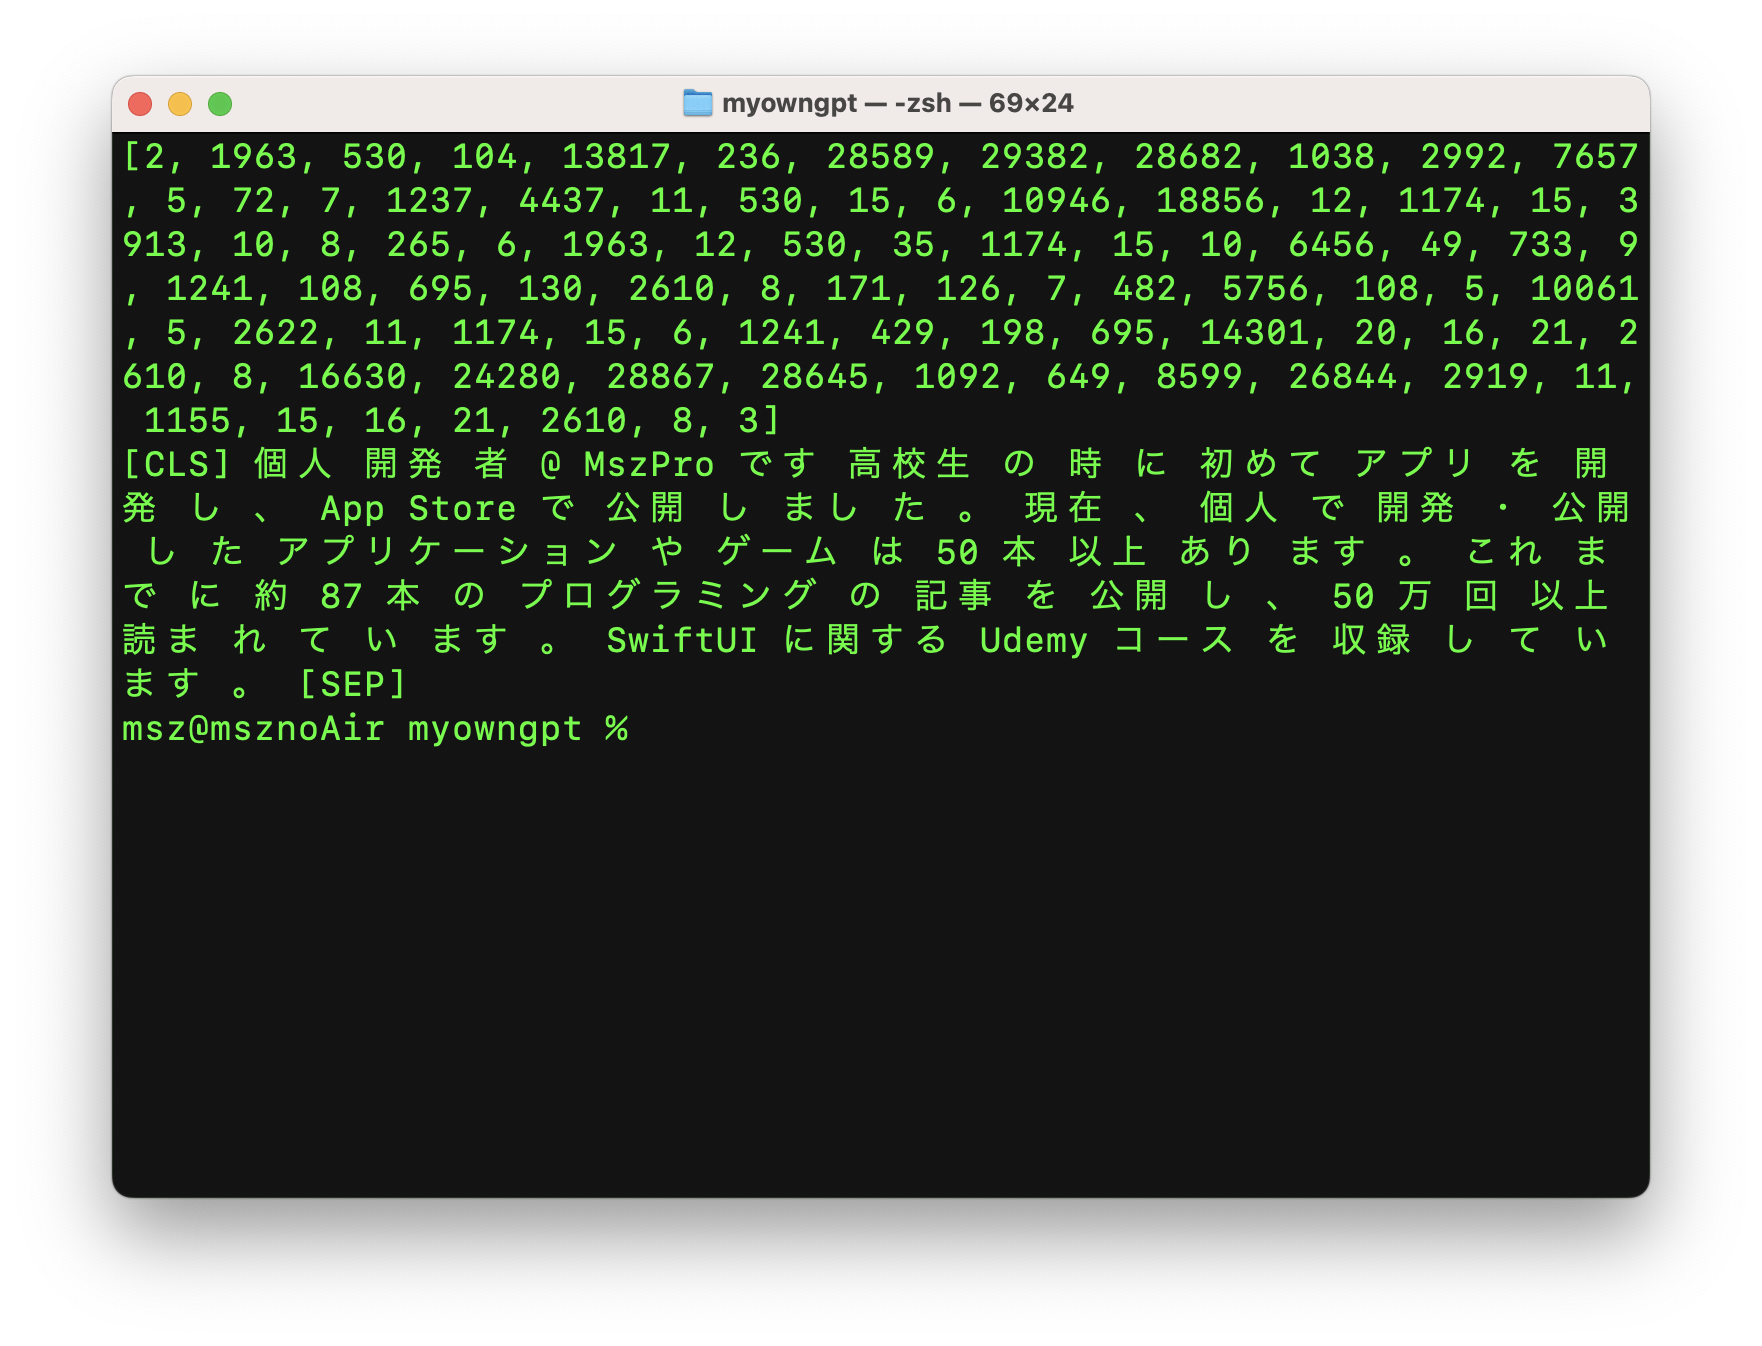
トークナイザはテキストをいくつかのコンポーネントに分割しています。例えば、「個人開発者」は「個人」、「開発」、「者」となります。
トレーニングデータを準備する
私のトレーニングデータセット(笑)
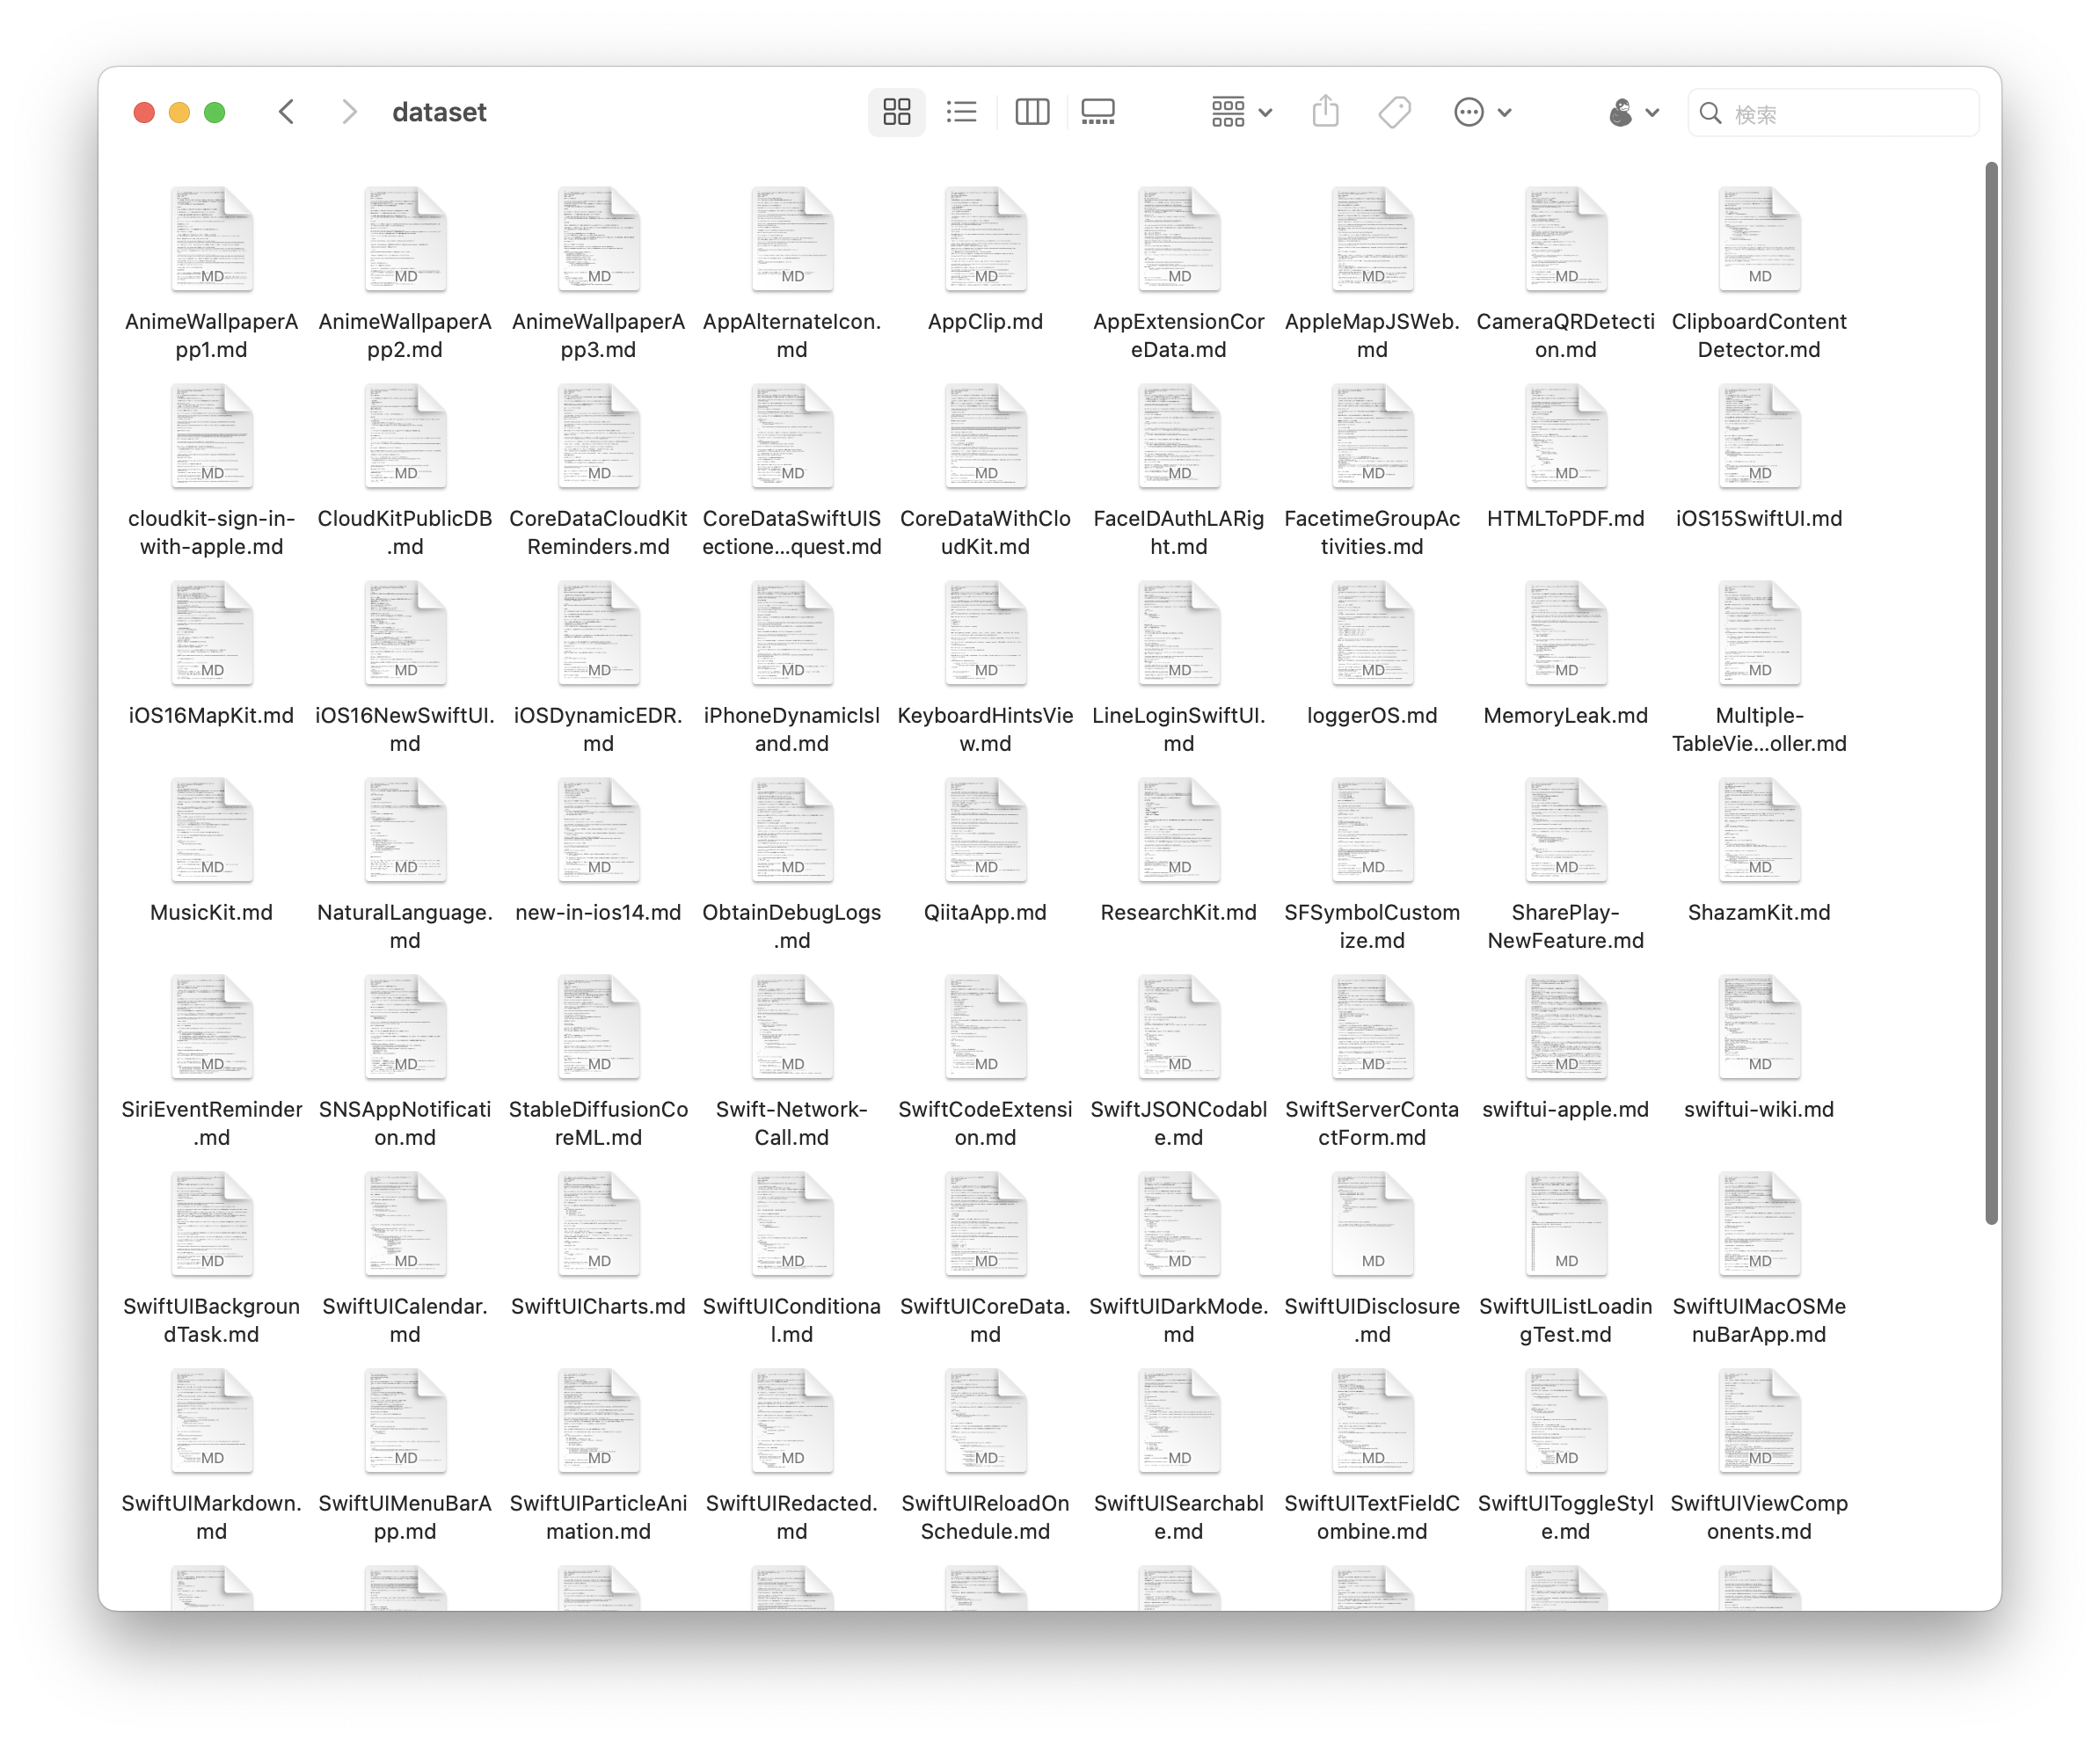
次に、すべてのトレーニングデータを1つのテキストファイルにまとめます。ここでは、私のQiitaの記事(88件)から.mdファイルをすべて変換するためにこのコードを使っています:
def read_markdown_file(file_path):
    if file_path.endswith(".DS_Store"):
        return ""
    with open(file_path, mode="r", encoding="utf-8") as md_file:
        print("Reading", file_path)
        content = md_file.read()
    return content

datasetFolderPath = "/Users/office/Desktop/MyOwnGPT/dataset/"
dataSetFileNames = os.listdir(datasetFolderPath)

entries = ""
for filename in dataSetFileNames:
    file_path = datasetFolderPath + filename
    print("Processing ", file_path)
    markdown_content = read_markdown_file(file_path)
    for line in markdown_content.split("\n"):
        if len(line) > 5:
            entries += line + "\n\n"

n = len(entries)
print("Total input entry length", n)
さて、そのデータファイルの中身は、次のようなものになります:
また、App Clipのプログラムのファイルサイズは10MB未満でなければなりません。

## ステップ 1. App Clipのターゲットを作成する

トップにあるファイル (File) メニューをクリック、次にニュー (New) オプション、ターゲット (Target) をクリックして下さい。

App Clipを作成するには、ただ新しい  のターゲットをアプリに追加するだけです。

...
トレーニングセットとテスト(試験)セットを用意する
ここで、上記のデータを2つのセットに分け、
トレーニングセットはAIモジュールの学習に使用し、
テストセットはモジュールがどのように動作するかをテストするためのトレーニングプログラムに使用することにします:
trainEntries = entries[:int(n*0.9)]
evalEntries = entries[int(n*0.9):]

print("Train entries:", trainEntries, " eval entries ", evalEntries)
ここでは、上記のテキストの90%をトレーニングに、10%をテストに使っています。
入力テキストをトークンに変換
ここで、AIモジュールの学習プログラムが理解できるように、すべての入力をトークンに変換します。上記の日本語トークナイザーを利用することができます:
max_length = 512  # Maximum sequence length for BERT
tokenizer = BertJapaneseTokenizer.from_pretrained('cl-tohoku/bert-base-japanese-whole-word-masking', max_len=max_length)

trainTokens = []
train_text_segments = [trainEntries[i:i+max_length] for i in range(0, len(trainEntries), max_length)]
for segment in train_text_segments:
    train_segment_tokens = tokenizer.encode(segment, add_special_tokens=True)
    trainTokens.extend(train_segment_tokens)

evalTokens = []
eval_text_segments = [evalEntries[i:i+max_length] for i in range(0, len(evalEntries), max_length)]
for segment in eval_text_segments:
    eval_segment_tokens = tokenizer.encode(segment, add_special_tokens=True)
    evalTokens.extend(eval_segment_tokens)

print(len(trainTokens), "used for training;", len(evalTokens), "used for eval")
これで、学習用のトークンがすべて入った trainTokens 変数と、
テストに使うトークンが入った evalTokens 変数が用意されました。
英語の入力しかない場合は、gpt-2トークナイザーを使用することができます:
enc = tiktoken.get_encoding("gpt2")
train_ids = enc.encode_ordinary(train_data)
eval_ids = enc.encode_ordinary(val_data)
トークンをファイルに保存
さて、トークンをファイルに書き込んでいきます:
train_ids = np.array(trainTokens)
val_ids = np.array(evalTokens)
newFolderPath = os.path.join(os.path.dirname(__file__), 'TrainingSet')
if not os.path.exists(newFolderPath):
    os.makedirs(newFolderPath)
train_ids.tofile(os.path.join(newFolderPath, 'train.bin'))
val_ids.tofile(os.path.join(newFolderPath, 'val.bin'))
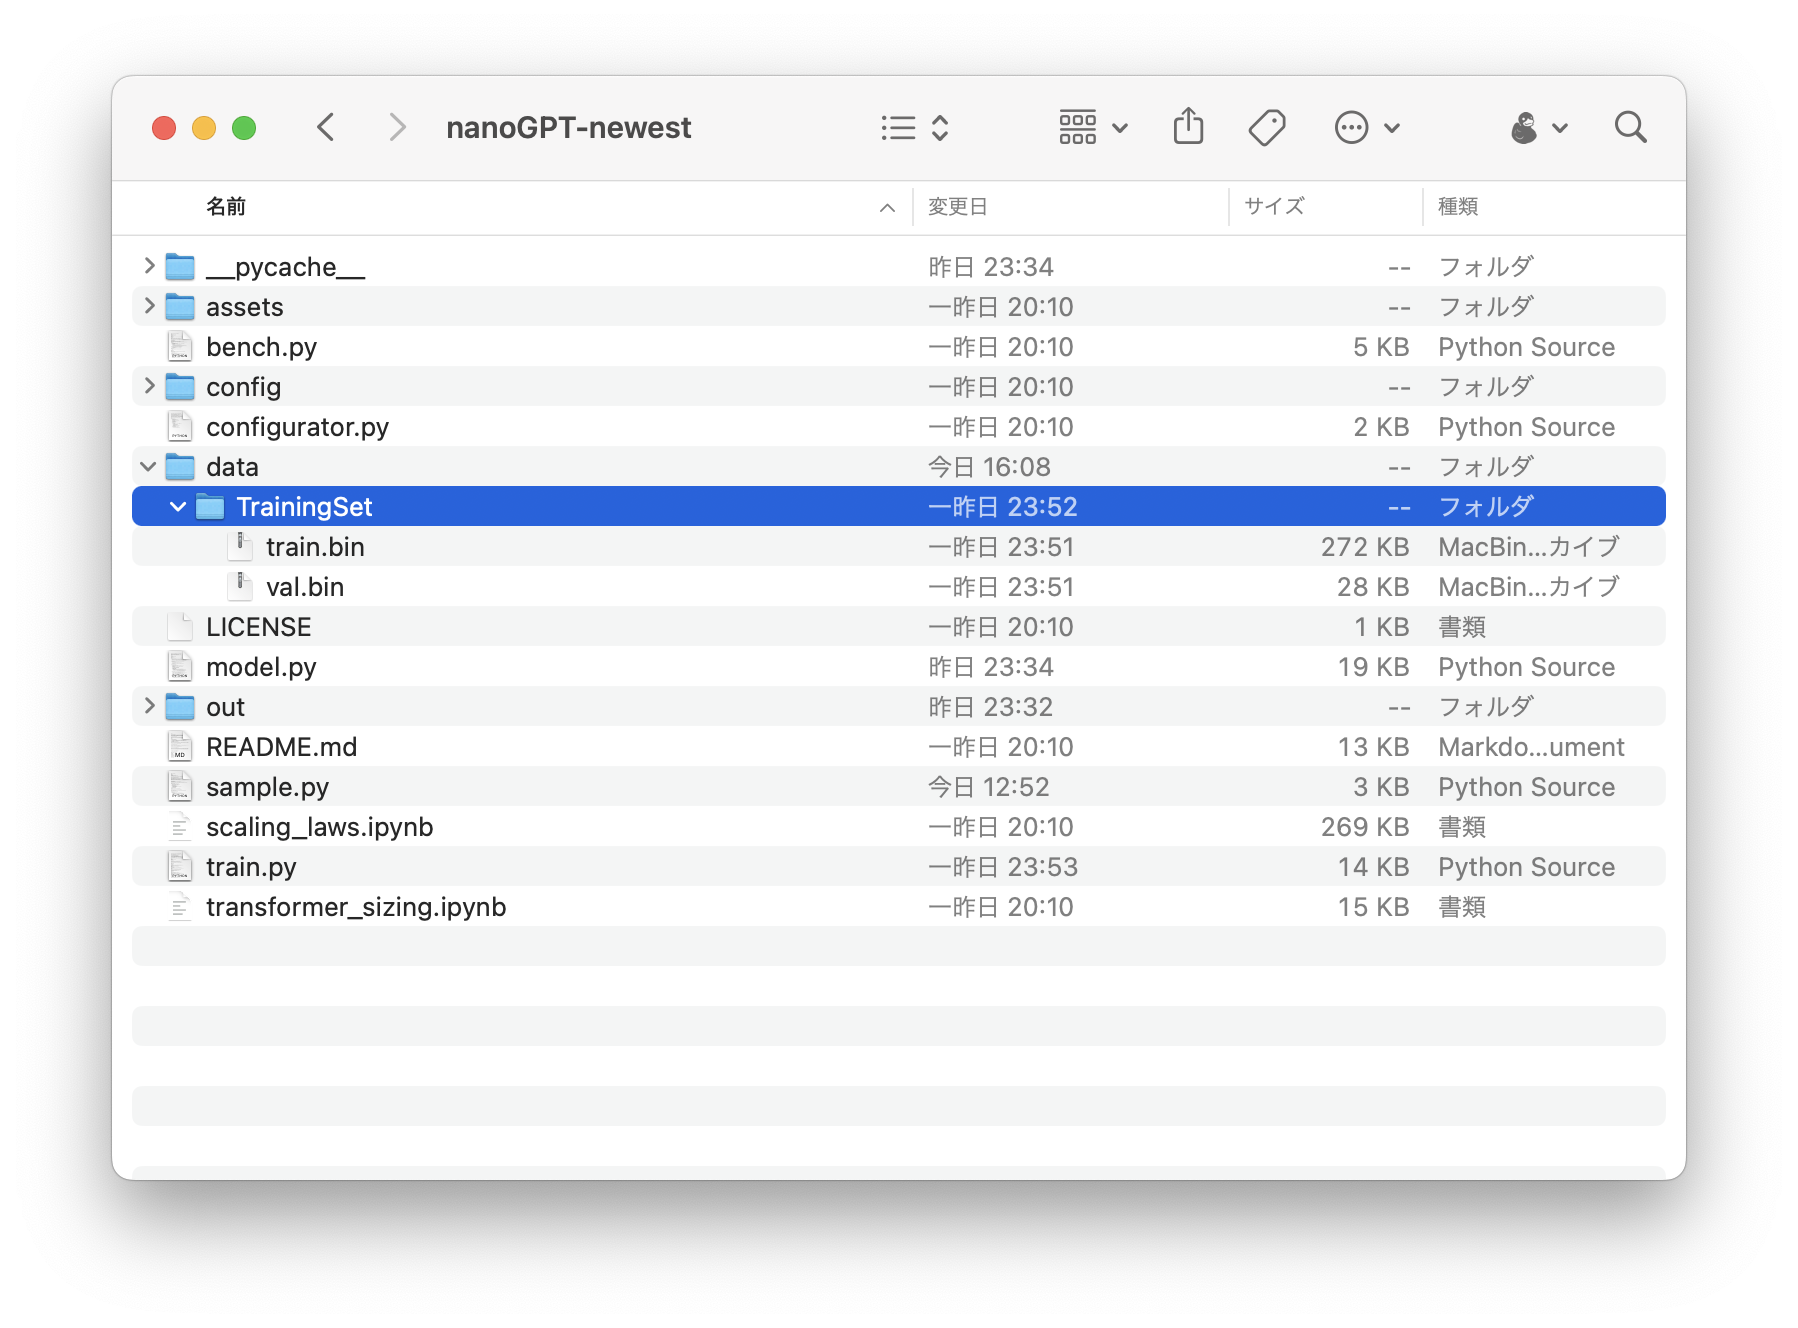
これにより、学習データ用の train.bin ファイルとテスト用の val.bin ファイルが作成されます。これらのファイルは、ディレクトリ内の TrainingSet フォルダに作成されます。
トレーニングの開始
ここで、新しく生成された TrainingSet を
クローンした nanoGPT リポジトリフォルダのdataフォルダに
コピーします。
次に、nanoGPT リポジトリにある train.py 関数を使って、モジュールをトレーニングします。
eval_intervalを100に設定していることに注意してください。つまり、100回繰り返すごとに、outフォルダに学習済みモジュールが取得され、すぐにテスト(入力からの応答取得)に使用することができます。
python3 train.py \
  --dataset=TrainingSet \
  --n_layer=4 \
  --n_head=4 \
  --n_embd=64 \
  --compile=False \
  --eval_iters=1 \
  --block_size=64 \
  --batch_size=8 \
  --device=mps \
  --eval_interval=100
では、学習処理を開始します。
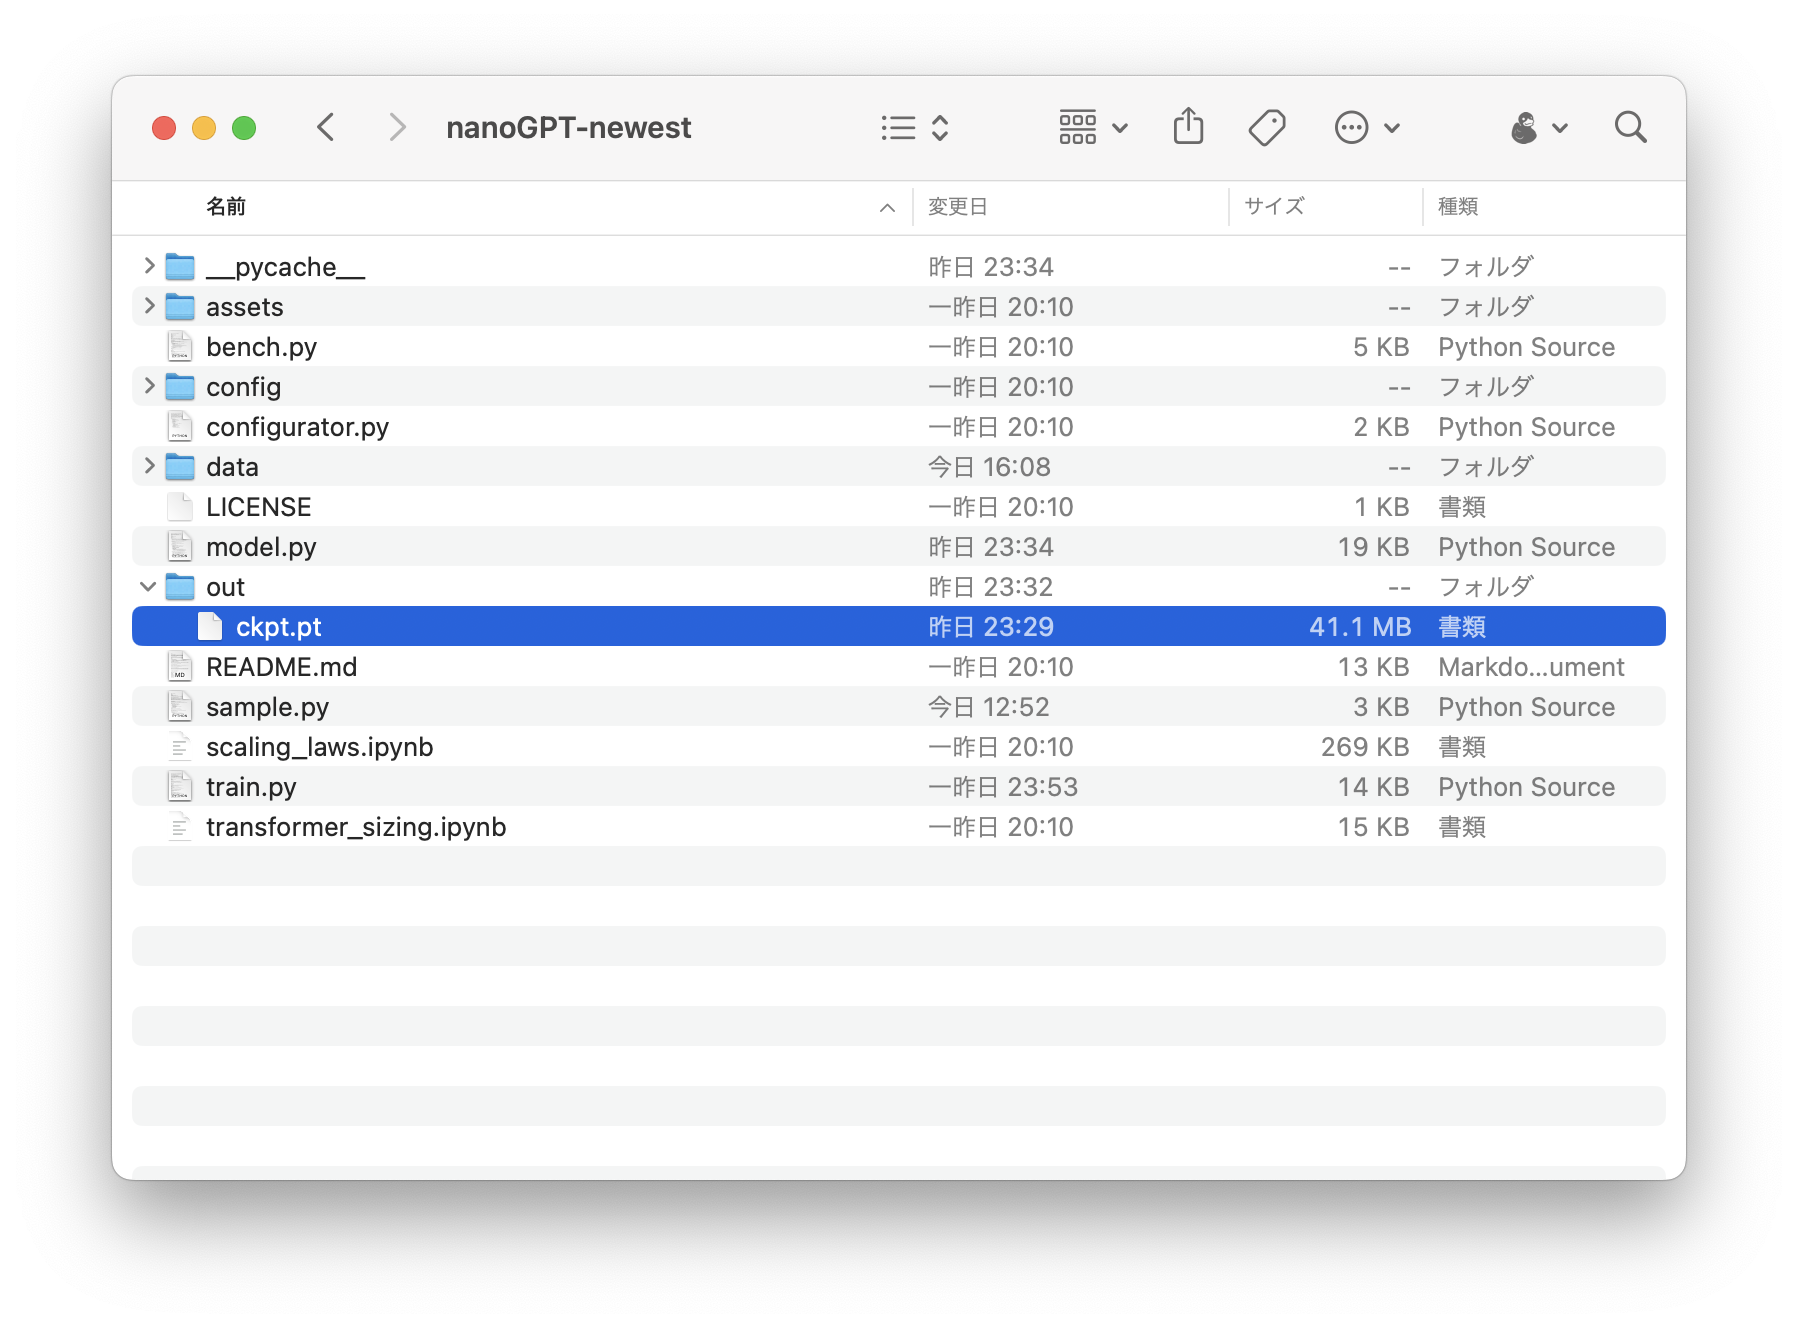
繰り返し回数が100回に達するたびに、out フォルダに出力モジュールファイルが表示されます:
このファイルをテストするために、トレーニングを停止する必要はありません。トレーニングのプロセスを停止したい場合は、キーボードのcontrol-cキーで終了してください。
注意:正しい文章を出力できるモジュールを作るには、20000回以上の繰り返しが必要です。
sample.pyを日本語トークナイザーを使うように
今回はカスタムのトークナイザーを使用したので、クローンしたnanoGPTフォルダ内のデフォルトのsample.pyファイルを更新する必要があります:
import os
from contextlib import nullcontext
import torch
from transformers import BertJapaneseTokenizer
from model import GPTConfig, GPT
import random

# -----------------------------------------------------------------------------
init_from = 'resume' # either 'resume' (from an out_dir) or a gpt2 variant (e.g. 'gpt2-xl')
out_dir = 'out' # ignored if init_from is not 'resume'
num_samples = 1 # number of samples to draw
max_new_tokens = 500 # number of tokens generated in each sample
temperature = 0.05 # 1.0 = no change, < 1.0 = less random, > 1.0 = more random, in predictions
top_k = 100 # retain only the top_k most likely tokens, clamp others to have 0 probability
seed = random.randint(0, 2**32 - 1)
device = 'cpu' # examples: 'cpu', 'cuda', 'cuda:0', 'cuda:1', etc.
dtype = 'bfloat16' # 'float32' or 'bfloat16' or 'float16'
compile = False # use PyTorch 2.0 to compile the model to be faster
exec(open('configurator.py').read()) # overrides from command line or config file
# -----------------------------------------------------------------------------

torch.manual_seed(seed)
torch.cuda.manual_seed(seed)
torch.backends.cuda.matmul.allow_tf32 = True # allow tf32 on matmul
torch.backends.cudnn.allow_tf32 = True # allow tf32 on cudnn
device_type = 'cuda' if 'cuda' in device else 'cpu' # for later use in torch.autocast
ptdtype = {'float32': torch.float32, 'bfloat16': torch.bfloat16, 'float16': torch.float16}[dtype]
ctx = nullcontext() if device_type == 'cpu' else torch.amp.autocast(device_type=device_type, dtype=ptdtype)

# model
if init_from == 'resume':
    # init from a model saved in a specific directory
    ckpt_path = os.path.join(out_dir, 'ckpt.pt')
    checkpoint = torch.load(ckpt_path, map_location=device)
    gptconf = GPTConfig(**checkpoint['model_args'])
    model = GPT(gptconf)
    state_dict = checkpoint['model']
    unwanted_prefix = '_orig_mod.'
    for k,v in list(state_dict.items()):
        if k.startswith(unwanted_prefix):
            state_dict[k[len(unwanted_prefix):]] = state_dict.pop(k)
    model.load_state_dict(state_dict)
elif init_from.startswith('gpt2'):
    # init from a given GPT-2 model
    model = GPT.from_pretrained(init_from, dict(dropout=0.0))

model.eval()
model.to(device)
if compile:
    model = torch.compile(model) # requires PyTorch 2.0 (optional)

# load custom tokenizer
tokenizer = BertJapaneseTokenizer.from_pretrained("cl-tohoku/bert-base-japanese-whole-word-masking")

# encode the beginning of the prompt
while(True):
    start = input("What do you want to ask?")
    start_ids = tokenizer.encode(start)
    x = (torch.tensor(start_ids, dtype=torch.long, device=device)[None, ...])
# run generation
    with torch.no_grad():
        with ctx:
            y = model.generate(x, max_new_tokens, temperature=temperature, top_k=top_k)
            decoded_text = tokenizer.decode(y[0].tolist(), skip_special_tokens=True)
            print(decoded_text)
            print('---------------')
ここでは、BertJapaneseTokenizer を使って、日本語の出力をデトークしています。
また、次の入力を求め続けるループを追加しています。
さて、テストしてみましょう:
質問したい文章(日本語)を入力し、キーボードのエンターキーを押す。
終了したいときは、control-cキーの組み合わせで終了します。
より多くのデータ、より多くの反復練習
より多くのデータ入力(例えば、https://github.com/karpathy/nanoGPT/tree/master/data/openwebtext)でAIを訓練すれば、gpt-2論文に記載されたようなチャットロボットを得ることができます。
もちろん、より多くの反復のためのモジュールの訓練も必要です。
私の論文では、私のQiitaの記事88個と1時間程度のトレーニングを使いました(なので、とてもとても弱いです、笑)。
Githubリポジトリ
私は、質問をしたり、ただランダムにチャットしたりするのにChatGPTを使うのが好きです。Siriを使ってGPT-3に質問をしたり、音声チャットを使えるiOSアプリを作りました。是非、以下のリンクをチェックしてください:
https://twitter.com/MszPro/status/1640874358301409281
お読みいただき、ありがとうございます。
MastodonやMissKeyでフォローしてください:🐘 マストドン @me@mszpro.com
Twitterでフォローしてください:☺️ Twitter @MszPro
☺️ サイト https://MszPro.com

Written by MszPro~