やること
SwiftでStoryboardを使った画面遷移を行う
とりあえず簡単な画面遷移ということで、画面遷移前に入力チェックをして、次の画面に値を受け渡し、画面遷移先で受け取った値を表示する
開発環境
Xcode 8
Swift 3
プロジェクト構成
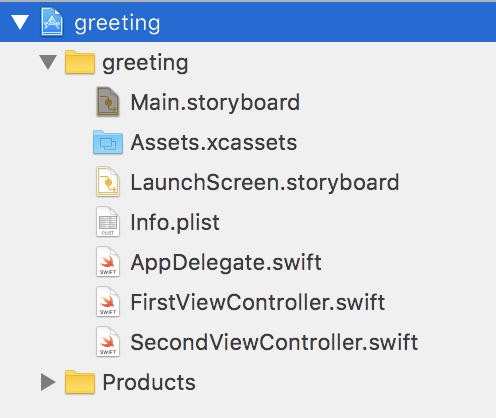
今回編集したのは、以下の3ファイル
- Main.storyboard
- FirstViewController.swift
- SecondViewController.swift
Storyboardの設定
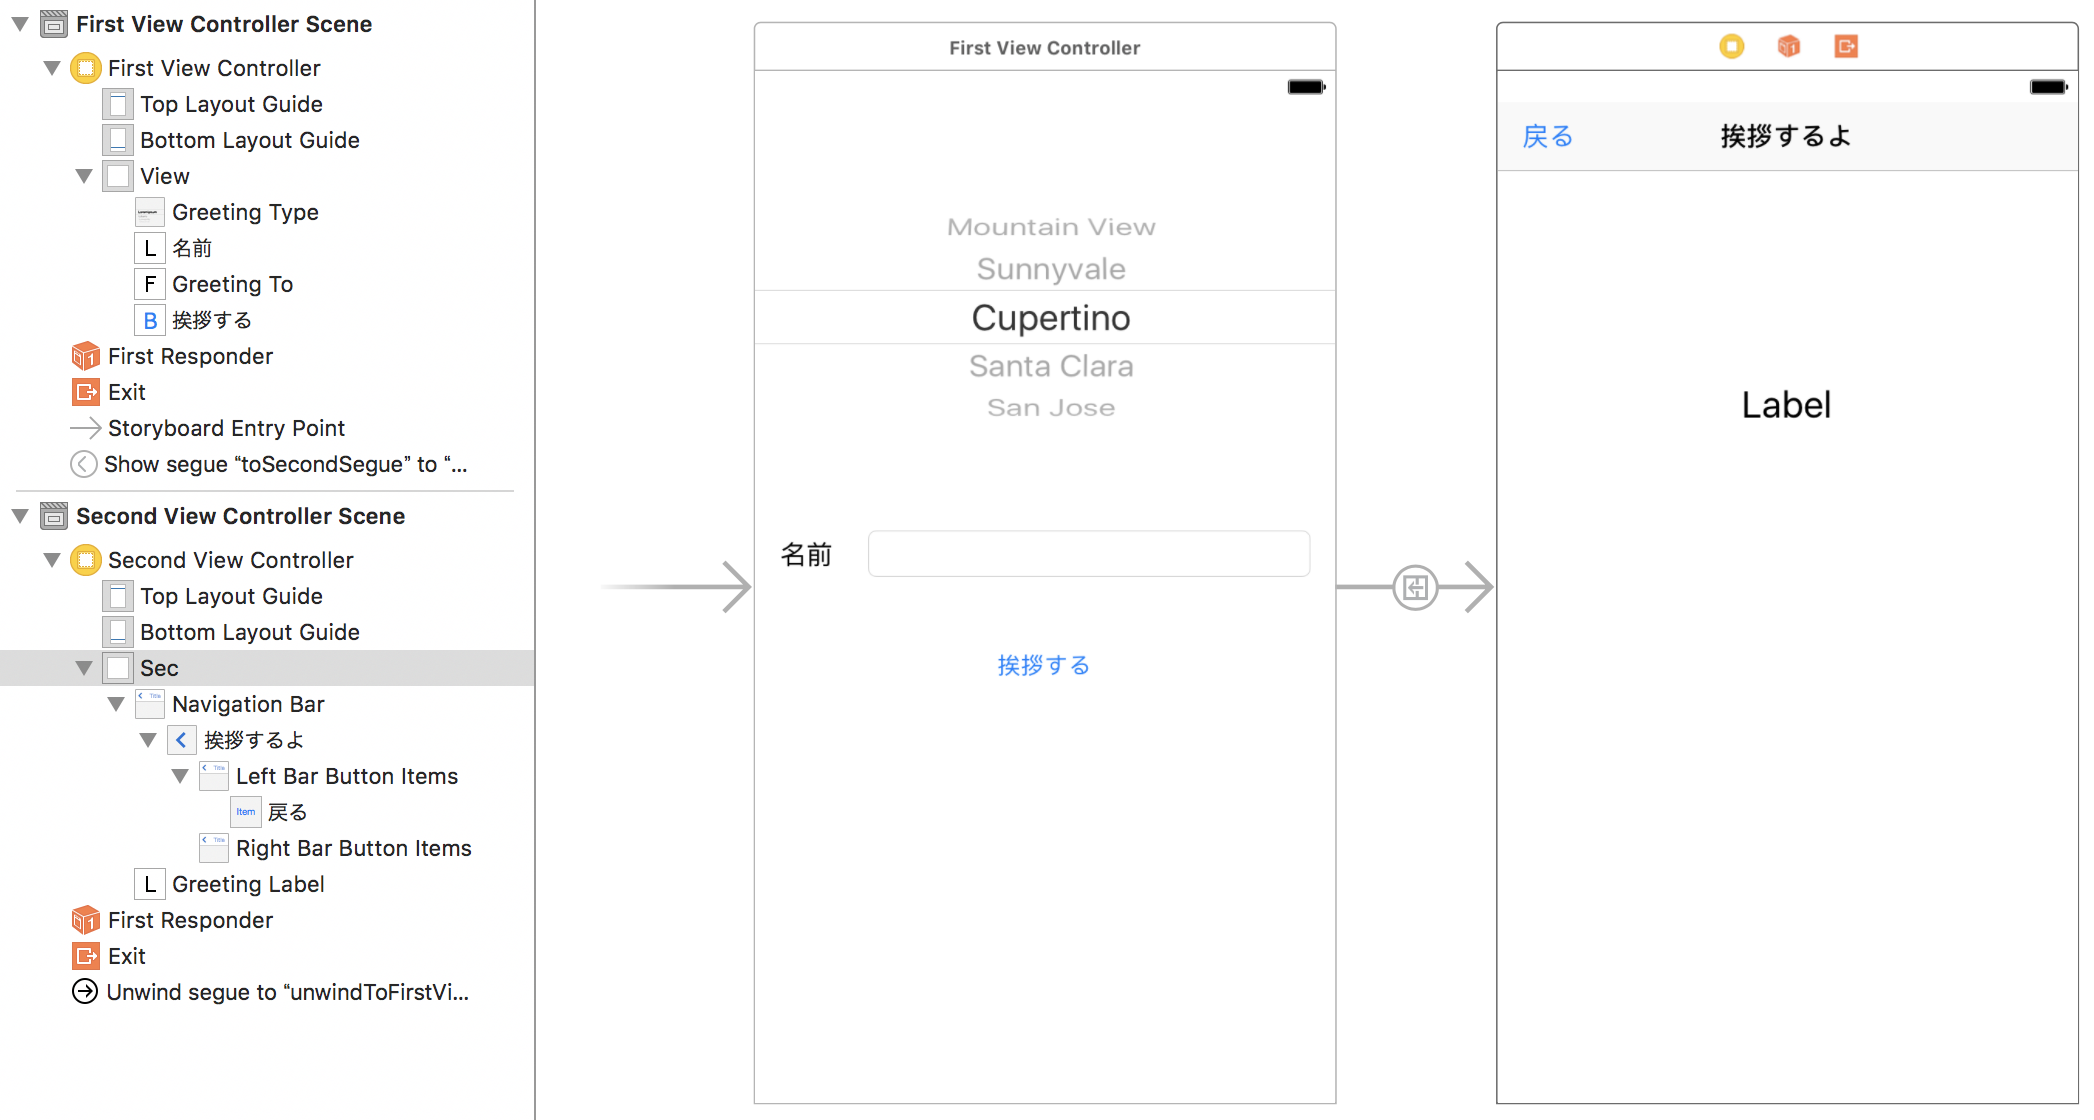
UIViewControllerを2つ作成し、それぞれ後述するFirstViewController、SecondViewControllerと紐づける
FirstViewControllerには以下の3つのコントロールを配置
- 挨拶を選択する Picker View
- 挨拶をする人の名前を入力する Text Field
- 次の画面へ遷移する Button(後でSegueの設定するよ)
SecondViewControllerには以下の3つのコントロールを配置
- Navigation Bar
- 前の画面に戻るための Bar Button Item(後でUnwind Segueの設定するよ)
- 挨拶を表示する Label
画面遷移の設定
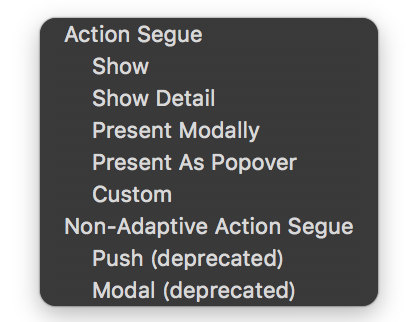
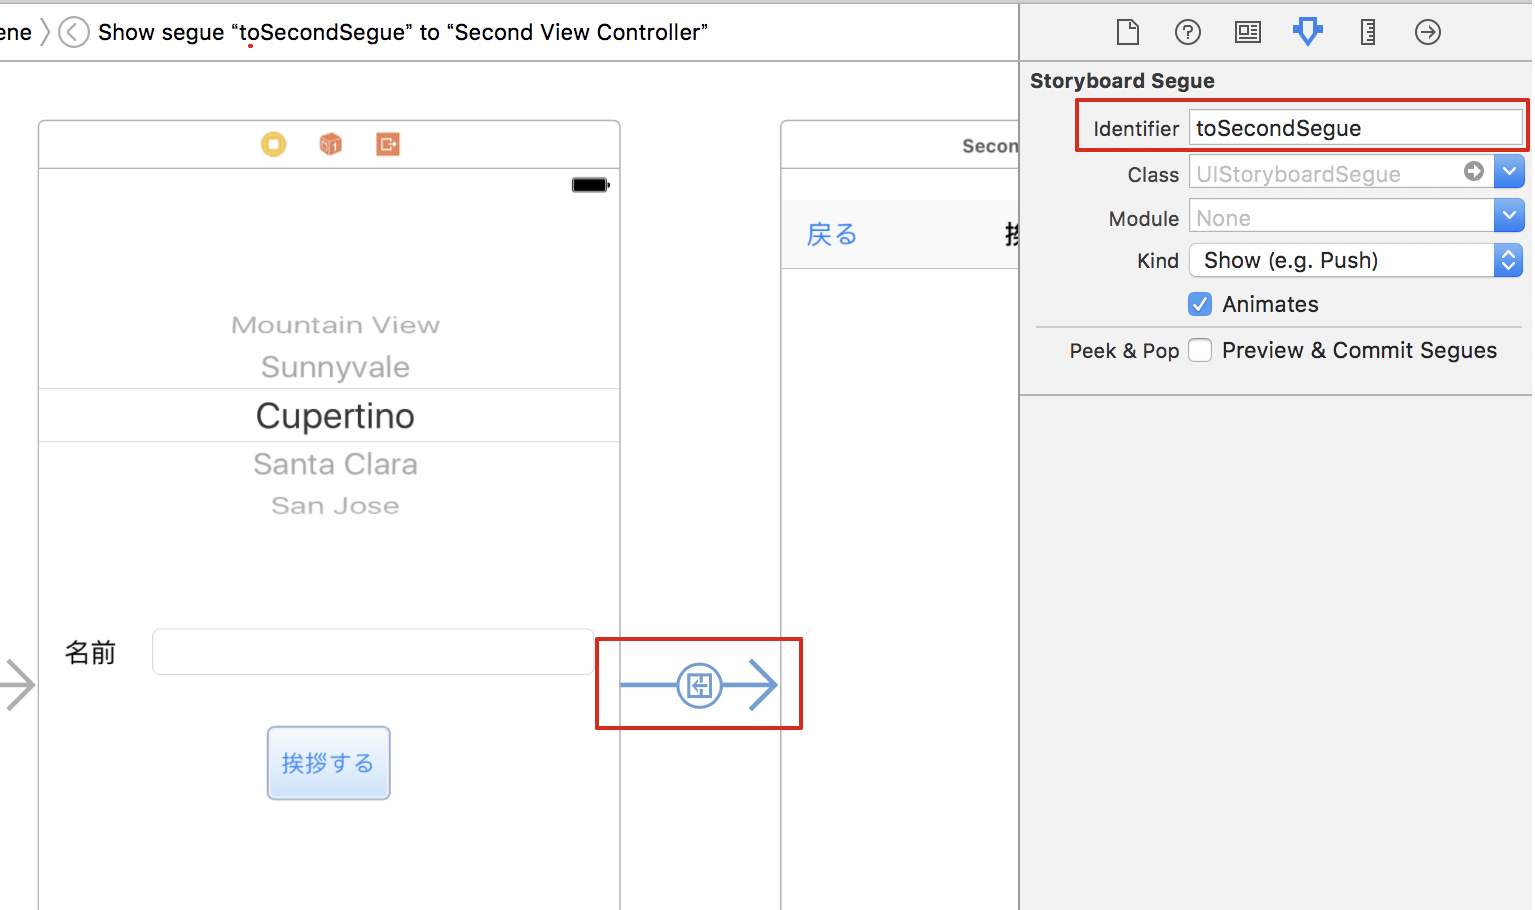
FirstViewControllerの「挨拶する」ボタンをcontrolキーを押しながら、SecondViewControllerにドラッグすると、画面の表示方法が選択できるので今回はshowを選択

上記で作成したSegueのidentifierに名前をつける
ソース
import Foundation
import UIKit

class FirstViewController: UIViewController, UIPickerViewDelegate, UIPickerViewDataSource {
    @IBOutlet weak var greetingType: UIPickerView!
    @IBOutlet weak var greetingTo: UITextField!

    let greetingTypes = ["おはよう", "こんにちは", "こんばんは"]
    var selectedGreetingType: String = ""

    override func viewDidLoad() {
        super.viewDidLoad()
    }

    /// 画面遷移するかの判定処理
    override func shouldPerformSegue(withIdentifier identifier: String, sender: Any?) -> Bool {
        if (identifier == "toSecondSegue") {
            if (self.greetingTo.text?.isEmpty)! {
                let alert = UIAlertController(title: "入力エラー", message: "名前を入力してください", preferredStyle: .alert)
                alert.addAction(UIAlertAction(title: "OK", style: .default))
                self.present(alert, animated: true, completion: nil)
                return false;
            }
        }
        return true;
    }

    /// 画面遷移時の処理
    override func prepare(for segue: UIStoryboardSegue, sender: Any?) {
        if (segue.identifier == "toSecondSegue") {
            let secondViewController:SecondViewController = segue.destination as! SecondViewController
            let selectedRow = self.greetingType.selectedRow(inComponent: 0)
            secondViewController.greetingType = self.greetingTypes[selectedRow]
            secondViewController.greetingTo = self.greetingTo.text!
        }
    }

    /// Storyboadでunwind sequeを引くために必要
    @IBAction func unwindToFirstView(segue: UIStoryboardSegue) {
    }

    /// 以下は挨拶選択を作成している
    func numberOfComponents(in pickerView: UIPickerView) -> Int {
        return 1
    }

    func pickerView(_ pickerView: UIPickerView, numberOfRowsInComponent component: Int) -> Int {
        return greetingTypes.count
    }

    func pickerView(_ pickerView: UIPickerView, titleForRow row: Int, forComponent component: Int) -> String? {
        return greetingTypes[row]
    }

    func pickerView(_ pickerView: UIPickerView, didSelectRow row: Int, inComponent component: Int) {
        self.selectedGreetingType = greetingTypes[row]
    }
}
画面遷移の判定
shouldPerformSegue(withIdentifier)が画面遷移判定用のメソッドで、falseを戻すと画面遷移をキャンセルする
パラメータのidentifierにStoryboardでSegueにつけた値がもらえるので、画面遷移先が複数ある場合は、この値で処理を分岐させる
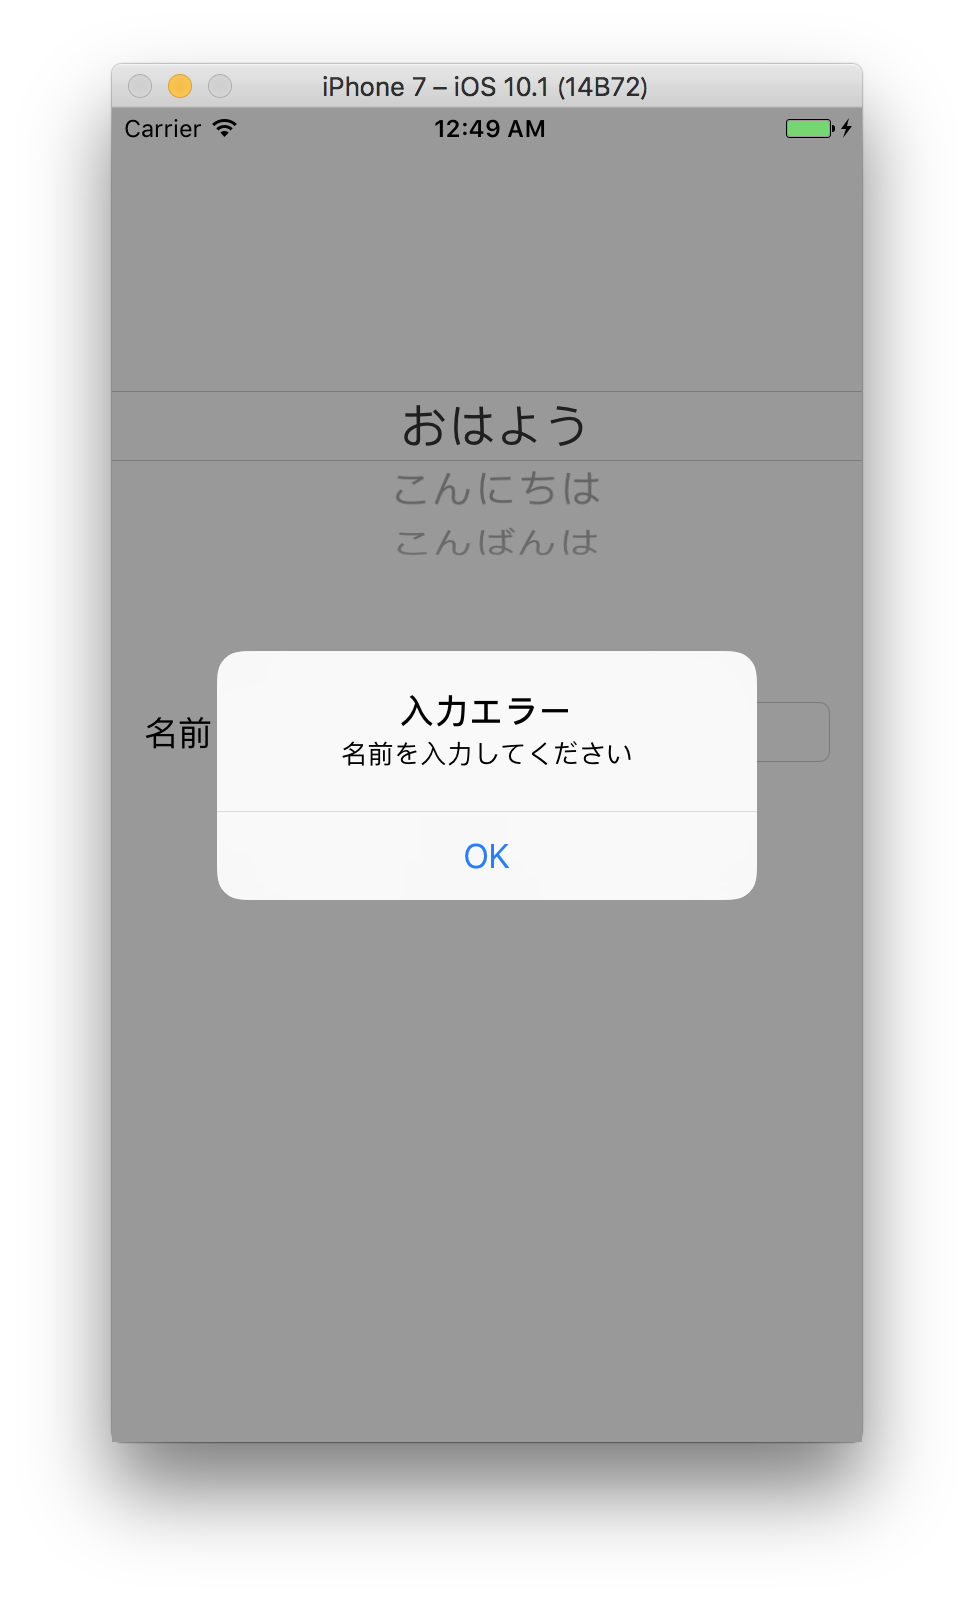
今回は名前(Text Field)が入力されていない場合、アラートを出して画面遷移を中止する
画面遷移処理
prepare(for segue)が画面遷移時のメソッド
パラメータのsegueが画面遷移先のオブジェクトとなっていて、先程と同じようにsegue.identifierで遷移先を判定するか、segue.destinationが遷移先のViewControllerオブジェクトとなっているので、型で遷移先を判断することもできる
今回はsegue.identifierで遷移先を特定し、segue.destinationを遷移先のSecondViewControllerクラスにキャストして必要な値を受け渡す
遷移先から戻る処理
unwindToFirstViewはStoryboardで戻る線を引くために必要となるメソッド
@IBActionをつけたメソッドでパラメータをsegue: UIStoryboardSegueとする(メソッド名は自由につけられる)
閉じる処理などは特に記述する必要はないので、戻る際の処理が特に必要なければメソッドは空のままでよい
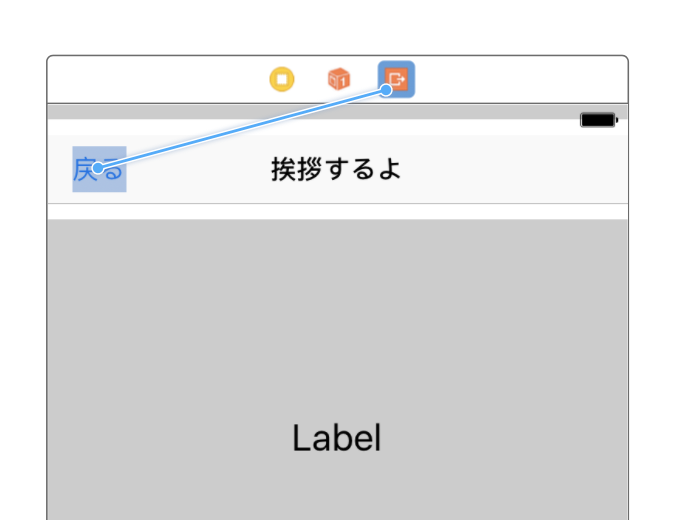
戻るボタンがあるSecondViewControllerではなく、戻り先のFirstViewControllerに作るのがポイント
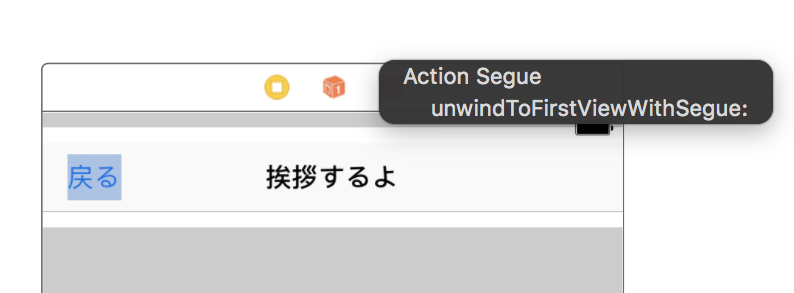
メソッドを作成したらStoryboardを開きSecondViewControllerの「戻る」ボタンをcontrolキーを押しながら上の3つのうち一番右のExitアイコンにドラッグすると、上記で作成したメソッドが出てくるので選択する
import Foundation
import UIKit

class SecondViewController: UIViewController {
    @IBOutlet weak var greetingLabel: UILabel!

    var greetingType: String = ""
    var greetingTo: String = ""

    override func viewDidLoad() {
        super.viewDidLoad()

        self.greetingLabel.text = String(format: "%@ %@さん", self.greetingType, self.greetingTo)
    }
}
遷移先
画面遷移時の値を受け取れるようにgreetingType,greetingToの2つ変数を宣言しておき、viewDidLoadで受け取った値を表示
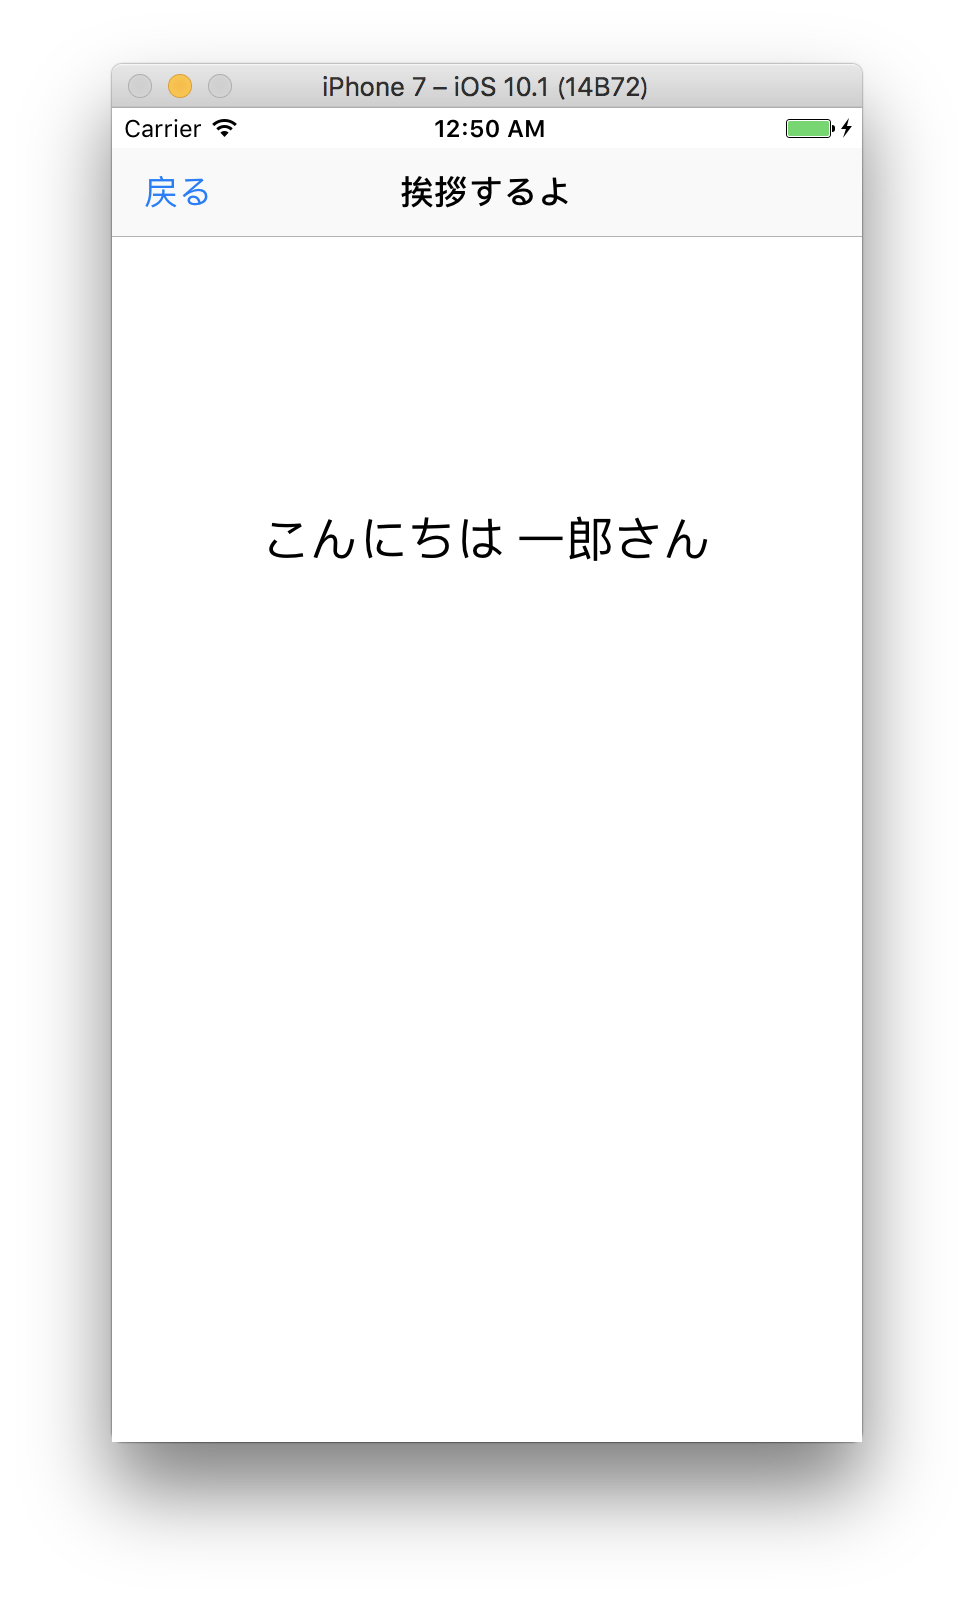
完成したもの
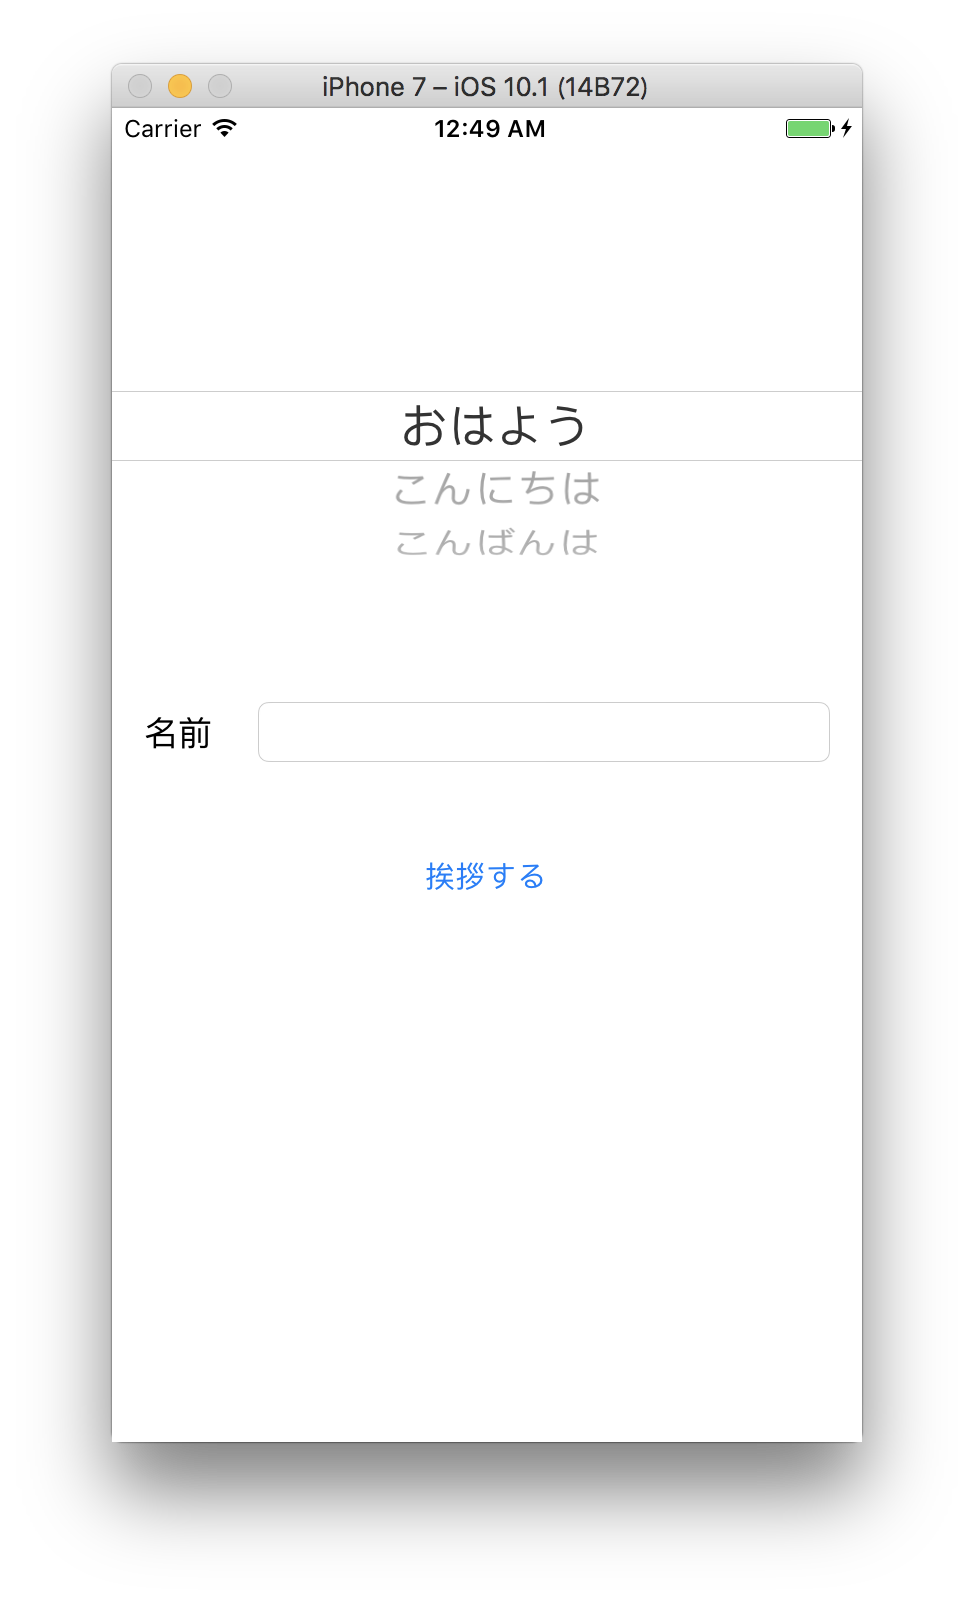
画面起動時
そのまま「挨拶」するボタンをタップ(入力エラー)
挨拶を撰択して、名前も入力

画面遷移