React × TypeScriptで作る天気予報ウィジェット(livedoor 天気互換APIを利用)
本記事では、無料で利用できる 天気予報API(livedoor 天気互換) を使って、名古屋市の天気予報を表示するウィジェットの作り方を解説します。
完成イメージ
以下の情報をウィジェットで表示します。
- 現在の日付・更新時刻
- 今日の天気状態(最高・最低気温、降水確率、風向き、風速など)
- 今日・明日・明後日の3日間の予報
- 天気状態に応じた背景色とアイコン
- 詳細な天気概況文
利用する技術スタック
- React + TypeScript
- CSS
- Lucide React(アイコン)
実装手順
1. APIレスポンスの型定義
APIから返ってくるJSONに合わせて、型定義を行います。
interface WeatherForecast {
  date: string;
  dateLabel: string;
  telop: string;
  detail: {
    weather: string | null;
    wind: string | null;
    wave: string | null;
  };
  temperature: {
    min: { celsius: string | null };
    max: { celsius: string | null };
  };
  chanceOfRain: { T00_06: string; T06_12: string; T12_18: string; T18_24: string };
  image: { url: string };
}
2. 天気状態の判定
APIのテロップ(telop)から天気の状態を判断します。
const getWeatherCondition = (telop: string) => {
  if (telop.includes('雷')) return 'thunderstorm';
  if (telop.includes('雨')) return 'rain';
  if (telop.includes('雪') || telop.includes('みぞれ')) return 'snow';
  if (telop.includes('曇')) return 'cloudy';
  if (telop.includes('霧') || telop.includes('霞')) return 'fog';
  return 'clear';
};
3. 天気データの取得
名古屋市のCity ID「230010」を使用してAPIを叩きます。
useEffect(() => {
  fetch('https://weather.tsukumijima.net/api/forecast/city/230010')
    .then(res => res.json())
    .then(data => {/*データ処理*/})
    .catch(() => {/*エラーハンドリング*/});
}, []);
4. APIからのデータ加工
降水確率は最も高い数値を採用します。
const rainChances = [
  forecast.chanceOfRain.T00_06,
  forecast.chanceOfRain.T06_12,
  forecast.chanceOfRain.T12_18,
  forecast.chanceOfRain.T18_24
];
const maxRainChance = rainChances.reduce((max, current) =>
  parseInt(current) > parseInt(max) ? current : max, '0%');
5. アイコンと背景色の設定
Lucideアイコンを天気状態に応じて使い分けます。
const getWeatherIcon = condition => {
  switch (condition) {
    case 'clear': return <Sun />;
    case 'rain': return <CloudRain />;
    // その他の状態
  }
};
背景色も状態に応じて変えます。
.weather-clear { background-color: #2c3e50; border-left: 3px solid #ffd700; }
.weather-clear .icon { color: #ffd700; }
6. ウィジェットのレンダリング
取得した情報を画面に表示します。
<div className="widget">
  <h2>天気予報</h2>
  <div>{formattedDate} (更新: {updateTime})</div>
  <div>{/* 今日の天気詳細 */}</div>
  <div>{/* 3日間予報 */}</div>
  <div>{/* 詳細な天気概況文 */}</div>
</div>
注意点
- 本APIは公式ではないため、仕様変更の可能性があります。
- 風速は詳細文から推測して表示しています。
今後の改善案
- 複数都市の切り替え表示
- 週間天気予報機能
実行例
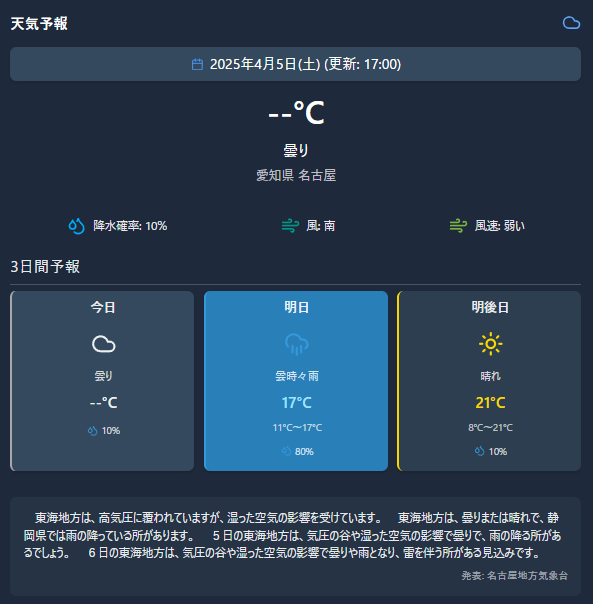
※ 今日の天気が--となっていますが、取得時間に起因するもので明日になれば出てくる(はず)。
ReactとTypeScriptを用いて手軽に天気ウィジェットが実装できるので、ぜひ試してみてください!