Hortonworks GalleryにAmbariのZeppelinサービスであるambari-zeppelin-serviceが公開されています。Option 2のAmbari Blueprintを使う方法は仮想マシン上に新しくHDPクラスタとZeppelinをインストールします。今回は仮想マシンではなく、Docker Swarm上にセットアップしてみます。
仮想マシンの作成
IDCFクラウドにDebian 8.2.0 64-bitテンプレートを使い仮想マシンを3台作成します。メモリを多めにスペックはstandard.M8を選びました。
| Dockerホストのhostname | Dockerホストのeth0 | Docker Swarm |
|---|---|---|
| swarm-1 | 10.3.0.201 | Swarm Manager/Agent |
| swarm-2 | 10.3.0.202 | Swarm Agent |
| swarm-3 | 10.3.0.203 | Swarm Agent |
作成した仮想マシンにログインしてDebianとカーネルのバージョンを確認します。以下の作業はrootユーザーで行います。マニュアルで構築ができた後はSaltで構成管理をする予定です。
$ lsb_release -a
No LSB modules are available.
Distributor ID: Debian
Description:    Debian GNU/Linux 8.2 (jessie)
Release:        8.2
Codename:       jessie
$ uname -r
3.16.0-4-amd64
Overlayネットワーク
以下を参考にしてswarm-[1-3]の仮想マシンにOverlayネットワークを作成します。
Consul
Consulはoverlayドライバのメタデータを保存する用途です。
$ curl -LO https://releases.hashicorp.com/consul/0.6.3/consul_0.6.3_linux_amd64.zip
$ unzip consul_0.6.3_linux_amd64.zip
$ mv consul /usr/local/bin
$ consul version
Consul v0.6.3
Consul Protocol: 3 (Understands back to: 1)
Consulを実行するのconsulユーザーを作成します。
$ useradd consul
swawrm-[1-3]の仮想マシン全てに同じ設定をします。Consulの設定ファイルを配置するディレクトリと、データを保存するディレクトリを作成してオーナーをconsulユーザーに変更します。
$ mkdir /var/consul /etc/consul.d /etc/sysconfig
$ chown consul:consul /var/consul
/etc/default/consul
Debian用の環境設定ファイルを作成します。-advertiseには仮想マシンのeth0のIPアドレスを指定します。
- swarm-1
GOMAXPROCS=2
CMD_OPTS="agent -advertise 10.3.0.201 -config-dir=/etc/consul.d -data-dir=/var/consul"
- swarm-2
GOMAXPROCS=2
CMD_OPTS="agent -advertise 10.3.0.202 -config-dir=/etc/consul.d -data-dir=/var/consul"
- swarm-3
GOMAXPROCS=2
CMD_OPTS="agent -advertise 10.3.0.203 -config-dir=/etc/consul.d -data-dir=/var/consul"
/etc/consul.d/config.json
- bootstrap_expect: Consulクラスタは3台で構成します。
- retry_join: ノードのIPアドレスを列挙して3台が参加するまで起動を待機します。
{
  "bootstrap_expect": 3,
  "server": true,
  "data_dir": "/var/consul",
  "log_level": "INFO",
  "enable_syslog": false,
  "retry_join": ["10.3.0.201", "10.3.0.202", "10.3.0.203"],
  "client_addr": "0.0.0.0"
}
systemd
ConsulのSystemd設定ファイルを作成します。
[Unit]
Description=Consul agent
Requires=network-online.target
After=network-online.target

[Service]
User=consul
Group=consul
EnvironmentFile=-/etc/default/consul
ExecStart=/usr/local/bin/consul $CMD_OPTS
ExecReload=/bin/kill -HUP $MAINPID
KillSignal=SIGINT

[Install]
WantedBy=multi-user.target
Consulサービスの自動起動を有効にしてサービスを起動します。
$ systemctl daemon-reload
$ systemctl enable consul
Created symlink from /etc/systemd/system/multi-user.target.wants/consul.service to /lib/systemd/system/consul.service.
$ systemctl start consul
Consulサービスのstatusを確認します。正常に起動しました。
$ systemctl status consul
● consul.service - Consul agent
   Loaded: loaded (/lib/systemd/system/consul.service; enabled)
   Active: active (running) since 金 2016-01-15 14:41:20 JST; 9s ago
 Main PID: 5437 (consul)
   CGroup: /system.slice/consul.service
           └─5437 /usr/local/bin/consul agent -advertise 10.3.0.201 -config-d...
swarm-1仮想マシン
最初にSwarm Managerになるswarm-1仮想マシンで作業を行います。
Docker
https://get.docker.com/のインストールスクリプトを使いDockerをインストールします。
$ curl -sSL https://get.docker.com/ | sh
Dockerサービスを停止してからDockerのSystemd設定ファイルを編集します。
$ systemctl stop docker
Dockerデーモンの起動オプションは、Overlayネットワーク、Swarm Managerが使うリモートAPI、UNIXソケットを追加します。
DOCKER_OPTS="--cluster-store=consul://localhost:8500 --cluster-advertise=eth0:2376 -H tcp://0.0.0.0:2375 -H unix:///var/run/docker.sock"
systemdのdocker.serviceファイルを編集します。
- EnvironmentFile: 環境設定ファイルからDOCKER_OPTS環境変数を読み込む
- ExecStart: Docker daemonの起動オプションに追加
[Unit]
Description=Docker Application Container Engine
Documentation=https://docs.docker.com
After=network.target docker.socket
Requires=docker.socket

[Service]
Type=notify
EnvironmentFile=-/etc/default/docker
ExecStart=/usr/bin/docker daemon -H fd:// $DOCKER_OPTS
MountFlags=slave
LimitNOFILE=1048576
LimitNPROC=1048576
LimitCORE=infinity

[Install]
WantedBy=multi-user.target
Systemd設定ファイルをリロードしてDockerサービスを開始します。
$ systemctl daemon-reload
$ systemctl start docker
Swarm Managerコンテナ
以下を参考にしてDocker Swarmクラスタを作成します。
swawrm-1仮想マシンのDockerホストにSwarm Managerコンテナをインストールします。公開するポートは3333を指定しました。
$ docker pull swarm
$ docker run -d \
  --name swarm-manage \
  -p 3333:2375 \
  swarm \
  manage \
  consul://10.3.0.201:8500/swarm
Swarm Agentコンテナ
次にSwarm Agentをインストールします。swarm-1仮想マシンにはSwarm ManagerとSwarm Agentの両方のコンテナを起動します。
$ docker run -d \
  --name swarm-node-1 \
  swarm \
  join \
  --addr=10.3.0.201:2375 \
  consul://10.3.0.201:8500/swarm
-HフラグでDockerデーモンをDocker Managerに指定してからinfoコマンドを実行してみます。Docker Swarmが正常に起動しました。
$ docker -H tcp://10.3.0.201:3333 info
Containers: 2
Images: 1
Role: primary
Strategy: spread
Filters: health, port, dependency, affinity, constraint
Nodes: 1
 swarm-1: 10.3.0.201:2375
  └ Status: Healthy
  └ Containers: 2
  └ Reserved CPUs: 0 / 2
  └ Reserved Memory: 0 B / 8.202 GiB
  └ Labels: executiondriver=native-0.2, kernelversion=3.16.0-4-amd64, operatingsystem=Debian GNU/Linux 8 (jessie), storagedriver=aufs
CPUs: 2
Total Memory: 8.202 GiB
Name: 8cc34ebf6290
Overlayネットワークの作成
Docker Swarmで使うOverlayネットワークを作成します。Apache Zeppelin用にネットワーク名をzeppelinとしました。
$ docker network create \
  --subnet=192.168.0.0/24 \
  --driver=overlay \
  zeppelin
swarm-[2-3]仮想マシン
swarm-[2-3]仮想マシンにはSwarm Agentをインストールします。
Swarm Agentコンテナ
Dockerの設定まではswarm-1仮想マシンと同じです。それぞれにSwarm Agentをインストールします。仮想マシンのeth0のIPアドレスを指定します。
- swarm-2仮想マシンのswarm-node-2コンテナ
$ docker run -d \
  --name swarm-node-2 \
  swarm \
  join \
  --addr=10.3.0.202:2375 \
  consul://10.3.0.202:8500/swarm
- swarm-3仮想マシンのswarm-node-3コンテナ
$ docker run -d \
  --name swarm-node-3 \
  swarm \
  join \
  --addr=10.3.0.203:2375 \
  consul://10.3.0.203:8500/swarm
swarm-2またはswarm-3仮想マシンからSwarm Managerを指定してinfoを表示します。3台のノードがHealthyに起動しています。
$ docker -H tcp://10.3.0.201:3333 info
Containers: 4
Images: 3
Role: primary
Strategy: spread
Filters: health, port, dependency, affinity, constraint
Nodes: 3
 swarm-1: 10.3.0.201:2375
  └ Status: Healthy
  └ Containers: 2
  └ Reserved CPUs: 0 / 2
  └ Reserved Memory: 0 B / 8.202 GiB
  └ Labels: executiondriver=native-0.2, kernelversion=3.16.0-4-amd64, operatingsystem=Debian GNU/Linux 8 (jessie), storagedriver=aufs
 swarm-2: 10.3.0.202:2375
  └ Status: Healthy
  └ Containers: 1
  └ Reserved CPUs: 0 / 2
  └ Reserved Memory: 0 B / 8.202 GiB
  └ Labels: executiondriver=native-0.2, kernelversion=3.16.0-4-amd64, operatingsystem=Debian GNU/Linux 8 (jessie), storagedriver=aufs
 swarm-3: 10.3.0.203:2375
  └ Status: Healthy
  └ Containers: 1
  └ Reserved CPUs: 0 / 2
  └ Reserved Memory: 0 B / 8.202 GiB
  └ Labels: executiondriver=native-0.2, kernelversion=3.16.0-4-amd64, operatingsystem=Debian GNU/Linux 8 (jessie), storagedriver=aufs
CPUs: 6
Total Memory: 24.61 GiB
Name: 8cc34ebf6290
Ambari Nodeコンテナ
swarm-1の仮想マシンにログインして作業マシンとして使います。DOCKER_HOST環境変数をSwarm Managerに指定して、3台のSwarm NodeにオフィシャルのCentOS 6.xイメージをpullします。
$ export DOCKER_HOST=tcp://10.3.0.201:3333
$ docker pull centos:6
swarm-1: Pulling centos:6...
swarm-2: Pulling centos:6...
swarm-3: Pulling centos:6...
コンテナの作成
Ambariで使うコンテナはnode[1-4]の4台を作成します。node1のコンテナはAmbari Serverをインストールします。
ambari-serverサービスがforegroundでフロントで実行できないのでtail -f /dev/nullするcommandにしました。もっと良い方法がありそうです。
- --privileged: ambari-bootstrapに権限が必要なため
- --name:
/etc/hostにわかりやすいhostnameをつける - --hostname:
/etc/hostにzeppelinドメインのhostnameをつける - --net: Overlayネットワークを使う
- --env: swarm-1仮想マシンにコンテナを作成する制約を入れる
$ export DOCKER_HOST=tcp://10.3.0.201:3333
$ docker run -d \
  --privileged \
  --name node1 \
  --hostname node1.zeppelin \
  --net zeppelin \
  --env constraint:node==swarm-1 \
  centos:6 \
  tail -f /dev/null
node[2-4]の3台は--nameと--hostname以外は同じです。
- node2コンテナ
$ docker run -d \
  --privileged \
  --name node2 \
  --hostname node2.zeppelin \
  --net zeppelin \
  centos:6 \
  tail -f /dev/null
- node3コンテナ
$ docker run -d \
  --privileged \
  --name node3 \
  --hostname node3.zeppelin \
  --net zeppelin \
  centos:6 \
  tail -f /dev/null
- node4コンテナ
$ docker run -d \
  --privileged \
  --name node4 \
  --hostname node4.zeppelin \
  --net zeppelin \
  centos:6 \
  tail -f /dev/null
docker psで確認をします。コンテナがswarm-[1-3]仮想マシンに分散して作成されました。
$ docker ps
CONTAINER ID        IMAGE               COMMAND                  CREATED             STATUS              PORTS                                                                   NAMES
ea0cfa4631e9        centos:6            "tail -f /dev/null"      11 seconds ago      Up 10 seconds                                                                               swarm-2/node4
ac1d338d54ce        centos:6            "tail -f /dev/null"      26 seconds ago      Up 24 seconds                                                                               swarm-3/node3
7643d9256e83        centos:6            "tail -f /dev/null"      33 seconds ago      Up 31 seconds                                                                               swarm-2/node2
ceb2fc18d7f3        centos:6            "tail -f /dev/null"      42 seconds ago      Up 40 seconds                                                                               swarm-1/node1
ambari-bootstrapを使う
ambari-bootstrapを使ってAmbariノードのbootstrappingをします。本来はDockerイメージに落とし込む必要がありますがプロトタイプなのでコンテナに入って作業していきます。An Ambari Service for ZeppelinのOption2の手順を実行していきます。
node[2-4]コンテナ
3台のAmbari Nodeに入って作業します。Docker Swarmクラスタを構成しているので、ログインしているDockerホスト以外で起動しているコンテナにもdocker execできます。以下はnode2の例です。node3とnode4も同様にインストールします。
- node2コンテナ
$ docker exec -it node2 bash
$ export ambari_server=node1
$ curl -sSL https://raw.githubusercontent.com/seanorama/ambari-bootstrap/master/ambari-bootstrap.sh | sh
- node3コンテナ
$ docker exec -it node3 bash
$ export ambari_server=node1
$ curl -sSL https://raw.githubusercontent.com/seanorama/ambari-bootstrap/master/ambari-bootstrap.sh | sh
- node4コンテナ
$ docker exec -it node4 bash
$ export ambari_server=node1
$ curl -sSL https://raw.githubusercontent.com/seanorama/ambari-bootstrap/master/ambari-bootstrap.sh | sh
node1コンテナ
node1コンテナにAmbari Serverをインストールします。Hortnworks Galleryのambari-zeppelin-serviceをgit cloneして、AmbariのサービスとしてZeppelinを選択できるようにします。
$ docker exec -it node1 bash
$ export install_ambari_server=true
$ curl -sSL https://raw.githubusercontent.com/seanorama/ambari-bootstrap/master/ambari-bootstrap.sh | sh
$ yum install -y git
$ VERSION=2.3
$ git clone https://github.com/hortonworks-gallery/ambari-zeppelin-service.git /var/lib/ambari-server/resources/stacks/HDP/$VERSION/services/ZEPPELIN
ambari-serverのインストールが終わったら、role_command_order.jsonのgeneral_depsフィールドの適当な位置に"ZEPPELIN_MASTER-START": ["NAMENODE-START", "DATANODE-START"],を追加します。
...
    "KAFKA_BROKER-START" : ["ZOOKEEPER_SERVER-START", "RANGER_USERSYNC-START", "NAMENODE-START"],
    "NIMBUS-START" : ["ZOOKEEPER_SERVER-START", "RANGER_USERSYNC-START", "NAMENODE-START"],
    "ZEPPELIN_MASTER-START": ["NAMENODE-START", "DATANODE-START"],
    "STORM_UI_SERVER-START" : ["NIMBUS-START", "NAMENODE-START"]
  }
}
node1コンテナのambari-serverとambari-agentをrestartします。
$ service ambari-server restart
$ service ambari-agent restart
AmbariのREST APIを実行してクラスタを構成するホストの情報を表示します。
$ curl -u admin:admin -H  X-Requested-By:ambari http://localhost:8080/api/v1/hosts
{
  "href" : "http://localhost:8080/api/v1/hosts",
  "items" : [
    {
      "href" : "http://localhost:8080/api/v1/hosts/node1.zeppelin",
      "Hosts" : {
        "host_name" : "node1.zeppelin"
      }
    },
    {
      "href" : "http://localhost:8080/api/v1/hosts/node2.zeppelin",
      "Hosts" : {
        "host_name" : "node2.zeppelin"
      }
    },
    {
      "href" : "http://localhost:8080/api/v1/hosts/node3.zeppelin",
      "Hosts" : {
        "host_name" : "node3.zeppelin"
      }
    },
    {
      "href" : "http://localhost:8080/api/v1/hosts/node4.zeppelin",
      "Hosts" : {
        "host_name" : "node4.zeppelin"
      }
    }
  ]
}
Ambari Blueprint
引き続きnode1コンテナ上で作業します。
$ docker exec -it node1 bash
最初に必要なパッケージのインストールとambari-bootstrapをcloneします。
$ yum install -y python-argparse
$ cd
$ git clone https://github.com/seanorama/ambari-bootstrap.git
bluerprint.jsonとcluster.jsonを作成
ambari-bootstrap/deployディレクトリに移動してAmbariサービスのインストールに必要な設定ファイルを生成します。Zeppelinを実行するために必要なミニマルな構成のサービスを選択します。
$ export ambari_services="HDFS MAPREDUCE2 YARN ZOOKEEPER HIVE ZEPPELIN SPARK"
deploy-recommended-cluster.bashスクリプトを実行するとダイアログの途中でホスト台数を聞かれます。先ほど確認した4を入力します。
$ cd ambari-bootstrap/deploy
$ export deploy=false
$ bash ./deploy-recommended-cluster.bash

        Please enter the number of hosts you are expecting,
        or enter "skip" to proceed without the host check.

        This prompt when timeout in 30 seconds.

        host_count: 4
Deploying the cluster once 4 hosts are registered.


Fri Jan 15 08:01:42 UTC 2016

# Checking the number of registered hosts before proceeding with deployment
===========================================================================

  * Hosts expected:   4
  * Hosts registered: 4

Success: All hosts have checked in!

# Deploying Hortonworks Data Platform using Ambari Blueprint Recommendations
============================================================================
tempdir*ディレクトリが作成されるので移動します。このディレクトリにあるblueprint.jsonとcluster.jsonを編集します。
$ cd tempdir*
$ ls
blueprint.json  configurations.json  request-configurations.json
cluster.json    host_groups.json     request-host_groups.json
ambari_services環境変数にHDFS MAPREDUCE2 YARN ZOOKEEPER HIVE ZEPPELIN SPARKを指定しました。これがAmbariにインストールするサービスとしてblueprint.jsonに定義されています。zeppelin.host.publicnameフィールドを追加します。node1コンテナを起動するときに--env constraint:node==swarm-1`の制約を指定しています。swarm-1仮想マシンにポートフォワードしているパブリックIPアドレスを指定します。
...
 "configurations": [
    {
      "zeppelin-ambari-config": {
        "zeppelin.executor.mem": "512m",
        "zeppelin.executor.instances": "2",
        "zeppelin.host.publicname": "210.xxx.xxx.xxx",
        "zeppelin.install.dir": "/opt"
      }
    },
...
}
ここで指定したパブリックIPに向けて仮想マシンの内部からも通信を行います。IDCFクラウドの場合はこのパブリックIPアドレスのポートフォワードにバーチャルルータ内からの通信を許可する必要があります。
- 10.3.0.101/21
- TCP: 1-65535

blueprint.jsonにはhost-group-[1-4]まで4つのホストグループを定義しています。次のcluster.jsonの中でホストグルーぷとホスト(Ambari NodeのDockerコンテナ)をマップしていきます。
  "host_groups": [
    {
      "name": "host-group-2",
      "components": [
        {
          "name": "NODEMANAGER"
        },
        {
          "name": "JOURNALNODE"
        },
        {
          "name": "DATANODE"
        }
      ]
    },
    {
      "name": "host-group-4",
      "components": [
        {
          "name": "NODEMANAGER"
        },
        {
          "name": "HIVE_SERVER"
        },
        {
          "name": "APP_TIMELINE_SERVER"
        },
        {
          "name": "HISTORYSERVER"
        },
        {
          "name": "HIVE_METASTORE"
        },
        {
          "name": "ZOOKEEPER_SERVER"
        },
        {
          "name": "JOURNALNODE"
        },
        {
          "name": "RESOURCEMANAGER"
        },
        {
          "name": "WEBHCAT_SERVER"
        },
        {
          "name": "DATANODE"
        },
        {
          "name": "SECONDARY_NAMENODE"
        },
        {
          "name": "MYSQL_SERVER"
        }
      ]
    },
    {
      "name": "host-group-3",
      "components": [
        {
          "name": "YARN_CLIENT"
        },
        {
          "name": "ZEPPELIN_MASTER"
        },
        {
          "name": "NODEMANAGER"
        },
        {
          "name": "HDFS_CLIENT"
        },
        {
          "name": "HIVE_CLIENT"
        },
        {
          "name": "DATANODE"
        },
        {
          "name": "MAPREDUCE2_CLIENT"
        },
        {
          "name": "NAMENODE"
        },
        {
          "name": "ZOOKEEPER_CLIENT"
        },
        {
          "name": "ZOOKEEPER_SERVER"
        },
        {
          "name": "JOURNALNODE"
        },
        {
          "name": "SPARK_CLIENT"
        },
        {
          "name": "SPARK_JOBHISTORYSERVER"
        },
        {
          "name": "HCAT"
        }
      ]
    },
    {
      "name": "host-group-1",
      "components": [
        {
          "name": "NODEMANAGER"
        },
        {
          "name": "ZOOKEEPER_SERVER"
        },
        {
          "name": "JOURNALNODE"
        },
        {
          "name": "DATANODE"
        }
      ]
    }
  ],
編集したblueprint.jsonをAmbari Serverにuploadします。URLの/zeppelinBPがblueprintの名前です。
$ curl -u admin:admin -H X-Requested-By:ambari http://localhost:8080/api/v1/blueprints/zeppelinBP -d @blueprint.json
cluster.jsonにはAmbari NodeのコンテナがFQDNで定義されています。blueprintフィールドに使用するblueprint名を指定します。
{
  "blueprint": "zeppelinBP",
  "default_password": "hadoop",
  "host_groups": [
    {
      "hosts": [
        {
          "fqdn": "node3.zeppelin"
        }
      ],
      "name": "host-group-3"
    },
    {
      "hosts": [
        {
          "fqdn": "node2.zeppelin"
        }
      ],
      "name": "host-group-2"
    },
    {
      "hosts": [
        {
          "fqdn": "node4.zeppelin"
        }
      ],
      "name": "host-group-4"
    },
    {
      "hosts": [
        {
          "fqdn": "node1.zeppelin"
        }
      ],
      "name": "host-group-1"
    }
  ]
}
| ホストグループ | ホスト(Ambari Nodeコンテナ) | 仮想マシン |
|---|---|---|
| host-group-1 | node1.zeppelin | swarm-1 |
| host-group-2 | node2.zeppelin | swarm-2 |
| host-group-3 | node3.zeppelin | swarm-3 |
| host-group-4 | node4.zeppelin | swarm-2 |
編集したcluster.jsonファイルをAmbari ServerにPOSTしてHDPクラスタとZeppelinをインストールします。URLの/zeppelinがHDPクラスタの名前になります。Acceptedのレスポンスが返りAmbariサービスのセットアップが開始しました。
$ curl -u admin:admin -H  X-Requested-By:ambari http://localhost:8080/api/v1/clusters/zeppelin -d @cluster.json
{
  "href" : "http://localhost:8080/api/v1/clusters/zeppelin/requests/1",
  "Requests" : {
    "id" : 1,
    "status" : "Accepted"
  }
}[
Nginx
IDCFクラウドの仮想マシンにセットアップしたAmbari ServerをパブリックIPアドレスからアクセスするためにNginxでリバースプロキシのコンテナを作成します。Ambari Serverのnode1コンテナが起動している同じswarm-1仮想マシンにログインしてプロジェクトのディレクトリを作成します。
$ mkdir ~/nginx
$ cd ~/nginx
NginxのオフィシャルイメージをベースにしてDockerfileを書きます。
FROM nginx
ADD default.conf /etc/nginx/conf.d/default.conf
Nginxの設定ファイルを作成します。9995ポートはZeppelinが使います。WebSocketも同じポートを使います。ZeppelinのNotebookがすぐタイムアウトしないように時間を延ばします。8080ポートがAmbari Serverのダッシュボードです。
server {
  listen 9995;
  location / {
    proxy_set_header   Host $host;
    proxy_set_header   X-Real-IP $remote_addr;
    proxy_set_header   X-Forwarded-Host $host;
    proxy_set_header   X-Forwarded-For $proxy_add_x_forwarded_for;
    proxy_set_header   X-Forwarded-Proto $scheme;
    proxy_pass         http://node1.zeppelin:9995;
    proxy_http_version 1.1;
    proxy_set_header   Upgrade $http_upgrade;
    proxy_set_header   Connection "upgrade";
    proxy_read_timeout 86400;
  }
}

server {
  listen 8080;
  location / {
    proxy_set_header   Host $host:$server_port;
    proxy_set_header   X-Real-IP $remote_addr;
    proxy_set_header   X-Forwarded-Host $host;
    proxy_set_header   X-Forwarded-For $proxy_add_x_forwarded_for;
    proxy_set_header   X-Forwarded-Proto $scheme;
    proxy_pass         http://node1.zeppelin:8080;
  }
}
Dockerイメージをビルドします。--env constraint:node==swarm-1の制約を入れてswarm-1仮想マシン上で起動させます。
$ docker build -t masato/nginx .
$ export DOCKER_HOST=tcp://10.3.0.201:3333
$ docker run -d \
  --name nginx \
  --net zeppelin \
  --env constraint:node==swarm-1 \
  -p 8080:8080 \
  -p 9995:9995 \
  masato/nginx
docker psで確認します。swarm-1仮想マシン上でNginxコンテナが起動しました。
$ docker ps
CONTAINER ID        IMAGE               COMMAND                  CREATED             STATUS              PORTS                                                                   NAMES
5be44394b88b        masato/nginx        "nginx -g 'daemon off"   4 seconds ago       Up 4 seconds        80/tcp, 10.3.0.201:8080->8080/tcp, 443/tcp, 10.3.0.201:9995->9995/tcp   swarm-1/nginx
IDCFクラウドのパブリックIPアドレスをブラウザで開きAmbari Serverにログインします。
- Username: admin
- Password: admin

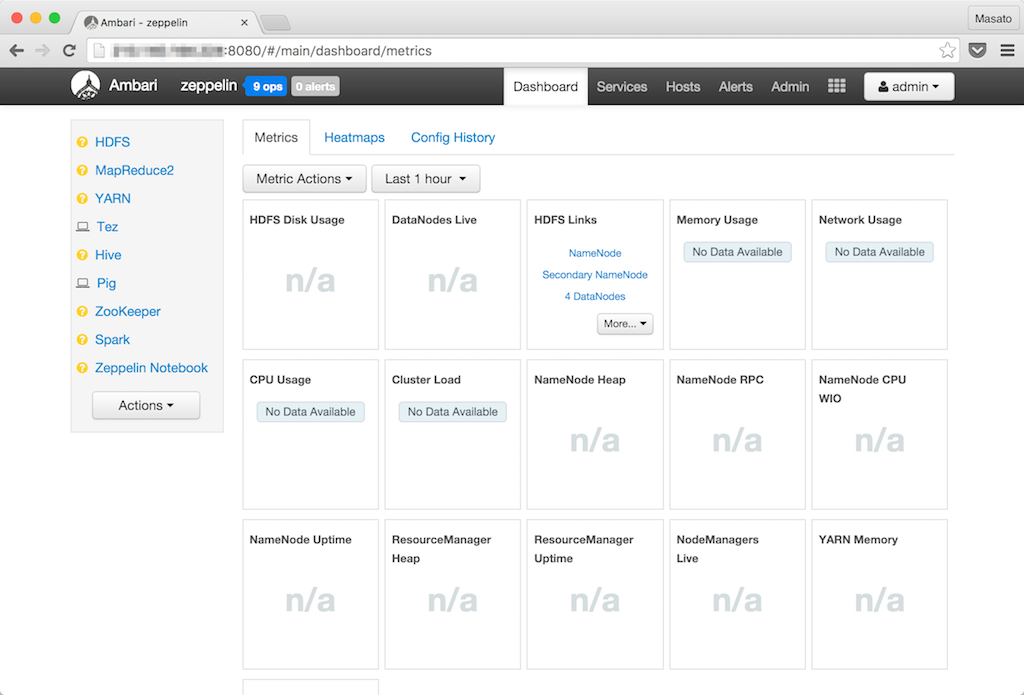
ダッシュボード画面が表示されました。Ambariサービスがインストール中なの黄色いアイコンがついています。9 opsはn現在実行中の処理数を表示します。
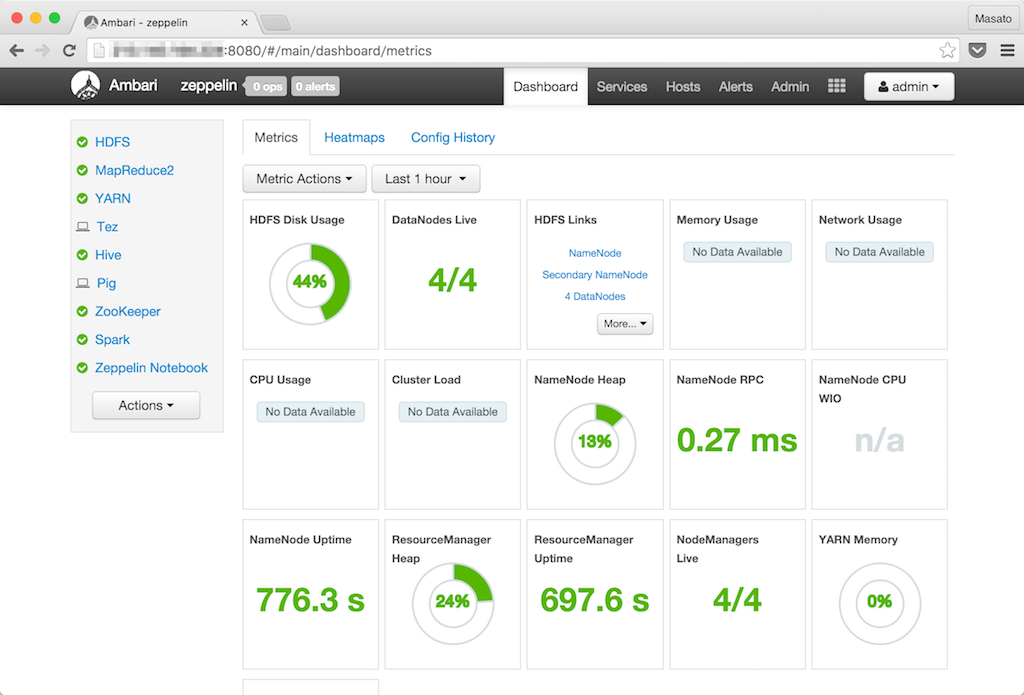
しばらくするとサービスのアイコンが全て緑色になりインストールが終了します。HadoopエコシステムもAmbari Blueprintから簡単にセットップできます。
Ambari View
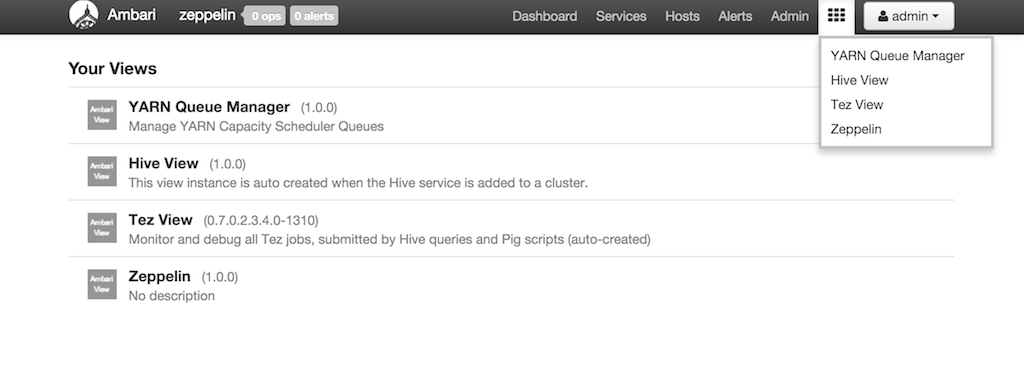
Ambari Viewはプラグイン形式でAmbari画面にAmbariサービスの画面を埋め込むことができます。
Ambari画面の上メニューのAmbari Viewのメニューです。
Hive View
node1コンテナに入りrootユーザーとadminユーザーのホームディレクトリをHDFSに作成します。このディレクトリはZeppelin ViewやHive ViewからHiveのクエリを実行する時に必要になります。
$ docker exec -it node1 bash
$ su hdfs
$ hadoop fs -mkdir /user/root
$ hadoop fs -chown root /user/root
$ hadoop fs -mkdir /user/admin
$ hadoop fs -chown admin /user/admin
HDFSサービスの設定画面を開きます。

Advancedタグを下にスクロールしてCustom core-siteセクションを開きます。Add Propertyをクリックしてプロパティを追加します。rootの箇所はOSの実行ユーザーがrootの場合です。
- key: hadoop.proxyuser.root.groups, value: *
- key: hadoop.proxyuser.root.hosts, value: *
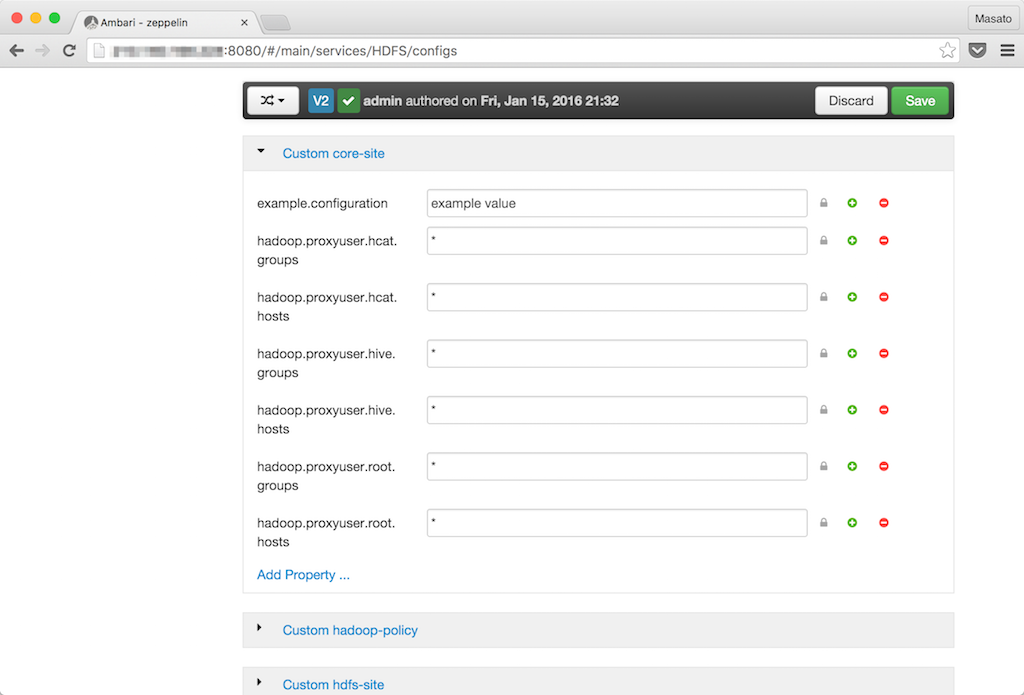
Savaボタンをクリックして変更を保存します。そのあとにRestartボタンのRestart All Affectedをクリックして設定変更の影響があるコンポーネントをリスタートします。MapReduce2サービスとYARNサービスも影響マークのアイコンが出ているのでリスタートします。
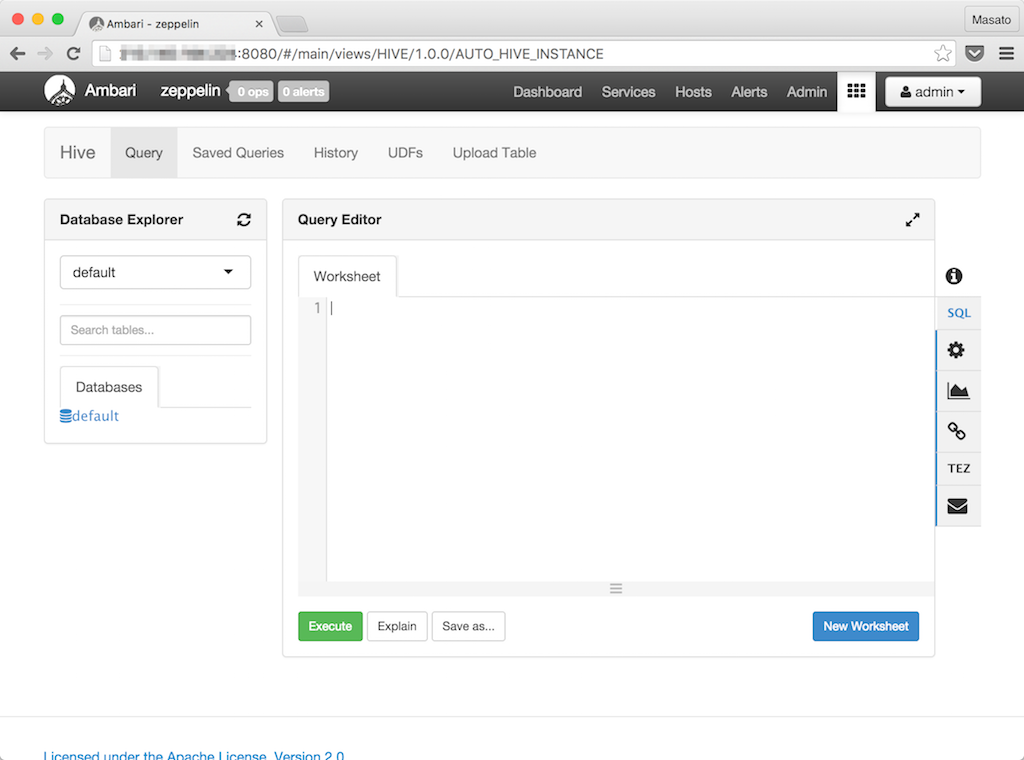
Ambari ViewからHiveビューを開きます。デフォルトのデータベースも表示されエラーもなく起動しました。
Zeppelin View
ZeppelinはAmbari Serverと同じnode1コンテナにインストールしているのでサービスをリスタートすると使えるようになります。
$ docker exec -it node1 bash
$ service ambari-server restart
ZeppelinがAmbari画面の中に埋め込まれた状態で表示されました。

9995ポートからZeppelinを直接使うこともできます。
