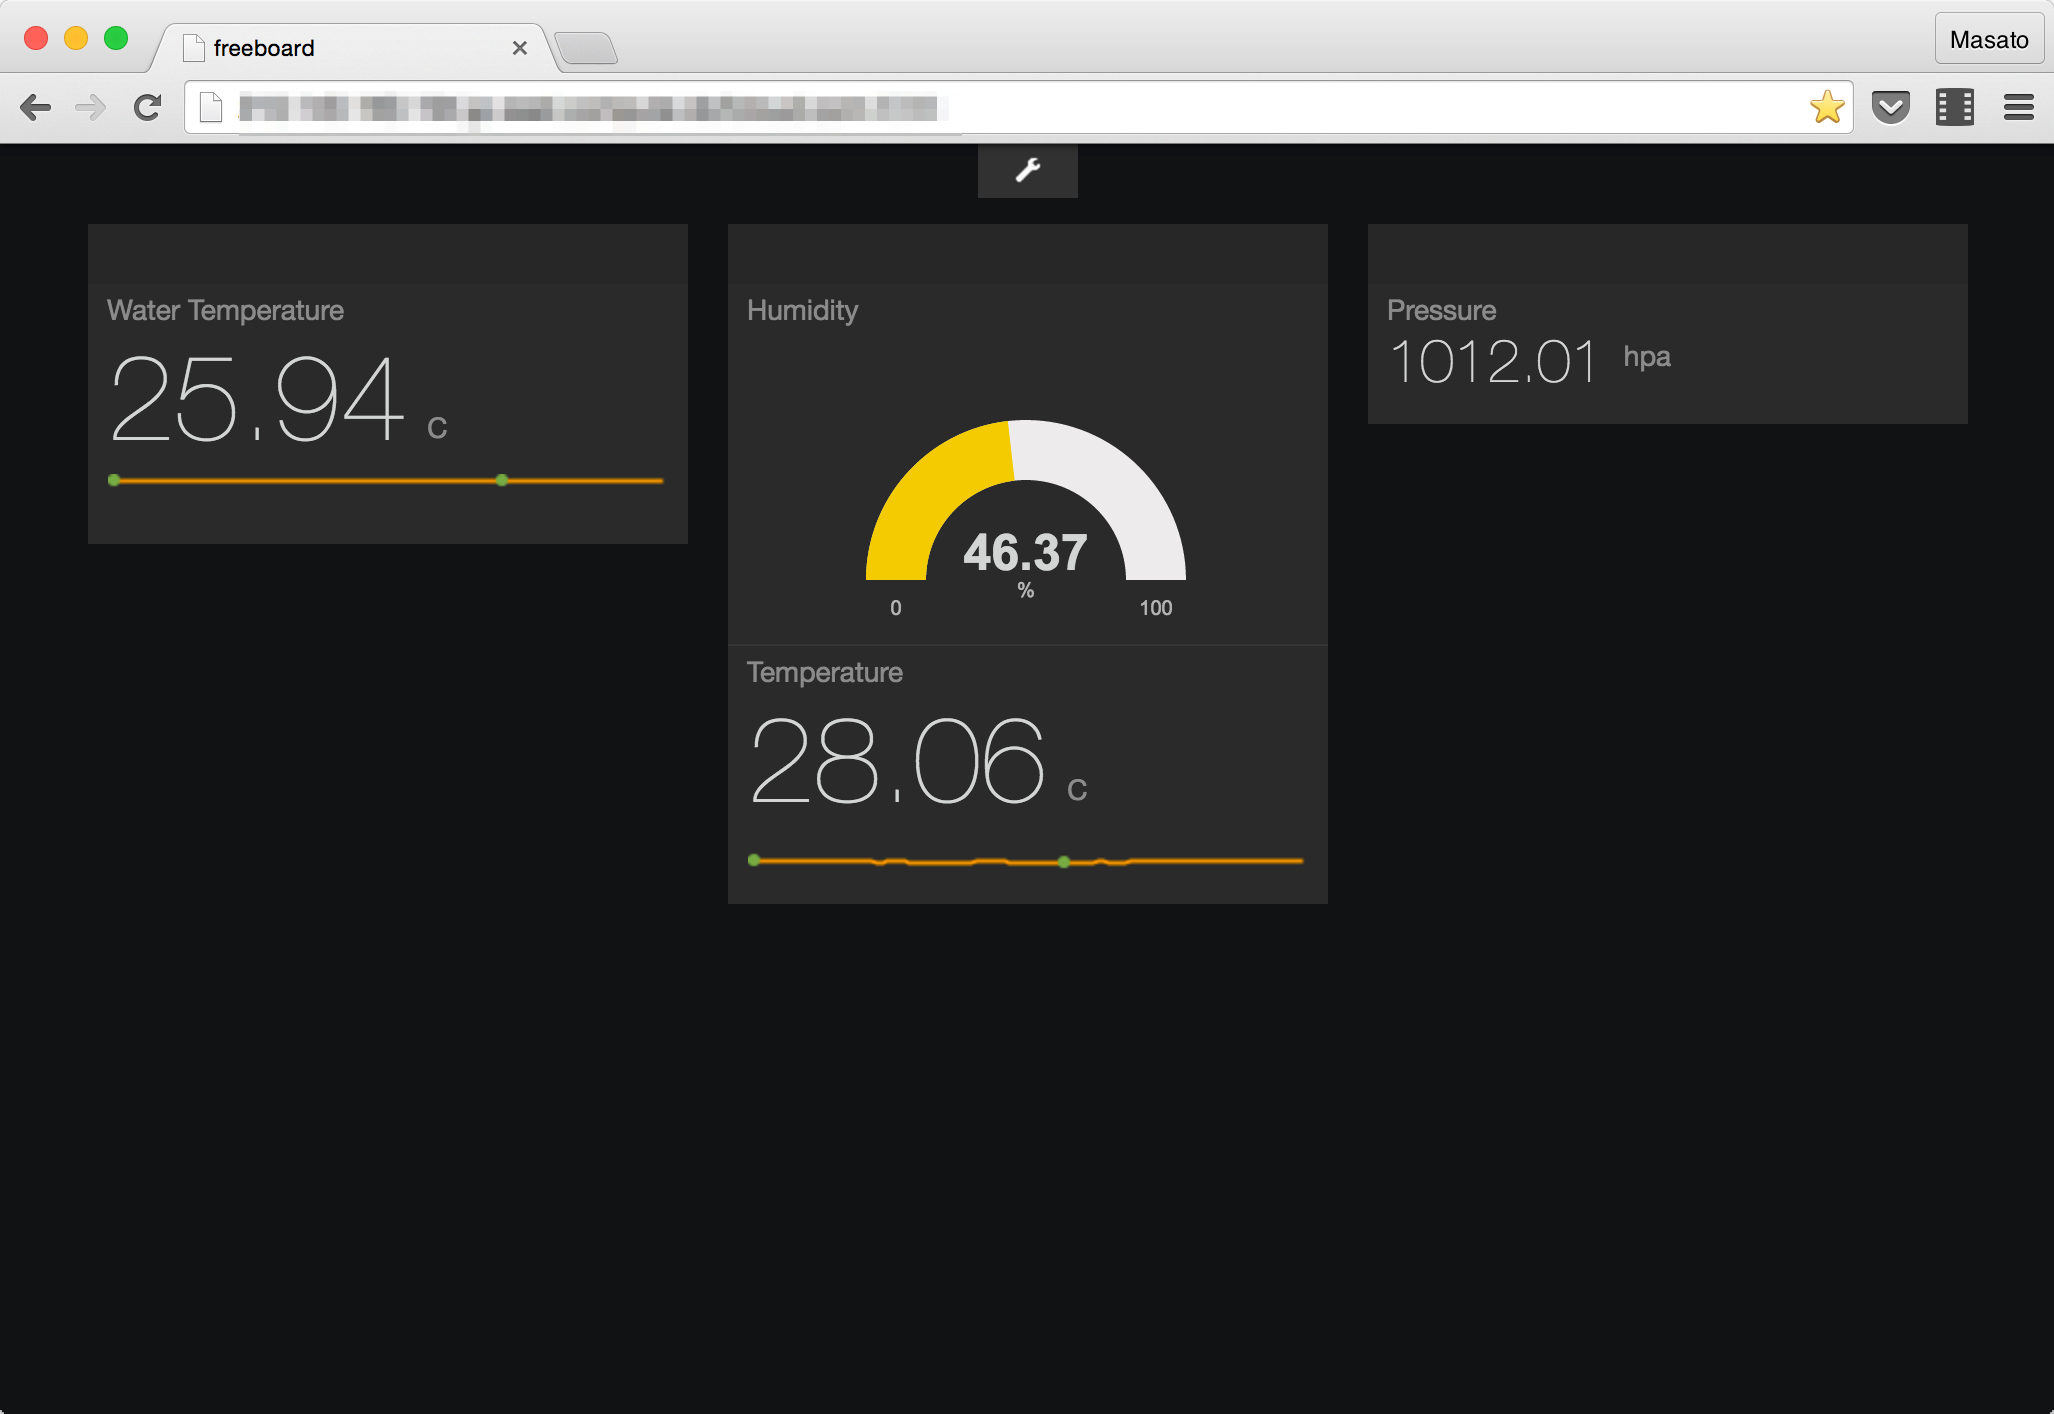
前回はHubotでMQTTを使いPubSubをするサンプルを書きました。それぞれに対応するMQTTクライアントのPubSubをBeagleBone BlackとRaspberry Pi 2に実装します。BeagleBone BlackはHubotからLEDライトをオンオフするメッセージをsubscribeします。USB連動電源タップのUSBポートが接続されたUSBハブの特定のポートの電源を操作することで、植物育成LEDの電源を制御します。またDS18B20で計測したアボカドが入っているガラス瓶の水温をfreeboardのダッシュボードにpublishします。Raspberry Pi 2はBME280からアボカド周辺の気温、湿度、気圧をfreeboardにpublishします。
BeagleBone Black
BeagleBone Blackには防水仕様のDS18B20で計測した水温をMQTTブローカーにpublishするプロセスと、Slackから植物育成LEDライトをon/offするメッセージをsubscribeするプロセスを起動します。リポジトリはこちらです。
Supervisor
プロセスのデモナイズにSupervisorを使います。
$ sudo apt-get update
$ sudo apt-get install supervisor
DS18B20
1-wireのDS18B20をBeagleBone Blackのcapemgrの設定は毎回必要です。Supervisorから管理するプロセスの起動スクリプトを用意して最初に有効化の処理を書きます。その後にDS18B20から計測した水温をMQTTブローカーにpublishするPythonスクリプトを実行します。
# !/bin/bash
sudo sh -c 'echo BB-W1:00A0 > /sys/devices/bone_capemgr.9/slots'
/home/debian/python_apps/glow-light-py/w1_publish.py
DS18B20で計測した温度をMQTTブローカーにpubishするPythonのプログラムです。
# !/usr/bin/python
# -*- coding: utf-8 -*-

import paho.mqtt.client as mqtt
from time import sleep
import json
import sys
from config import conf

w1="/sys/bus/w1/devices/{}/w1_slave".format(conf["W1_ID"])

def sensing():
    raw = open(w1, "r").read()
    celsius = float(raw.split("t=")[-1])/1000
    retval = dict(temperature="{:.2f}".format(celsius))
    return retval

def on_connect(client, userdata, rc):
    print("Connected with result code {}".format(rc))

def on_publish(client, userdata, mid):
    print("publish: {}".format(mid))

def main():
    client = mqtt.Client(client_id='',
	                 clean_session=True, protocol=mqtt.MQTTv311)

    client.username_pw_set(conf["TRIGGER_5_UUID"], conf["TRIGGER_5_TOKEN"])

    client.on_connect = on_connect
    client.on_publish = on_publish

    client.connect(conf["IDCF_CHANNEL_URL"], 1883, 60)

    while True:
        retval = sensing()
        if retval:
             message = json.dumps({"devices":
	                       conf["ACTION_5_UUID"],
                              "payload": retval})
             print(message)
             client.publish("message",message)
        sleep(5)

if __name__ == '__main__':
    main()
DS18B20のIDはデバイス毎に異なるため、/sys/bus/w1/devicesに作成される28*のIDを設定ファイルに記述します。
conf = {
...
     "W1_ID": "28-xxx",
...
}
PahoのPythonクライアントをインストールします。
$ sudo pip install paho-mqtt
Supervisorの設定ファイルを書きます。debianユーザーが実行するプロセスになります。上記のラップしたシェルスクリプトを実行コマンドにします。
[program:w1]
command=/home/debian/python_apps/glow-light-py/start_w1.sh
numprocs=1
redirect_stderr=true
stdout_logfile=/var/log/w1.log
user=debian
w1の設定ファイルの変更をreleadでSupervisorに伝えてから、addで子プロセスを追加します。
$ sudo supervisorctl reread
w1: available
$ sudo supervisorctl add w1
w1: added process group
植物育成LED
DS18B20と違いこちらはSupervisorの設定ファイルに直接debianユーザーが実行できるPythonのプログラムをcommandに指定します。
[program:led]
command=/home/debian/python_apps/glow-light-py/led_subscribe.py
numprocs=1
redirect_stderr=true
stdout_logfile=/var/log/led.log
user=debian
Hubutからの指示をsubscribeしてLEDライトをon/offします。
# !/usr/bin/python
# -*- coding: utf-8 -*-

import paho.mqtt.client as mqtt
import json
import subprocess
import os

from config import conf

def on_connect(client, userdata, rc):
    print("Connected with result code {}".format(rc))
    client.subscribe(conf["ACTION_3_UUID"])

def on_subscribe(client, userdata, mid, granted_qos):
    print("Subscribed: "+str(mid)+" "+str(granted_qos))

def led_on_off(on_off):
    cmd = os.path.abspath(os.path.join(os.path.dirname(__file__), "hub-ctrl"))
    p = subprocess.Popen(["sudo",cmd,
	"-b", "1",
	"-d", conf["DEVICE_NO"],
	"-P", conf["PORT_NO"],
	"-p", on_off], stdout=subprocess.PIPE)
    out, err = p.communicate()
    print(out)

def on_message(client, userdata, msg):
    print(msg.topic+" "+str(msg.payload))
    payload = json.loads(msg.payload)
    on_off_str = payload["data"]
    if on_off_str == "led-on" :
        led_on_off("1")
    elif on_off_str == "led-off" :
        led_on_off("0")
    else:
        pass

def main():
    client = mqtt.Client(client_id='',
                         clean_session=True, protocol=mqtt.MQTTv311)

    client.username_pw_set(conf["ACTION_3_UUID"], conf["ACTION_3_TOKEN"])

    client.on_connect = on_connect
    client.on_subscribe = on_subscribe
    client.on_message = on_message
    client.connect(conf["IDCF_CHANNEL_URL"], 1883, 60)

    client.loop_forever()

if __name__ == '__main__':
    main()
hub-ctrlで指定して電源をコントロールするUSBのデバイス番号とポート番号は変わる場合があるので、lsusbコマンドで確認します。NEC Corp. HighSpeed Hubがコントロール先のデバイスです。
$ sudo lsusb
Bus 001 Device 002: ID 0409:005a NEC Corp. HighSpeed Hub
Bus 001 Device 001: ID 1d6b:0002 Linux Foundation 2.0 root hub
Bus 002 Device 001: ID 1d6b:0002 Linux Foundation 2.0 root hub
Bus 001 Device 003: ID 2019:ab2a PLANEX GW-USNano2 802.11n Wireless Adapter [Realtek RTL8188CUS]
確認したデバイス番号と、USB連動電源タップを接続したUSBハブのポート番号の1(左端)を設定ファイルに記述します。
conf = {
...
     "DEVICE_NO": "2",
     "PORT_NO": "1"
}
同様にSupervisorの子プロセスに追加します。
$ sudo supervisorctl reread
led: available
$ sudo supervisorctl add led
led: added process group
Supervisorに追加した時点で子プロセスが起動します。statusでステータスを確認すると「RUNNING」になっています。
$ sudo supervisorctl status
led                              RUNNING    pid 3218, uptime 0:00:03
w1                               RUNNING    pid 3190, uptime 0:03:51
Raspberry Pi 2
Raspberry Pi 2にはBME280の環境センサーをMQTTブローカーにpublishするプロセスを起動します。リポジトリはこちらです。
Supervisor
Supervisorをインストールします。
$ sudo apt-get update
$ sudo apt-get install supervisor
Supervisorでは子プロセスをuserを指定せずにrootで実行したりsudoをつけてプログラムを実行することは推奨されないようです。sudoなしでI2Cを使うプログラムを実行できるように、piユーザーをi2cグループに追加します。
$ sudo usermod -aG i2c pi
Supervisorの設定ファイルはBeagleBone Blackのときと同じです。
[program:bme280]
command=/home/pi/python_apps/bme280-meshblu-py/bme280_publish.py
numprocs=1
redirect_stderr=true
stdout_logfile=/var/log/bme280.log
user=pi
ACTION_1_UUIDとACTION_2_UUIDにBME280から計測した環境データをpublishします。ACTION_1_UUIDはHubotのMQTTがsubscribeしているuuidです。ACTION_2_UUIDはfreeboardのダッシュボードがWebSocketでsubscribeしているuuidです。
# !/usr/bin/python
# -*- coding: utf-8 -*-

import paho.mqtt.client as mqtt
from time import sleep
import json
import sys
import bme280
from config import conf

def sensing():
    return bme280.readData()

def on_connect(client, userdata, rc):
    print("Connected with result code {}".format(rc))

def on_publish(client, userdata, mid):
    print("publish: {}".format(mid))

def main():
    client = mqtt.Client(client_id='',
	                 clean_session=True, protocol=mqtt.MQTTv311)

    client.username_pw_set(conf["TRIGGER_1_UUID"], conf["TRIGGER_1_TOKEN"])

    client.on_connect = on_connect
    client.on_publish = on_publish

    client.connect(conf["IDCF_CHANNEL_URL"], 1883, 60)

    while True:
        retval = sensing()
        if retval:
             message = json.dumps({"devices":
	                      [conf["ACTION_1_UUID"],
	                       conf["ACTION_2_UUID"]],
                              "payload": retval})
             print(message)
             client.publish("message",message)
        sleep(5)

if __name__ == '__main__':
    main()
PahoのPythonクライアントをインストールします。
$ sudo pip install paho-mqtt
子プロセスをSupervisorに追加して起動します。
$ sudo supervisorctl reread
bme280: available
$ sudo supervisorctl add bme280
bme280: added process group
trigger-1はデフォルトでaction-1にメッセージを送信できますが、action-2への送信も許可します。DockerホストのMeshbluコンテナが起動しているディレクトリで実行します。
$ docker-compose run --rm iotutil whiten -- -f trigger-1 -t action-2

> iotutil@0.0.1 start /app
> node app.js "whiten" "-f" "trigger-1" "-t" "action-2"

trigger-1 can send message to action-2
freeboard
freeboardのダッシュボードにアボカド周辺の環境データが4種類表示できました。
