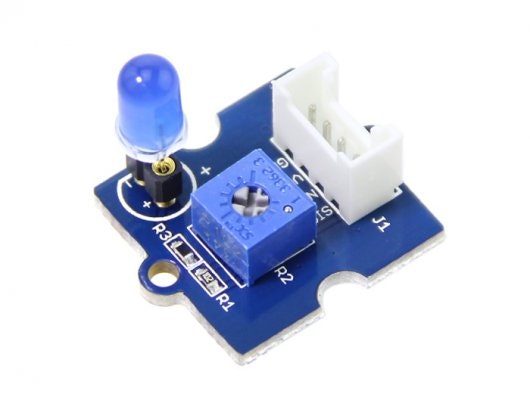
Seeeduino Archと一緒に購入したGrove Blue LEDを使ってLチカしてみます。Grove Starter Kit for ArduinoやGrovePi+ Starter Kit for Raspberry Piと違い、Wikiにmbedのサンプルコードがないのでちょっと困りました。
Grove Blue LED
GROVE - 青 LED (5mm)をスイッチサイエンスから購入しました。4ピンケーブルは付属してました。別途購入してしまいましたが。
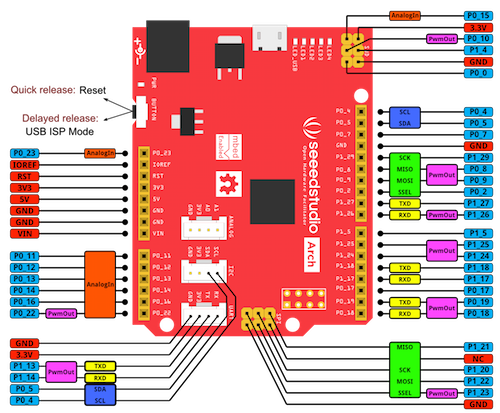
ピンアウト図
Arch V1.1のピンアウト図を見るとGroveのポートは3つあります。
マイコンボードによってピン番号が異なり、Arduinoのdigital port 2やRaspberry PiのD4といった表記になっていません。Seeeduino Archの場合は以下のピン番号を使うとLチカするようです。
- UARTポート:
P1_14 - I2Cポート:
P0_04
mbed Compiler
オンラインのmbed Compilerで前回コンパイルしたmbed_blinkyプロジェクトと同様にBlinky LED Hello Worldテンプレートを使います。ピン番号をLED1からP1_14に変更しただけです。
main.cpp
# include "mbed.h"

DigitalOut myled(P1_14);

int main() {
    while(1) {
        myled = 1;
        wait(0.2);
        myled = 0;
        wait(0.2);
    }
}
ファームウェアの書き込み
OSXにUSBケーブルで接続して、Seeeduino Archのリセットボタンを押します。D0が青色に点灯し、OSXのデスクトップにCRP DISABLDボリュームがマウントされたことを確認します。
mbed Compilerからコンパイルを実行するとバイナリファイルがダウンロードできます。ddコマンドを使ってSeeeduino Archに書き込みます。
$ dd if=~/Downloads/grove_led_LPC11U24.bin of=/Volumes/CRP\ DISABLD/firmware.bin conv=notrunc
20+1 records in
20+1 records out
10308 bytes transferred in 0.000077 secs (133854135 bytes/sec)
Seeeduino Archのリセットボタンを押すと「ディスクの不正な取り出し」の警告がでますがLチカが始まります。


