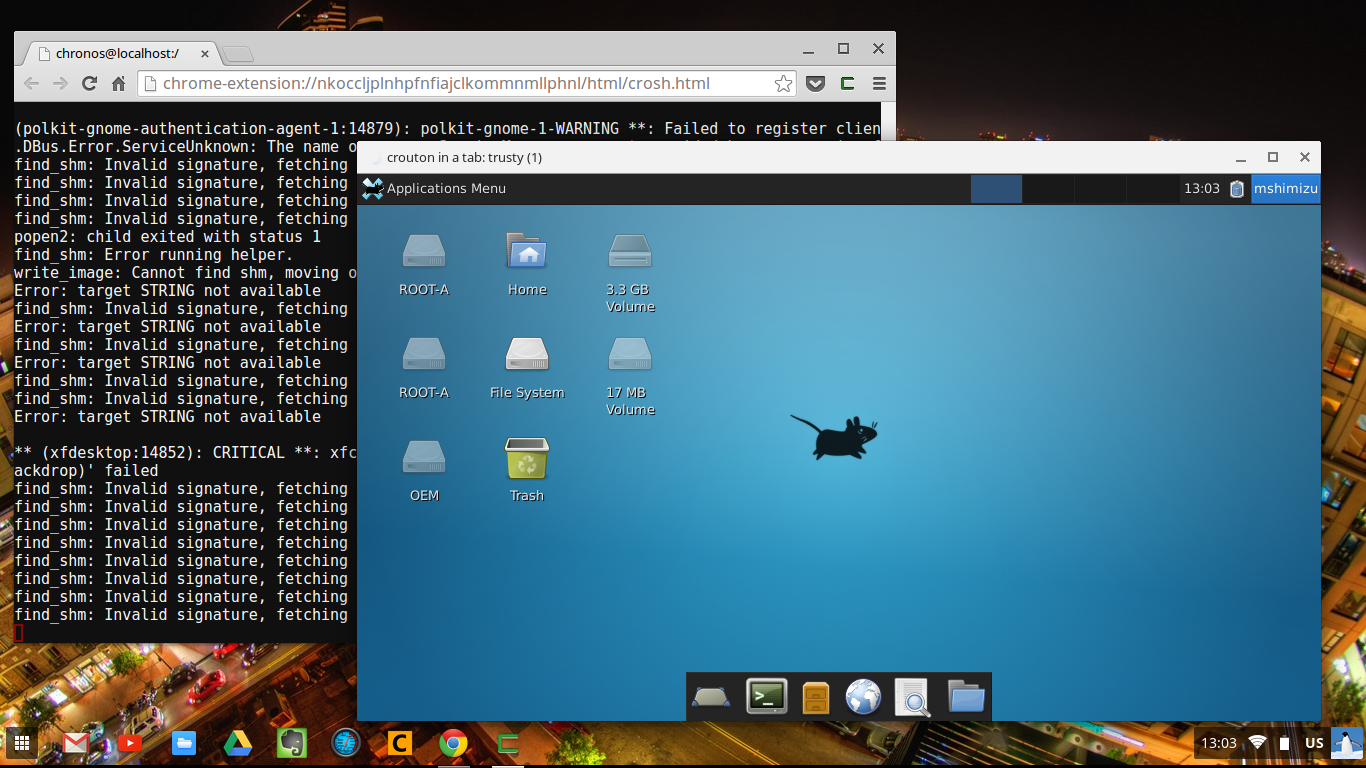
去年購入したHP Chromebook 11はしばらく放置していたのですが、BeagleBone BlackとUSB-EthernetやUSB-Serial接続して開発用の端末にしよう考えています。ChromeOSのネイティブウインドウ上でX11を操作できるcrouton integrationなど、以前とはすこし違った方法でUbuntuを再インストールしようと思います。
VefificationはOFF、Developper Mode
ESC + Refresh + Powerボタンを押してChromebookをリカバリモードで起動します。VefificationがOFFの状態であることを確認して、ctrl+dでDevelopper Modeに入ります。言語とキーボードは以下のようにします。
- 言語の選択: 日本語
- キーボードの選択: 英語(米国)のキーボード
croutonからUbuntuのインストール
ChromeOSが起動したらアップデートを確認して適用します。
- 設定 > ChromeOSについて
- バージョン: 40.0.2214.93
Chromeブラウザからctrl + alt + tをタイプしてcroshを起動します。
crosh> shell
chronos@localhost / $
すでにcroutonでインストールしたchrootをすべて削除する場合は次を実行します。
$ cd /usr/local/chroots
$ sudo delete-chroot *
$ sudo rm -rf /usr/local/bin
croutonをダウンロードします。
$ wget http://goo.gl/fd3zc -O ~/Downloads/crouton
-rフラグでリリースはUbuntu 14.04 trustyを選択します。
$ sudo sh -e ~/Downloads/crouton -r trusty -t xfce,keyboard,audio,cli-extra,extension,xiwi,chromium
インストールには30分くらいかかります。
Chromiumターゲット
targetフラグにchromeを指定してもARMにChromeはまだビルドされていなので、Chromiumを指定します。
Google Chrome does not yet have an ARM build. Installing Chromium instead.
crouton integrationターゲット
crouton integrationをChromeウェブストアからインストールしておきます。croutonの-tフラグのターゲットにxiwiフラグを追加するとChromeブラウザの拡張機能としてcroutonを別ウィンドウとして使えるようになります。
CLIの起動
croshからUbuntuをマウントしてCLI接続します。
$ sudo enter-chroot
Entering /mnt/stateful_partition/crouton/chroots/trusty...
(trusty)mshimizu@localhost:~$
croshはまだ日本語の入力ができないのですが、コンソールからUbuntuを使う場合はChromeブラウザから操作できます。
Xfceの起動
croshからUbuntuとXfceのデスクトップをマウントします。
$ sudo startxfce4
ChromeOSとUbuntuを切り替える場合は、以下のキーを押します。
- ChromeSへ切り換え: Ctrl+Shift+Alt+Back(F1)
- Ubuntuへ切り換え: Ctrl+Shift+Alt+Forward(F2)
croutonにxiwiとextensionターゲット、Chromeブラウザにcrouton integrationをインストールしているので全画面表示とウィンドウ表示を切り替えることができます。
Xfceのバージョンを確認します。ウインドウが表示されます。バージョンは4.10です。
$ xfce4-abount
Ubuntuの日本語設定
日本語でUbuntuとXfceを使うための設定をしていきます。
フォント
Takaoフォントをインストールします。
$ sudo apt-get install fonts-takao
locale
localeを更新します。
$ export LANG=ja_JP.UTF-8
$ sudo locale-gen $LANG
$ sudo update-locale $LANG
外観の設定でフォント指定を変更します。
- Settings > Appereance > Fonts > TakaoPゴシック > 12 > Enable anti-aliasing
日本語入力
Mozcの日本語入力をインストールします。
$ sudo apt-get install ibus ibus-mozc
- Settings > Keyboard Input Methods > Input Methods
Customize active input methodsにチェックをいれて、AddボタンからMozcを追加します。
- Add > Japanese > Mozc
デフォルトで英語と日本語の切り換えはctrl + spaceでトグルできます。Emacsのmark setと競合してしまうのでKeyboard Shortcutsの設定を変更します。
- Settings > Keybord Input Methods > Keyboard Shortcuts > space
エディタ
デフォルトのnanoから、vimにエディタを変更します。
$ sudo apt-get install vim
$ sudo update-alternatives --set editor /usr/bin/vim.basic
