はじめに
navigationControllerを使った画面遷移をいつもどうだったか忘れて、調べ直す、という手間を省きたくて、備忘録的に作成しました。
1.pushViewControllerを使った画面遷移と戻り方
一般的な画面遷移で、横にスライドし、遷移先の画面にはノーコードでBackボタンが付きます。
ボタン等を使って、画面を戻す為には、popViewControllerを使います。
またアプリ起動時に表示されるViewControllerに戻す遷移にはpoprootViewControllerを使います。

以下、コード全文
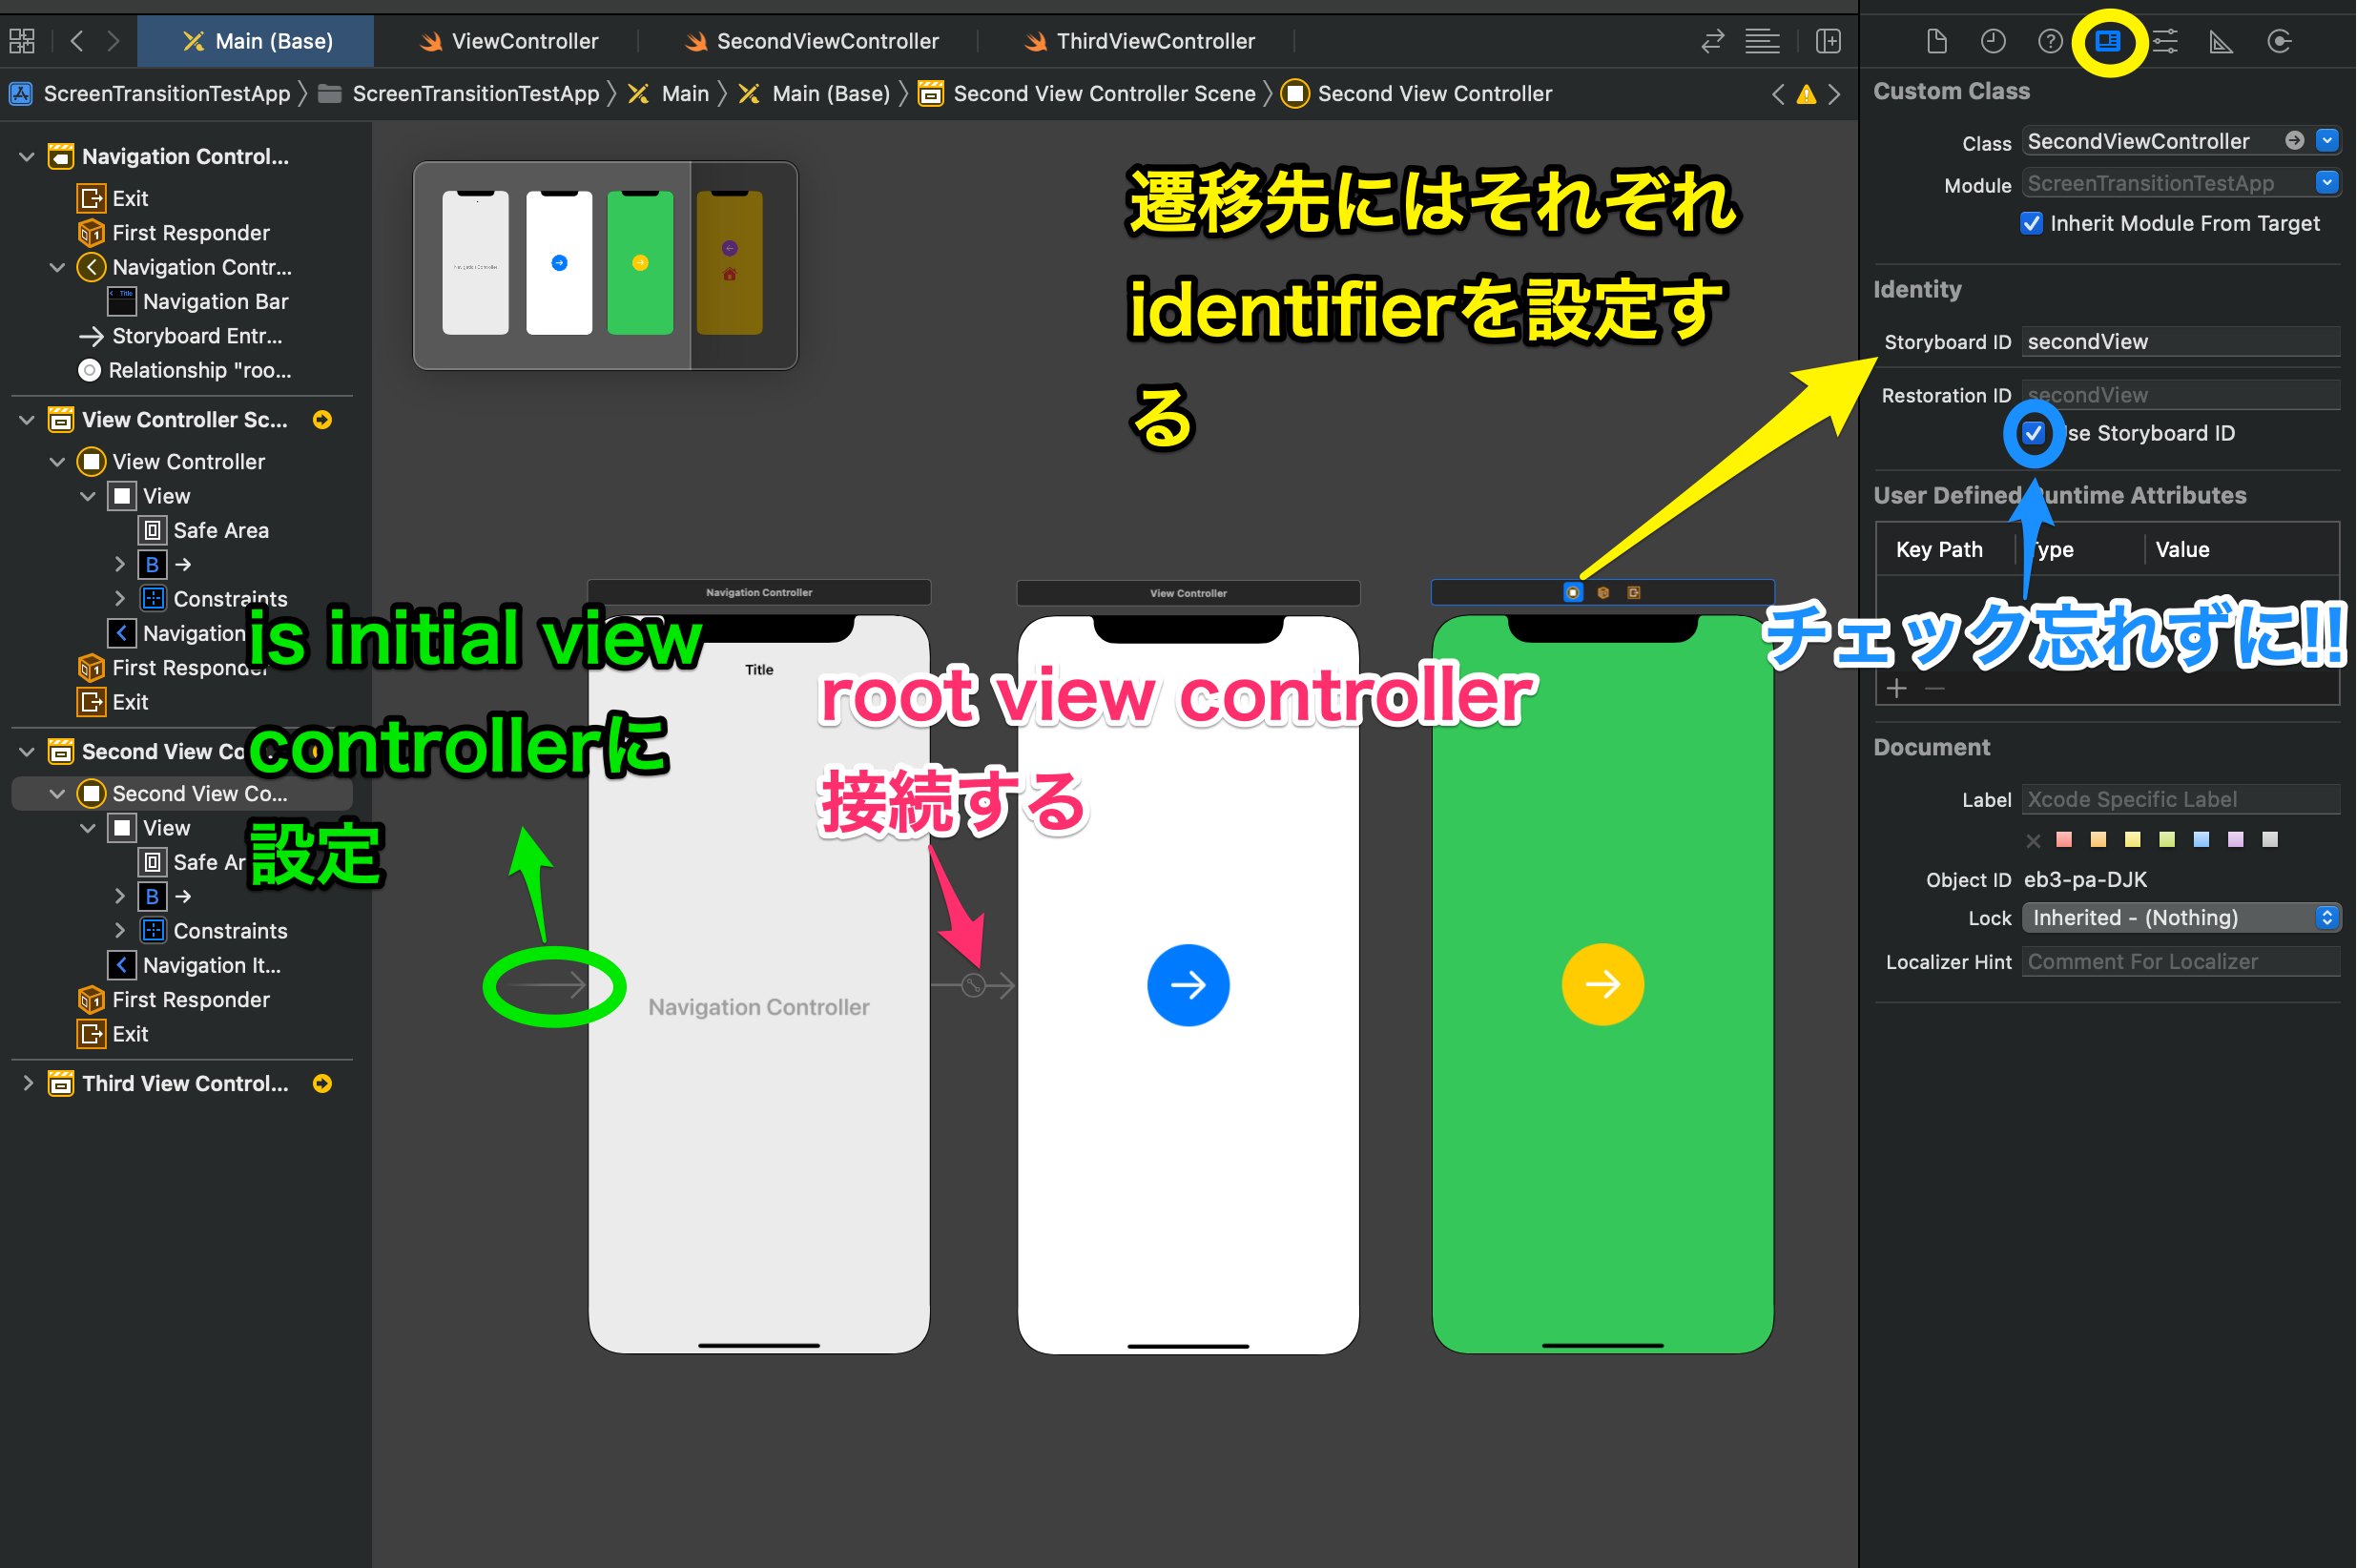
※前準備として、各UIButtonはstoryboard上で各ViewControllerに紐づけています。
navigationControllerを設置して、rootViewController接続して下さい。
navigationControllerから
(Control + ドラッグ&ドロップで接続出来ます)
ViewController
import UIKit

class ViewController: UIViewController {
    @IBAction func toSecondViewButton(_ sender: Any) {
        let secondVC = storyboard?.instantiateViewController(identifier: "secondView") as! SecondViewController
        navigationController?.pushViewController(secondVC,animated: true)
    }
}
SecondViewController
import UIKit

class SecondViewController: UIViewController {

    @IBAction func toThirdViewButton(_ sender: Any) {
        let thirdVC = storyboard?.instantiateViewController(identifier: "thirdView") as! ThirdViewController
        navigationController?.pushViewController(thirdVC,animated: true)
    }
}
ThirdViewController
import UIKit

class ThirdViewController: UIViewController {

    @IBAction func backSecondViewButoon(_ sender: Any) {
        navigationController?.popViewController(animated: true)
    }
    @IBAction func homeViewButton(_ sender: Any) {
        //アプリ起動時に表示されるViewControllerに戻る
        navigationController?.popToRootViewController(animated: true)
       }
}
2.presentを使った画面遷移と戻り方
presentを使った画面遷移の最大のメリットはアニメーションが設定出来る点です。
modalPresentationStyleの設定を変更する事で簡単にアニメーションが指定できます。
画面を戻す遷移にはdismissを使います。またアプリ起動時に表示されるViewControllerに戻す遷移には.rootViewController?.dismissを使います。

以下、コード全文
ViewController
import UIKit

class ViewController: UIViewController {

    @IBAction func toSecondViewButton(_ sender: Any) {
        let secondVC = storyboard?.instantiateViewController(identifier: "secondView")
        let nav = UINavigationController(rootViewController: secondVC!)
        nav.modalPresentationStyle = .fullScreen//.fullScreenの記述を変えればアニメーションを変えられます
        present(nav,animated: true, completion: nil)
    }
}
secondViewController
import UIKit

class SecondViewController: UIViewController {

    @IBAction func toThirdViewButton(_ sender: Any) {
        let thirdVC = storyboard?.instantiateViewController(identifier: "thirdView")
        let nav = UINavigationController(rootViewController: thirdVC!)
        nav.modalPresentationStyle = .fullScreen
        present(nav,animated: true, completion: nil)
    }
}
ThirdViewController
import UIKit

class ThirdViewController: UIViewController {


    @IBAction func backSecondViewButton(_ sender: Any) {
        //dismiss(animated: true, completion: nil)でも可
        self.presentingViewController?.dismiss(animated: true, completion: nil)
    }
    @IBAction func homeViewButton(_ sender: Any) {
        //アプリ起動時に表示されるViewControllerに戻る
        self.view.window?.rootViewController?.dismiss(animated: true, completion: nil)
    }
}
# さいごに
画面遷移方法はSegueで繋いだり、コードで繋いだり、選択肢が多くある為、迷ってしまう事があると思います。
そんな時に基本に立ち返ってこの記事を使って頂けると幸いです。
以上です!!