前回の続き
Vue.jsと比較しながら覚えるAngular -実装編- その3
前回は、routingと親子のコンポーネントのデータの渡し方について説明していった
今回は、一覧ページと詳細ページを作成しながらAPIからの取得とパイプについて見ていきたいと思う
下準備
取得するモック用のAPIを作成していく、モック用のapiにはjson-serverを利用していく
まずは、ディレクトリを作成
mkdir mock-api
ディレクトリに移動
cd mock-api
初期化
yarn init
or
npm init
json-serverをインストール
yarn add json-server
or
npm install json-server
yarnコマンドで実行できるようにscriptsを記載
{
  "name": "mock-api",
  "version": "1.0.0",
  "main": "index.js",
  "license": "MIT",
+  "scripts": {
+    "serve": "json-server --watch db.json"
+  },
  "dependencies": {
    "json-server": "^0.15.1"
  }
}
db.jsonファイルを作成
表示したい内容のjsonデータを記載
{
    "products":[
        {
            "id": 1,
            "name": "いい感じの商品名「いい感じ」",
            "image": "/assets/1.jpg",
            "tag": [
                "shoes",
                "canvas"
            ],
            "price": 2000,
            "product_copy": "サイコーにかっこいいキャッチコピーやテキストがここに入る。サイコーにかっこいいキャッチコピーやテキストがここに入る。",
            "zip_code": "123-4567",
            "shop_address": "東京都 〇〇区 123-456",
            "tel": "03-123-456",
            "description": "サイコーにかっこいい説明文。かっこいいテキストがここに入る。サイコーにかっこいい説明文。かっこいいテキストがここに入る。サイコーにかっこいい説明文。かっこいいテキストがここに入る。サイコーにかっこいい説明文。かっこいいテキストがここに入る。サイコーにかっこいい説明文。かっこいいテキストがここに入る。サイコーにかっこいい説明文。かっこいいテキストがここに入る。サイコーにかっこいい説明文。かっこいいテキストがここに入る。サイコーにかっこいい説明文。かっこいいテキストがここに入る。"
        },
        {
            "id": 2,
            "name": "いい感じの商品名「いい感じ」",
            "image": "/assets/2.jpg",
            "tag": [
                "shoes",
                "canvas"
            ],
            "price": 2000,
            "product_copy": "サイコーにかっこいいキャッチコピーやテキストがここに入る。サイコーにかっこいいキャッチコピーやテキストがここに入る。",
            "zip_code": "123-4567",
            "shop_address": "東京都 〇〇区 123-456",
            "tel": "03-123-456",
            "description": "サイコーにかっこいい説明文。かっこいいテキストがここに入る。サイコーにかっこいい説明文。かっこいいテキストがここに入る。サイコーにかっこいい説明文。かっこいいテキストがここに入る。サイコーにかっこいい説明文。かっこいいテキストがここに入る。サイコーにかっこいい説明文。かっこいいテキストがここに入る。サイコーにかっこいい説明文。かっこいいテキストがここに入る。サイコーにかっこいい説明文。かっこいいテキストがここに入る。サイコーにかっこいい説明文。かっこいいテキストがここに入る。"
        },
        {
            "id": 3,
            "name": "いい感じの商品名「いい感じ」",
            "image": "/assets/3.jpg",
            "tag": [
                "shoes",
                "canvas"
            ],
            "price": 2000,
            "product_copy": "サイコーにかっこいいキャッチコピーやテキストがここに入る。サイコーにかっこいいキャッチコピーやテキストがここに入る。",
            "zip_code": "123-4567",
            "shop_address": "東京都 〇〇区 123-456",
            "tel": "03-123-456",
            "description": "サイコーにかっこいい説明文。かっこいいテキストがここに入る。サイコーにかっこいい説明文。かっこいいテキストがここに入る。サイコーにかっこいい説明文。かっこいいテキストがここに入る。サイコーにかっこいい説明文。かっこいいテキストがここに入る。サイコーにかっこいい説明文。かっこいいテキストがここに入る。サイコーにかっこいい説明文。かっこいいテキストがここに入る。サイコーにかっこいい説明文。かっこいいテキストがここに入る。サイコーにかっこいい説明文。かっこいいテキストがここに入る。"
        },
        {
          "id": 4,
          "name": "いい感じの商品名「いい感じ」",
          "image": "/assets/4.jpg",
          "tag": [
              "shoes",
              "canvas"
          ],
          "price": 2000,
          "product_copy": "サイコーにかっこいいキャッチコピーやテキストがここに入る。サイコーにかっこいいキャッチコピーやテキストがここに入る。",
          "zip_code": "123-4567",
          "shop_address": "東京都 〇〇区 123-456",
          "tel": "03-123-456",
          "description": "サイコーにかっこいい説明文。かっこいいテキストがここに入る。サイコーにかっこいい説明文。かっこいいテキストがここに入る。サイコーにかっこいい説明文。かっこいいテキストがここに入る。サイコーにかっこいい説明文。かっこいいテキストがここに入る。サイコーにかっこいい説明文。かっこいいテキストがここに入る。サイコーにかっこいい説明文。かっこいいテキストがここに入る。サイコーにかっこいい説明文。かっこいいテキストがここに入る。サイコーにかっこいい説明文。かっこいいテキストがここに入る。"
      },
      {
          "id": 5,
          "name": "いい感じの商品名「いい感じ」",
          "image": "/assets/5.jpg",
          "tag": [
              "shoes",
              "canvas"
          ],
          "price": 2000,
          "product_copy": "サイコーにかっこいいキャッチコピーやテキストがここに入る。サイコーにかっこいいキャッチコピーやテキストがここに入る。",
          "zip_code": "123-4567",
          "shop_address": "東京都 〇〇区 123-456",
          "tel": "03-123-456",
          "description": "サイコーにかっこいい説明文。かっこいいテキストがここに入る。サイコーにかっこいい説明文。かっこいいテキストがここに入る。サイコーにかっこいい説明文。かっこいいテキストがここに入る。サイコーにかっこいい説明文。かっこいいテキストがここに入る。サイコーにかっこいい説明文。かっこいいテキストがここに入る。サイコーにかっこいい説明文。かっこいいテキストがここに入る。サイコーにかっこいい説明文。かっこいいテキストがここに入る。サイコーにかっこいい説明文。かっこいいテキストがここに入る。"
      },
      {
          "id": 6,
          "name": "いい感じの商品名「いい感じ」",
          "image": "/assets/6.jpg",
          "tag": [
              "shoes",
              "canvas"
          ],
          "price": 2000,
          "product_copy": "サイコーにかっこいいキャッチコピーやテキストがここに入る。サイコーにかっこいいキャッチコピーやテキストがここに入る。",
          "zip_code": "123-4567",
          "shop_address": "東京都 〇〇区 123-456",
          "tel": "03-123-456",
          "description": "サイコーにかっこいい説明文。かっこいいテキストがここに入る。サイコーにかっこいい説明文。かっこいいテキストがここに入る。サイコーにかっこいい説明文。かっこいいテキストがここに入る。サイコーにかっこいい説明文。かっこいいテキストがここに入る。サイコーにかっこいい説明文。かっこいいテキストがここに入る。サイコーにかっこいい説明文。かっこいいテキストがここに入る。サイコーにかっこいい説明文。かっこいいテキストがここに入る。サイコーにかっこいい説明文。かっこいいテキストがここに入る。"
      }
    ]
}
apiサーバーを起動
yarn serve
or
npm run serve
http://localhost:3000/productsにアクセスし、jsonデータが表示されていたら成功
一覧ページ
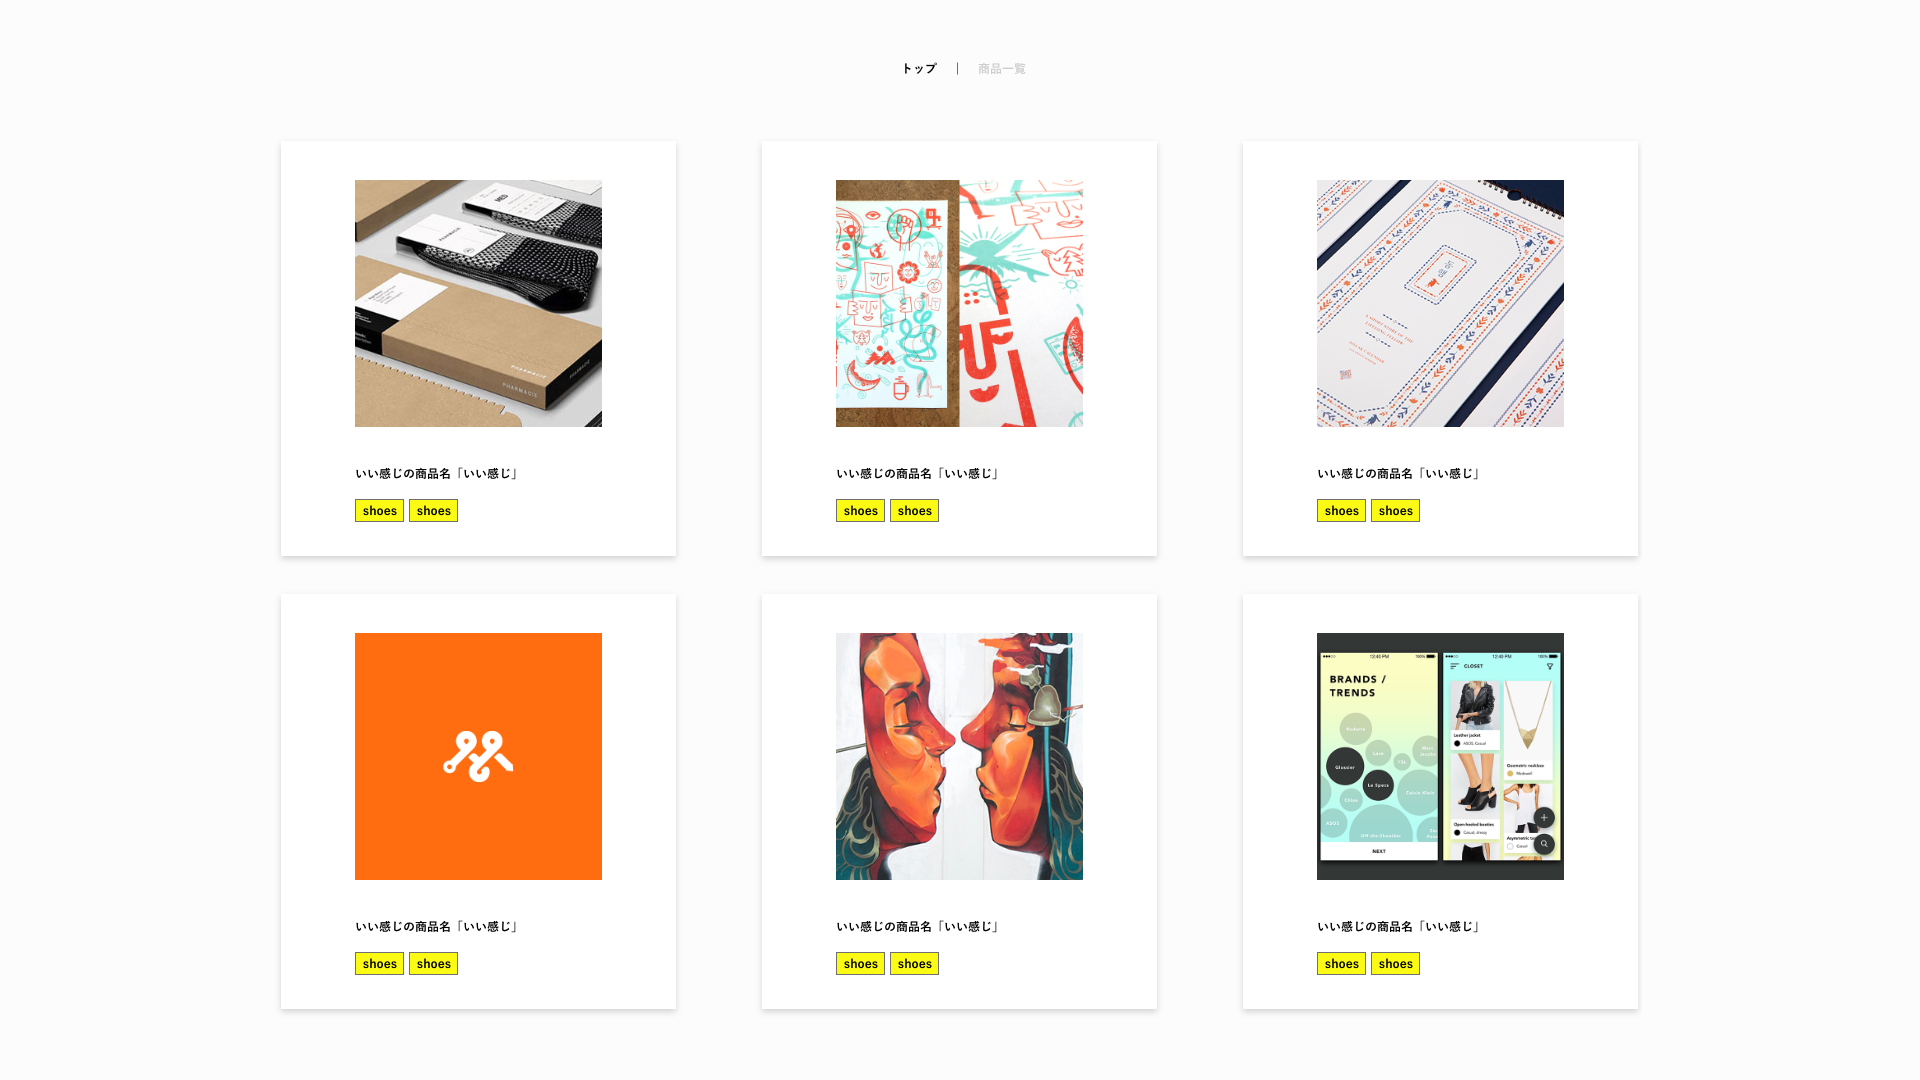
まずは一覧ページを作成していく
Vueの場合
共通コンポーネントの作成
tagコンポーネント
<template>
  <span class="tag">{{ text }}</span>
</template>

<script>

export default {
  name: 'BaseTag',
  props: {
    /**
     * @param text tagに表示させる文字列
     */
    text: {
      type: String,
      required: true
    }
  }
}
</script>

<style lang="scss" scoped>
.tag{
  display: inline-block;
  font-size: 12px;
  padding: 5px 8px;
  box-sizing: border-box;
  color: #000;
  background: #FAFA15;
  font-weight: 700;
  text-align: center;
  line-height: 1;
  border: 1px solid #707070;
}
</style>
レイアウトの作成
一覧コンポーネント
<template>
  <div class="list">
    <TheHeader></TheHeader>
    <ul class="productList">
      <router-link tag="li" :to="'detail/'+ pi" class="productItem" v-for="(produtItem, pi) in 6" :key="pi">
        <img class="productThumb" src="https://placehold.jp/247x247.png" alt="">
        <p class="productTitle">いい感じの商品名「いい感じ」</p>
        <ul class="tagList">
          <li class="tagItem" v-for="(tagItem, ti) in 2" :key="ti"><BaseTag text="shoes"></BaseTag></li>
        </ul>
      </router-link>
    </ul>
  </div>
</template>

<script>
import TheHeader from '@/components/TheHeader'
import BaseTag from '@/components/BaseTag'

export default {
  name: 'List',
  components: {
    TheHeader,
    BaseTag
  }
}
</script>

<style lang="scss" scoped>
  .productList{
    width: 1327px;
    margin: auto;
    display: flex;
    flex-wrap: wrap;
    justify-content: space-between;
  }
  .productItem{
    width: 395px;
    height: 415px;
    margin-bottom: 38px;
    padding: 40px 75px 35px;
    box-sizing: border-box;
    box-shadow: 0 3px 6px rgba(0, 0, 0, 0.16);
  }
  .productTitle{
    font-size: 12px;
    font-weight: 700;
    overflow: hidden;
    white-space: nowrap;
    text-overflow: ellipsis;
    margin-top: 40px;
  }
  .productThumb{
    object-fit: cover;
    width: 247px;
    height: 247px;
  }
  .tagList{
    margin-top: 20px;
    display: flex;
  }
  .tagItem{
    &:not(:first-child){
      margin-left: 5px;
    }
  }
</style>
APIの取得
Vueにはフレームワーク独自のhttpクライアントが存在しないので
APIのやりとりをするためのaixosをインストールする
yarn add axios
or
npm install axios
インストールが完了したら
次にvuex内にAPIからの取得データを格納していく
import Vue from 'vue'
import Vuex from 'vuex'
+ import axios from 'axios'

Vue.use(Vuex)

// これはモック用APIのURL
+ const URL = 'http://localhost:3000'

export default new Vuex.Store({
  state: {
+    products: []
  },
  mutations: {
+    addProduct(state, payload) {
+      state.products = payload
+    }
  },
  actions: {
+    async fetchProducts({ commit }) {
+      const res = await axios.get(`${ URL }/products`)
+      commit('addProduct', res.data)
+    }
  },
  modules: {
  }
})
一覧ページからfetchProductsを実行して、stateのをテンプレートに反映していく
<template>
  <div class="list">
    <TheHeader></TheHeader>
    <ul class="productList">
+      <router-link tag="li" :to="'detail/'+ produtItem.id" class="productItem" v-for="(produtItem, pi) in products" :key="pi">
+        <img class="productThumb" :src="'..' + produtItem.image" alt="">
+        <p class="productTitle">{{produtItem.name}}</p>
        <ul class="tagList">
+          <li class="tagItem" v-for="(tagItem, ti) in produtItem.tag" :key="ti"><BaseTag :text="tagItem"></BaseTag></li>
        </ul>
      </router-link>
    </ul>
  </div>
</template>

<script>
import TheHeader from '@/components/TheHeader'
import BaseTag from '@/components/BaseTag'

+ import { mapState, mapActions } from 'vuex'

export default {
  name: 'List',
  components: {
    TheHeader,
    BaseTag
  },
+  computed: {
+    ...mapState([
+      'products'
+    ])
+  },
+  methods: {
+    ...mapActions([
+      'fetchProducts'
+    ])
+  },
+  created() {
+    this.fetchProducts()
+  }
}
</script>
/listページをブラウザで表示してみて、データが表示されていたら完成
Angularの場合
共通コンポーネントの作成
Angular cliを利用してtagコンポーネントのファイルを作成する
ng g c shared/component/tag --export=true #export=trueはexportsの記述を自動的に追加してくれるoption
ファイルを作成されたら、下記コードを反映していく
<span class="tag">{{ text }}</span>
.tag{
  display: inline-block;
  font-size: 12px;
  padding: 5px 8px;
  box-sizing: border-box;
  color: #000;
  background: #FAFA15;
  font-weight: 700;
  text-align: center;
  line-height: 1;
  border: 1px solid #707070;
}
import { Component, OnInit, Input } from '@angular/core';

@Component({
  selector: 'app-tag',
  templateUrl: './tag.component.html',
  styleUrls: ['./tag.component.scss']
})
export class TagComponent implements OnInit {
  /**
   * @param text tagに表示させる文字列
   */
  @Input() text: string;

  constructor() { }

  ngOnInit() {
  }

}
レイアウトの作成
次に一覧ページをCSSレイアウトしていく
共通のtagコンポーネントは<app-tag>で読み込ませる
<app-header></app-header>
<ul class="productList">
  <li [routerLink]="'detail/'+ pi" class="productItem" *ngFor="let produtItem of dummyData">
    <img class="productThumb" src="https://placehold.jp/247x247.png" alt="">
    <p class="productTitle">いい感じの商品名「いい感じ」</p>
    <ul class="tagList">
      <li class="tagItem" *ngFor="let tagItem of (produtItem.tag)"><app-tag [text]="tagItem"></app-tag></li>
    </ul>
  </li>
</ul>
.productList{
  width: 1327px;
  margin: auto;
  display: flex;
  flex-wrap: wrap;
  justify-content: space-between;
}
.productItem{
  width: 395px;
  height: 415px;
  margin-bottom: 38px;
  padding: 40px 75px 35px;
  box-sizing: border-box;
  box-shadow: 0 3px 6px rgba(0, 0, 0, 0.16);
}
.productTitle{
  font-size: 12px;
  font-weight: 700;
  overflow: hidden;
  white-space: nowrap;
  text-overflow: ellipsis;
  margin-top: 40px;
}
.productThumb{
  object-fit: cover;
  width: 247px;
  height: 247px;
}
.tagList{
  margin-top: 20px;
  display: flex;
}
.tagItem{
  &:not(:first-child){
    margin-left: 5px;
  }
}
Vueではテンプレート側に数字を指定することによってループできたが
Angularではできないのでダミーデータの配列を6つ作って代用にする
import { Component, OnInit } from '@angular/core';

@Component({
  selector: 'app-list',
  templateUrl: './list.component.html',
  styleUrls: ['./list.component.scss']
})
export class ListComponent implements OnInit {
+  dummyData = []

  constructor() {
+    // ダミーデータを作成
+    for (let index = 0; index < 6; index++) {
+      this.dummyData.push({tag: ['test', 'test']})
+    }
  }

  ngOnInit() {
  }

}
これでレイアウトは完成
APIの取得
AngularはVueと違ってAngular独自のHttpクライアントが存在する
今回はそれを利用してAPIの通信を行いたいと思う
まずはhttpClientを利用するためにモジュールをimportに読み込む
import { BrowserModule } from '@angular/platform-browser';
import { NgModule } from '@angular/core';
+ import { HttpClientModule } from '@angular/common/http';

import { AppRoutingModule } from './app-routing.module';
import { AppComponent } from './app.component';
import { TopComponent } from './top/top.component';
import { ListComponent } from './list/list.component';
import { DetailComponent } from './detail/detail.component';
import { SharedModule } from './shared/shared.module';

@NgModule({
  declarations: [
    AppComponent,
    TopComponent,
    ListComponent,
    DetailComponent
  ],
  imports: [
    BrowserModule,
    AppRoutingModule,
    SharedModule,
+    HttpClientModule
  ],
  bootstrap: [AppComponent],
})
export class AppModule { }
共通データとして利用したいので、serviceファイルを作成して
全体でデータが使いまわすことができるようにする
ng g s service/products
作成したサービスファイルにhttpClientを使えるように読み込む
import { Injectable } from '@angular/core';
+ import { HttpClient } from '@angular/common/http';

@Injectable({
  providedIn: 'root'
})
export class ProductsService {

  constructor(
+    private http: HttpClient
  ) { }
}
次にAPIのgetを記述してみる
型に指定されているObservableはrxjsの機能です
配列を順番よく取り出してくれるもので
http.getでリクエストしたデータは```subscribe``で取得できます
import { Injectable } from '@angular/core';
import { HttpClient } from '@angular/common/http';
+ import { Observable } from 'rxjs';

@Injectable({
  providedIn: 'root'
})
export class ProductsService {
+  private url = 'http://localhost:3000';

  constructor(
    private http: HttpClient
  ) { }

+  fetchProducts(): Observable<any> {
+    return this.http.get<any>(`${this.url}/products`)
+  }
}
取得したいコンポーネントで作成した関数とsubscribeを実行すると
APIの中のデータを取得することができます
import { Component, OnInit } from '@angular/core';
+ import { ProductsService } from '../service/products.service';

@Component({
  selector: 'app-list',
  templateUrl: './list.component.html',
  styleUrls: ['./list.component.scss']
})
export class ListComponent implements OnInit {
+  productData = []

  constructor(
+    public productSerivce: ProductsService
  ) {
+    this.productSerivce.fetchProducts().subscribe(productData => {
+      this.productData = productData
+    })
  }

  ngOnInit() {

  }

}
htmlは取得したAPIに合わせてデータの取得を変更
<app-header></app-header>
<ul class="productList">
+  <li [routerLink]="'/detail/'+ produtItem.id" class="productItem" *ngFor="let produtItem of productData">
+    <img class="productThumb" [src]="'..' + produtItem.image" alt="">
+    <p class="productTitle">{{ produtItem.name }}</p>
    <ul class="tagList">
      <li class="tagItem" *ngFor="let tagItem of (produtItem.tag)">
        <app-tag [text]="tagItem"></app-tag>
      </li>
    </ul>
  </li>
</ul>
これで一覧ページは完了
詳細ページ
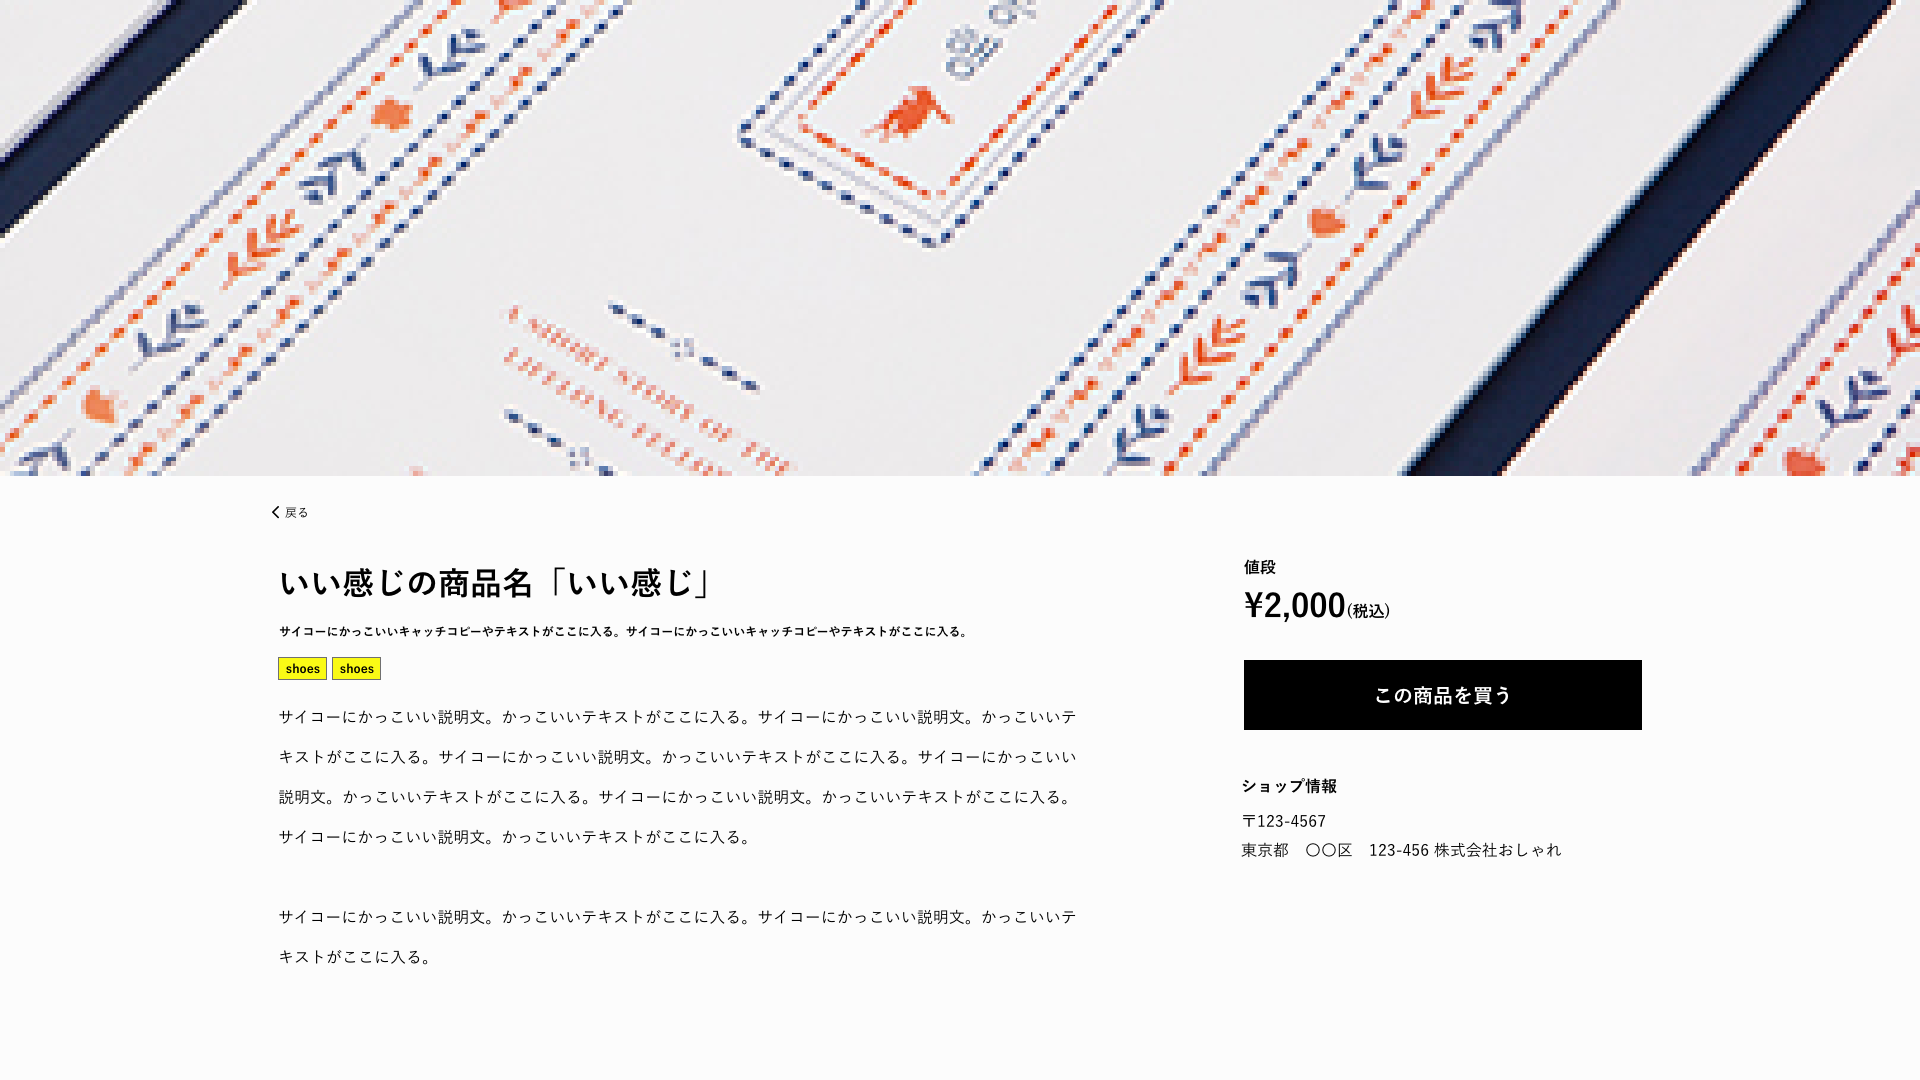
次に詳細ページを作成していく
詳細ページでは文字列の変形について詳しく比較していこうと思う
Vueの場合
APIのやりとりは、上述しているので説明は割愛する
まずは詳細ページのAPIデータをstoreで取得する
import Vue from 'vue'
import Vuex from 'vuex'
import axios from 'axios'

Vue.use(Vuex)

const URL = 'http://localhost:3000'

export default new Vuex.Store({
  state: {
    products: [],
+    detail: []
  },
  mutations: {
    addProduct(state, payload) {
      state.products = payload
    },
+    addProductDetail(state, payload) {
+      state.detail = payload
+    }
  },
  actions: {
    async fetchProducts({ commit }) {
      const res = await axios.get(`${ URL }/products`)
      commit('addProduct', res.data)
    },
+    async fetchProductDetail({ commit }, id) {
+      const res = await axios.get(`${ URL }/products/${id}`)
+      commit('addProductDetail', res.data)
    }
  },
  modules: {
  }
})
アイコンフォントを利用したいのでindex.htmlに追記
<!DOCTYPE html>
<html lang="ja">
  <head>
    <meta charset="utf-8">
    <meta http-equiv="X-UA-Compatible" content="IE=edge">
    <meta name="viewport" content="width=device-width,initial-scale=1.0">
    <link rel="icon" href="<%= BASE_URL %>favicon.ico">
+    <link href="https://use.fontawesome.com/releases/v5.6.1/css/all.css" rel="stylesheet">
    <title>sample-vue</title>
  </head>
  <body>
    <noscript>
      <strong>We're sorry but sample-vue doesn't work properly without JavaScript enabled. Please enable it to continue.</strong>
    </noscript>
    <div id="app"></div>
    <!-- built files will be auto injected -->
  </body>
</html>
次に、Detail.vueで取得したデータを反映する
<template>
  <div class="detail">
    <div class="detailImage">
      <img :src="'..' + detail.image" alt="">
    </div>
    <div class="detailUnder">
      <div class="detailHeader">
        <router-link to="/list" class="detailBackButtoon"><i class="fas fa-chevron-left detailBackArrow"></i>戻る</router-link>
      </div>
      <div class="detailContent">
        <div class="detailLeft">
          <h1 class="detailTitle">{{detail.name}}</h1>
          <p class="detailCopy">{{detail.product_copy}}</p>
          <ul class="tagList">
            <li class="tagItem" v-for="(tagItem, ti) in detail.tag" :key="ti">
              <BaseTag :text="tagItem"></BaseTag>
            </li>
          </ul>
          <p class="detailDescription">{{detail.description}}</p>
        </div>
        <div class="detailRight">
          <h2 class="detailSubTitle">値段</h2>
          <p class="detailPrice">{{priceStr}}<span class="detailPrice-tax">(税込)</span></p>
          <div class="detailButton">
            <BaseButton text="この商品を買う" path="#"></BaseButton>
          </div>
          <h2 class="detailSubTitle">ショップ情報</h2>
          <p class="detailAddress">〒{{detail.zip_code}}</p>
          <p class="detailAddress">{{detail.shop_address}}</p>
        </div>
      </div>
    </div>
  </div>
</template>

<script>
import BaseTag from '@/components/BaseTag'
import BaseButton from '@/components/BaseButton'
import { mapActions, mapState } from 'vuex'

export default {
  name: 'Detail',
  components: {
    BaseTag,
    BaseButton
  },
  computed: {
    ...mapState([
      'detail'
    ]),
    priceStr() {
      return `¥${this.detail.price.toLocaleString()}`
    }
  },
  methods: {
    ...mapActions([
      'fetchProductDetail'
    ])
  },
  created() {
    this.fetchProductDetail(this.$route.params.id)
  }
}
</script>

<style lang="scss" scoped>
  .detailImage{
    img{
      object-fit: cover;
      width: 100%;
      height: 476px;
    }
  }
  .detailUnder{
    width: 1370px;
    margin: 30px auto 0;
    padding-bottom: 100px;
  }
  .detailBackButtoon{
    color: #000;
  }
  .detailBackArrow{
    padding-right: 5px;
  }
  .detailContent{
    margin-top: 40px;
    display: flex;
    justify-content: space-between;
  }
  .detailLeft{
    width: 812px;
  }
  .detailTitle{
    font-size: 32px;
  }
  .detailCopy{
    margin-top: 26px;
    font-weight: 700;
  }
  .tagList{
    margin-top: 20px;
    display: flex;
  }
  .tagItem{
    &:not(:first-child){
      margin-left: 5px;
    }
  }
  .detailDescription{
    margin-top: 30px;
    font-size: 16px;
    line-height: 2.5;
  }
  .detailRight{
    width: 400px;
  }
  .detailButton{
    margin: 38px 0;
  }
  .detailSubTitle{
    font-size: 16px;
    font-weight: 700;
    line-height: 1;
    margin-bottom: 14px;
  }
  .detailPrice{
    font-size: 32px;
    font-weight: 700;
    &-tax{
      font-size: 16px;
    }
  }
  .detailAddress{
    font-size: 16px;
    line-height: 1.8;
  }
</style>
注目して欲しいのが、computedの記述
vueでは、文字列を変換したい場合にcomputedを利用する
今回の場合は、APIデータを下記の内容で変換している
-
{ price: 2000 }は3桁カンマ区切りに変換。先頭には「¥」をつける
<template>
          ...
          <h2 class="detailSubTitle">値段</h2>
          <p class="detailPrice">{{priceStr}}<span class="detailPrice-tax">(税込)</span></p>
          ...
          <h2 class="detailSubTitle">ショップ情報</h2>
          <p class="detailAddress">{{zipCodeStr}}</p>
          ...
</template>

<script>
import BaseTag from '@/components/BaseTag'
import BaseButton from '@/components/BaseButton'
import { mapActions, mapState } from 'vuex'

export default {
  ...
  computed: {
    ...mapState([
      'detail'
    ]),
    priceStr() {
      return `¥${this.detail.price.toLocaleString()}`
    }
  }
これで詳細ページは完成
Angularの場合
APIの情報を取得していく
idを引数で渡すようにAPIリクエストの処理を記述
import { Injectable } from '@angular/core';
import { HttpClient } from '@angular/common/http';
import { Observable } from 'rxjs';

@Injectable({
  providedIn: 'root'
})
export class ProductsService {
  private url = 'http://localhost:3000';

  constructor(
    private http: HttpClient
  ) { }

  fetchProducts(): Observable<any> {
    return this.http.get<any>(`${this.url}/products`)
  }

+  fetchProductsIds(id): Observable<any> {
+    return this.http.get<any>(`${this.url}/products/${id}`)
+  }
}
productServiceを読み込んで、先ほど作った関数を実行する
ActiveRouteはvueのparamsのような取得をしてくれる機能を利用するために読み込んでいる
import { Component, OnInit } from '@angular/core';
+ import { ProductsService } from '../service/products.service';
+ import { ActivatedRoute } from '@angular/router';

@Component({
  selector: 'app-detail',
  templateUrl: './detail.component.html',
  styleUrls: ['./detail.component.scss']
})
export class DetailComponent implements OnInit {
+  detailData = []

  constructor(
+    private route: ActivatedRoute,
+    public productSerivce: ProductsService
  ) {
+    // パラメータからidを抽出
+    // vueで言う所のthis.$route.params.id
+    const id = this.route.snapshot.paramMap.get('id');
+
+    this.productSerivce.fetchProductDetail(id).subscribe(detailData => {
+      this.detailData = detailData
+    })
  }

  ngOnInit() {
  }

}
データの読み込みが完了したら
テンプレートに反映させていく
<div class="detail">
  <div class="detailImage">
    <img [src]="'..' + detailData.image" alt="">
  </div>
  <div class="detailUnder">
    <div class="detailHeader">
      <a routerLink="/list" class="detailBackButtoon"><i class="fas fa-chevron-left detailBackArrow"></i>戻る</a>
    </div>
    <div class="detailContent">
      <div class="detailLeft">
        <h1 class="detailTitle">{{detailData.name}}</h1>
        <p class="detailCopy">{{detailData.product_copy}}</p>
        <ul class="tagList">
          <li class="tagItem" *ngFor="let tagItem of (detailData.tag)">
            <app-tag [text]="tagItem"></app-tag>
          </li>
        </ul>
        <p class="detailDescription">{{detailData.description}}</p>
      </div>
      <div class="detailRight">
        <h2 class="detailSubTitle">値段</h2>
        <p class="detailPrice">{{detailData.price | currency : 'JPY': true}}<span class="detailPrice-tax">(税込)</span></p>
        <div class="detailButton">
          <app-button text="この商品を買う" path="#"></app-button>
        </div>
        <h2 class="detailSubTitle">ショップ情報</h2>
        <p class="detailAddress">〒{{detailData.zip_code}}</p>
        <p class="detailAddress">{{detailData.shop_address}}</p>
      </div>
    </div>
  </div>
</div>
vueだとcomputedを利用して、文字列を変換していたが
angularではpipeという機能が存在する
デフォルトで用意されているパイプで以下の5種類が存在する
- DatePipe 日付
- UpperCasePipe 大文字英数
- LowerCasePipe 小文字英数
- CurrencyPipe 通貨
- PercentPipe パーセント
今回は通貨を変換するpipeを利用して記述している
{{detailData.price | currency : 'JPY': true}}
あとはCSSをレイアウトして完成
.detailImage{
  img{
    object-fit: cover;
    width: 100%;
    height: 476px;
  }
}
.detailUnder{
  width: 1370px;
  margin: 30px auto 0;
  padding-bottom: 100px;
}
.detailBackButtoon{
  color: #000;
}
.detailBackArrow{
  padding-right: 5px;
}
.detailContent{
  margin-top: 40px;
  display: flex;
  justify-content: space-between;
}
.detailLeft{
  width: 812px;
}
.detailTitle{
  font-size: 32px;
}
.detailCopy{
  margin-top: 26px;
  font-weight: 700;
}
.tagList{
  margin-top: 20px;
  display: flex;
}
.tagItem{
  &:not(:first-child){
    margin-left: 5px;
  }
}
.detailDescription{
  margin-top: 30px;
  font-size: 16px;
  line-height: 2.5;
}
.detailRight{
  width: 400px;
}
.detailButton{
  margin: 38px 0;
}
.detailSubTitle{
  font-size: 16px;
  font-weight: 700;
  line-height: 1;
  margin-bottom: 14px;
}
.detailPrice{
  font-size: 32px;
  font-weight: 700;
  &-tax{
    font-size: 16px;
  }
}
.detailAddress{
  font-size: 16px;
  line-height: 1.8;
}
詳細ページの完成!
まとめ
アニメーションやtypescript、rxjsなど
色々と割愛して説明を大雑把に書いていったが
何かしらのSPAフレームワークを利用したことがある開発者なら
公式ドキュメントを読み進めながら、Angularを利用できそうだと感じた
作りたいプロジェクトがあれば、導入してみるのもいいかな(小並感)