この記事はvExperts Advent Calendar 2019の12月11日分の投稿です。
はじめに
UpstreamのKubernetes 1.14からWindows Nodeが正式にサポートされたことを受け、VMware Enterprise PKS 1.5はWindows Worker-Based Kubernetes Clustersのベータサポートを開始しました。この記事ではWindows Containerでコンテナイメージを作成して、VMware Enterprise PKSで作成したWindows Worker-Based Kubernets Cluster上でPodを動かしてみます。長くなってしまったので興味があるところだけ読んでください。
Windows Containerのコンテナイメージ作成
Enterprise PKSでWindows Worker-Based Clusterを作成する前に、WIndows Server 2019にWindows ContainerをインストールしてWindows Containerのコンテナイメージを作成します。
Windows Containerのインストール
Windows Server 2019をインストールしてPowerShellコマンドでWindows Containerを有効化し、Dockerをインストールします。
PS C:\Users\Administrator> Install-WindowsFeature containers

-- 再起動 --

PS C:\Users\Administrator> Install-Module -Name DockerMsftProvider -Repository PSGallery -Force
PS C:\Users\Administrator> Install-Package -Name docker -ProviderName DockerMsftProvider
インストールが終わるとdockerコマンドが利用可能になります。
PS C:\Users\Administrator> docker version
Client: Docker Engine - Enterprise
 Version:           19.03.5
 API version:       1.40
 Go version:        go1.12.12
 Git commit:        2ee0c57608
 Built:             11/13/2019 08:00:16
 OS/Arch:           windows/amd64
 Experimental:      false

Server: Docker Engine - Enterprise
 Engine:
  Version:          19.03.5
  API version:      1.40 (minimum version 1.24)
  Go version:       go1.12.12
  Git commit:       2ee0c57608
  Built:            11/13/2019 07:58:51
  OS/Arch:          windows/amd64
  Experimental:     false
コンテナイメージの作成
普通のDockerと同じ様にコンテナイメージを作成します。今回は以下のDockerfileでコンテナイメージを作成します。
FROM microsoft/iis
SHELL ["powershell", "-command"]
EXPOSE 80

# Install ASP
RUN Install-WindowsFeature Web-ASP;

# Clean out default site
RUN powershell -NoProfile -Command Remove-Item -Recurse C:\inetpub\wwwroot\*

WORKDIR /inetpub/wwwroot
# Copy the app artifact in (assumes you are in the publish folder when building docker image)
COPY wwwroot/* ./
wwwrootフォルダには以下のdefault.aspファイルを作成しておきます。
<!DOCTYPE html>
  <html>
    <body>
      <h1>
        <% response.write(Request.ServerVariables("LOCAL_ADDR")) %>
      </h1>
    </body>
  </html>
docker buildコマンドでイメージを作成します。
PS C:\aspnet-helloworld> docker build -t asp-helloworld:1.0 .
Sending build context to Docker daemon  3.584kB
Step 1/7 : FROM microsoft/iis
latest: Pulling from microsoft/iis
65014b3c3121: Pull complete
e96b0897c5d1: Pull complete
2a2adafcfe78: Pull complete
98f44b26ff56: Pull complete
2f8dc6e980ee: Pull complete
Digest: sha256:52a0341763b7ef0be3f70e279ef8298973fc92541e580a047b9863affd8415cd
Status: Downloaded newer image for microsoft/iis:latest
 ---> 281fc8d13022
Step 2/7 : SHELL ["powershell", "-command"]
 ---> Running in 5fe7df4560d3
Removing intermediate container 5fe7df4560d3
 ---> 1f0fbd9dae22
Step 3/7 : EXPOSE 80
 ---> Running in 422d9f7f0b13
Removing intermediate container 422d9f7f0b13
 ---> 0d82eba3000a
Step 4/7 : RUN Install-WindowsFeature Web-ASP;
 ---> Running in 2b5c87cfbf0c

Success Restart Needed Exit Code      Feature Result
------- -------------- ---------      --------------
True    No             Success        {Application Development, ASP, ISAPI E...


Removing intermediate container 2b5c87cfbf0c
 ---> 5a376995ae0b
Step 5/7 : RUN powershell -NoProfile -Command Remove-Item -Recurse C:\inetpub\wwwroot\*
 ---> Running in ed001ac9cef8
Removing intermediate container ed001ac9cef8
 ---> 90ff9eeb605b
Step 6/7 : WORKDIR /inetpub/wwwroot
 ---> Running in 706fe80e1b3d
Removing intermediate container 706fe80e1b3d
 ---> 2ef5ed358da8
Step 7/7 : COPY wwwroot/* ./
 ---> 5d86456c93c5
Successfully built 5d86456c93c5
Successfully tagged asp-helloworld:1.0
レジストリにコンテナイメージをプッシュ
今回はオンプレのHarborをレジストリとして利用します。Harborの証明書を発行した認証局のルート証明書をWindows Serverにインポートします。
PS C:\> Import-Certificate -FilePath C:\root_ca_certificate -CertStoreLocation Cert:\LocalMachine\Root


   PSParentPath: Microsoft.PowerShell.Security\Certificate::LocalMachine\Root

Thumbprint                                Subject
----------                                -------
249F00819D98609C5833881B69EC9143996F3D8C  O=Pivotal, C=US
Harborレジストリにログインして、コンテナイメージをプッシュします。
PS C:\> docker login harbor.example.com
Username: admin
Password:
WARNING! Your password will be stored unencrypted in C:\Users\Administrator\.docker\config.json.
Configure a credential helper to remove this warning. See
https://docs.docker.com/engine/reference/commandline/login/#credentials-store

Login Succeeded
PS C:\> docker tag asp-helloworld:1.0 harbor.example.com/library/asp-helloworld:1.0
PS C:\> docker push  harbor.example.com/library/asp-helloworld:1.0
The push refers to repository [harbor.example.com/library/aspnet]
48ab051d86db: Mounted from library/asp-helloworld
4369bfa416d2: Mounted from library/asp-helloworld
c181c797dbd7: Mounted from library/asp-helloworld
6c0d95d98b74: Mounted from library/asp-helloworld
c8c49d2f6c0c: Mounted from library/asp-helloworld
751a9cbaaca2: Mounted from library/asp-helloworld
08298699d71c: Mounted from library/asp-helloworld
6e162f0d5805: Mounted from library/asp-helloworld
d223497e798e: Mounted from library/asp-helloworld
340cae54f905: Skipped foreign layer
c4d02418787d: Skipped foreign layer
1.0: digest: sha256:d9259df7185aca421424061a450b271bc92ae2a0a34326e1dc50e31640561cd2 size: 2906
Enterprise PKSでWindows Worker-Based Kubernetes Clusterの作成
制約
- Ops Manager v2.6.6以降
- vSphere環境のみ (GCP/Azure/AWSは未対応)
- ネットワークCNIはFlannelのみ (NSX-Tには未対応)
- Windows Server 2019
- Process Isolationのみ (Hyper-V Isolationには未対応)
構成情報
今回構成したのは以下の環境です。
| コンポーネント | バージョン |
|---|---|
| vSphere | 6.7U3 |
| Ops Manager for vSphere | 2.6.13 |
| Enterprise PKS | 1.6.0 |
| Windows stemcell | 2019.7 |
| Windows Server 2019 | 10.0.17763 |
| Windows ISO Image | 17763.737.190906-2324.rs5_release_svc_refresh_SERVER_EVAL_x64FRE_en-us_1.iso |
2019年12月5日現在、Ops Managerは2.7.6、Windows stemcellは1803.17/2019.13が最新版ですが、Ops Manager 2.6.x/Windows stemcell 2019.7の組み合わせでないとWindows Worker-Based Kubernets Clusterを作成することができませんでした。
Windows Stemcellの作成
PKSはKubernetesクラスター作成時に、stemcellと呼ばれる仮想マシンイメージを利用してクラスターを構成する仮想マシンを作成します。通常PKSのKubernetesクラスターはPivotalが提供するUbuntuベースのstemcellを利用しますが、Windowsのstemcell自体はPivotalが提供していないので自身で作成する必要があります。作成方法は以下のページに記載されています。
Creating a Windows Stemcell for vSphere Using stembuild (Beta)
Stemcellの作成方法はマニュアルで作成する方法と、stembuild(β版)を利用して作成する2種類の方法があります。今回はstembuildを利用してWindows stemcellを作成します。
stembuildコマンドはここからダウンロード可能です。PKS向けのWindows stemcellをビルドするには、stembuild CLI for Windows v2019.7が必要です。
2019年11月29日現在、stembuildの最新バージョンは2019.13となっていますが、最新バージョンを利用するとstemcell自体は作成できますが、OpsManagerからPKSを構成する際に失敗します。2019.7を利用する必要があるので注意が必要です。
Microsoft Local Group Policy Object Utility (LGPO)をここからダウンロードしてstembuildコマンドと同じフォルダに配置します。
Windows仮想マシンの作成
WIndows Server 2019仮想マシンを作成してISOからOSをインストールします。テストするだけであれば、Windows Server 2019の試用版を利用することが可能です。インストールするOSは「Windows Server 2019 Standard」を指定します。インストール完了後、Administratorのパスワードを設定します。
-
PowerShellからOSのバージョンを確認します。
PS C:\Users\Administrator> [System.Environment]::OSVersion.Version Major Minor Build Revision ---- ---- ----- -------- 10 0 17763 0 -
VMware Toolsをインストールします。
PS C:\Users\Administrator> D:\setup64.exe -
SConfigコマンド(Server Configuration)を利用してWindows Updateから更新をインストールします。(★勢いで1809や1903等にアップデートしないように)
-
再起動後、SConfigコマンドからIPアドレスを構成します。
-
VMを停止してクローンします。オリジナルのVMは将来的にstemcellにパッチを当てる場合に利用します。
Construct the BOSH Stemcell
VMをPowerOnして外部のホストからstembuildコマンドをつかってstembuild constructを実行します。constructにより仮想マシンに変更が行われるため、construct前に仮想マシンがクリーンな状態でスナップショットやクローンを取っておくと良いです。また、マニュアルには記載がありませんが、Windows Firewallを無効化する必要がありました。cmd.exeの場合はnetsh advfirewall set allprofiles state offとすることで、CLIからWindows Firewallを無効化することが可能です。
stembuild constructは以下の書式で実行します。
$ stembuild construct -vm-ip TARGET-VM-IP ¥
    -vm-username TARGET-USERNAME ¥
    -vm-password TARGET-VM-PASSWORD ¥
    -vcenter-url VCENTER-URL ¥
    -vcenter-username VCENTER-USERNAME ¥
    -vcenter-password VCENTER-PASSWORD ¥
    -vm-inventory-path INVENTORY-PATH
- TARGET-VM-IP : ゲストOSのIPアドレスを指定
- TARGET-VM-USERNAME : ゲストOSのユーザー名
- TARGET-VM-PASSWORD : ゲストOSのパスワード
- VCENTER-URL : VMがあるvCenterのURL
- VCENTER-USERNAME : vCenterのユーザー名
- VCENTER-PASSWORD : vCenterのパスワード
- INVENTORY-PATH : VMのインベントリパス
stembuildは接続先のvCenterの証明書を確認します。vCenterが自己署名証明書等を利用している場合は証明書をダウンロードして-vcenter-ca-certsでローカルの証明書を指定することで接続可能です。
実行例
$ stembuild construct -vm-ip 10.44.59.226 ¥
    -vm-username administrator ¥
    -vm-password 'some-password' ¥
    -vcenter-url vcenter-fqdn.example.com ¥
    -vcenter-username 'administrator@vsphere.local' ¥
    -vcenter-password 'some-password' ¥
    -vm-inventroy-path '/DC/vm/w2019-stemcell' ¥
    -vcenter-ca-certs '/root/pks/ca.crt'
Constructを実行すると数分で終了しますが、コマンド実行後も仮想マシン内で処理が継続します。処理が終わって仮想マシンがPowerOff状態になるのを待ちます。
Package the BOSH Stemcell
Constructが終了するとVMはPowerOffされます。続いてstemcbuild packageで仮想マシンをstemcellとしてエクスポートします。stembuild packageは以下の書式で実行します。
$ stembuild package -vcenter-url VCENTER-URL ¥
    -vcenter-username VCENTER-USERNAME ¥
    -vcenter-password VCENTER-PASSWORD ¥
    -vm-inventory-path INVENTORY-PATH
実行例
$ stembuild package -vcenter-url vc.example.com ¥
    -vcenter-username 'administrator@vsphere.local' ¥
    -vcenter-password 'Passw0rd!' ¥
    -vm-inventory-path '/DC/vm/w2019-stemcell' ¥
    -vcenter-ca-certs '/root/pks/ca.crt'
Pakageは数分で完了して、カレントディレクトリにbosh-stemcell-2019.7-vsphere-esxi-windows2019-go_agent.tgzが作成されます。
Enterprise PKSのセットアップ
Enterprise PKSの初期設定
通常と同じ方法でPKSの初期設定を行います。CNIとしてNSX-Tを利用しない設定にするのがポイントです。
- vSphere環境にOps Managerをデプロイする
- BOSH Director for vSphereを構成する (NSX-Tは利用しないのでvCenter Configでは
Standard vCenter Networkingを選択) - ProductとしてEnterprise PKSをインポートして構成する (NetworkingではContainer Networking Interfaceとして
flannelを選択)
Windows Cluster向けPlanの設定
Windows Worker-Based Kubernets ClusterをデプロイするためにOps ManagerのPKSタイルでPlan 11〜13を有効化します。今回は以下の様に構成しました。
- Plan 11 : Master x 1 / Node x3
- Plan 12 : Master x 3 / Node x 5
Stemcellのインポート
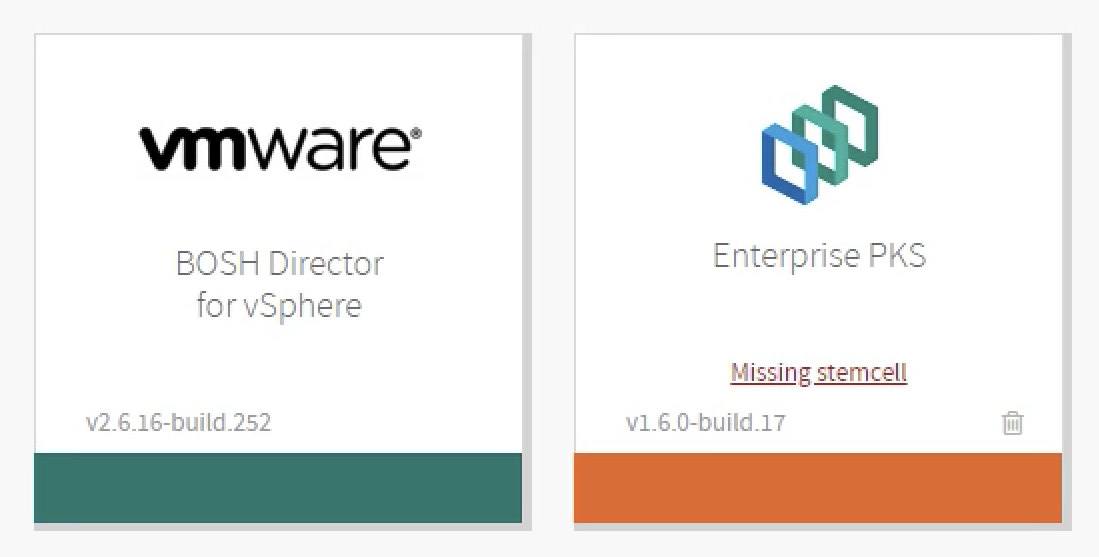
Plan 11〜13を有効化することでEnterprise PKSタイルがMissing stemcell状態となるので、Windows stemcellをインポートします。
Missing stemcellをクリックして、Stemcell Library画面でstembuildで作成したStemcell(bosh-stemcell-2019.7-vsphere-esxi-windows2019-go_agent.tgz)をインポートします。
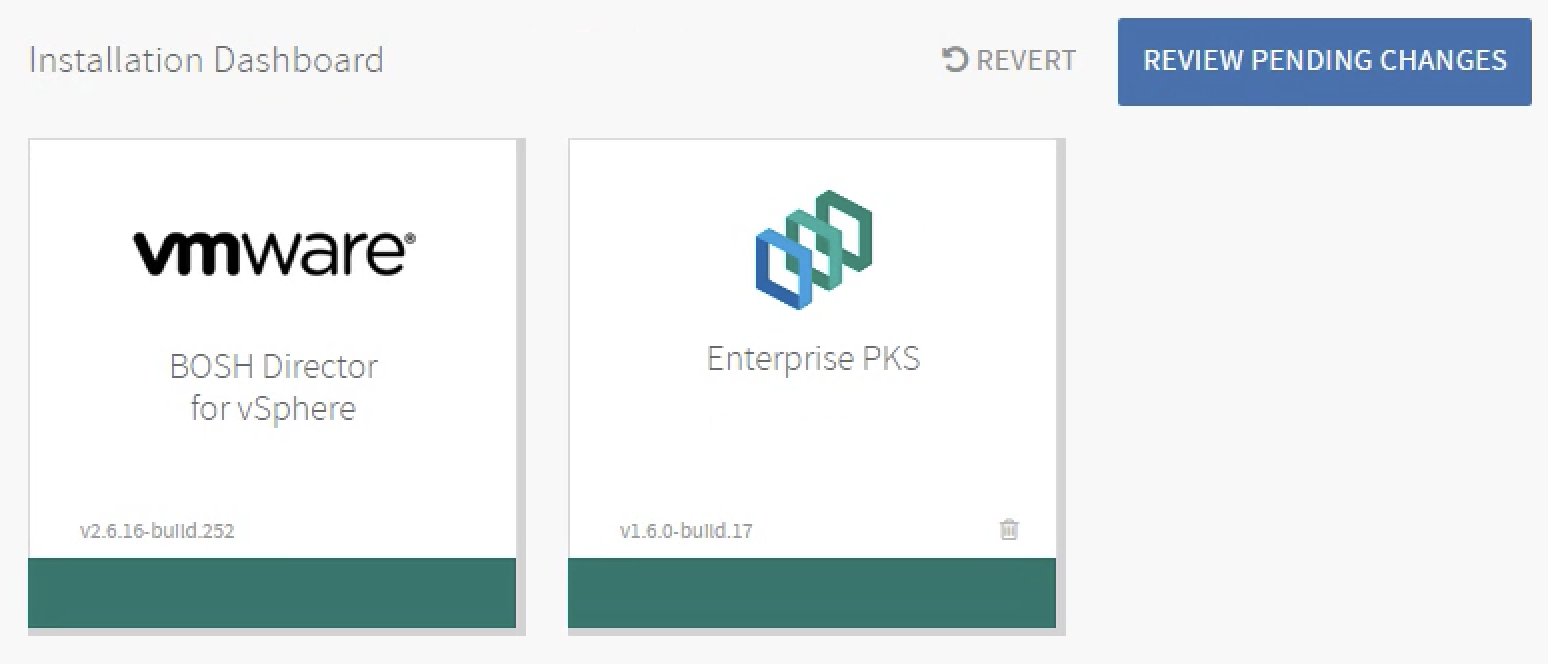
Stemcellインポート後、Installation Dashboardで全てのタイルが緑色になったらReview Pending Changes ▶ Apply Changesをクリックして、PKSを構成します。それなりに時間がかかります。
PKSの構成が完了すると、Ops Manager上で以下のメッセージが表示されます。
PKSクレデンシャルの作成
PKSを利用してKubernetesクラスターを作成するためにPKSにアカウントを作成します。uaacを利用してユーザーを作成してpksのadminロールを割り当てます。PKS接続時のSecretはEnterprise PKSタイルのCredentailsタブにあるPks Uaa Management Admin Clientの値を利用します。
$ uaac target api.pks.example.com:8443 --skip-ssl-validation
Unknown key: Max-Age = 86400

Target: https://api.pks.example.com:8443

$ uaac token client get admin -s [Pks Uaa Management Admin Client]
Unknown key: Max-Age = 86400

Successfully fetched token via client credentials grant.
Target: https://api.pks.example.com:8443
Context: admin, from client admin

$ uaac user add masanara --emails masanara -p "somepassword"
user account successfully added

$ uaac member add pks.clusters.admin masanara
success
PKS APIへのログイン
pksコマンドを利用してpksにログインします。
$ pks login -k -a https://api.pks.example.com -u masanara

Password: *********
API Endpoint: https://api.pks.example.com
User: masanara
Login successful.
PKS Clusterの作成
Windows Nodeで構成されるKubernetesクラスターを作成します。
$ pks create-cluster -e win.pks.example.com -p Plan-11-Windows-Beta win-pks

PKS Version:              1.6.0-build.17
Name:                     win-pks
K8s Version:              1.15.5
Plan Name:                Plan-11-Windows-Beta
UUID:                     feed32c6-7754-4d0e-9cbd-7d4cfdb60ad0
Last Action:              CREATE
Last Action State:        in progress
Last Action Description:  Creating cluster
Kubernetes Master Host:   win.pks.example.com
Kubernetes Master Port:   8443
Worker Nodes:             3
Kubernetes Master IP(s):  In Progress
Network Profile Name:

Use 'pks cluster win-pks2' to monitor the state of your cluster
Windows Worker-Based Kubernetes Clusterの利用
クレデンシャルの取得
pksコマンドで作成したクラスターのクレデンシャルを取得して、クラスターへの接続を確認します。
$ pks get-credentails win-pks

Fetching credentials for cluster win-pks.
Context set for cluster win-pks.

You can now switch between clusters by using:
$kubectl config use-context <cluster-name>

$ kubectl config use-context win-pks
Switched to context "win-pks".

$ kubectl get nodes -o wide
NAME                                   STATUS   ROLES    AGE   VERSION   INTERNAL-IP   EXTERNAL-IP   OS-IMAGE                                  KERNEL-VERSION      CONTAINER-RUNTIME
059bd427-024a-4995-bc9b-5741dec680a4   Ready    <none>   21h   v1.15.5   10.44.58.26   10.44.58.26   Windows Server 2019 Standard Evaluation   10.0.17763.737      docker://18.9.9
0aa9c951-3e20-4f7f-9582-1016c4f84fbd   Ready    <none>   21h   v1.15.5   10.44.58.25   10.44.58.25   Windows Server 2019 Standard Evaluation   10.0.17763.737      docker://18.9.9
c39cbd5b-dd55-4405-81a1-f753792a1c53   Ready    <none>   21h   v1.15.5   10.44.58.23   10.44.58.23   Ubuntu 16.04.6 LTS                        4.15.0-66-generic   docker://18.9.9
c5029b36-5ff4-4d0c-85b2-e0951da7c9ba   Ready    <none>   21h   v1.15.5   10.44.58.24   10.44.58.24   Windows Server 2019 Standard Evaluation   10.0.17763.737      docker://18.9.9
Nodeに対するHarborレジストリ証明書のインポート
Harborレジストリ上のコンテナイメージを利用してPodを作成するために、Harborの証明書を発行した認証局のルート証明書をWindows Nodeにインポートします。
Bosh Commandline Credentailsの取得
Ops Manager GUIのBosh Director for vSphereタイルのCredentailsにあるBosh Commandline Credentialsをコピーして、環境変数として設定します。
$ export BOSH_CLIENT=ops_manager
$ export BOSH_CLIENT_SECRET=rOwmVFSLNHzyjh_csbF0XcBRSMpyqapz
$ export BOSH_CA_CERT=/root/root_ca_certificate
$ export BOSH_ENVIRONMENT=10.44.58.20 bosh
環境変数を設定するとboshコマンドによりPKSやPKSが作成したクラスターの情報を確認できます。
$ bosh vms
Using environment '10.44.58.20' as client 'ops_manager'

Task 96
Task 95
Task 94
Task 95 done

Task 96 done

Task 94 done

Deployment 'pivotal-container-service-23bed6b337f61ef38590'

Instance                                                        Process State  AZ   IPs          VM CID                                   VM Type     Active
pivotal-container-service/8109a8eb-d0cf-4568-b38e-b3b6f3a11c24  running        WIN  10.44.58.21  vm-c0726b1c-de47-4b93-b15e-916662194fa5  large.disk  true

1 vms

Deployment 'service-instance_dfae02bd-384c-4c78-ba22-155fd4f9a996'

Instance                                             Process State  AZ   IPs          VM CID                                   VM Type      Active
master/4ef72736-3c7f-4bd6-a2f8-0a756baa55f0          running        WIN  10.44.58.22  vm-ef52a54e-d819-4228-8ed7-87a338c833ce  medium.disk  true
windows-worker/06a35d28-6216-4d97-b66e-f4bf235910a6  running        WIN  10.44.58.25  vm-5fb98491-e3a0-4706-aa70-6d9e36e50ccf  xlarge       true
windows-worker/7fdfb9d2-b1a3-44c2-bf43-8c0a05ae31fe  running        WIN  10.44.58.24  vm-2f2c0562-3549-4c48-976e-a04b743441fd  xlarge       true
windows-worker/87e5a460-fcbd-4d3b-be14-277c9e3441af  running        WIN  10.44.58.26  vm-06fd10cd-1531-4d02-9f02-495373af95dc  xlarge       true
worker/4e217181-94e7-4151-bae7-855b548550c6          running        WIN  10.44.58.23  vm-8d88376e-306d-4f66-9dbb-2b721f16ecb6  xlarge       true

5 vms

Succeeded
証明書のアップロード
boshコマンドで証明書ファイルを全てのWindowsノードに対してscpでコピーします。
$ bosh -d service-instance_dfae02bd-384c-4c78-ba22-155fd4f9a996 scp root_ca_certificate windows-worker/87e5a460-fcbd-4d3b-be14-277c9e3441af:/
Using environment '10.44.58.20' as client 'ops_manager'

Using deployment 'service-instance_dfae02bd-384c-4c78-ba22-155fd4f9a996'

Task 76. Done

Succeeded
証明書のインポート
boshコマンドで全てのWindowsノードに対してsshしてscpした証明書をインポートします。
$ bosh ssh -d service-instance_dfae02bd-384c-4c78-ba22-155fd4f9a996 windows-worker/87e5a460-fcbd-4d3b-be14-277c9e3441af
Using environment '10.44.58.20' as client 'ops_manager'

Using deployment 'service-instance_dfae02bd-384c-4c78-ba22-155fd4f9a996'

Task 78. Done

Microsoft Windows [Version 10.0.17763.737]
(c) 2018 Microsoft Corporation. All rights reserved.

bosh_af947407628e475@WIN-60GE525AJ05 C:\Users\bosh_af947407628e475>powershell
Windows PowerShell
Copyright (C) Microsoft Corporation. All rights reserved.

PS C:\Users\bosh_af947407628e475> Import-Certificate -FilePath C:\root_ca_certificate -CertStoreLocation Cert:\LocalMachine\Root


   PSParentPath: Microsoft.PowerShell.Security\Certificate::LocalMachine\Root

Thumbprint                                Subject
----------                                -------
AAFA624724526CDF33FE28A2AC6EB84F110F1017  O=Pivotal, C=US


PS C:\Users\bosh_af947407628e475>exit
動作確認
動作確認としてマニフェストからDeployment/Service/Ingressを作成します。
Ingress Controllerの構成
Flannelで構成するとIngress Controllerが存在しないため、ingress-nginxでNodePortを利用してIngress Controllerを構成します。(NSX-Tで構成するとNSX-TのLoadbalancerによりIngressが自動的に構成されます。)
$ wget https://raw.githubusercontent.com/kubernetes/ingress-nginx/master/deploy/static/mandatory.yaml
$ wget https://raw.githubusercontent.com/kubernetes/ingress-nginx/master/deploy/static/provider/baremetal/service-nodeport.yaml
service-nodeport.yamlのspec.externalIPsにNodeのIPアドレスを指定します。今回は以下の様に追加しました。
apiVersion: v1
kind: Service
metadata:
  name: ingress-nginx
  namespace: ingress-nginx
  labels:
    app.kubernetes.io/name: ingress-nginx
    app.kubernetes.io/part-of: ingress-nginx
spec:
  type: NodePort
  ports:
    - name: http
      port: 80
      targetPort: 80
      protocol: TCP
    - name: https
      port: 443
      targetPort: 443
      protocol: TCP
  selector:
    app.kubernetes.io/name: ingress-nginx
    app.kubernetes.io/part-of: ingress-nginx
  externalIPs:
    - 10.44.58.23
2つのマニフェストファイルでIngress Controllerを構成します。
$ kubectl apply -f mandatory.yaml
$ kubectl apply -f service-nodeport.yaml
Deployment/Service/Ingressの構成
このマニフェストをapplyして動作を確認します。マニフェストをapplyしてリソースが作成されたことを確認します。
$ kubectl apply -f aspnet.yaml
$ kubectl get all
NAME                                     READY   STATUS    RESTARTS   AGE
pod/aspnet-helloworld-7564fbb89f-2mzl8   1/1     Running   0          7s
pod/aspnet-helloworld-7564fbb89f-jpbjl   1/1     Running   0          7s
pod/aspnet-helloworld-7564fbb89f-p56cs   1/1     Running   0          7s
pod/aspnet-helloworld-7564fbb89f-pnqn4   1/1     Running   0          7s
pod/aspnet-helloworld-7564fbb89f-zpx4g   1/1     Running   0          7s

NAME                        TYPE        CLUSTER-IP      EXTERNAL-IP   PORT(S)        AGE
service/aspnet-helloworld   NodePort    10.100.200.60   <none>        80:32249/TCP   7s
service/kubernetes          ClusterIP   10.100.200.1    <none>        443/TCP        23h

NAME                                READY   UP-TO-DATE   AVAILABLE   AGE
deployment.apps/aspnet-helloworld   5/5     5            5           7s

NAME                                           DESIRED   CURRENT   READY   AGE
replicaset.apps/aspnet-helloworld-7564fbb89f   5         5         5       7s
curlでIngresss経由でアクセスできることを確認します。
$ curl 10.44.58.23.xip.io
<!DOCTYPE html>
  <html>
    <body>
      <h1>
        10.200.61.35
      </h1>
    </body>
  </html>
Podでのコマンド実行
Linux Containerと同じくkubectl execを利用することができるので、起動中のPodに接続してPowerShellを実行することも可能です。
$ kubectl exec -it aspnet-helloworld-7564fbb89f-2mzl8 powershell

Windows PowerShell
Copyright (C) Microsoft Corporation. All rights reserved.

PS C:\inetpub\wwwroot> hostname
aspnet-helloworld-7564fbb89f-2mzl8
PS C:\inetpub\wwwroot> ipconfig

Windows IP Configuration


Ethernet adapter vEthernet (02f0ed6b13c714b62c1c0c20646617967724d902fb9631ca25627652dc80166a_cbr0):

   Connection-specific DNS Suffix  . : svc.cluster.local
   Link-local IPv6 Address . . . . . : fe80::b9ab:e43f:f466:9083%27
   IPv4 Address. . . . . . . . . . . : 10.200.61.35
   Subnet Mask . . . . . . . . . . . : 255.255.255.0
   Default Gateway . . . . . . . . . : 10.200.61.2
PS C:\inetpub\wwwroot> [System.Environment]::OSVersion.Version

Major  Minor  Build  Revision
-----  -----  -----  --------
10     0      17763  0
まとめ
VMware Enterise PKSを利用することでvSphere環境にWindows WorkerのKubernetesクラスターを作成して、Windows ContainerでPodを起動することができました。


