はじめに
EKS AnywhereをvSphere上で実行してみました。ついでにGitOpsして、EKS ConnectorでAWSマネジメントコンソールに登録してみました。
Amazon EKS Anywhereとは
AmazonのEKSで利用されている、KubernetesディストリビューションであるEKS Distroをオプレミス環境で利用するためのツール。詳しくはこの辺を。
- Amazon EKS Anywhere
- Amazon EKS Anywhere – Now Generally Available to Create and Manage Kubernetes Clusters on Premises
- EKS Anywhere Documentation
準備
最新のeksctl cliのダウンロード
curl "https://github.com/weaveworks/eksctl/releases/latest/download/eksctl_$(uname -s)_amd64.tar.gz" \
    --silent --location \
    | tar xz -C /tmp
sudo mv /tmp/eksctl /usr/local/bin/
バージョン確認
$ eksctl version
0.66.0
anywhereサブコマンドは使えるのか?プラグインが必要
$ eksctl anywhere
"eksctl-anywhere" plugin was not found on your path
eksctl anywhereを利用するためのプラグインのインストール
export EKSA_RELEASE="0.5.0" OS="$(uname -s | tr A-Z a-z)"
curl "https://anywhere-assets.eks.amazonaws.com/releases/eks-a/1/artifacts/eks-a/v${EKSA_RELEASE}/${OS}/eksctl-anywhere-v${EKSA_RELEASE}-${OS}-amd64.tar.gz" \
    --silent --location \
    | tar xz ./eksctl-anywhere
sudo mv ./eksctl-anywhere /usr/local/bin/
anywhereサブコマンドが利用できるようになったことを確認
$ eksctl anywhere
Use eksctl anywhere to build your own self-managing cluster on your hardware with the best of Amazon EKS

Usage:
  anywhere [command]

Available Commands:
  create      Create resources
  delete      Delete resources
  generate    Generate resources
  help        Help about any command
  upgrade     Upgrade resources
  version     Get the eksctl anywhere version

Flags:
  -h, --help            help for anywhere
  -v, --verbosity int   Set the log level verbosity

Use "anywhere [command] --help" for more information about a command.
eksを作成するためのマニフェストテンプレートの作成
クラスター名を指定してeksctl anywhere generate clusterconfigを実行するとクラスターの構成情報を記述するためのコンフィグファイル(マニフェスト)が生成される。
CLUSTER_NAME=prod
eksctl anywhere generate clusterconfig $CLUSTER_NAME \
   --provider vsphere > eksa-cluster.yaml
コンフィグファイル(eksa-cluster.yaml)は以下のリソースを定義する。kind: VSphereMachineConfigが3つあるが、それぞれコントロールプレーン(Master)、ノード、etcdを構成するためのものになっている。
apiVersion: anywhere.eks.amazonaws.com/v1alpha1
kind: Cluster
--
apiVersion: anywhere.eks.amazonaws.com/v1alpha1
kind: VSphereDatacenterConfig
--
apiVersion: anywhere.eks.amazonaws.com/v1alpha1
kind: VSphereMachineConfig
metadata:
  name: prod-cp
--
apiVersion: anywhere.eks.amazonaws.com/v1alpha1
kind: VSphereMachineConfig
metadata:
  name: prod
--
apiVersion: anywhere.eks.amazonaws.com/v1alpha1
kind: VSphereMachineConfig
metadata:
  name: prod-etcd
コンフィグファイルの編集
Cluster
.spec.controlPlaneConfiguration.endpoint.hostとしてKubernetes APIのIPアドレスを指定する。このIPアドレスはノードがDHCPで取得するIPアドレスと同じCIDRで、DHCPのレンジ外のものを固定IPアドレスとして指定する。
spec:
  controlPlaneConfiguration:
    endpoint:
      host: "192.168.201.100"
GitOpsを利用する場合は、specに以下を追加する。(※GitOpsConfigを別途定義する必要がある)
spec:
  gitOpsRef:
    kind: GitOpsConfig
    name: eksacl
VSphereDatacenterConfig
EKS Anywhereクラスターを作成するvSphereクラスターの情報を定義する。
apiVersion: anywhere.eks.amazonaws.com/v1alpha1
kind: VSphereDatacenterConfig
metadata:
  name: prod
spec:
  datacenter: "Tanzu-DC"
  insecure: true
  network: "/Tanzu-DC/Network/eks"
  server: "tanzu-vc.example.com"
  thumbprint: ""
VSphereMachineConfig
cp, worker, etcdそれぞれに対してdatastore、resourcePool、sshAuthorizedKeysを指定する。
apiVersion: anywhere.eks.amazonaws.com/v1alpha1
kind: VSphereMachineConfig
metadata:
  name: prod
spec:
  datastore: "vsanDatastore"
  diskGiB: 25
  folder: ""
  memoryMiB: 8192
  numCPUs: 2
  osFamily: bottlerocket
  resourcePool: "/Tanzu-DC/host/Tanzu-Cluster/Resources/eks"
  users:
  - name: ec2-user
    sshAuthorizedKeys:
    - ssh-rsa AAAA...
現在EKS Anywhereで利用可能なOSイメージはbottlerocketとubuntuを利用可能であるため、osFamiliyとしてどちらかを指定する。ubuntuのOVAが8.54GBであるのに対し、bottolerocketは1.27GBと非常に小さいため、クラスター構築時間を大きく短縮できる。
GitOps
GitOpsを有効化する場合は、GitOpsConfigを追加する。
apiVersion: anywhere.eks.amazonaws.com/v1alpha1
kind: GitOpsConfig
metadata:
  name: eksacl
spec:
  flux:
    github:
      branch: main
      clusterConfigPath: clusters/eksacl
      fluxSystemNamespace: flux-system
      owner: masanara
      personal: true
      repository: eksagitops
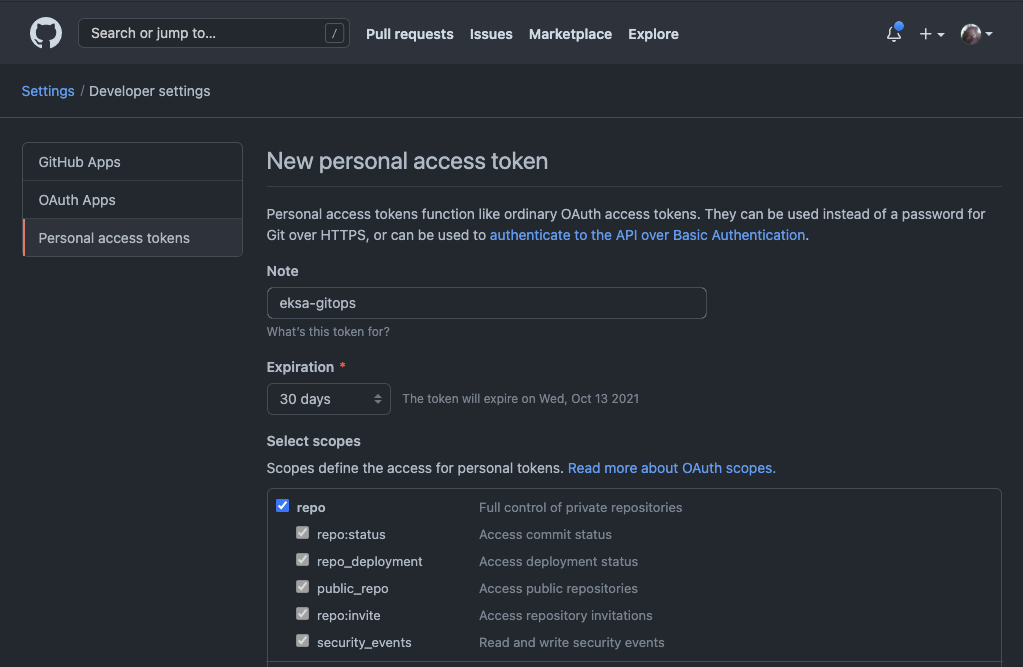
クラスター作成時にGitHubにリポジトリを作成するため、repoに対してアクセスを許可するPersonal Access Tokenを生成してEKSA_GITHUB_TOKEN環境変数として構成する。
export EKSA_GITHUB_TOKEN=ghp_MyValidPersonalAccessTokenWithRepoPermissions
GitOpsを有効化したクラスターを削除する際も、EKSA_GITHUB_TOKEN環境変数が求められる。
$ eksctl anywhere delete cluster eksacl
Error: failed to delete cluster: failed to set up git ooptions: error Git provider: github access token environment variable EKSA_GITHUB_TOKEN is invalid; could not get var from environment
vSphere環境の準備
EKSAクラスターを構成する仮想マシンはAWSが配布するOVAテンプレートを利用する。OVAテンプレートはコンテンツライブラリに登録された後、仮想マシンインベントリのTemplatesフォルダに仮想マシンテンプレートとして配置されるが、Templatesフォルダは自動的に生成されないため、あらかじめ用意しておく必要がある。
$ wget https://github.com/vmware/govmomi/releases/download/v0.26.1/govc_Linux_x86_64.tar.gz
$ tar zxvf govc_Linux_x86_64.tar.gz govc
$ mv govc /usr/local/bin
$ export GOVC_URL='tanzu-vc.example.com'
$ export GOVC_USERNAME='administrator@vsphere.local'
$ export GOVC_PASSWORD='VMware1!'
$ govc folder.create /Tanzu-DC/vm/Templates
$ govc folder.info /Tanzu-DC/vm/Templates
Name:        Templates
  Path:      /Tanzu-DC/vm/Templates
  Types:     Folder,VirtualMachine,VirtualApp
  Children:  0
クラスターの作成
vSphereクレデンシャルを環境変数として設定する
export EKSA_VSPHERE_USERNAME='administrator@vsphere.local'
export EKSA_VSPHERE_PASSWORD='VMware1!'
作成したマニフェストを利用して、クラスターの作成を実行する。GitOpsを有効にした場合、クラスター作成時にEKSA_GITHUB_TOKEN環境変数が設定されていない場合、エラーとなる。
$ eksctl anywhere create cluster -f eksa-cluster.yaml
Checking Github Access Token permissions
✅ Github personal access token has the required repo permissions
Performing setup and validations
Warning: VSphereDatacenterConfig configured in insecure mode
VSphereMachineConfig folder for control plane is not set or is empty. Will default to root vSphere folder.
VSphereMachineConfig folder for worker nodes is not set or is empty. Will default to root vSphere folder.
VSphereMachineConfig folder for etcd machines is not set or is empty. Will default to root vSphere folder.
✅ Connected to server
✅ Authenticated to vSphere
✅ Datacenter validated
✅ Network validated
✅ Datastore validated
✅ Resource pool validated
✅ Datastore validated
✅ Resource pool validated
✅ Datastore validated
✅ Resource pool validated
Creating template. This might take a while.
✅ Control plane and Workload templates validated
✅ Vsphere Provider setup is valid
✅ Flux path
Creating new bootstrap cluster
Installing cluster-api providers on bootstrap cluster
Provider specific setup
Creating new workload cluster
Installing networking on workload cluster
Installing storage class on workload cluster
Installing cluster-api providers on workload cluster
Moving cluster management from bootstrap to workload cluster
Installing EKS-A custom components (CRD and controller) on workload cluster
Creating EKS-A CRDs instances on workload cluster
Installing AddonManager and GitOps Toolkit on workload cluster
Adding cluster configuration files to Git
Enumerating objects: 76, done.
Counting objects: 100% (76/76), done.
Compressing objects: 100% (39/39), done.
Total 76 (delta 11), reused 71 (delta 6), pack-reused 0
Finalized commit and committed to local repository      {"hash": "8094dc2f18b850bfc6954dbfc5c5d20edf7c67c8"}
Writing cluster config file
Deleting bootstrap cluster
🎉 Cluster created!
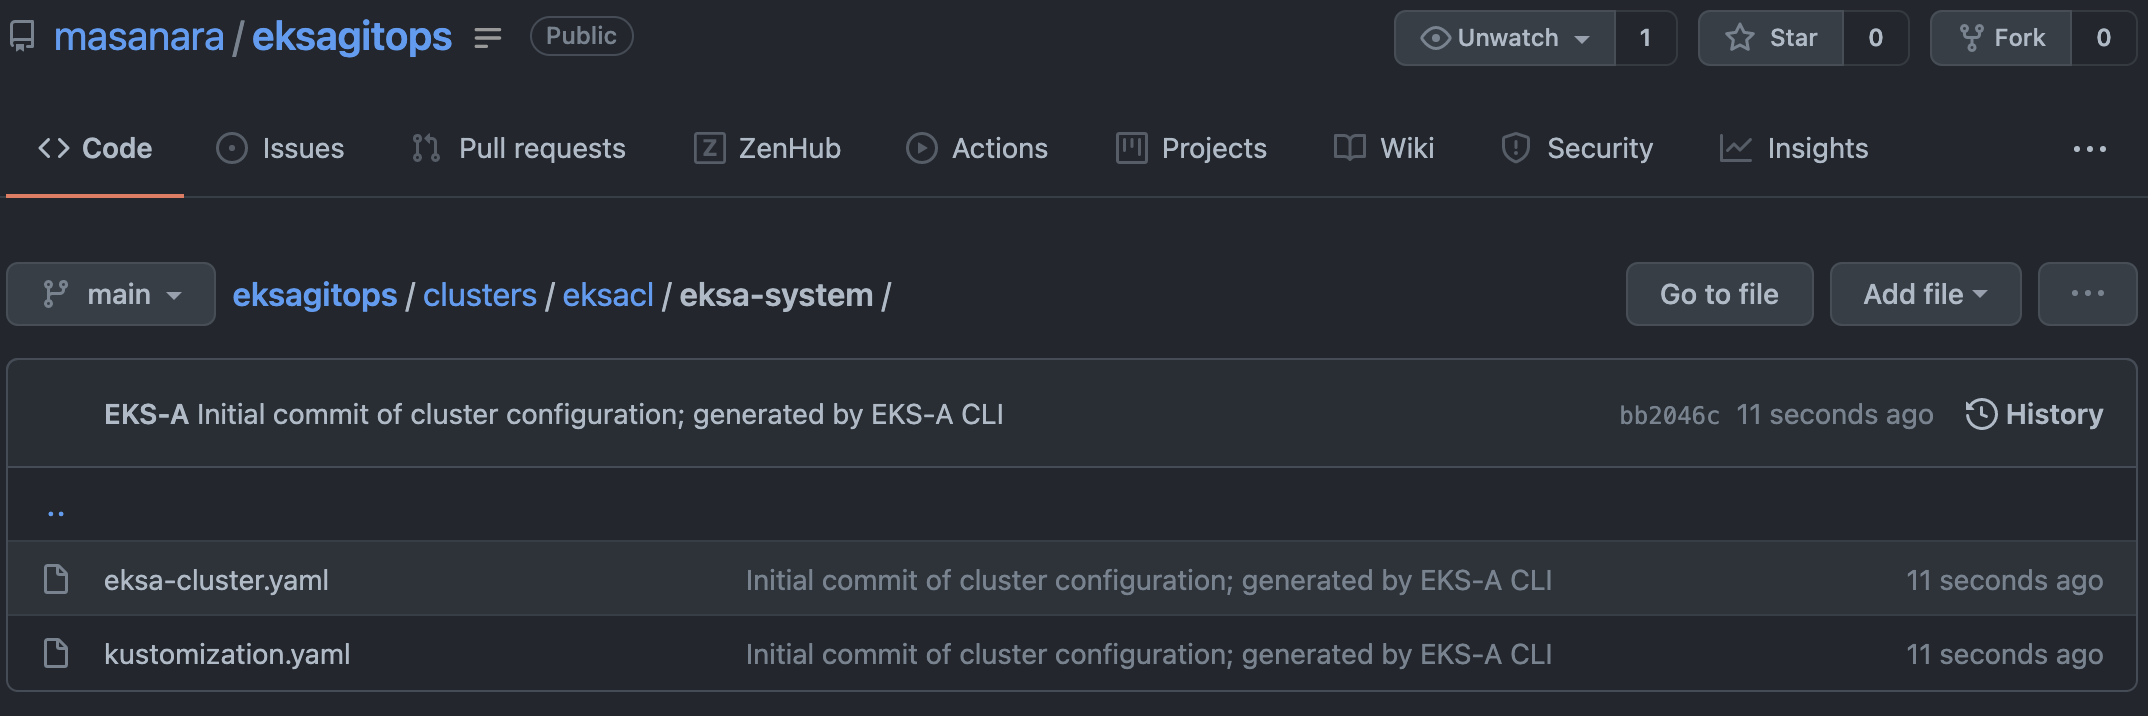
クラスター作成中に指定したリポジトリに、クラスターの構成が記述されたマニフェストファイルがclusters/クラスター名/eksa-system配下に作成される。
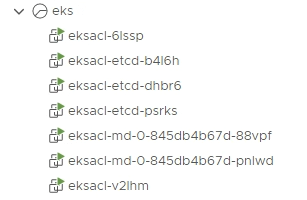
vSphere上には以下の仮想マシンが作成される。
GitOpsの利用
GitOpsを有効化してクラスターを構成すると、flux-systemネームスペースが作成され、Fluxが利用可能な状態でクラスターが作成される。
$ kubectl get pod -n flux-system
NAME                                       READY   STATUS    RESTARTS   AGE
helm-controller-6d875c9745-rkz9g           1/1     Running   0          5h48m
kustomize-controller-74c85f9944-lhvlk      1/1     Running   0          112m
notification-controller-7c59756d9d-wlz2v   1/1     Running   0          5h48m
source-controller-65dcfdf7f7-c8dpr         1/1     Running   0          5h48m
github上のマニフェストファイルを編集してGitOpsの動きを確認してみる。
クラスターの構成変更
デフォルトEKS Anywhereのマニフェストファイルの構成では2台のワーカーで構成されている。
$ kubectl get node
NAME              STATUS   ROLES                  AGE     VERSION
192.168.201.150   Ready    control-plane,master   5h37m   v1.21.3
192.168.201.152   Ready    control-plane,master   5h33m   v1.21.3
192.168.201.38    Ready    <none>                 5h35m   v1.21.3
192.168.201.76    Ready    <none>                 5h35m   v1.21.3
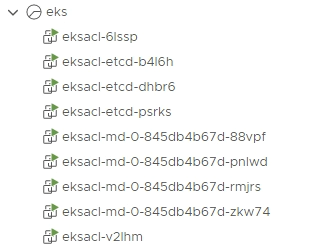
eksa-systems配下のeksa-cluster.yamlファイルのワーカーノード数(.spec.workerNodeGroupConfigurations.count)を修正・コミットし、暫く待つ仮想マシンが追加され、EKSクラスターのワーカーノードが増える。
$ kubectl get node
NAME              STATUS   ROLES                  AGE     VERSION
192.168.201.150   Ready    control-plane,master   5h57m   v1.21.3
192.168.201.152   Ready    control-plane,master   5h53m   v1.21.3
192.168.201.157   Ready    <none>                 36s     v1.21.3
192.168.201.38    Ready    <none>                 5h55m   v1.21.3
192.168.201.76    Ready    <none>                 5h55m   v1.21.3
192.168.201.79    Ready    <none>                 33s     v1.21.3
リソースの作成
github上に作成されたクラスターディレクトリ内にマニフェストを作成して、githubにpushするとクラスター上のfluxが変更を検出してマニフェストの内容をクラスターに反映させる。
クラスターディレクトリ内にtestディレクトリを作成してマニフェスト(nginx.yaml)を置く。
.
└── clusters
    └── eksacl
        ├── eksa-system
        │   ├── eksa-cluster.yaml
        │   └── kustomization.yaml
        ├── flux-system
        │   ├── gotk-components.yaml
        │   ├── gotk-patches.yaml
        │   ├── gotk-sync.yaml
        │   └── kustomization.yaml
        └── test
            └── nginx.yaml
nginx.yamlは以下の通り
apiVersion: v1
kind: Namespace
metadata:
  name: test
---
apiVersion: apps/v1
kind: Deployment
metadata:
  labels:
    app: nginx
  name: nginx
  namespace: test
spec:
  replicas: 3
  selector:
    matchLabels:
      app: nginx
  template:
    metadata:
      labels:
        app: nginx
    spec:
      containers:
      - image: nginx:alpine
        name: nginx
---
apiVersion: v1
kind: Service
metadata:
  name: nginx
  namespace: test
spec:
  selector:
    app: nginx
  ports:
    - port: 80
      targetPort: 80
しばらくするとクラスターにはネームスペースが作成されて、マニフェストの内容が反映される。
$ kubectl get ns test
NAME   STATUS   AGE
test   Active   113s
$ kubectl get deploy,pod,svc -n test
NAME                    READY   UP-TO-DATE   AVAILABLE   AGE
deployment.apps/nginx   3/3     3            3           115s

NAME                        READY   STATUS    RESTARTS   AGE
pod/nginx-cf4d5b4c8-2tghp   1/1     Running   0          115s
pod/nginx-cf4d5b4c8-8cx2n   1/1     Running   0          115s
pod/nginx-cf4d5b4c8-f2csm   1/1     Running   0          115s

NAME            TYPE        CLUSTER-IP     EXTERNAL-IP   PORT(S)   AGE
service/nginx   ClusterIP   10.99.191.46   <none>        80/TCP    115s
helmによるリソースの作成
fluxはhelmチャートを利用したリソースの作成も可能。helmを利用する場合は、HelmRepositoryとHelmReleaseを定義する。
apiVersion: v1
kind: Namespace
metadata:
  name: podinfo
---
apiVersion: source.toolkit.fluxcd.io/v1beta1
kind: HelmRepository
metadata:
  name: podinfo
  namespace: podinfo
spec:
  interval: 1m
  url: https://stefanprodan.github.io/podinfo
---
apiVersion: helm.toolkit.fluxcd.io/v2beta1
kind: HelmRelease
metadata:
  name: podinfo
  namespace: podinfo
spec:
  interval: 5m
  chart:
    spec:
      chart: podinfo
      version: ">=5.0.0"
      sourceRef:
        kind: HelmRepository
        name: podinfo
        namespace: podinfo
      interval: 1m
  values:
    replicaCount: 3
作成したネームスペースにHelmRepositoryとHelmReleaseが作成されており、helm listで追加されたパッケージを確認することが可能。
$ kubectl get ns podinfo
NAME      STATUS   AGE
podinfo   Active   85s

$ kubectl get helmrepository -n podinfo
NAME      URL                                      READY   STATUS                                                       AGE
podinfo   https://stefanprodan.github.io/podinfo   True    Fetched revision: 8411f23d07d3701f0e96e7d9e503b7936d7e1d56   95s

$ kubectl get helmrelease -n podinfo
NAME      READY   STATUS                             AGE
podinfo   True    Release reconciliation succeeded   104s
$ kubens podinfo
✔ Active namespace is "podinfo"

$ helm list
NAME    NAMESPACE       REVISION        UPDATED                                 STATUS          CHART           APP VERSION
podinfo podinfo         1               2021-09-13 09:51:04.350035442 +0000 UTC deployed        podinfo-6.0.0   6.0.0

$ kubectl get deploy,pod,svc
NAME                      READY   UP-TO-DATE   AVAILABLE   AGE
deployment.apps/podinfo   5/5     5            5           2m5s

NAME                           READY   STATUS    RESTARTS   AGE
pod/podinfo-5c6c96c87b-5rfnq   1/1     Running   0          2m5s
pod/podinfo-5c6c96c87b-m648v   1/1     Running   0          2m5s
pod/podinfo-5c6c96c87b-ngxx4   1/1     Running   0          2m5s
pod/podinfo-5c6c96c87b-pbwz4   1/1     Running   0          2m5s
pod/podinfo-5c6c96c87b-ssgsr   1/1     Running   0          2m5s

NAME              TYPE        CLUSTER-IP      EXTERNAL-IP   PORT(S)             AGE
service/podinfo   ClusterIP   10.96.150.177   <none>        9898/TCP,9999/TCP   2m5s
EKS Connectorの利用
プレビューリリースとして提供されているEKS Connectorを利用するとAWSマネジメントコンソールにクラスターを登録することが可能。(ドキュメント:Amazon EKS Connector)
Amzon EKS Connector Roleの作成
aws cliを利用してEKS Connectorに必要になるRole/Polciyを作成する。
aws iam create-service-linked-role --aws-service-name eks-connector.amazonaws.com
Amazon EKS Connector Agent IAM Roleの作成
以下の内容でポリシーファイルを作成
- eks-connector-agent-trust-policy.json
{
    "Version": "2012-10-17",
    "Statement": [
        {
            "Sid": "SSMAccess",
            "Effect": "Allow",
            "Principal": {
                "Service": [
                    "ssm.amazonaws.com"
                ]
            },
            "Action": "sts:AssumeRole"
        }
    ]
}
- eks-connector-agent-policy.json
{
    "Version": "2012-10-17",
    "Statement": [
        {
            "Sid": "SsmControlChannel",
            "Effect": "Allow",
            "Action": [
                "ssmmessages:CreateControlChannel"
            ],
            "Resource": "arn:aws:eks:*:*:cluster/*"
        },
        {
            "Sid": "ssmDataplaneOperations",
            "Effect": "Allow",
            "Action": [
                "ssmmessages:CreateDataChannel",
                "ssmmessages:OpenDataChannel",
                "ssmmessages:OpenControlChannel"
            ],
            "Resource": "*"
        }
    ]
}
作成したjsonファイルを利用してEKSConnectorAgentRole/AmazonEKSConnectorAgentPolicyを作成する。
aws iam create-role \
     --role-name AmazonEKSConnectorAgentRole \
     --assume-role-policy-document file://eks-connector-agent-trust-policy.json
iam put-role-policy \
     --role-name AmazonEKSConnectorAgentRole \
     --policy-name AmazonEKSConnectorAgentPolicy \
     --policy-document file://eks-connector-agent-policy.json
クラスターの登録
EKS Connectorを利用してオンプレミスのEKSクラスターをマネジメントコンソールに登録するためには、コンソール側でクラスターを登録し、生成されたマニフェストをクラスターに適用し、EKS Connectorコンポーネントをクラスター上で実行する必要がある。
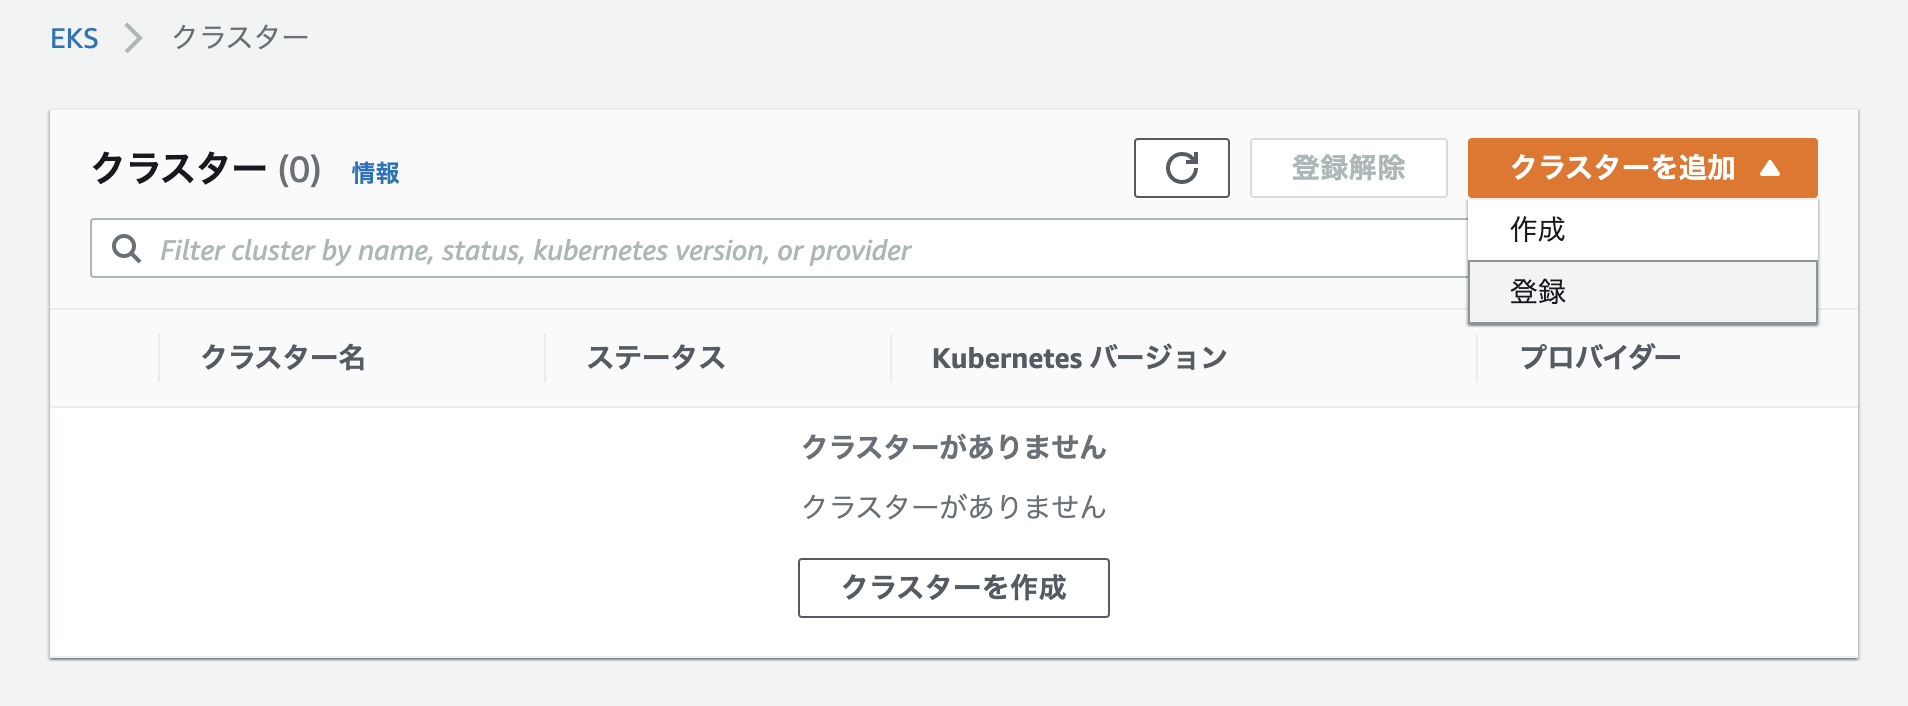
AWSにマネジメントコンソールの「Elastic Kubernetres Service」を開き、「クラスター」を選択し、「クラスターを追加」メニューから「登録」を選択する。
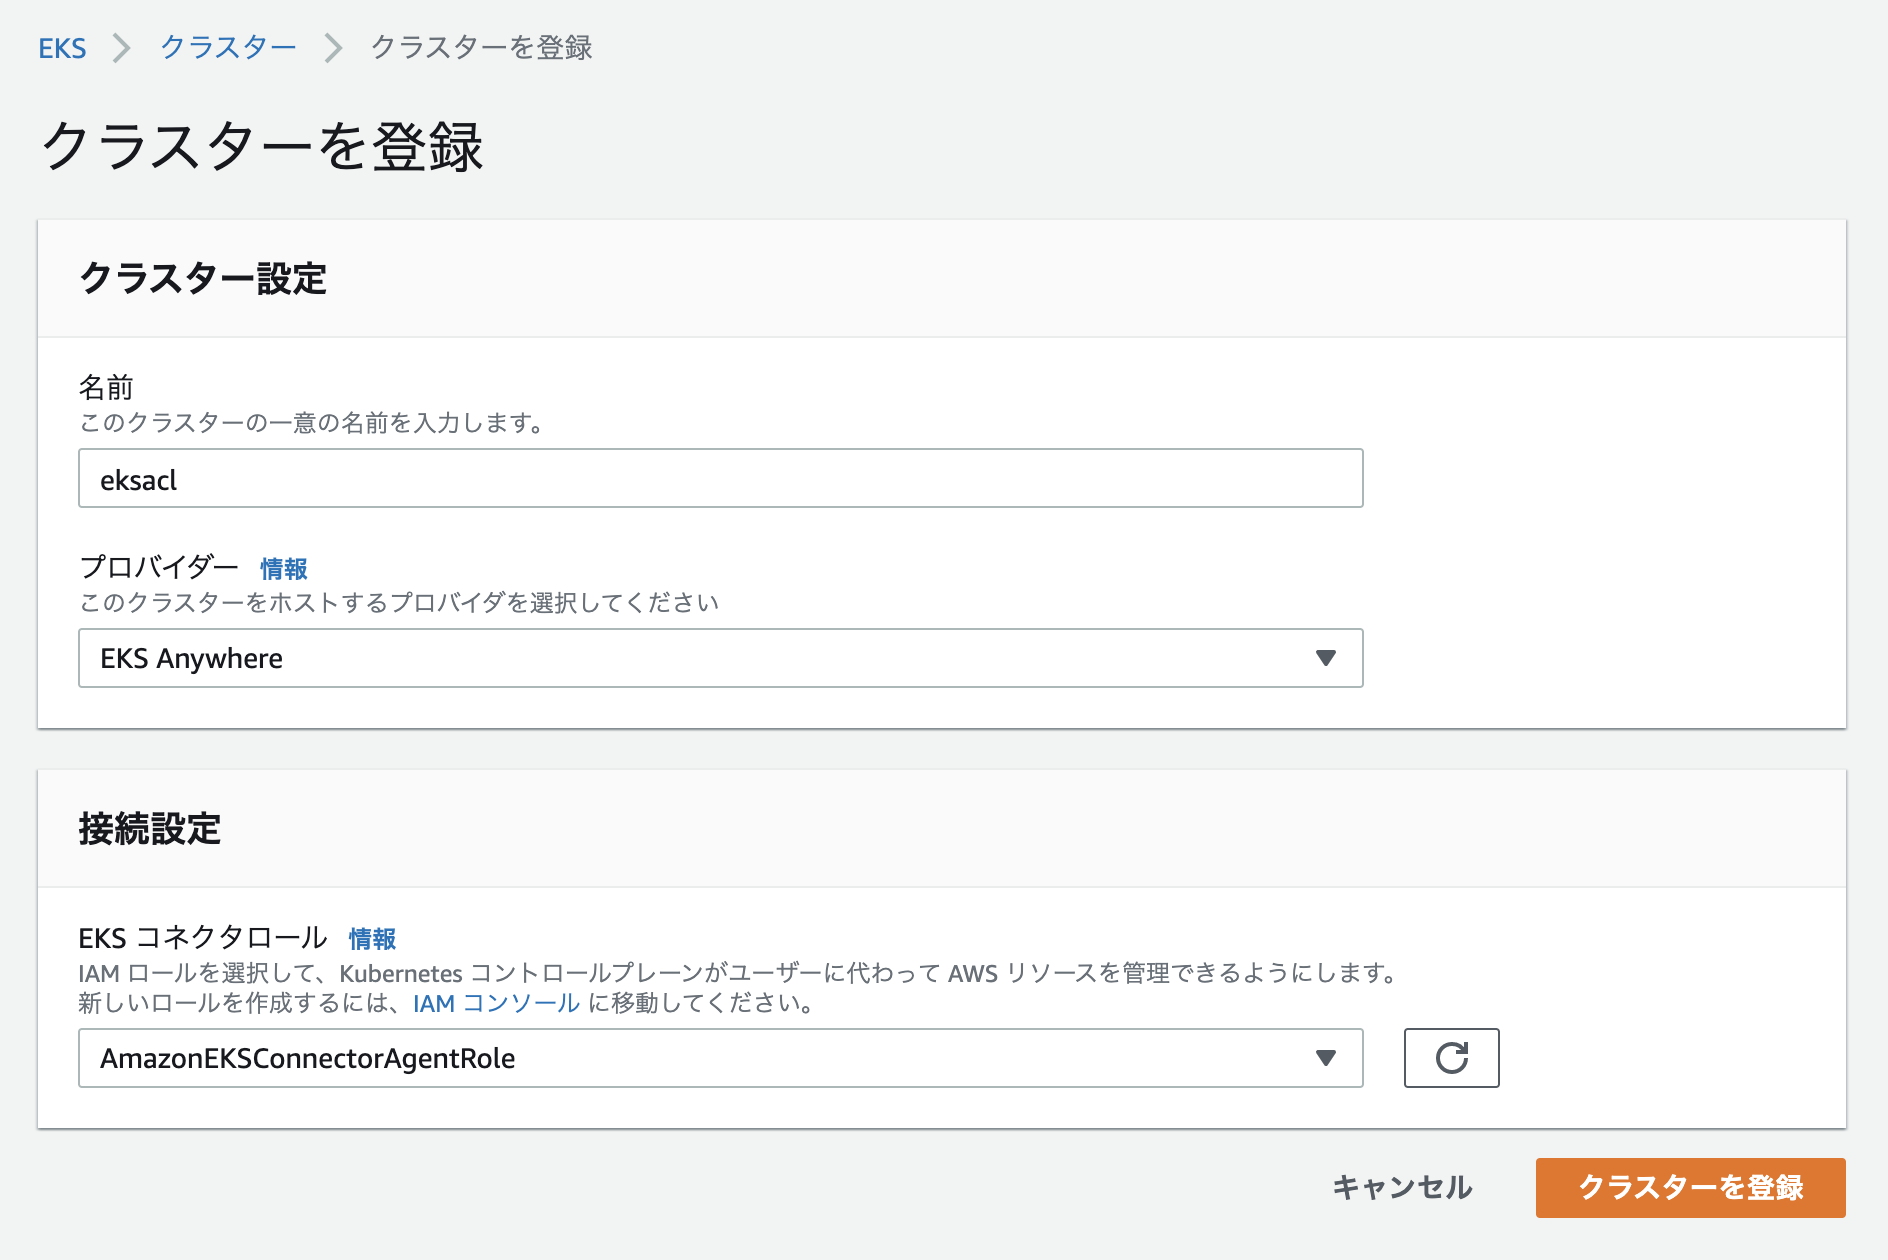
登録するクラスターの名前、プロバイダーを指定し、接続設定として作成したEKSコネクタロール(AmazonEKSConnectorAgentRole)を選択し、「クラスターを登録」を実行する。
登録したクラスターに対して適用するマニフェストをダウンロードする。
ダウンロードしたyamlファイルにより、クラスターにeks-connectorを作成する。作成に成功すると、eks-connectorネームスペースにeks-connector-0/eks-connector-1 Podが作成される。
$ kubectl apply -f eks-connector.yaml
namespace/eks-connector created
secret/eks-connector-activation-config created
role.rbac.authorization.k8s.io/eks-connector-secret-access created
serviceaccount/eks-connector created
secret/eks-connector-token created
rolebinding.rbac.authorization.k8s.io/eks-connector-secret-access created
configmap/eks-connector-agent created
statefulset.apps/eks-connector created
$ kubectl get pod -n eks-connector
NAME              READY   STATUS    RESTARTS   AGE
eks-connector-0   2/2     Running   0          46s
eks-connector-1   2/2     Running   0          24s
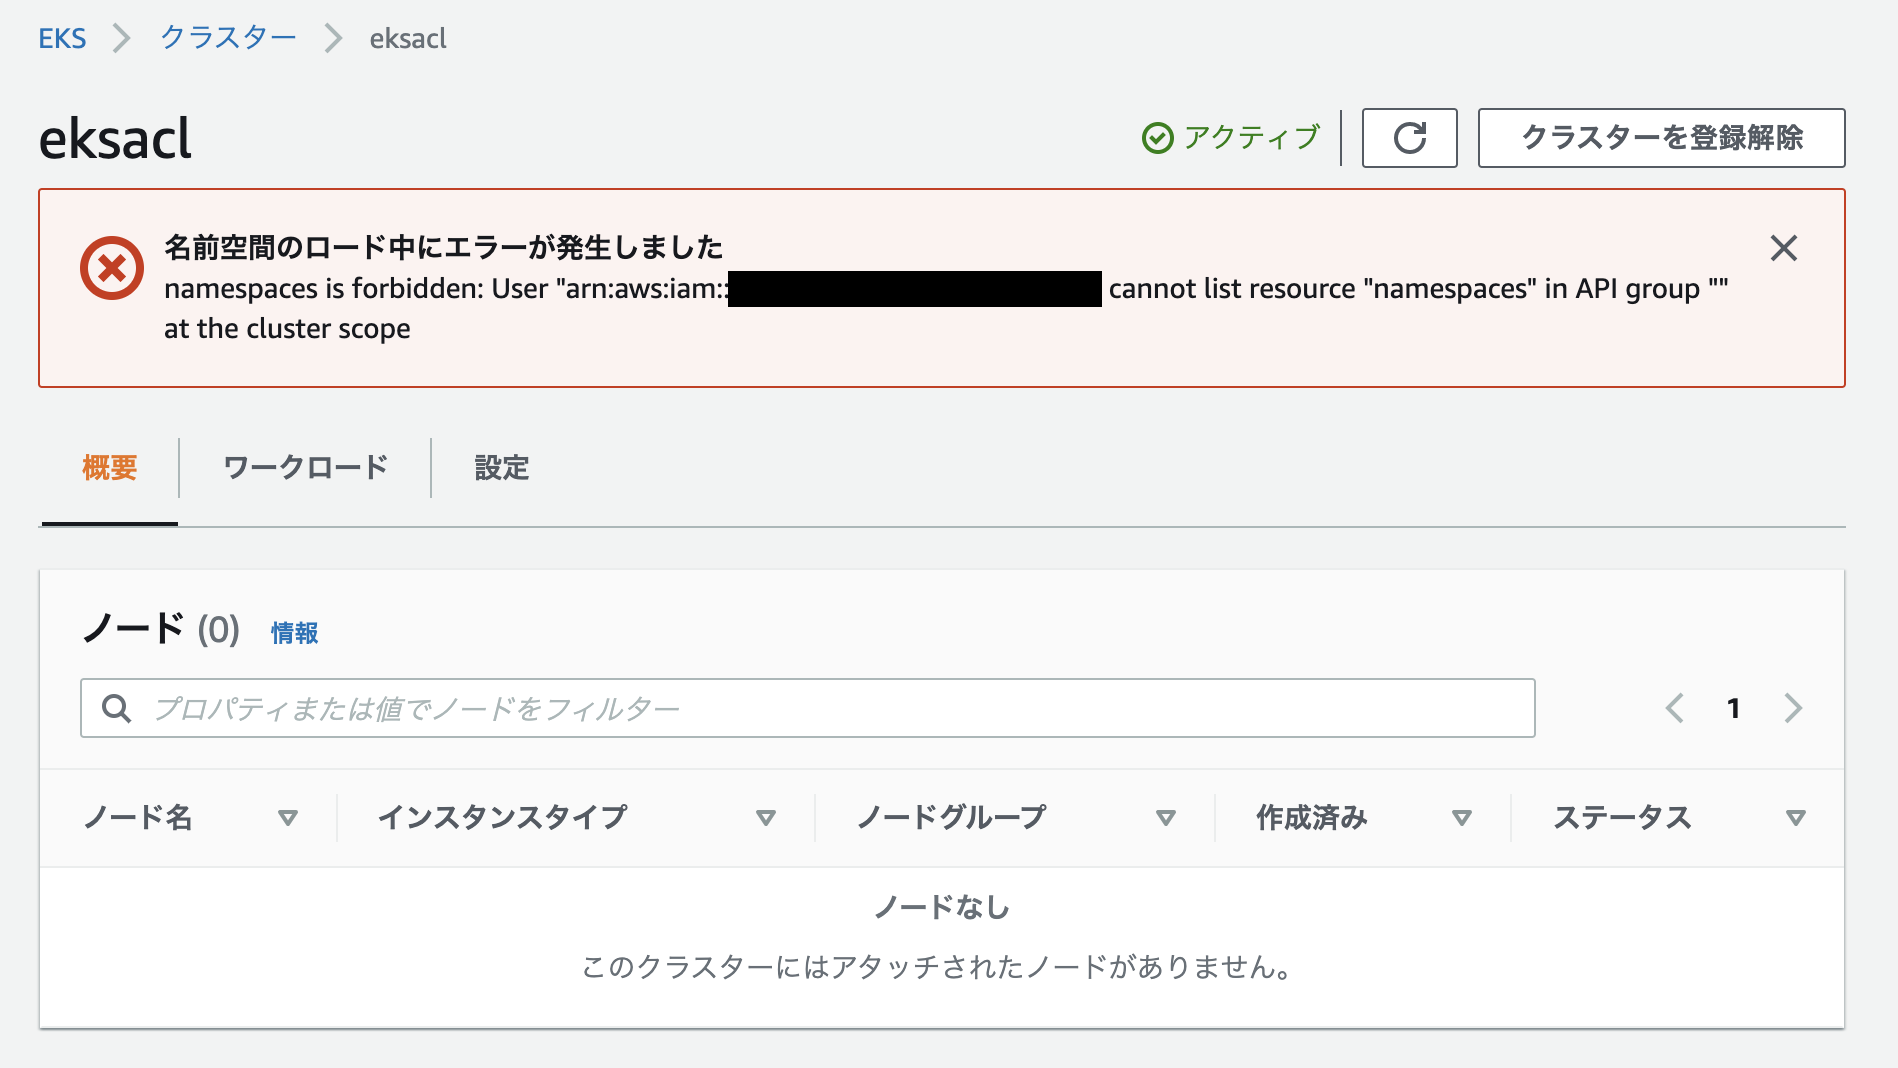
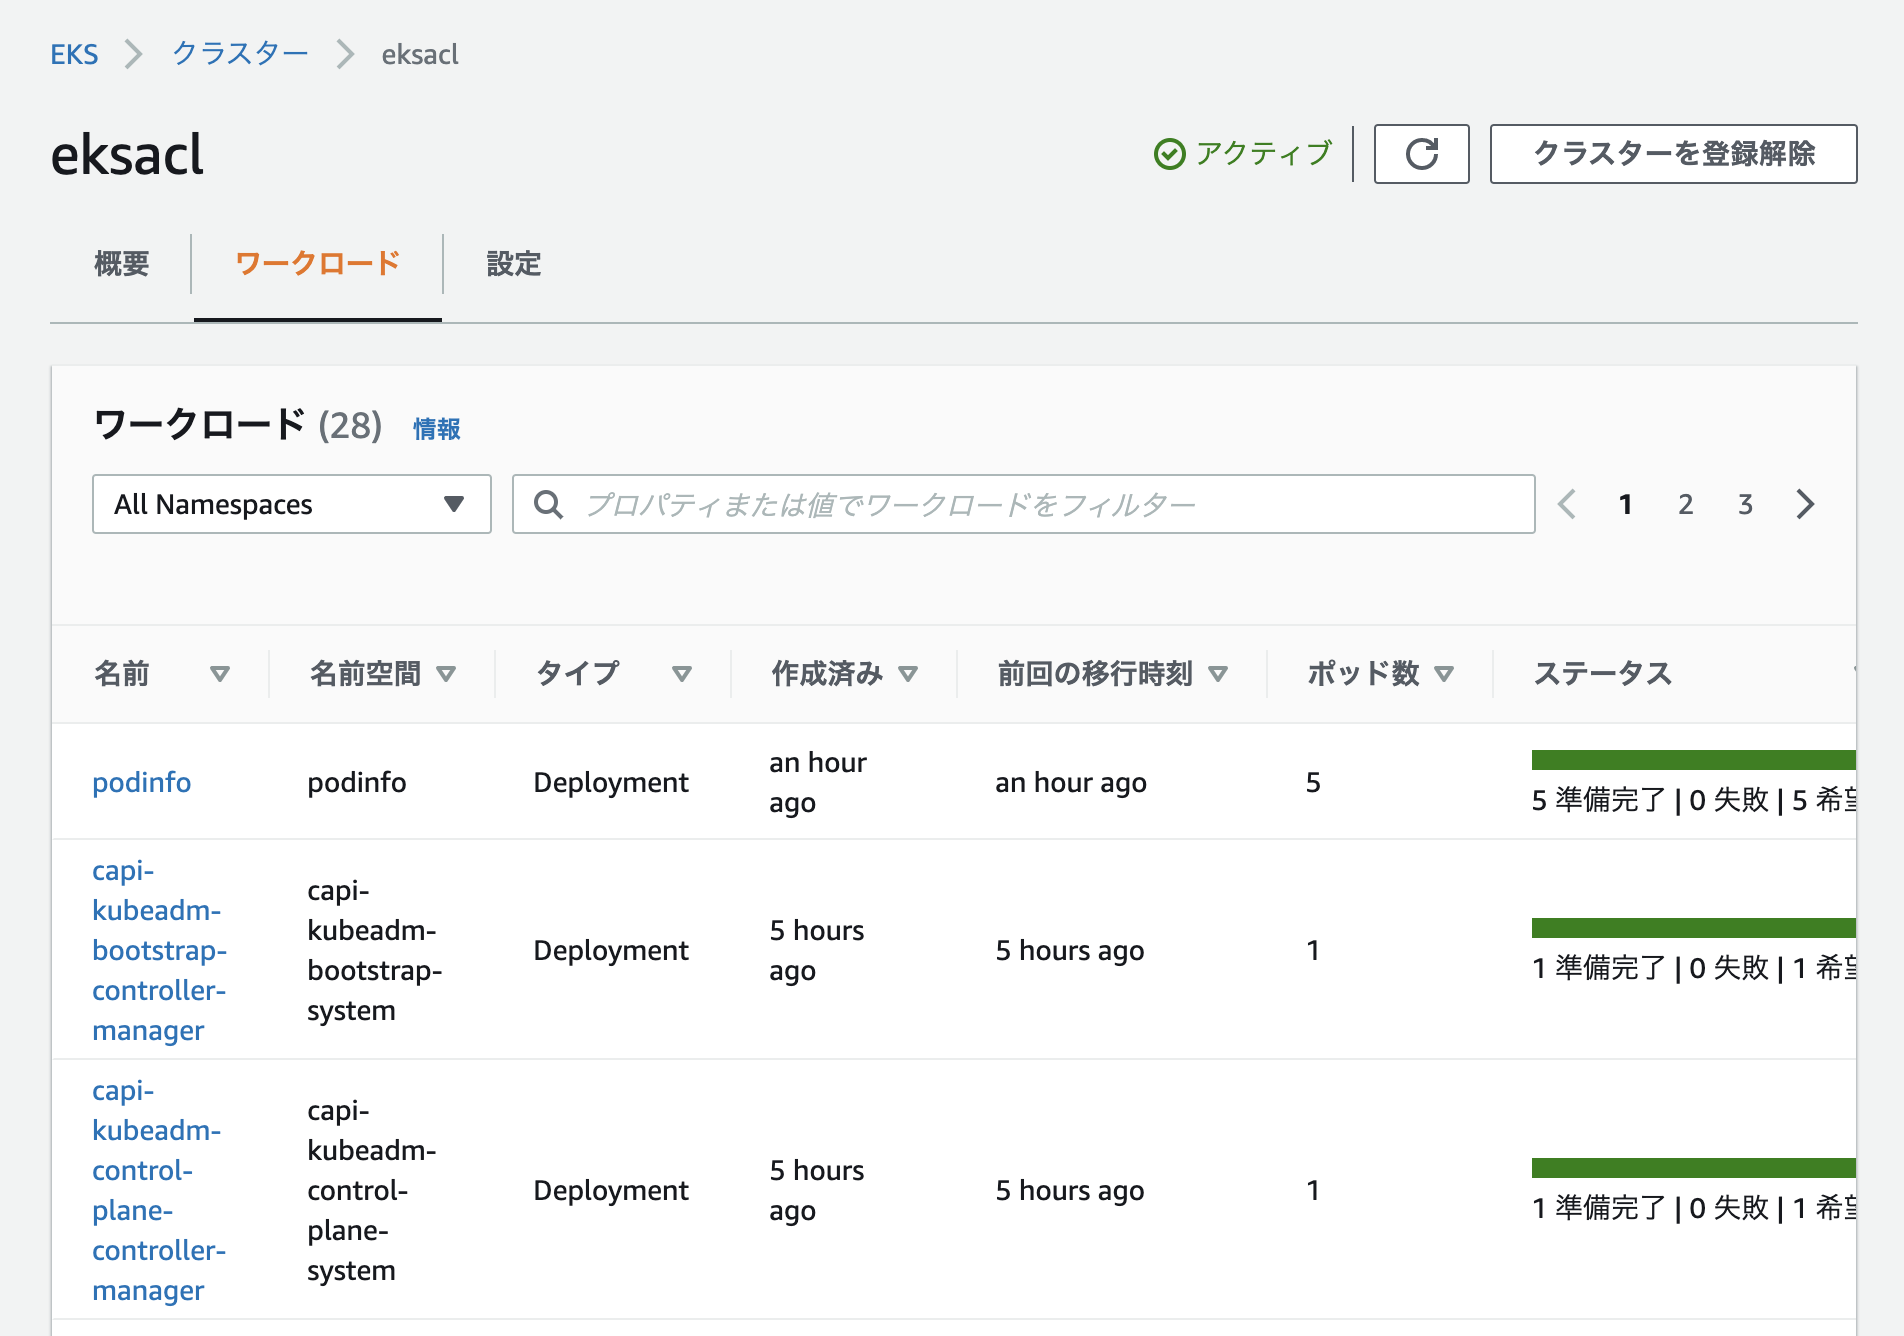
ここまでの手順でEKSクラスター自体は「アクティブ」な状態となる。
AWSマネジメントコンソールにアクセスするユーザーが、EKS Connectorを介してKubernetesクラスターにアクセスできるようClusterRole/ClusterRoleBindingを設定する。eks-connector-clusterrole.yaml と、eks-connector-console-dashboard-full-access-group.yamlを利用してClusterRole/ClusterRoleBinding/RBAC Authorizationを設定する。各マニフェスト内の%IAM_ARN%をIAMユーザーのARNに置き換えて適用する。
$ kubectl apply -f eks-connector-clusterrole.yaml
clusterrolebinding.rbac.authorization.k8s.io/eks-connector-service created
clusterrole.rbac.authorization.k8s.io/eks-connector-service created
$ kubectl apply -f eks-connector-console-dashboard-full-access-group.yaml
clusterrole.rbac.authorization.k8s.io/eks-connector-console-dashboard-full-access-clusterrole created
clusterrolebinding.rbac.authorization.k8s.io/eks-connector-console-dashboard-full-access-clusterrole-binding created
上記のClusterRole/ClusterRoleBinding/RBAC Authorizationの設定が正しく完了していない場合、クラスター内部のリソースを表示することができない。
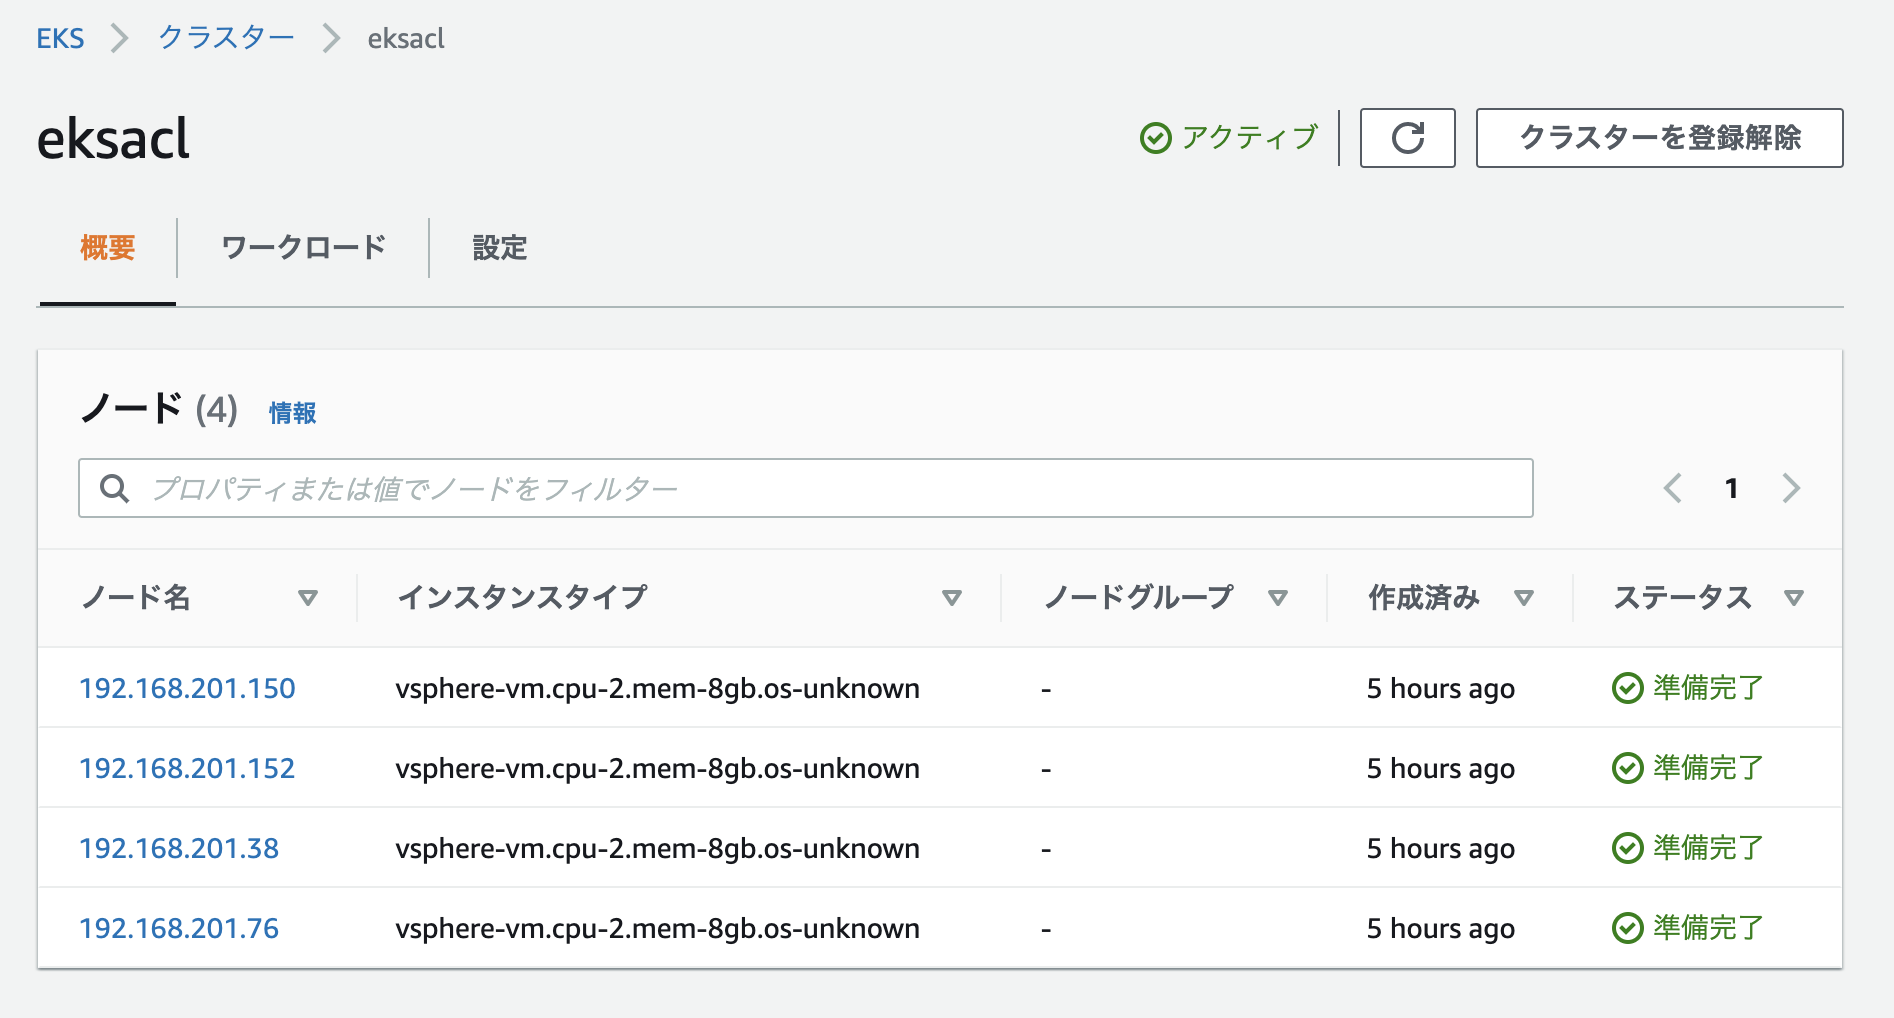
ClusterRole/ClusterRoleBinding/RBAC Authorizationを構成することで、クラスターを構成するノードはPod等の情報をマネジメントコンソールから確認することが可能になる。

