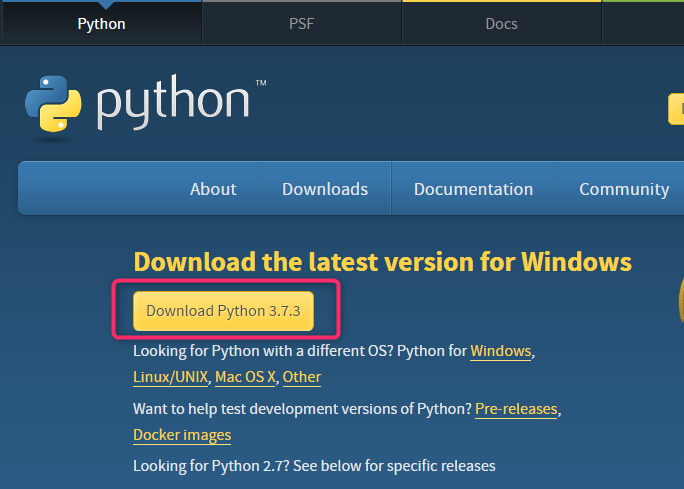
公式サイトからPythonをダウンロードする
公式サイト

※2019年7月時点の最新バージョンである「3.7.3」をダウンロードします。
インストールする
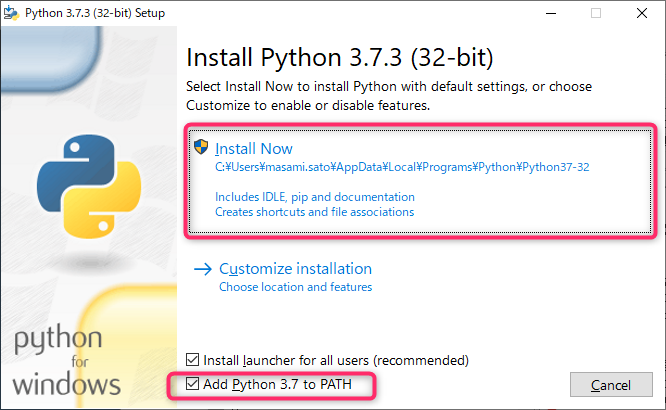
ダウンロードした「python-3.7.3.exe」を実行してください。

正しくインストールされたことを確認する
コマンドプロンプトから以下のコマンドを実行しましょう。
「Python 3.7.3」と表示されたらOKです。
※勉強会用にコマンドプロンプトもみんな同じもの(ConEmu)にそろえましょう。
Pythonの仮想環境を導入する
Pythonの仮想環境 = Pythonのバージョンとライブラリをプロジェクトごとに管理できるようにする仕組み です。
この仕組みにより、プロジェクトに必要なライブラリだけを仮想環境にインストールできます。
-
勉強会用のフォルダーを作る
今回は、Cドライブ(空きがなければ別ドライブでもOK)直下に「ml-intro」というフォルダを作成しましょう。 -
仮想環境を作る
以下のコマンドで作成
python -m venv env
以下のコマンドで仮想環境を有効化
env\Scripts\activate.bat
「Jupyter Notebook」をインストールする
Jupyter Notebookは、対話型でPythonを実行できるツールです。しかも、ブラウザで実行できます。
この勉強会では、Jupyter Notebookを使います。
※対応ブラウザは、「Google Chrome」「Firefox」「Safari」
-
Pythonの標準パッケージ管理ツール(= pip)を最新化する
仮想環境が有効である状態(以降、この状態であること)で、以下のコマンドを実行します。
python -m pip install --upgrade pip

-
Jupyter Notebook をインストールする
以下のコマンドを実行します。
pip install jupyter

途中省略

-
Jupyter Notebook を起動する
以下のコマンドを実行します。
jupyter notebook
このURLにアクセスし、
http://localhost:8888/tree
「1.開発環境の準備」は、これで終了です。
次回は、「2.「Jupyter Notebook」を使ってみよう」です。
社内勉強会 機械学習入門(2.「Jupyter Notebook」を使ってみよう)

