フロントエンド側とバックエンド側でちょっと有名になった言語があるのですが言語と言うかシステムなのですがdenoというものがあります.

コンセプトとしてはnode.jsの弱点を補った形らしいのですが私はあまり触ったことがないので入門してみたいと思いました。
概要
Denoは、V8を使用し、Rustに組み込まれた、JavaScriptとTypeScriptのシンプルでモダンで安全なランタイムです。
- デフォルトで保護します。明示的に有効にしない限り、ファイル、ネットワーク、または環境へのアクセスはありません。
- そのままの状態でTypeScriptをサポートします。
- 単一の実行可能ファイルのみを出荷します。
- 依存関係インスペクター(deno info)やコードフォーマッター(deno fmt)などの組み込みユーティリティがあります。
- Denoでの動作が保証されている一連のレビュー済み(監査済み)標準モジュールがあります:deno.land/std
上記は本家からの引用になります
実際に触ってみてなのですが
- node.jsと違って NPM というのでインストールすることはしないんでその都度サーバーからインストールするという方式をとっています。
- node.jsのコールバック地獄ないみたいなので本当にうれしい
- 今流行りのTyepscriptを標準として使えるのもいいところです。
型宣言できるというのはjava系のバックエンド側やってる人には非常にありがたい
インストール
環境的にはWindows10です。
何も問題なくインストールできました。
(念のために管理者権限で実行しています)
iwr https://deno.land/x/install/install.ps1 -useb | iex
Hello World
Hello Worldは超カンタン
deno run https://deno.land/std/examples/welcome.ts
さすがにこれだと・・・Hello Worldっぽくないので
import { serve } from "https://deno.land/std@0.54.0/http/server.ts";
const s = serve({ port: 8000 });
console.log("http://localhost:8000/");
for await (const req of s) {
 req.respond({ body: "Hello World\n" });
}
VSCODEの拡張のインストール
必ず入れて欲しい vscode の拡張があります
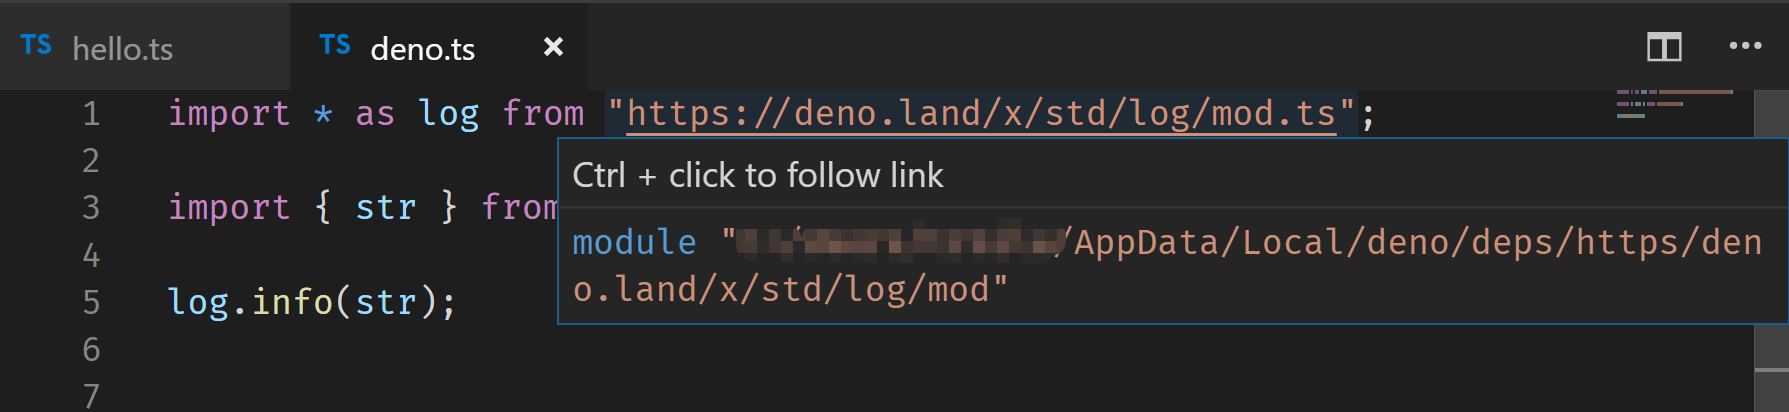
こちらをインストールすると補完してくれると言うのが便利です。
補完するには一度ダウンロードする必要があります。
そのため、新しいモジュールをインポートする時は
この状態で
import { serve } from "https://deno.land/std@0.54.0/http/server.ts";
で
deno run xxxx.tsをする必要があります。
インストール(キャッシュ)しないと補完してくれないのはちょっとめんどくさいかな・・・
インストール前

インストール後
denonのインストール
Node.jsではnodemonというアプリケーションがあってソースを修正すると自動的に再起動してくれます。
Denoでも同じ用にできるツールのdenonのインストールします
deno install --allow-read --allow-run --allow-write -f --unstable https://deno.land/x/denon/denon.ts
設定ファイルの作成
denon --init
カレントディレクトリにdenon.jsonファイルができます。構成ファイルのjsonとyamlの両方をサポートしている。
自分の設定
{
  "$schema": "https://deno.land/x/denon/schema.json",
  "scripts": {
    "start": {
      "cmd": "deno run server.ts",
      "allow": [
        "env",
        "read",
        "write",
        "net",
        "plugin"
      ],
      "env": {
        "PORT":"5000"
      },

      "unstable": true
    }
  },
  "logger": {
    "debug": true
  },
  "watcher": {
    "interval": 350,
    "exts": ["js", "ts", "json"],
    "match": ["*.*"],
    "skip": ["*/.git/*" ,"README.md" ],
    "legacy": false
  }
}
実行
enon start
[denon] v2.0.2
[denon] watching path(s): *.*
[denon] watching extensions: js,ts,json
[denon] starting `deno run --allow-env --allow-read --allow-write --allow-net --allow-plugin server.ts`
 S: starting process with pid 9384
 M: monitoring status of process with pid 9384
Server Running on port 5000
修正時のログ
 path server.ts is matched
 path server.ts is matched
 R: reload event detected, starting the reload procedure...
[denon] watching path(s): *.*
[denon] watching extensions: js,ts,json
[denon] restarting due to changes...
 K: killing 1 process[es]
 K: closing (windows) process with pid 9384
[denon] starting `deno run --allow-env --allow-read --allow-write --allow-net --allow-plugin server.ts`
 S: starting process with pid 1868
 M: monitoring status of process with pid 1868
 M: error getting status of process with pid 9384
 M: process with pid 9384 was killed
Compile file:///D:/git/deno_study/REST_API_mongodb/server.ts
Server Running on port 5000
注意点
- denon.jsonに記載されている環境変数だけは更新しても反映されません。
反映するにはdenonを止める必要があります - allowやenv以外も設定できる。unstableという設定があるがそちらはtrue or flaseで設定できます
ファイルの読み書き
ファイルの書き込み
const encoder = new TextEncoder()
const greetText = encoder.encode("Hello World\nMy Name is Masalib")
await Deno.writeFile("greet.txt", greetText)
- ファイルに書き込むには、Deno.writeFileを使います。
- 第2引数には[Uint8Array]しか渡せないため、文字列は[TextEncoder]でエンコードする必要があります。
- 実行する時には「--allow-write」が必要です
deno run --allow-write createFile.ts
ファイルの読み込み
let file = await Deno.open("greet.txt")
await Deno.copy(file,Deno.stdout)
file.close
にはDeno.copyを使うみたいな事が書いてあるのですが現実的なのは変数にいれる事なので
const result = await Deno.readFile("greet.txt");
const dec = new TextDecoder("utf-8");
const text = dec.decode(result);
console.log(text);
deno run --allow-read readFile.ts
書き込みと同様に「--allow-read」が必要です
読み書き時に[TextEncoder]でエンコードやデコードするのがめんどくさい