目的
ローカル環境内で Next.js アプリに next-auth.js を使ってメールリンク方式の認証の動作確認をする。
(NextAuth.js とは Next.js のための認証ライブラリです。)
環境
Windows10
VSCode 無料エディタ
Next.js React 用フレームワーク
NextAuth.js Next.js 用の認証モジュール
smtp4dev ダミー SMTP サーバー
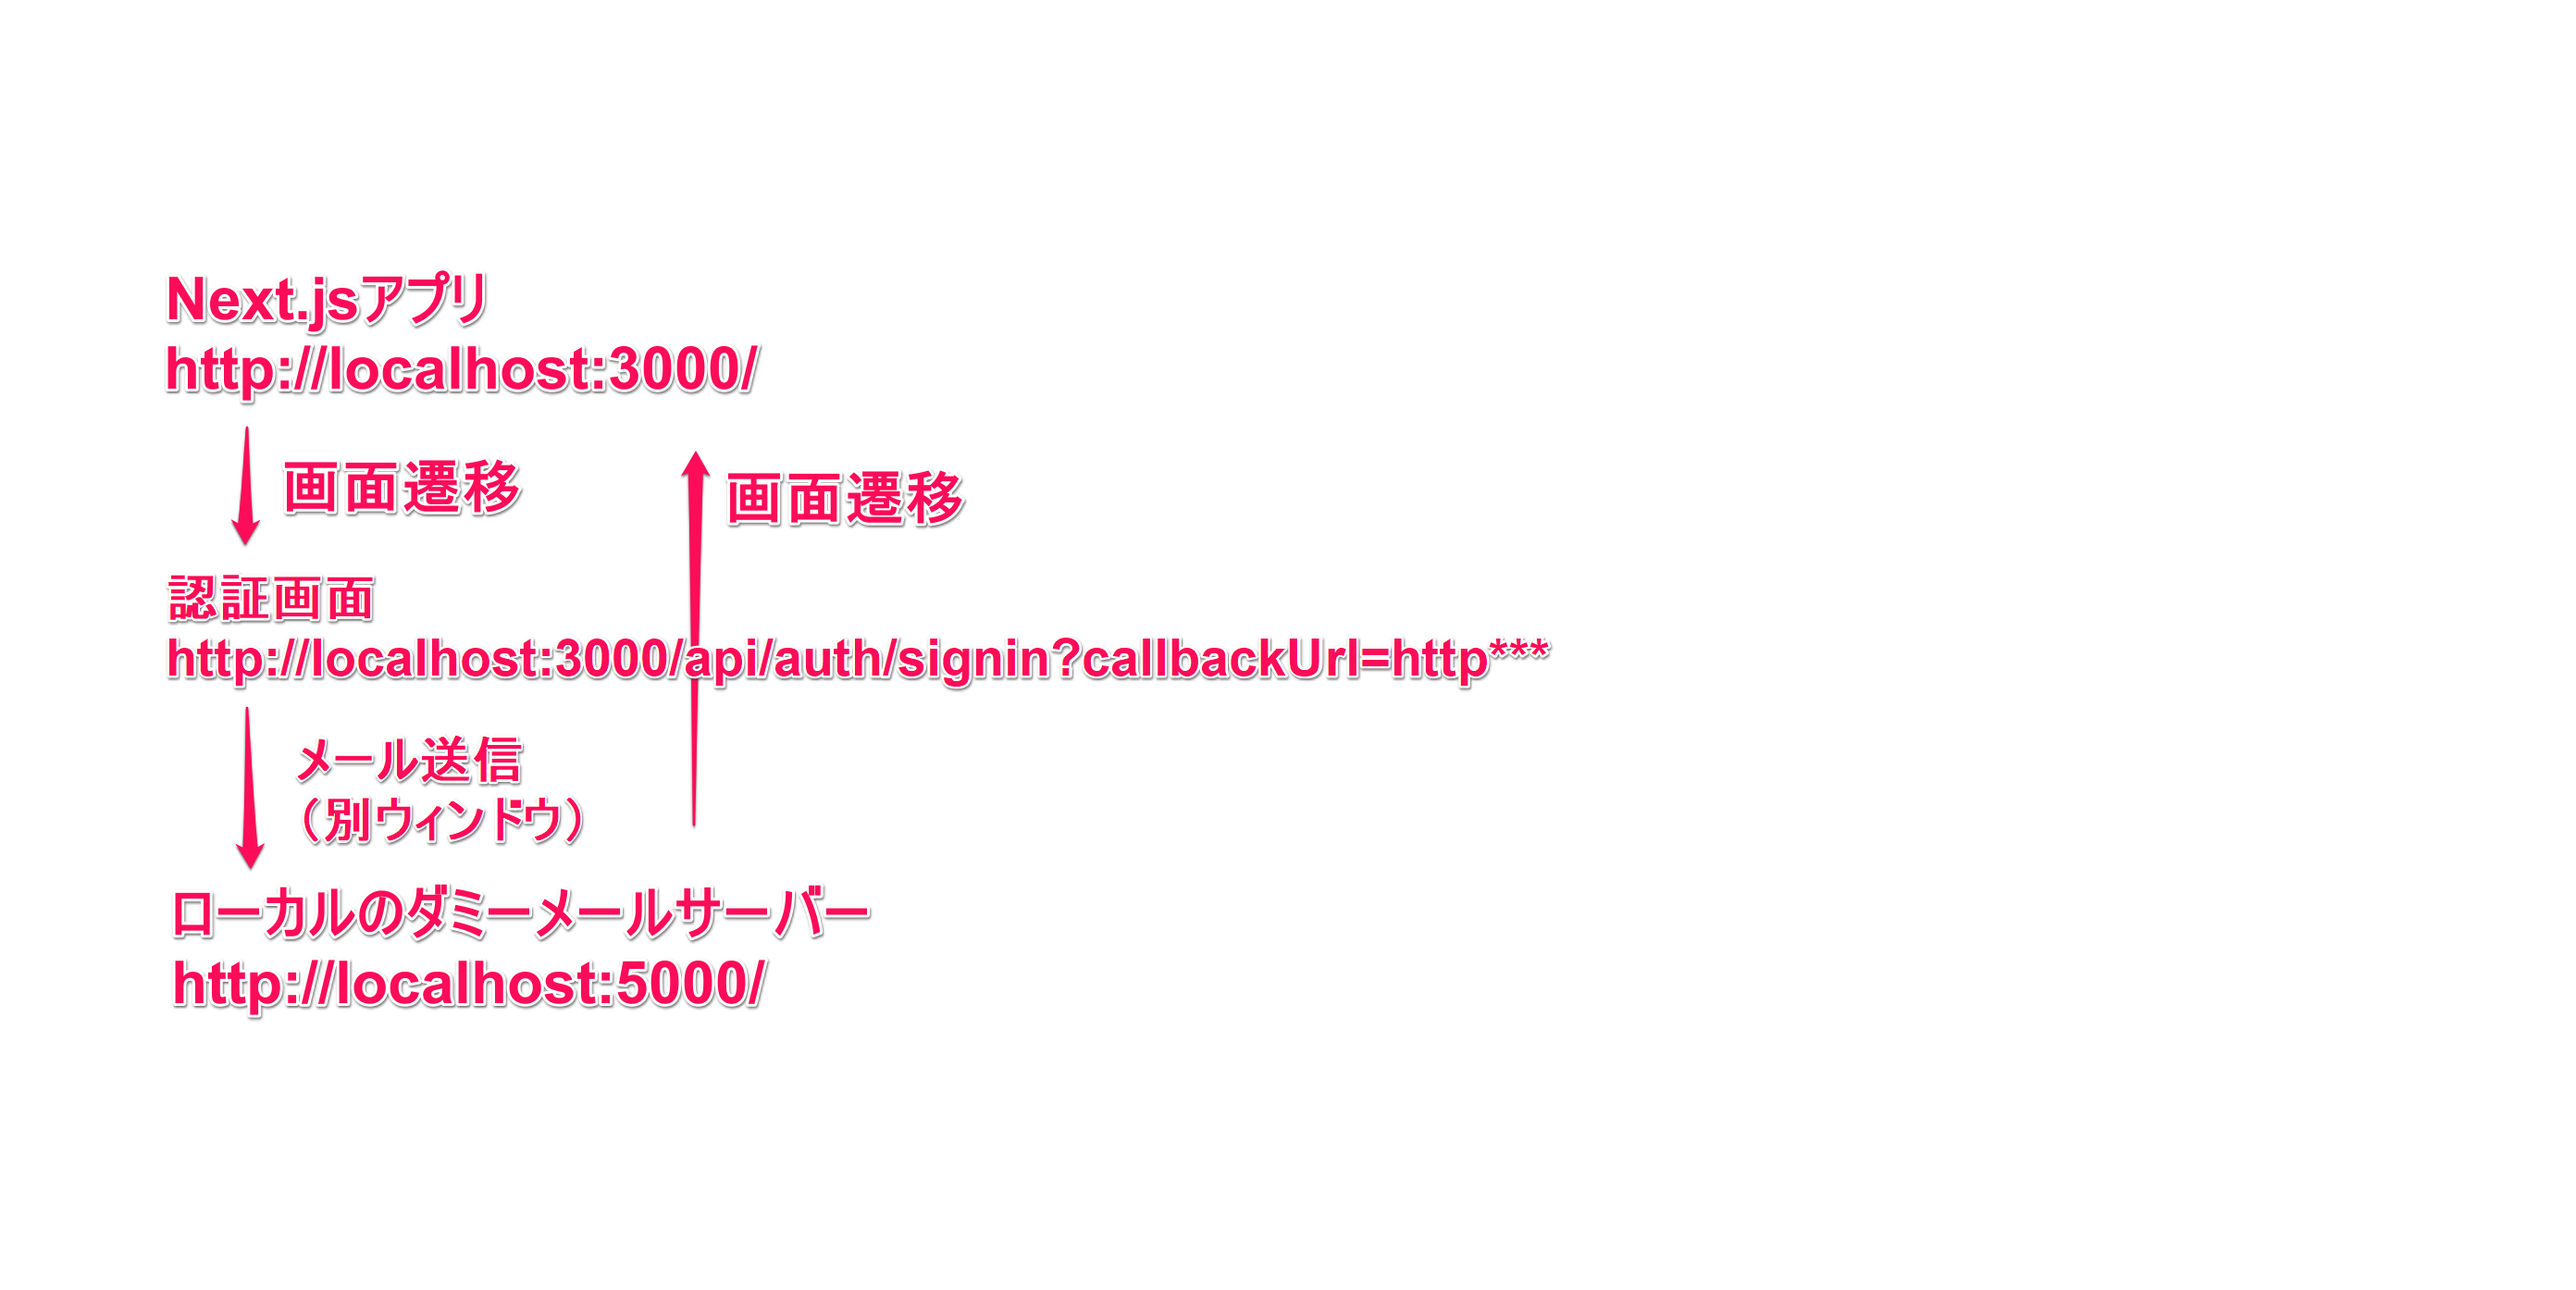
図

※全てローカル環境内で完結させます。
ネット上のサービスを使用せずにローカル内で認証プログラムを動かし認証を実行して終わらせます。
使用ツール
Next.js by Vercel - The React Framework
https://nextjs.org/
NextAuth.js
https://next-auth.js.org/
ライブラリ
vercel/next.js: The React Framework
https://github.com/vercel/next.js
nextauthjs/next-auth: Authentication for Next.js
https://github.com/nextauthjs/next-auth
next.js の nextauth サンプル
nextauthjs/next-auth-example: An example project that shows how to use NextAuth.js
https://github.com/nextauthjs/next-auth-example
ダミーサーバー(ローカル)
rnwood/smtp4dev: smtp4dev - the fake smtp email server for development and testing
https://github.com/rnwood/smtp4dev
インストール
適当なフォルダで VSCode を開きます。
Next.js の next-auth サンプルをインストール
nextauthjs/next-auth-example: An example project that shows how to use NextAuth.js
https://github.com/nextauthjs/next-auth-example
git clone https://github.com/nextauthjs/next-auth-example.git
cd next-auth-example
npm i
ファイル名
.env.local.example
を
.env.local
に変更します。
変更したファイル.env.localを開きます。
.env.local ファイルの設定
ローカルメールサーバ SMTP 設定値は下記のようになります。
"HostName": "localhost"
"Port": 25,
"Login": ""
"Password": ""
それぞれの値は下記のように変更します。
smtp.example.com > localhost
587 > 25
username > ""
password > ""
# EMAIL_SERVER=smtp://username:password@smtp.example.com:587
EMAIL_SERVER=smtp://"":""@localhost:25
#はコメントアウト
※username と password は空文字なのでダブルクォーテーションで囲んでいます。
書き換えた結果
NEXTAUTH_URL=http://localhost:3000
SECRET= # Linux: `openssl rand -hex 32` or go to https://generate-secret.now.sh/32

APPLE_ID=
APPLE_TEAM_ID=
APPLE_PRIVATE_KEY=
APPLE_KEY_ID=

AUTH0_ID=
AUTH0_SECRET=
AUTH0_DOMAIN=

FACEBOOK_ID=
FACEBOOK_SECRET=

GITHUB_ID=
GITHUB_SECRET=

GOOGLE_ID=
GOOGLE_SECRET=

TWITTER_ID=
TWITTER_SECRET=

# EMAIL_SERVER=smtp://username:password@smtp.example.com.com:587
EMAIL_SERVER=smtp://"":""@localhost:25

EMAIL_FROM=NextAuth <noreply@example.com>

DATABASE_URL=sqlite://localhost/:memory:?synchronize=true
Next.js アプリの立ち上げ
npm run dev
開発サーバーが立ち上がり
http://localhost:3000/
でアプリを確認することが出来ます。

※まだサインインは出来ません。アプリ側の確認が出来ただけでメールサーバー側はこれから書きます。
メールサーバーの設定
ローカルにダミーメールサーバーを立ち上げます。
ダウンロード
Releases rnwood/smtp4dev
https://github.com/rnwood/smtp4dev/releases

Latest release(最新)の Windows 版をダウンロードします。
自分の環境は Windows なので
Rnwood.Smtp4dev-win-x64-3.1.3.2.zip
をダウンロードします。
ダウンロード後ファイルを解凍して
Rnwood.Smtp4dev.exe を実行します。
ネットワークの接続の許可を求めてきますので許可します。

黒い画面が立ち上がります、これで
http://localhost:5000
でダミーメールサーバーが立ち上がった状態となります。
メールリンク方式の認証を確認する。
それでは受信メールをブラウザから確認します、この 2 画面を並べて表示するとやりやすいと思います。
ローカルのダミーメールサーバー
http://localhost:5000/

Next.jsのアプリ
http://localhost:3000/
手順 1
http://localhost:3000/
の画面右上にある青い「Sign in」ボタンを押します。
メールを Email のフォームに入力して「Sign in with Email」ボタンを押します。
「Check your email」という画面が表示されます。
手順2
メールを確認しにダミーメールサーバーを見に行きます。
http://localhost:5000/
メールが届いていると思います。

メールを開いて「Sign in」ボタンを押します。
そうすると
自動的に
http://localhost:3000/
へジャンプして「Sign in」が出来ているはずです。
そして右上の「Sign out」ボタンを押せばサインアウト出来ます。
以上でメールリンク方式の認証確認は終了です。
雑学
ローカルで立てるメールサーバー
今回の目的はメールリンク認証を実装することです。
これにはメールサーバー(= SMTP サーバー)が必要です。
メールサーバーは無料で使えるところがあったり、自宅でメールサーバーを立てたりできますが、設定などが非常に面倒なため今回はダミー SMTP サーバーツール「smtp4dev」を利用します。
smtp4dev とはどのようなものか?
メール通知テストに便利な“ダミー”の SMTP サーバー「smtp4dev」:IT プロ必携の超便利システム管理ツール集(12) - @IT
https://www.atmarkit.co.jp/ait/articles/1410/23/news017.html
開発中にメール送受信をブラウザで確認できます。
参考
nextauthjs/next-auth: Authentication for Next.js
https://github.com/nextauthjs/next-auth
NextAuth.js
https://next-auth.js.org/
Introduction | NextAuth.js
https://next-auth.js.org/getting-started/introduction
Example Code | NextAuth.js
https://next-auth.js.org/getting-started/example
Email | NextAuth.js
https://next-auth.js.org/providers/email
Errors | NextAuth.js
https://next-auth.js.org/errors#send_verification_email_error