はじめに
- ROSA (Red Hat OpenShift Service on AWS) はAWSとRed Hatが共同提供するフルマネージドなOpenShiftです。
- OpenShift 4.14からはROSAにおいてもOpenShift Virtualization (OV) の機能がGAとなりました。
- OVは、UpstreamのKubevirtを取り込んだ、「KVMを応用する事でKubernetesの上で仮想マシンのライフサイクル管理が可能になる機能」です
- OVを用いてスケジューリングされるVMはBare Metal Nodeの上のみになります
- よって、ROSAにBare Metal Nodeをアタッチすることで、OVが動きます。
- 4.14時点では、従来のROSA (Classic) でしかGAとなっておりません。Hosted Control Plane (HCP) でのGAはもう少し待ちましょう。(ただ、私が実機でやってみた感じ、問題なく動くっちゃ動きます)
ROSAにBare Metal Nodeを追加する
本検証環境の仕様は以下の通りです。
- ROSA 4.14.0
- Tokyo Region, Multi-AZのCluster
まずはデフォルトで作成されているNode一覧を見てみます。
~ % oc get nodes
NAME                                             STATUS   ROLES                  AGE   VERSION
ip-10-0-0-207.ap-northeast-1.compute.internal    Ready    worker                 10h   v1.27.6+f67aeb3
ip-10-0-13-247.ap-northeast-1.compute.internal   Ready    infra,worker           9h    v1.27.6+f67aeb3
ip-10-0-31-160.ap-northeast-1.compute.internal   Ready    control-plane,master   10h   v1.27.6+f67aeb3
ip-10-0-33-6.ap-northeast-1.compute.internal     Ready    infra,worker           9h    v1.27.6+f67aeb3
ip-10-0-38-109.ap-northeast-1.compute.internal   Ready    worker                 10h   v1.27.6+f67aeb3
ip-10-0-59-203.ap-northeast-1.compute.internal   Ready    control-plane,master   10h   v1.27.6+f67aeb3
ip-10-0-64-220.ap-northeast-1.compute.internal   Ready    control-plane,master   10h   v1.27.6+f67aeb3
ip-10-0-83-142.ap-northeast-1.compute.internal   Ready    infra,worker           9h    v1.27.6+f67aeb3
ip-10-0-91-29.ap-northeast-1.compute.internal    Ready    worker                 10h   v1.27.6+f67aeb3
Control Plane (旧称 Master Node)、Infra Node、Compute Node(旧称 Worker Node)の三種類が作成されています。
※Infra Nodeというのは、Worker Nodeの一種で、OpenShiftを構成する管理コンポーネントを司るPodをスケジューリングするためのNodeです。
OVを利用する為にはBare MetalのWorker Nodeが必要ですので、「Red Hat Hybrid Cloud Console」からNodeを追加します。
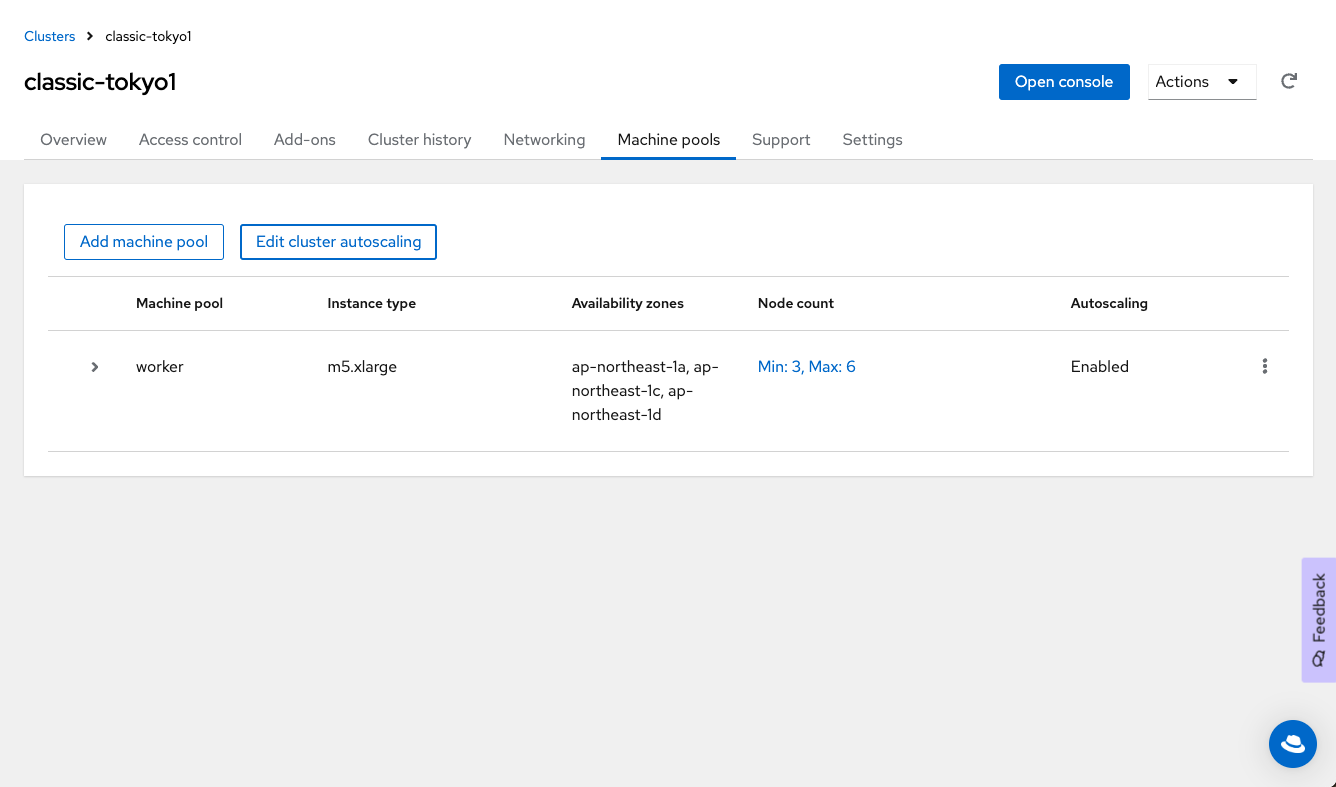
ROSAでは、Worker Nodeたちを種類別にMachine Poolとして作成・管理できます。Add machine poolしていきます。
Bare Metal Nodeを適当に選んでおきます。とりあえずm5.metalを選択しました。AutoScale等はご自由にしてください。
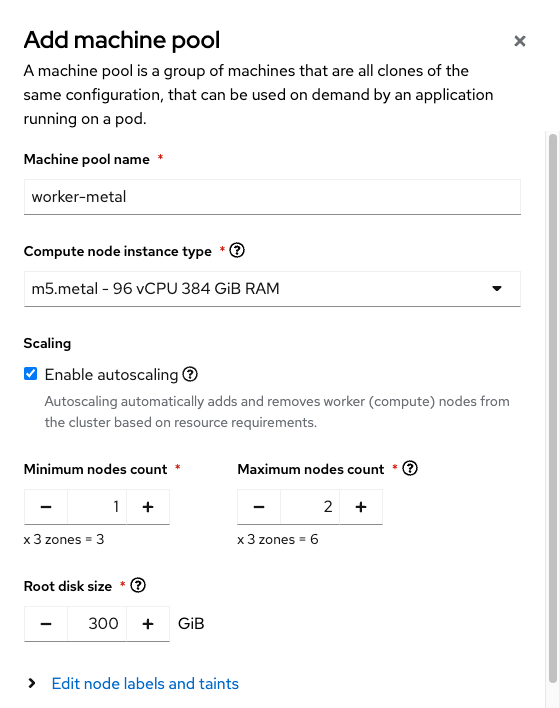
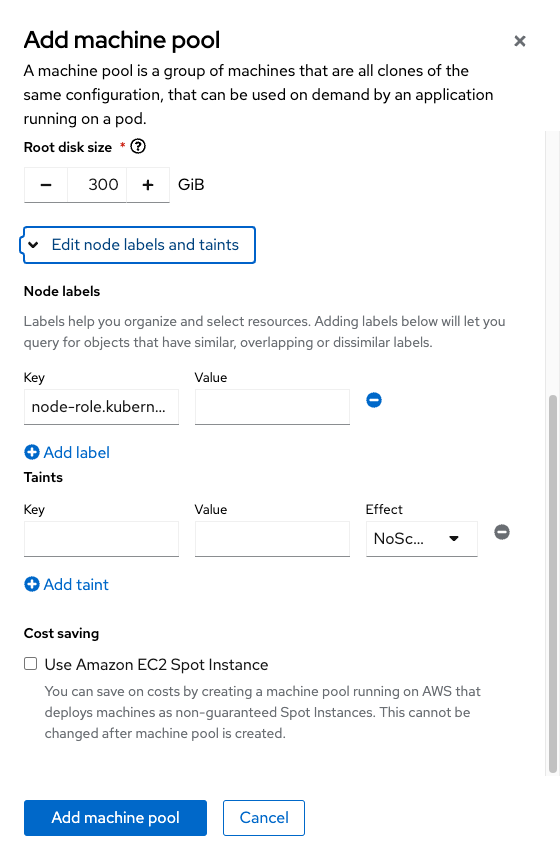
このまま追加してしまっても良いのですが、Annotation (key:value)にNodeRoleの情報node-role.kubernetes.io/metal: ''付与しておきます。
※あとで見やすいようにするためなので任意。
追加できました。
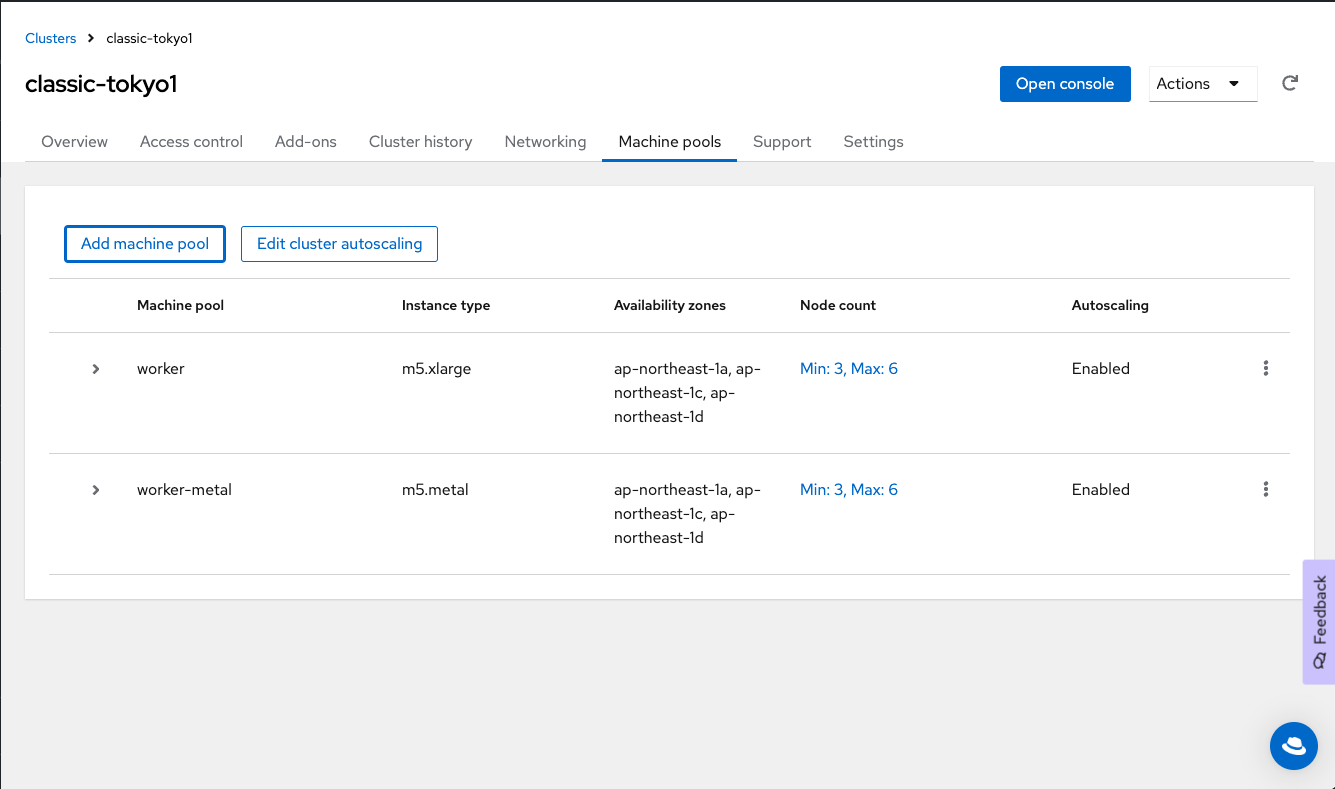
ただしProvisioningされるまで相応の時間がかかりますので、しばし待ちます。
EC2がProvisioningされ、更にOpenShiftのNodeとしてアタッチされるまで30分くらいはかかりました。
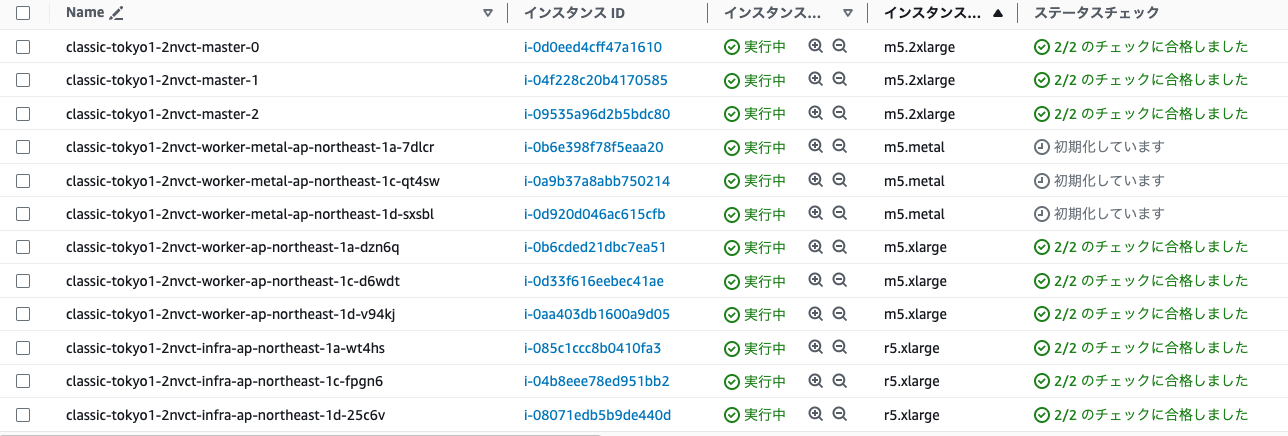
追加されました。NodeのROLE欄にmetalが入っているやつが見えます。
~ % oc get nodes
NAME                                             STATUS   ROLES                  AGE     VERSION
ip-10-0-0-207.ap-northeast-1.compute.internal    Ready    worker                 10h     v1.27.6+f67aeb3
ip-10-0-13-247.ap-northeast-1.compute.internal   Ready    infra,worker           10h     v1.27.6+f67aeb3
ip-10-0-31-160.ap-northeast-1.compute.internal   Ready    control-plane,master   10h     v1.27.6+f67aeb3
ip-10-0-33-6.ap-northeast-1.compute.internal     Ready    infra,worker           10h     v1.27.6+f67aeb3
ip-10-0-38-109.ap-northeast-1.compute.internal   Ready    worker                 10h     v1.27.6+f67aeb3
ip-10-0-50-57.ap-northeast-1.compute.internal    Ready    metal,worker           4m7s    v1.27.6+f67aeb3
ip-10-0-59-203.ap-northeast-1.compute.internal   Ready    control-plane,master   10h     v1.27.6+f67aeb3
ip-10-0-6-250.ap-northeast-1.compute.internal    Ready    metal,worker           4m17s   v1.27.6+f67aeb3
ip-10-0-64-220.ap-northeast-1.compute.internal   Ready    control-plane,master   10h     v1.27.6+f67aeb3
ip-10-0-67-158.ap-northeast-1.compute.internal   Ready    metal,worker           4m27s   v1.27.6+f67aeb3
ip-10-0-83-142.ap-northeast-1.compute.internal   Ready    infra,worker           10h     v1.27.6+f67aeb3
ip-10-0-91-29.ap-northeast-1.compute.internal    Ready    worker                 10h     v1.27.6+f67aeb3
OpenShiftのコンソール画面でも確認してみます。
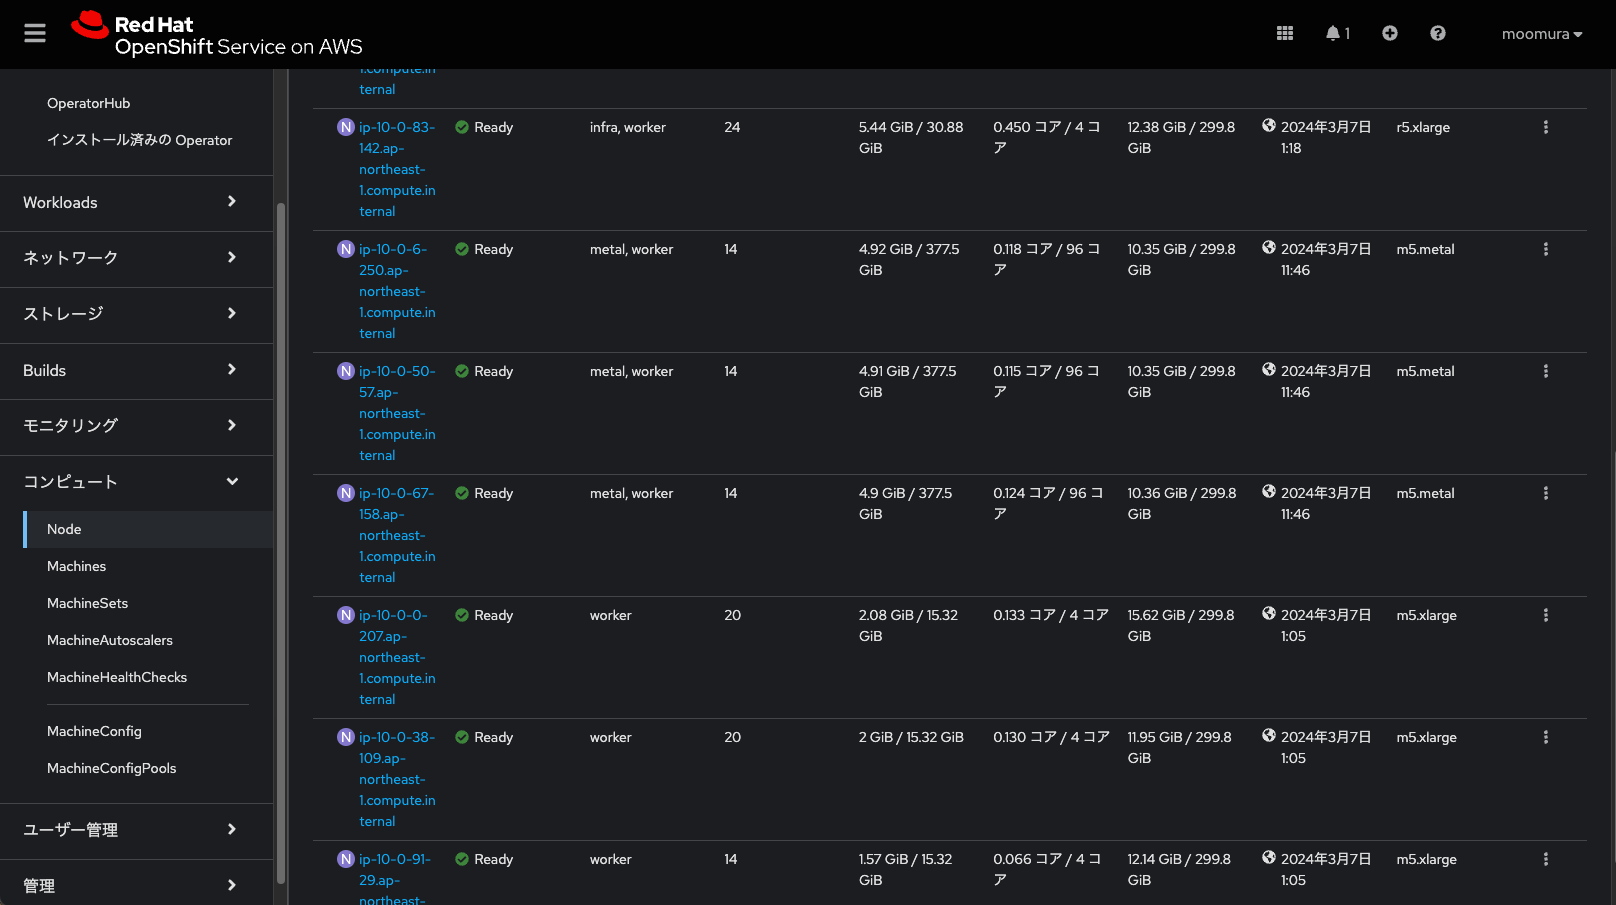
m5.metalが3台アタッチされました。
次はOpenShift Virtualization Operatorをインストールしていきます。
OpenShift Virtualization Operatorをインストール
簡単なのでコンソール画面からやっていきます。
管理者向け表示 → Operator → OperatorHub と進み、OpenShift Virtualization Operatorを選択します。
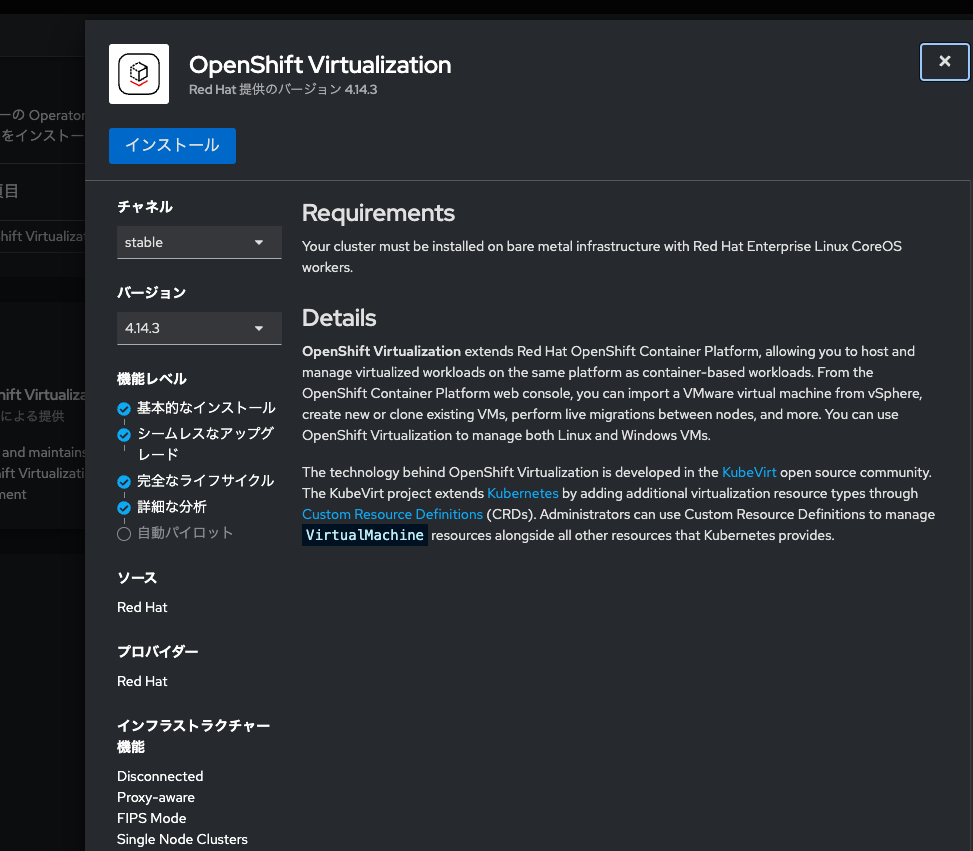
デフォルト設定のままインストールします。
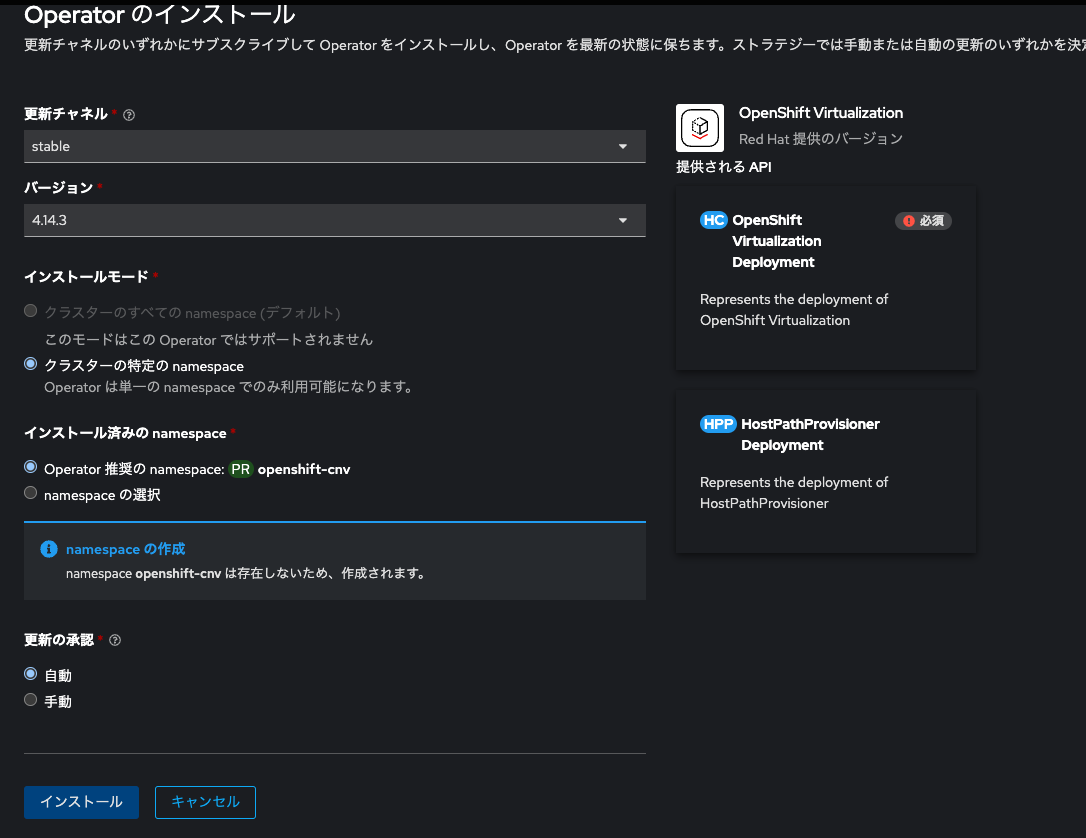
インストール完了までしばし待ちます。2,3分お待ち下さい。
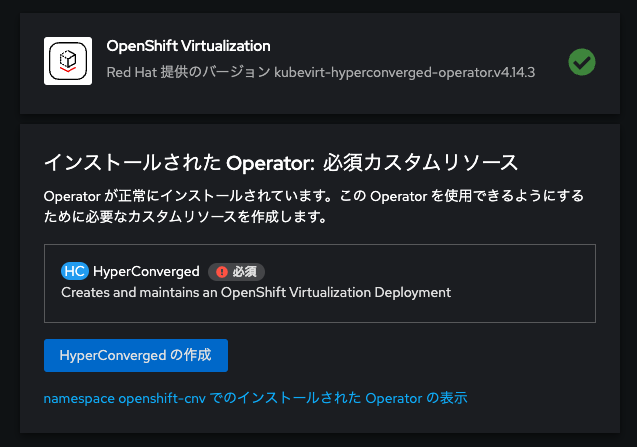
Operatorはインストールできました。続いてKubevirtを含むOVのコンポーネントをDeployしましょう。
「HyperConvergedの作成」をクリックします。
こちらもデフォルト設定で大丈夫です。Project(Namespace)がopenshift-cnvになっていると思います。
そのまま「作成」をクリックしてください。
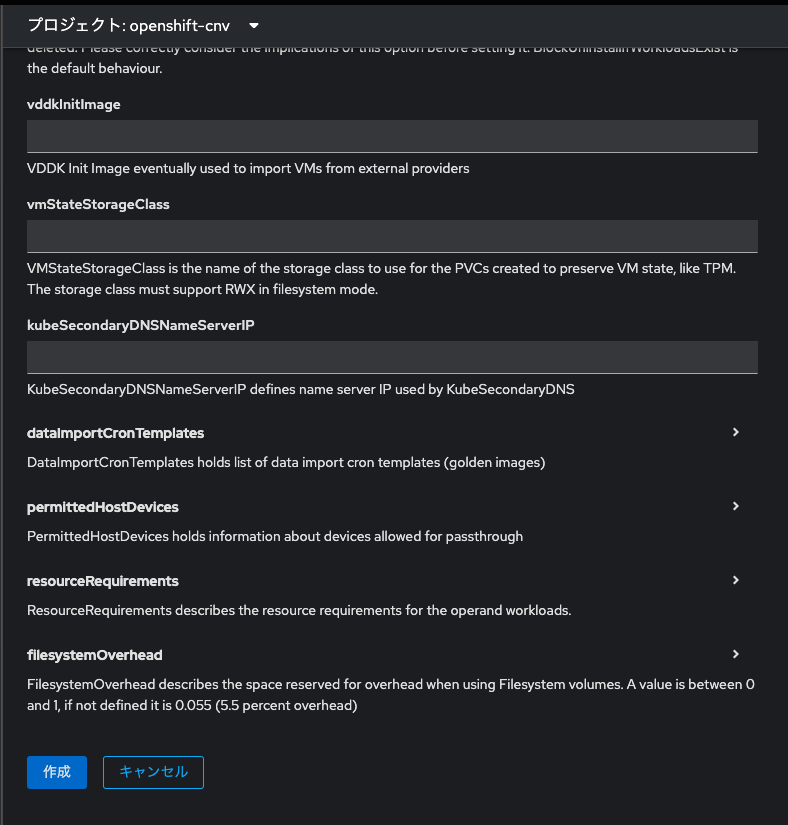
コンポーネントが立ち上がるまでしばし待ちます。こちらも2,3分。
※開発者向け表示でトポロジーを確認すると、作成過程を見られます。
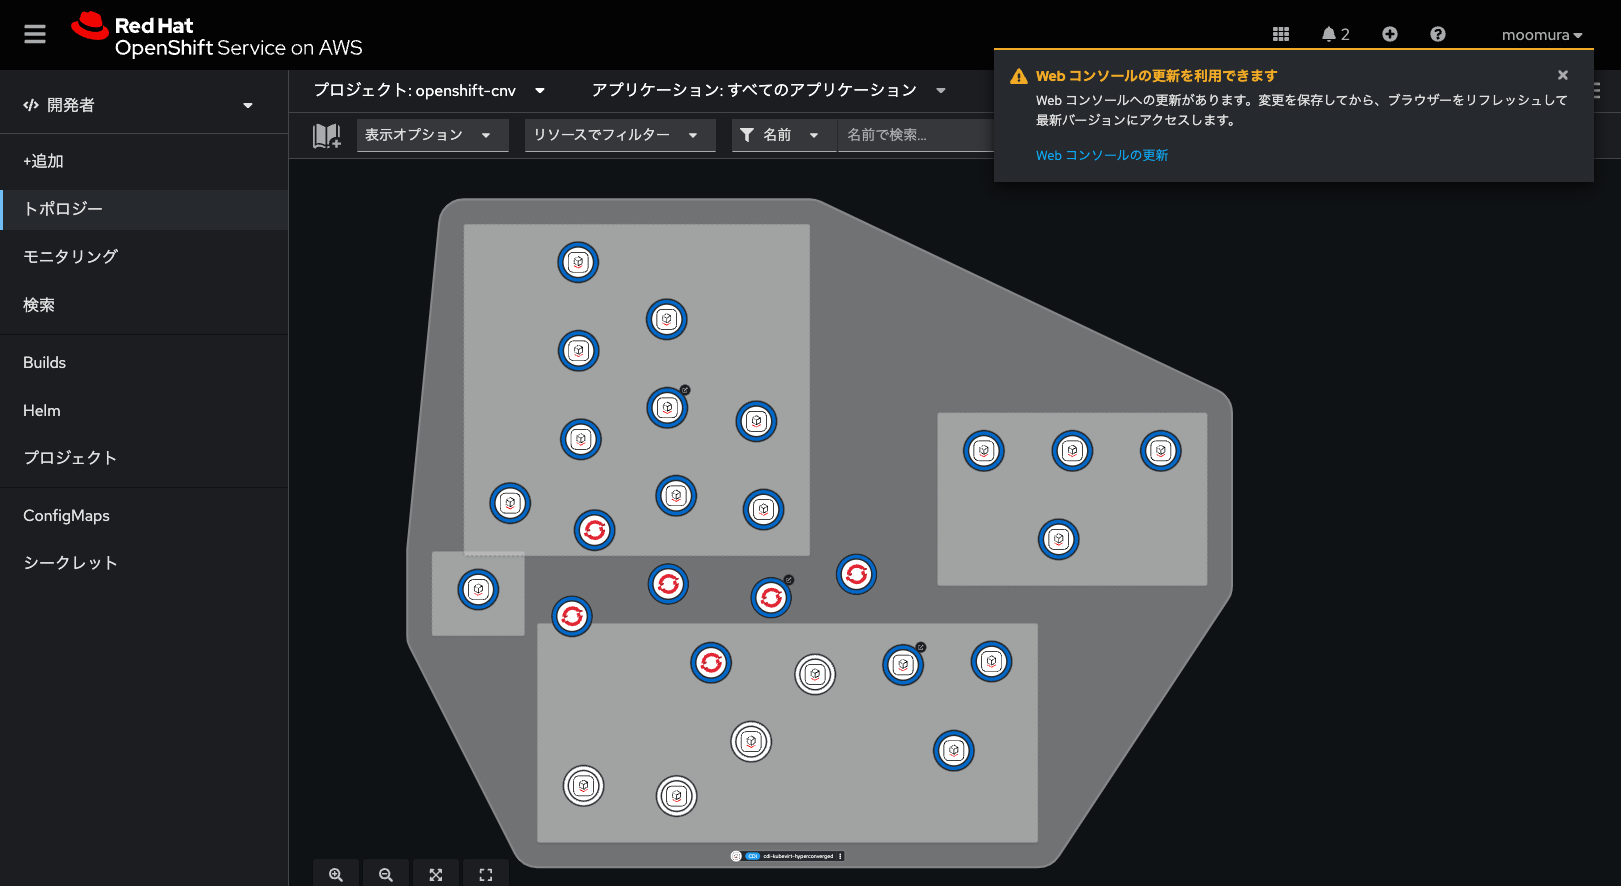
HyperConvergedがDeployされると、画面コンソールの更新を促されますので、更新してください。
管理者向け表示にすると、コンソールの左側にVirtualizationとかいうメニューができます。
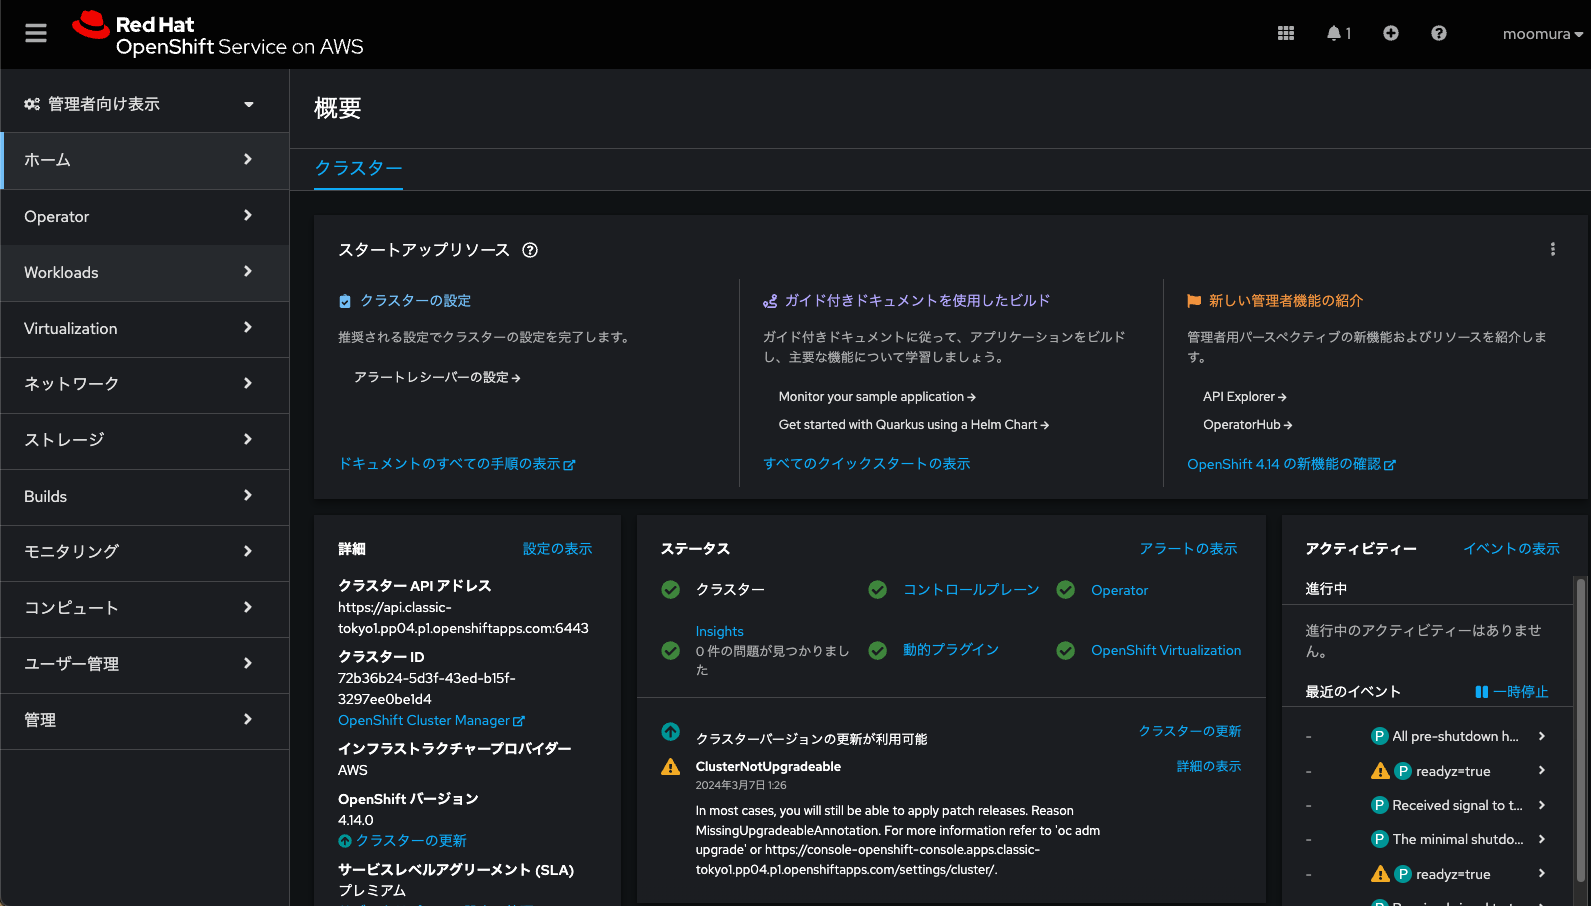
おめでとうございます。ROSAでOpenShift Virtualization機能が使えるようになりました。
では、なんか適当にVMを立ててみましょう。
VMを建てる
Projectを作成しておきます。今回はvirtual-machineという名前にしておきました。
管理者向け表示にて、Virtualization → VirtualMachine と進み、Create VirtualMachineをクリックします。
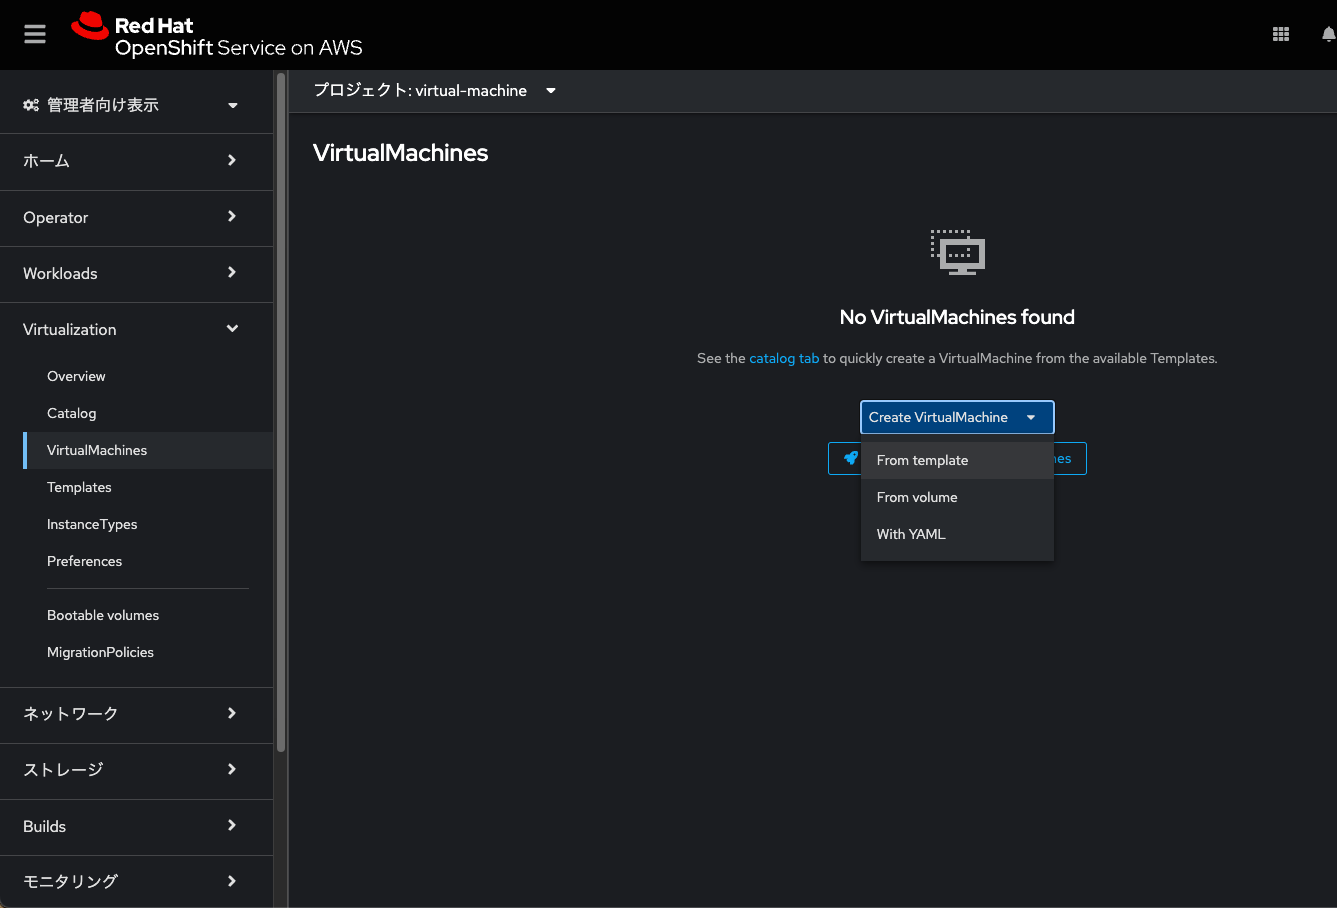
From templateを選んでください。
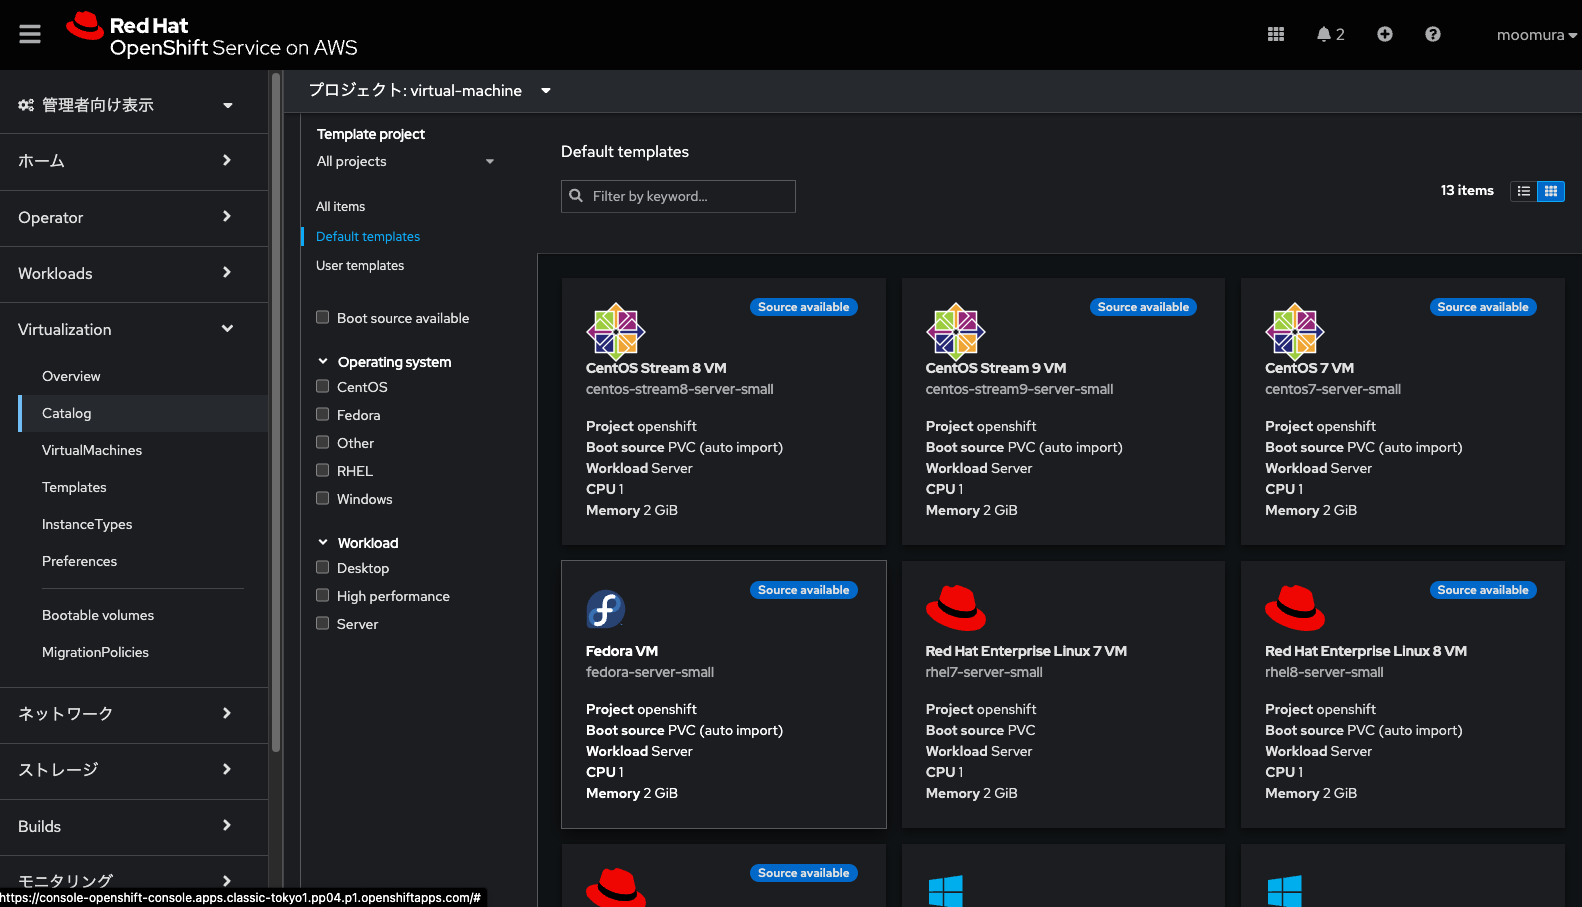
今回はサクッとVMを建てたいので、Fedoraを選びます。
※Fedoraは、RHELの最も上流にいるUpstreamのProjectです。
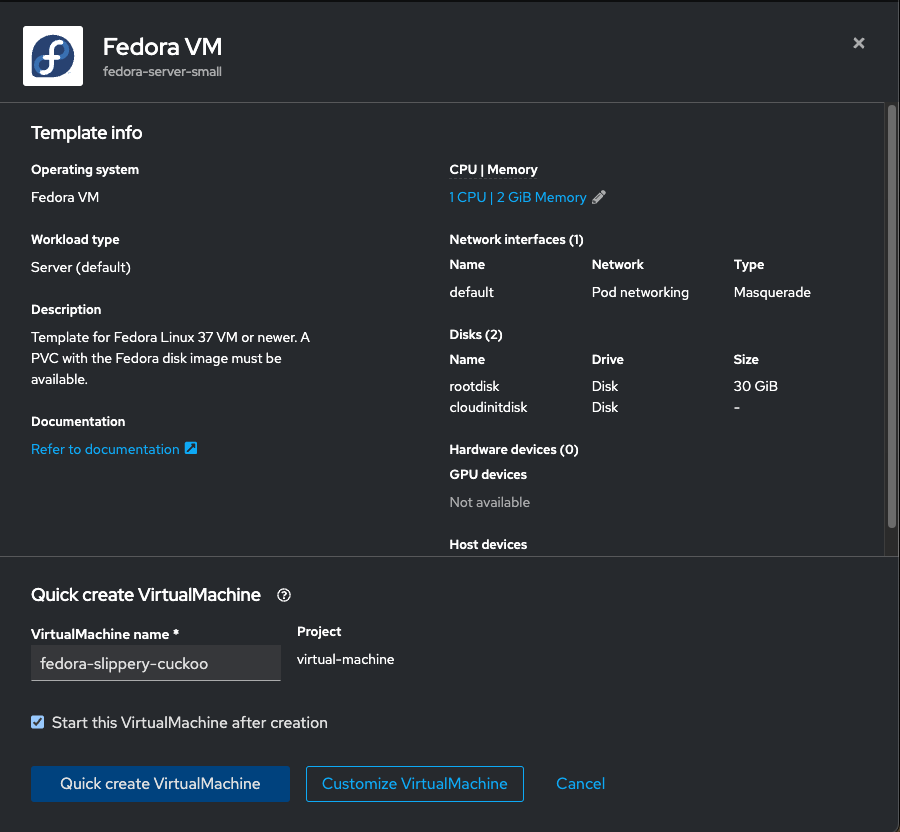
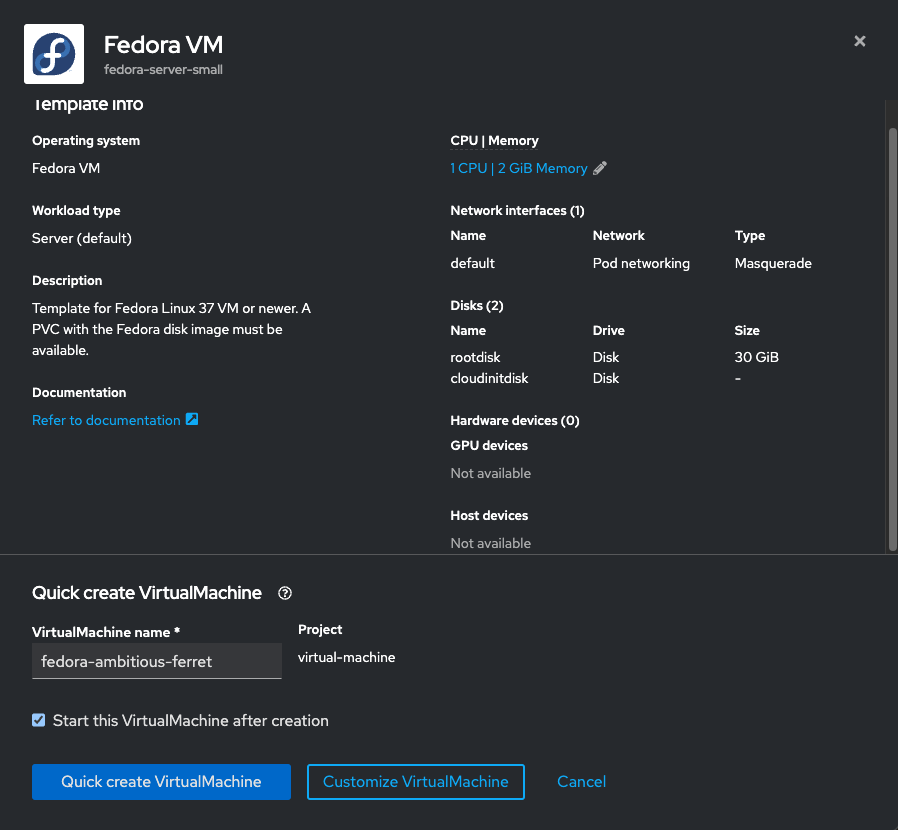
今回はそもまま「Quick create VirtualMachine」をクリック。
直ぐにProvisioningが始まります。しばし待ちます。
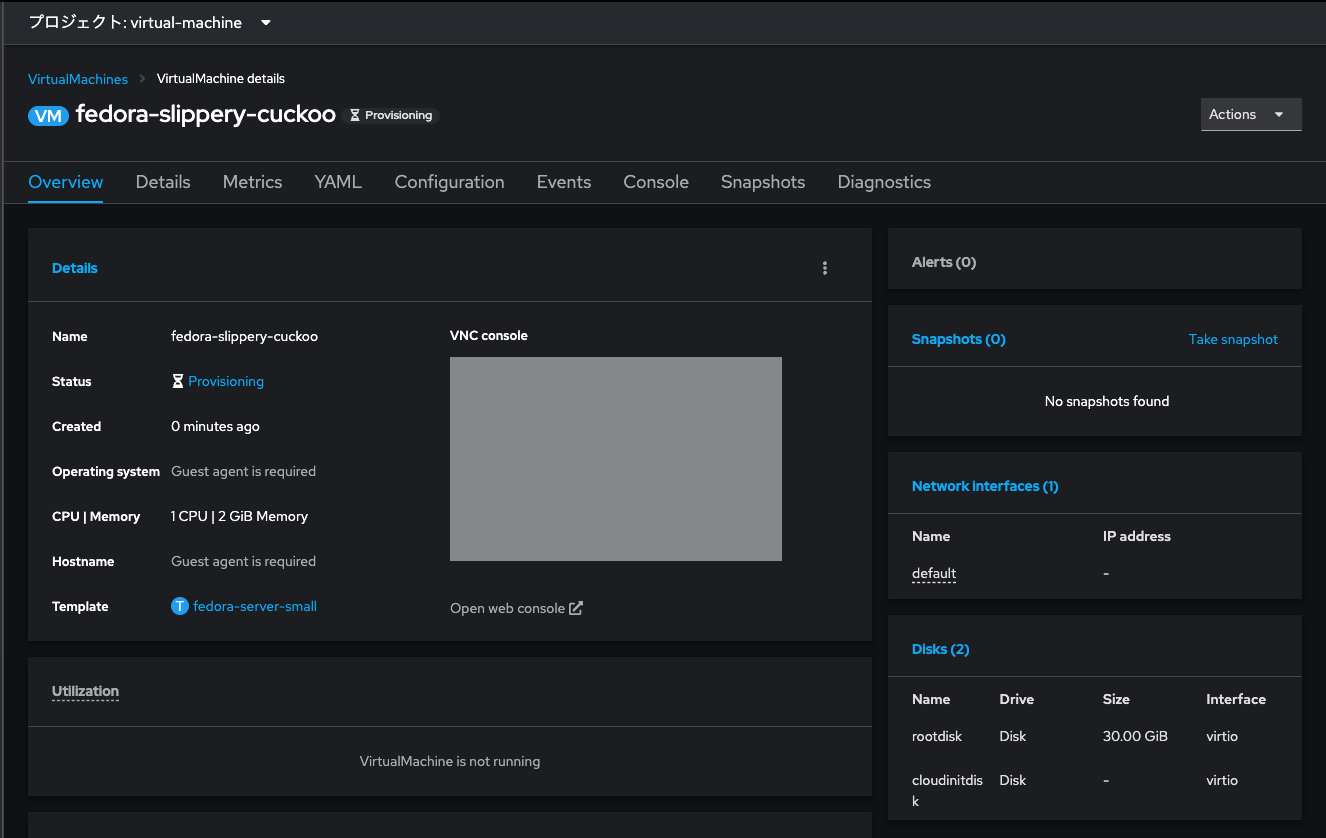
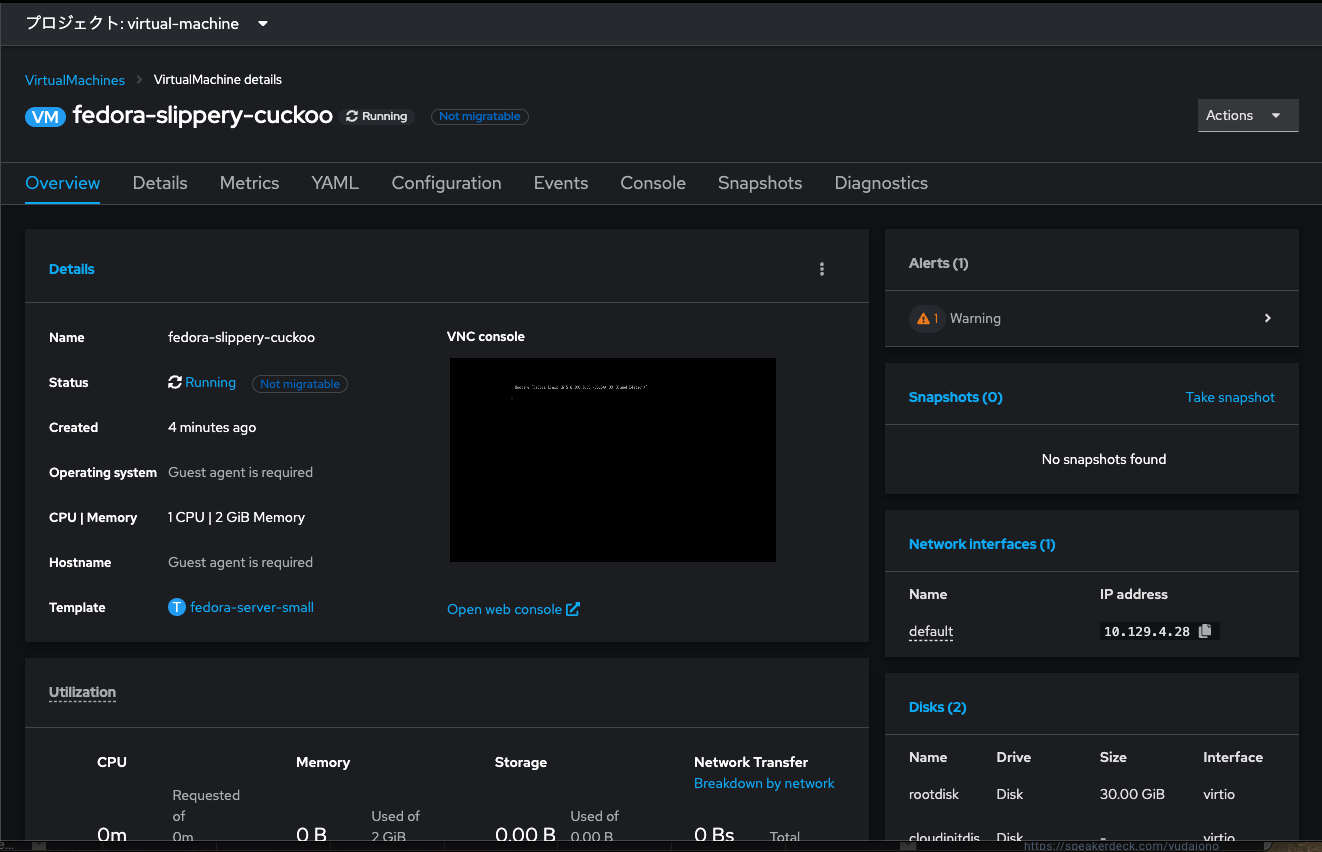
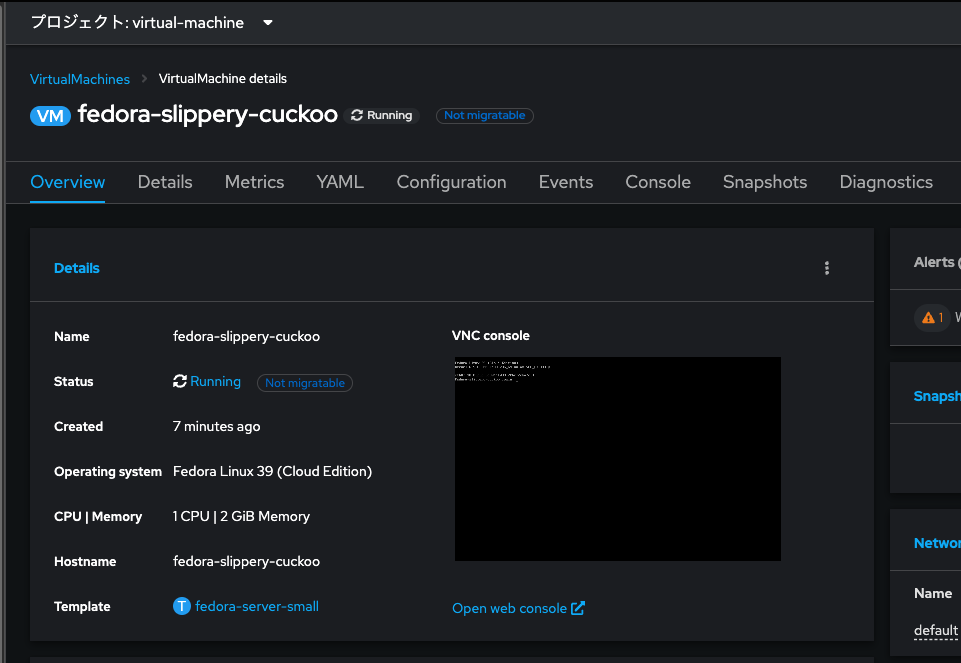
Fedora VMがROSAの上で立ち上がりました。
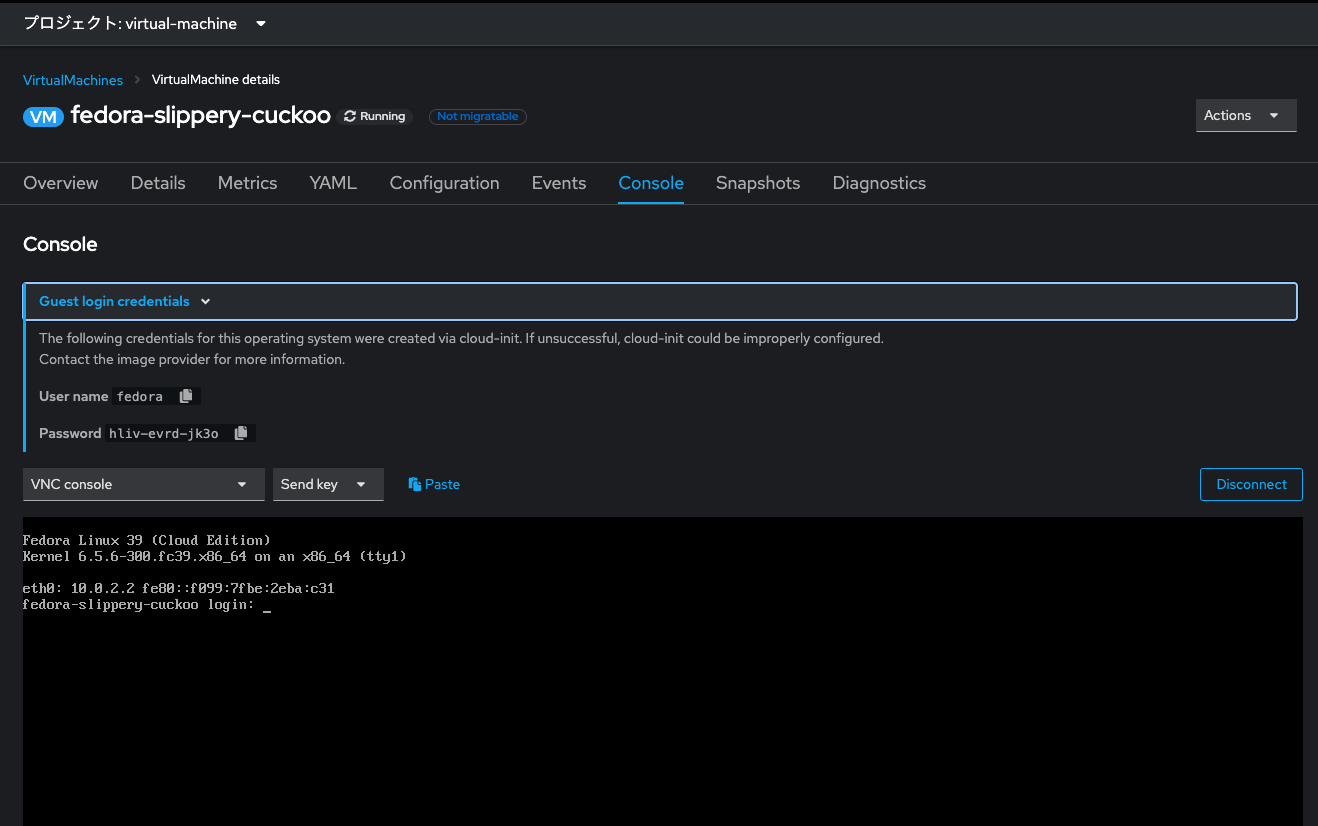
「Console」タブからVMのコンソール画面(CLI ot GUI)にアクセスできます。
開発者向け表示のトポロジー画面からもVMの詳細を見られます。
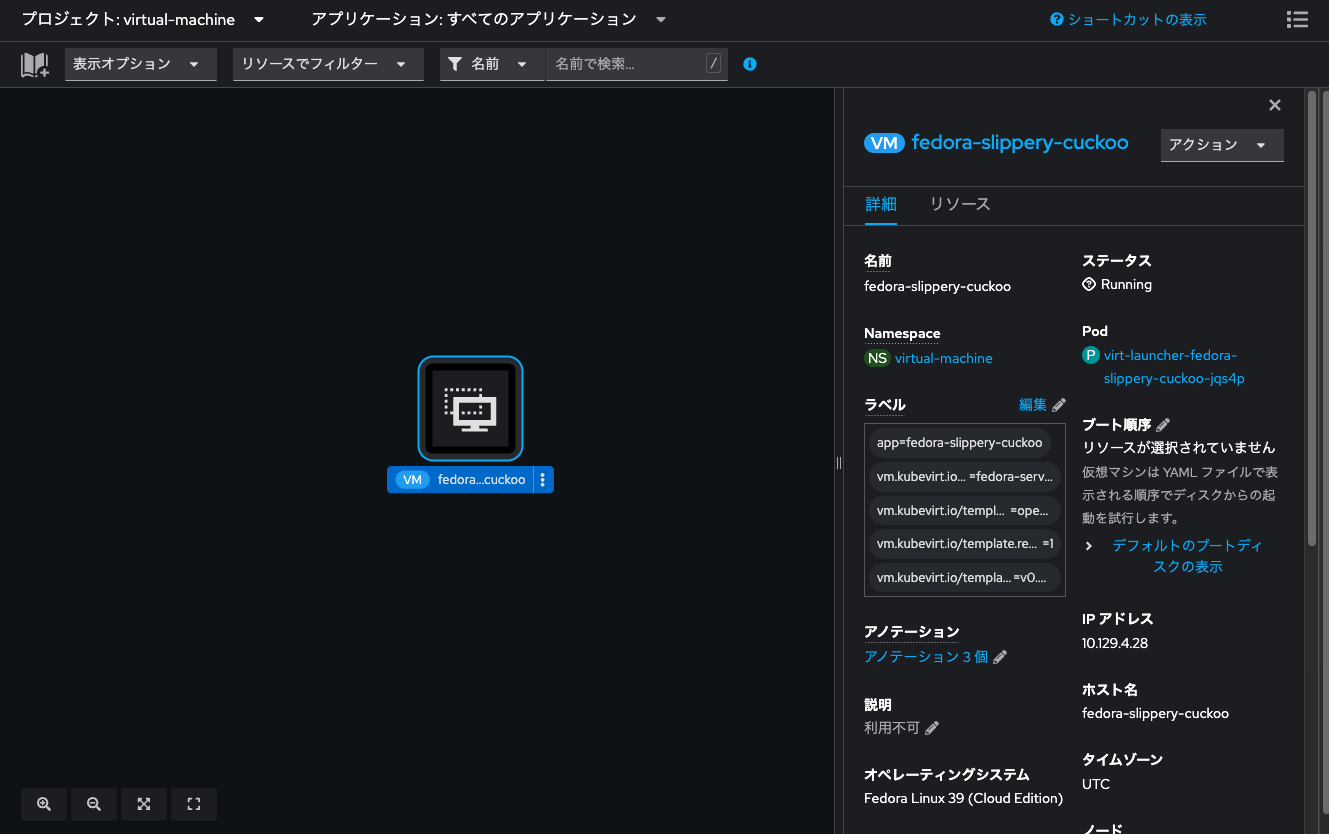
本来はPodが浮いているところに「VM」っていうやつがおります。初めて見ると、とても違和感がありますね。
環境観察
さて、Fedora VMの横っちょにNot migratableと青字で表示されています。
OpenShiftの上で管理するVMは、Bare Metal NodeをまたいでLive Migrationする事ができるのですが、そのためにはVMにアタッチされているVolumeがReadWriteMany (RWX) である必要があります。
なお、VMにアタッチされる論理ディスクの実態はPersistentVolume (PV) です。
※VMもコンテナの中で動いており、コンテナはPodの中で動いています。KubernetesからはVMもPod/Containerとして見ているわけですね。
管理者向け表示にて、ストレージ欄からPersistentVolumeClaim (PVC) を見てみます。

バインドされているPVを見てみます。
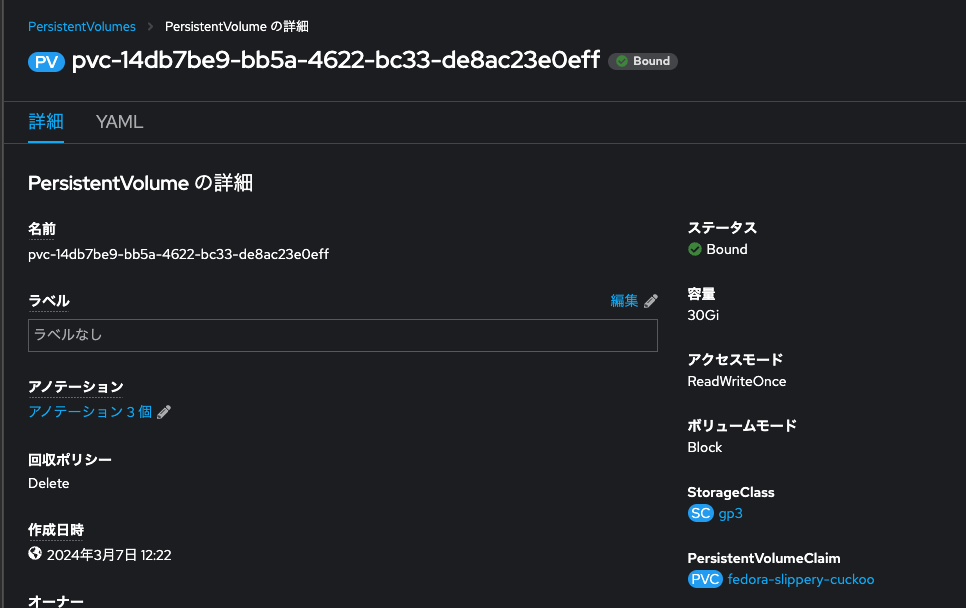
アクセスモードがReadWriteOnce (RWO) になってます。これではVMのLive Migrationはできません。
実は、AWS EBSの仕様で、EBSをStorageClassとして作成する論理ディスク=PVはRWOしかProvisioningできません。
ほんとか!? ちょっと確認しておきましょう。

From formを選んでPVCを作成してみます。
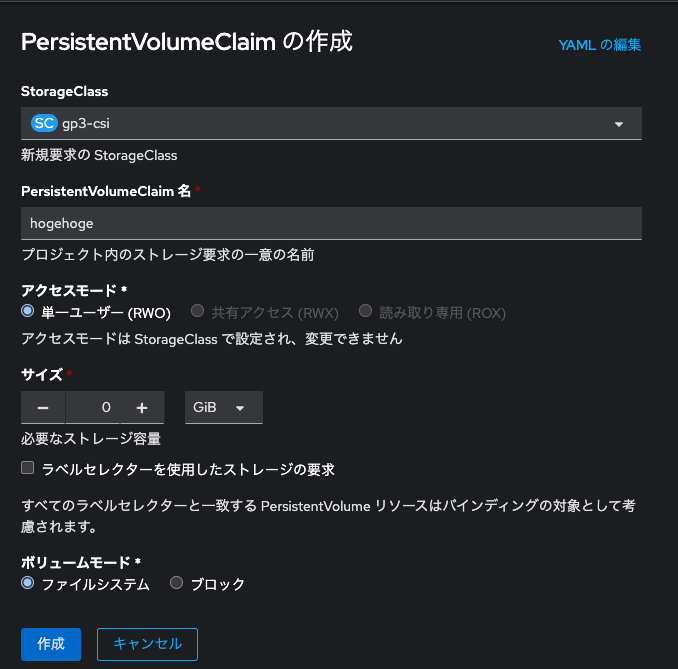
RWO以外が選択できません。
ちなみに、AWS EFSはRWXのPVCを作成可能です。
EFSをStorageClassとして選択できるようにする為には「AWS Elastic File Service CSI Driver Operator」をインストールする必要があります。
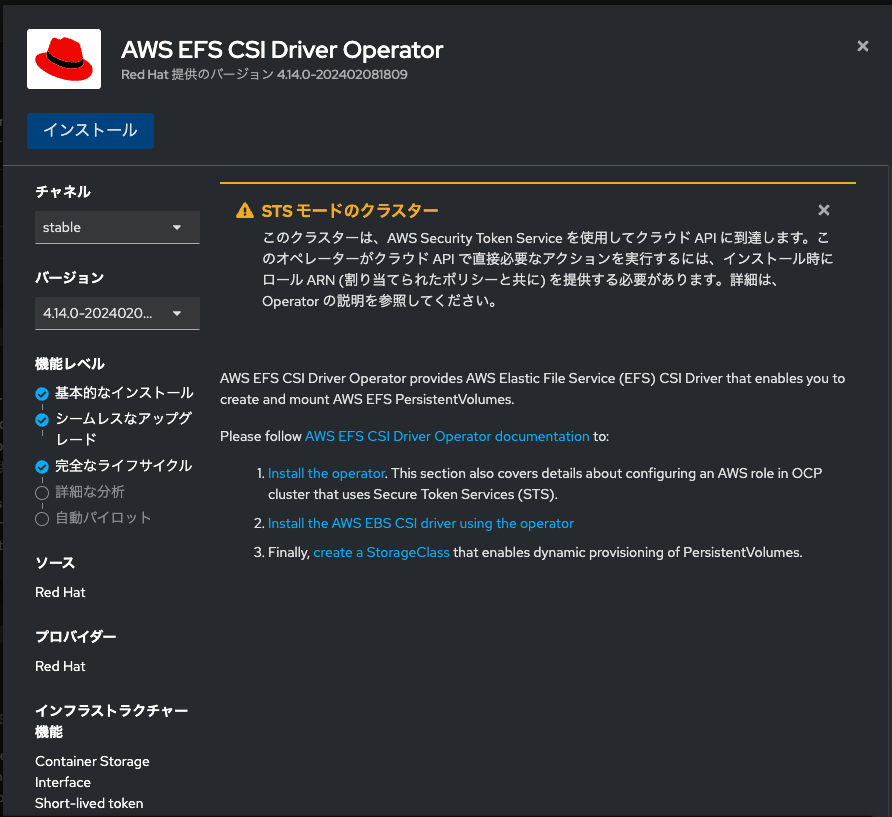
「AWS Elastic File Service CSI Driver Operator」をインストール後、こちらの説明に従ってCRDを編集しますと、StorageClassのプロビジョナーとしてEFSを選択できるようになります。
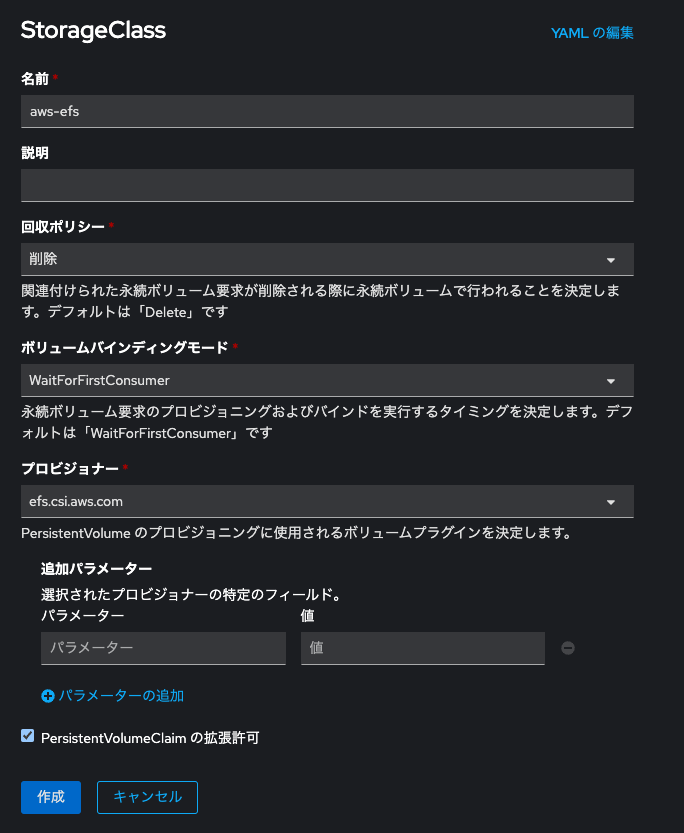
EFSをStorageClassに選ぶと、確かにRWO以外の選択肢を選択できます。やった〜!
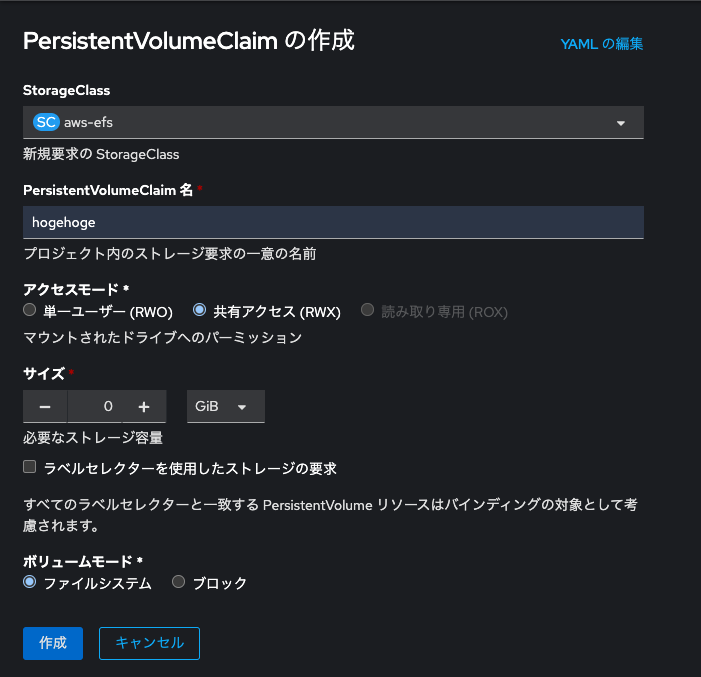
ただし、VMのVolumeにはブロックストレージを選択する必要がありますので、RWXであったとしてもEFSからProvisioningされたPV(ファイルシステム)は使えません。残念。
もしVMのLive Migrationを求める場合は、CSI対応の種々のSDSを用いて、RWXでProvisioningできるStorageClassを導入する必要がありますので、そのようにしてください。
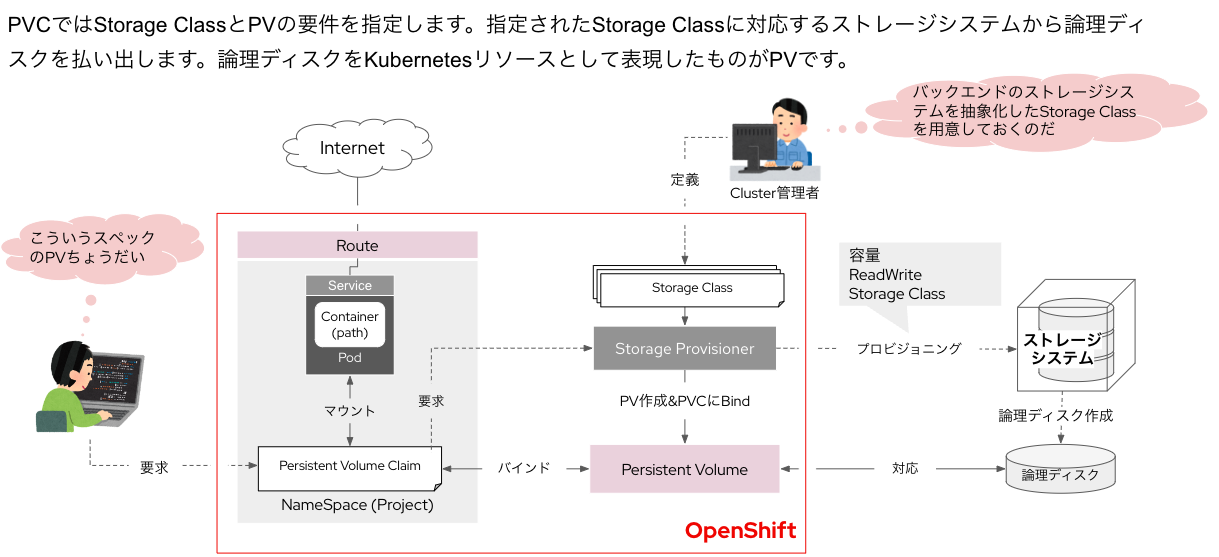
なお、ストレージシステムと論理ディスク、あるいはStorageClassとPersistentVolumeなどの関係は、以下のイラストを参考に理解頂けます。
OpenShift Data Foundationを使ってRWX対応のブロックストレージをProvisioningできるようにする
諦めきれないので、OpenShift Data Foundation (ODF) をROSAにDeployして、cephベースのストレージを使えるにしてみました。
【注意】現時点においては、ROSAにおけるODFの利用はRed Hatの公式サポート対象ではありません。やるにしても自己責任でお願いします。
参考情報:
- https://access.redhat.com/solutions/5945751
- https://access.redhat.com/documentation/ja-jp/red_hat_openshift_data_foundation/4.14
- https://access.redhat.com/labs/odfsi/#T0RGIGFzIFNlbGYtTWFuYWdlZCBTZXJ2aWNlLDQuMTQuNCwxLDAsMCwwLDA=
「OpenShift Data Foundation Operator」をインストールします。OperatorHubからインストールしてください。
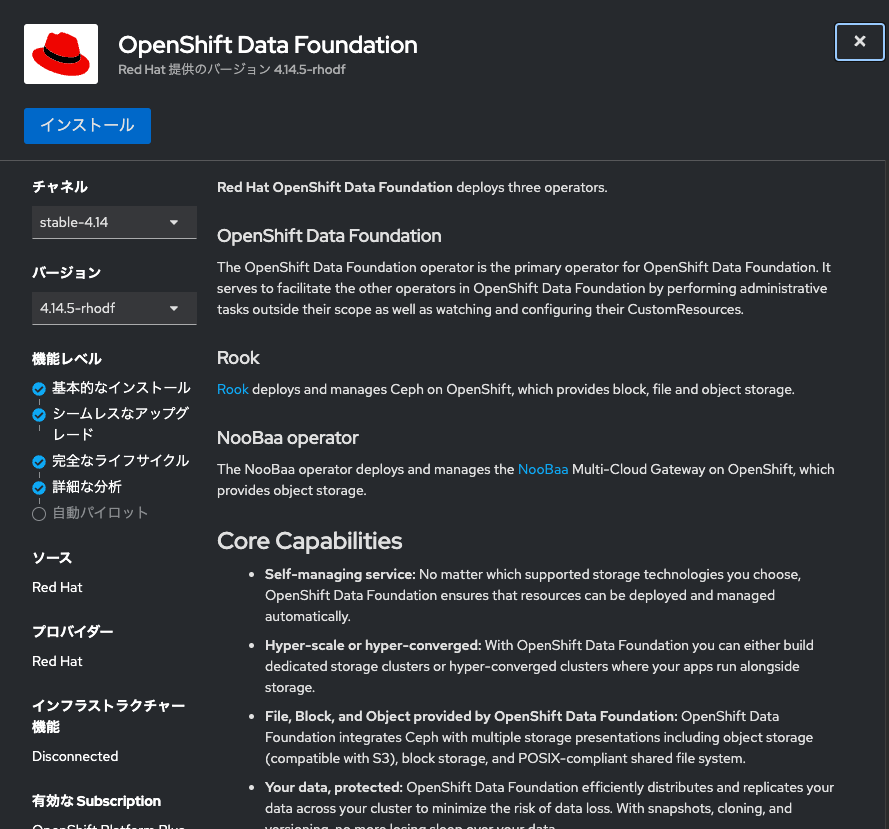
設定はそのままでインストール〜!
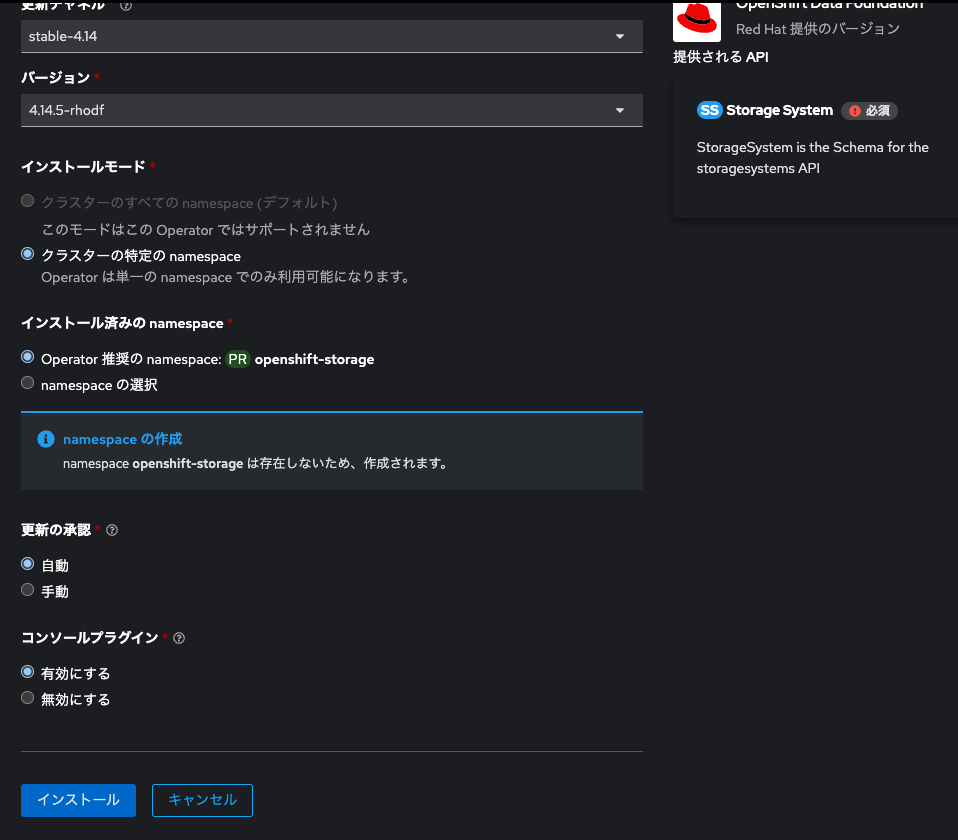
インストールが終わるとStorageSystemの作成と画面コンソールの更新を促されますのでそのようにしてください。
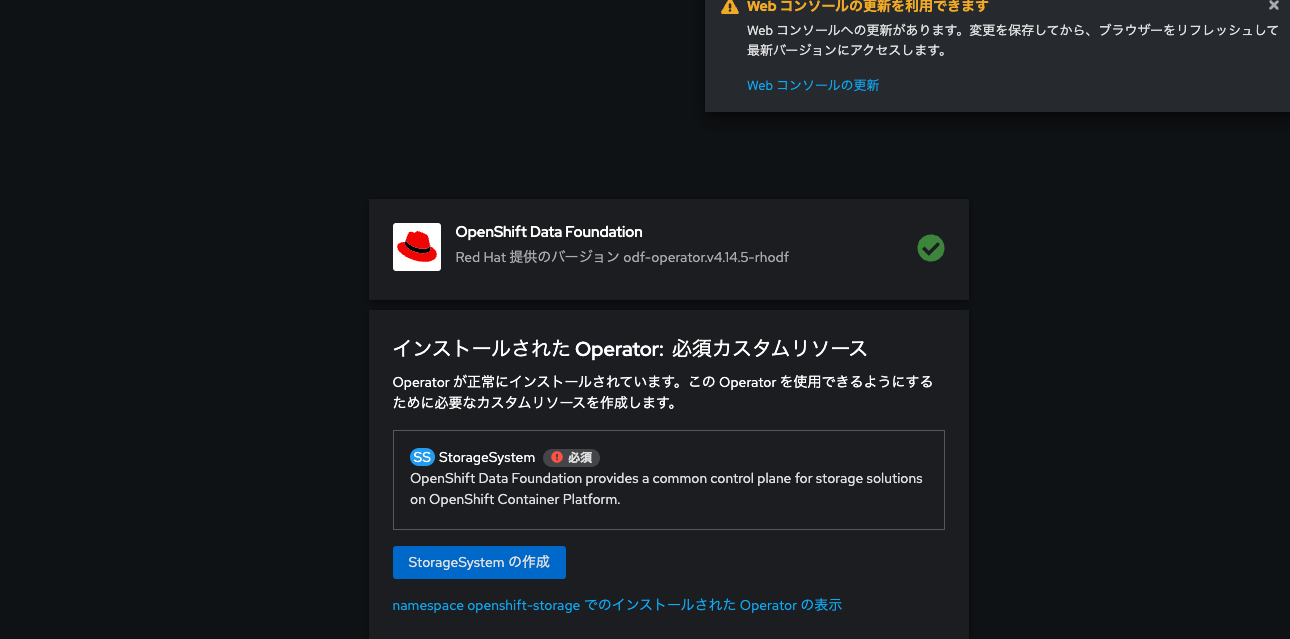
バッキングストレージはEBSを使います。ので、おそらくデフォルトで選ばれているgp3をそのまま選びます。
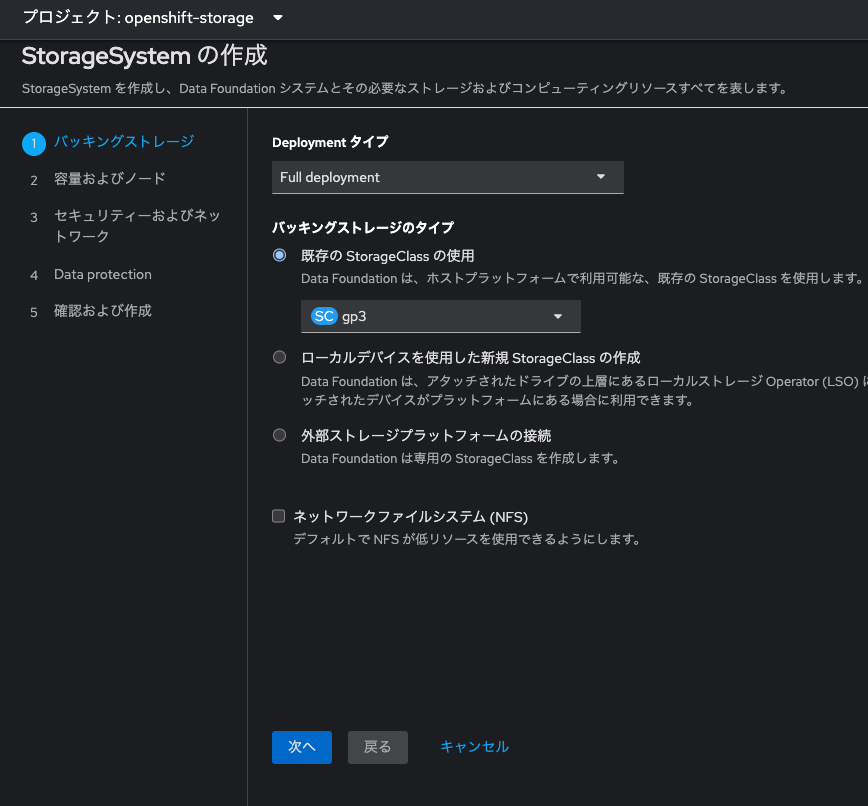
「次へ」をクリックすると、cephクラスタを構成する為のWorker Node選択画面に行きます。
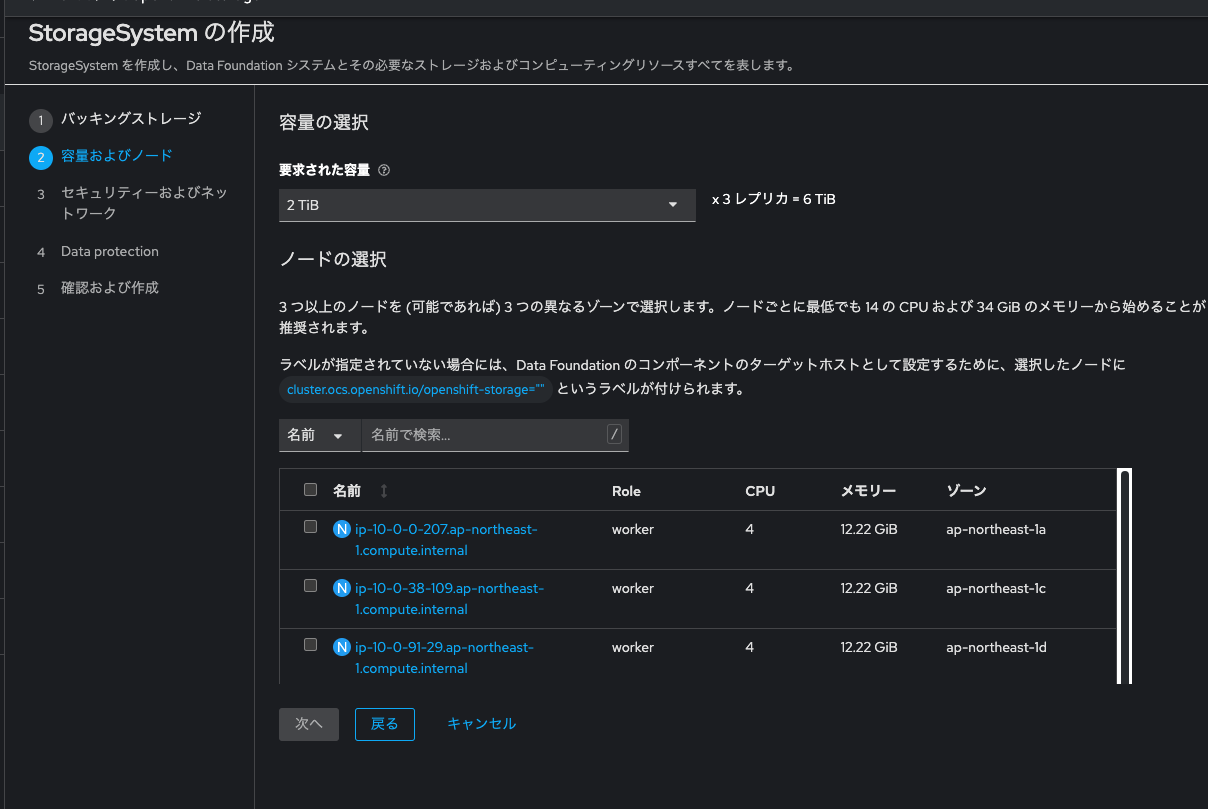
このNodeの条件が「3 つ以上のノードを (可能であれば) 3 つの異なるゾーンで選択します。ノードごとに最低でも 14 の CPU および 34 GiB のメモリー」ということでして、cephクラスタ用にNodeを更に追加します!
再度「Red Hat Hybrid Cloud Console」からadd machine poolする
条件に適合するMachineを選んでください。とりあえずm5.4xlargeを選んでおきました。
Auto Scallingなどは同じくご自由に!
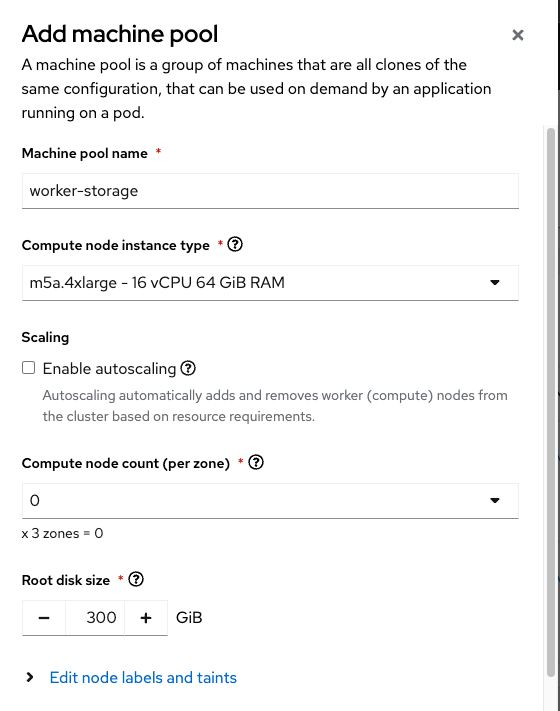
これも任意なのですが、あとで見つけやすいように、「Node labels」にnode-role.kubernetes.io/storage: ''を追記しておきました。
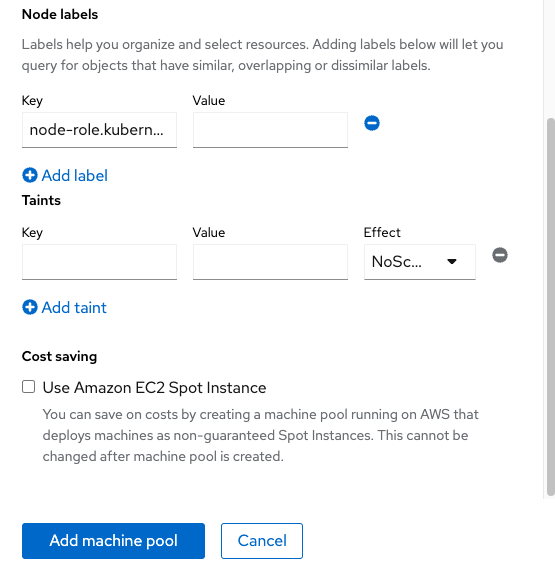
「Add machine pool」を選択し、NodeとしてのProvisioning完了までしばし待ちます。また30分くらい待つ。
~ % oc get nodes
NAME                                             STATUS   ROLES                  AGE    VERSION
ip-10-0-0-207.ap-northeast-1.compute.internal    Ready    worker                 12h    v1.27.6+f67aeb3
ip-10-0-11-81.ap-northeast-1.compute.internal    Ready    storage,worker         30m    v1.27.6+f67aeb3
ip-10-0-13-247.ap-northeast-1.compute.internal   Ready    infra,worker           12h    v1.27.6+f67aeb3
ip-10-0-31-160.ap-northeast-1.compute.internal   Ready    control-plane,master   12h    v1.27.6+f67aeb3
ip-10-0-33-6.ap-northeast-1.compute.internal     Ready    infra,worker           12h    v1.27.6+f67aeb3
ip-10-0-38-109.ap-northeast-1.compute.internal   Ready    worker                 12h    v1.27.6+f67aeb3
ip-10-0-50-57.ap-northeast-1.compute.internal    Ready    metal,worker           104m   v1.27.6+f67aeb3
ip-10-0-56-20.ap-northeast-1.compute.internal    Ready    storage,worker         30m    v1.27.6+f67aeb3
ip-10-0-59-203.ap-northeast-1.compute.internal   Ready    control-plane,master   12h    v1.27.6+f67aeb3
ip-10-0-6-250.ap-northeast-1.compute.internal    Ready    metal,worker           104m   v1.27.6+f67aeb3
ip-10-0-64-220.ap-northeast-1.compute.internal   Ready    control-plane,master   12h    v1.27.6+f67aeb3
ip-10-0-67-158.ap-northeast-1.compute.internal   Ready    metal,worker           105m   v1.27.6+f67aeb3
ip-10-0-83-142.ap-northeast-1.compute.internal   Ready    infra,worker           12h    v1.27.6+f67aeb3
ip-10-0-91-29.ap-northeast-1.compute.internal    Ready    worker                 12h    v1.27.6+f67aeb3
ip-10-0-92-153.ap-northeast-1.compute.internal   Ready    storage,worker         30m    v1.27.6+f67aeb3
Provisioningが完了しました。再びODFの画面に戻ってきて、cephクラスタ用のNode(Storage)を選択します。
当該Node達はストレージクラスタとしてのみ使う予定なので、「テイントノード」にチェックを入れてください。
※テイント(Taint)を付けられたNodeには、明示的にNode指定をしたワークロード以外はスケジューリングされなくなります。
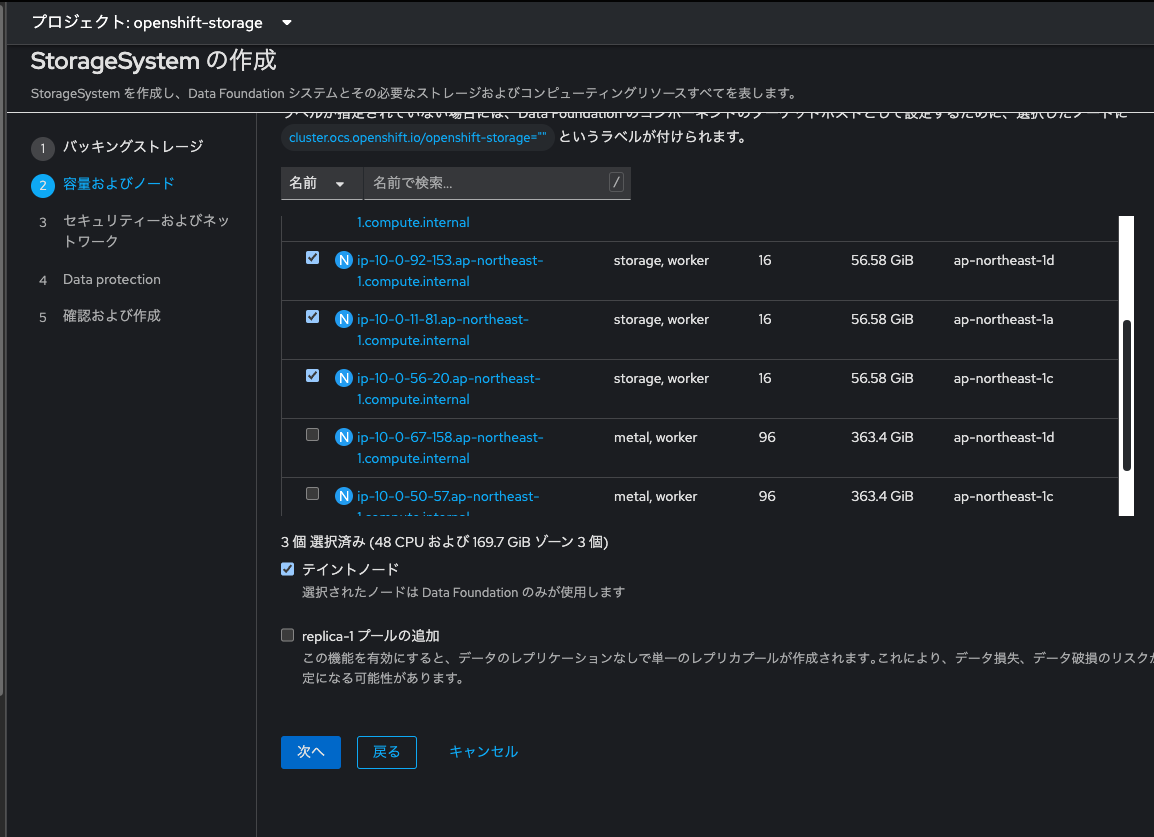
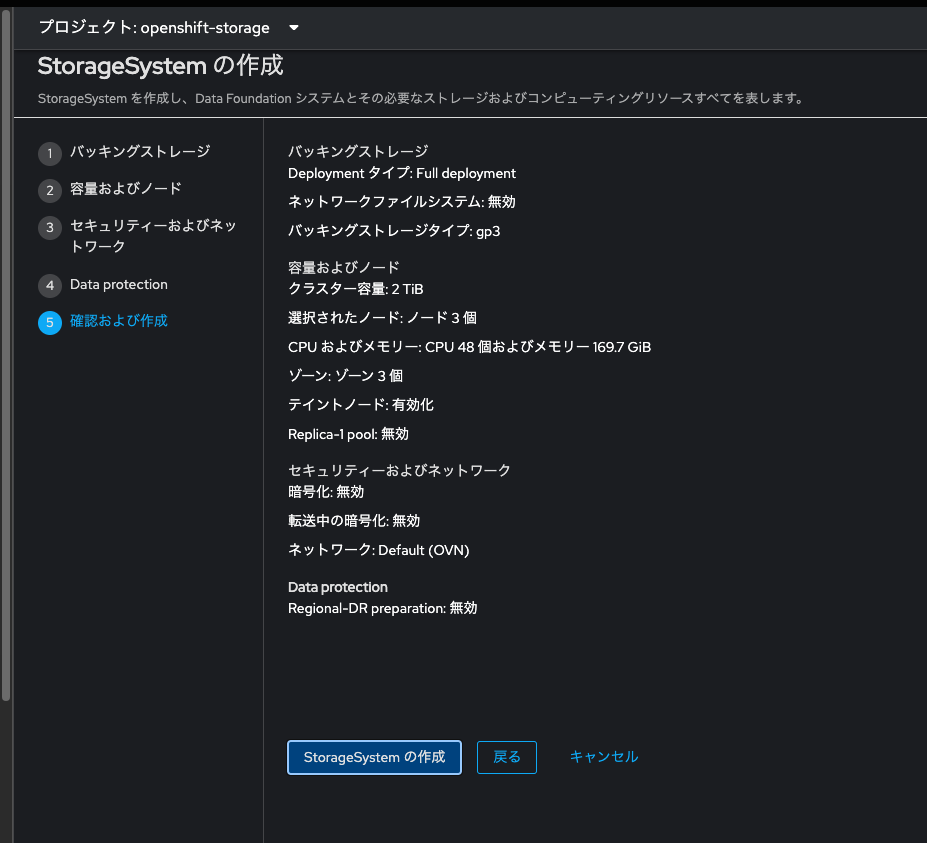
「次へ」をクリック、その後の設定はデフォルトでOKです。
ストレージクラスタの作成過程は、ストレージ → Data Foundation → Topologyで見ることができます。
途中、色んなアラートが出てびっくりするのですが、放っておけばストレージクラスタが完成しますので、しばし待ちます。
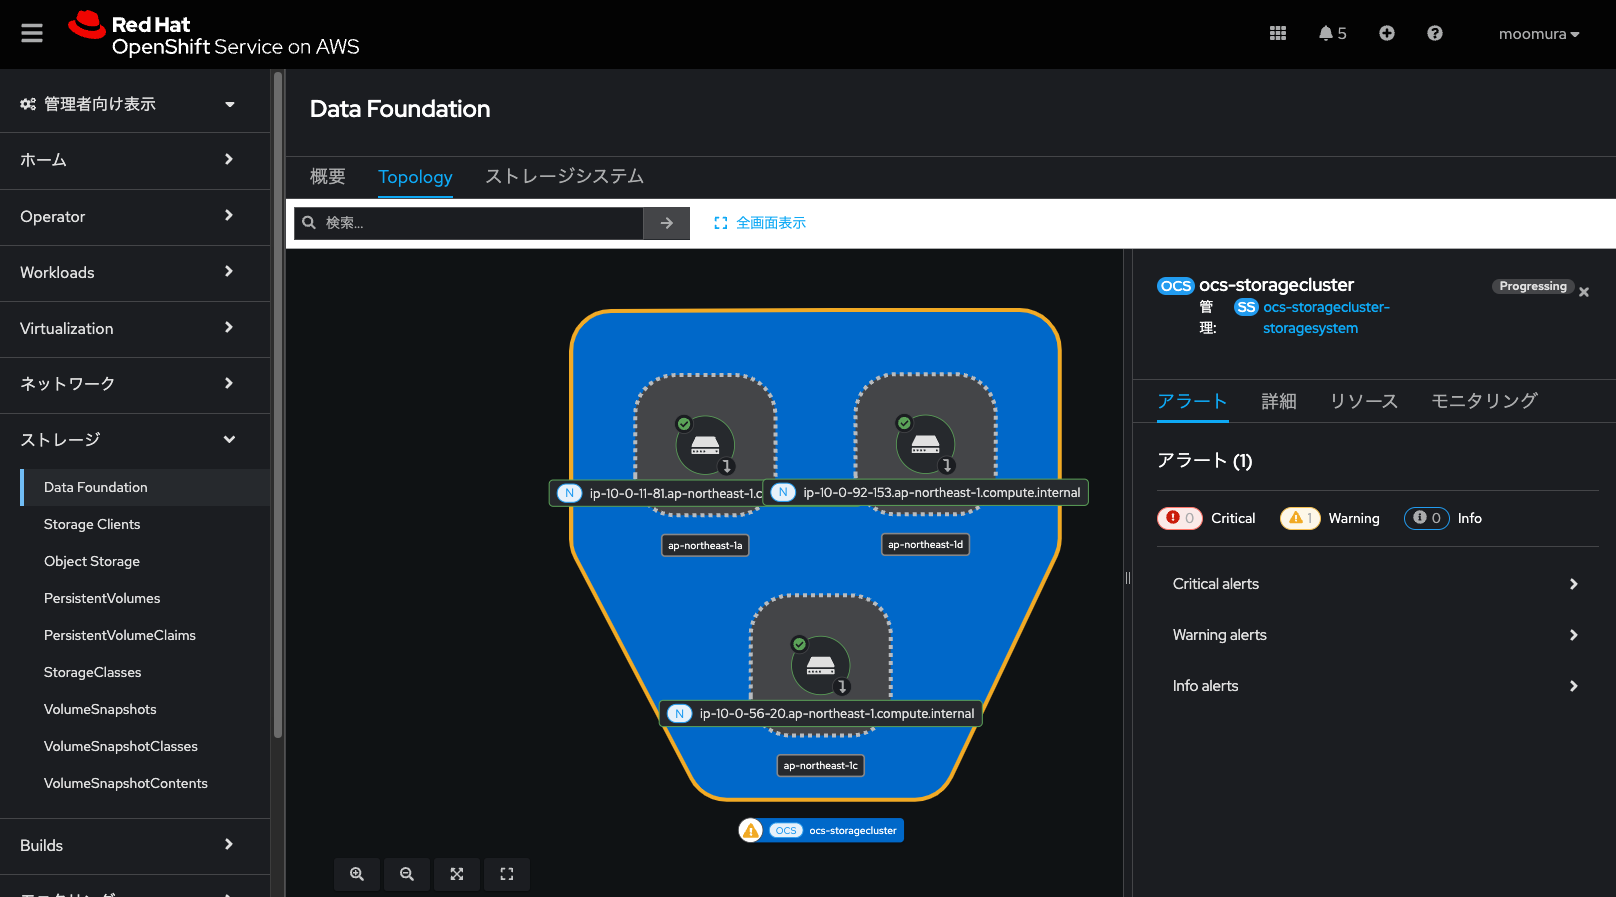
ストレージクラスタが完成しました。
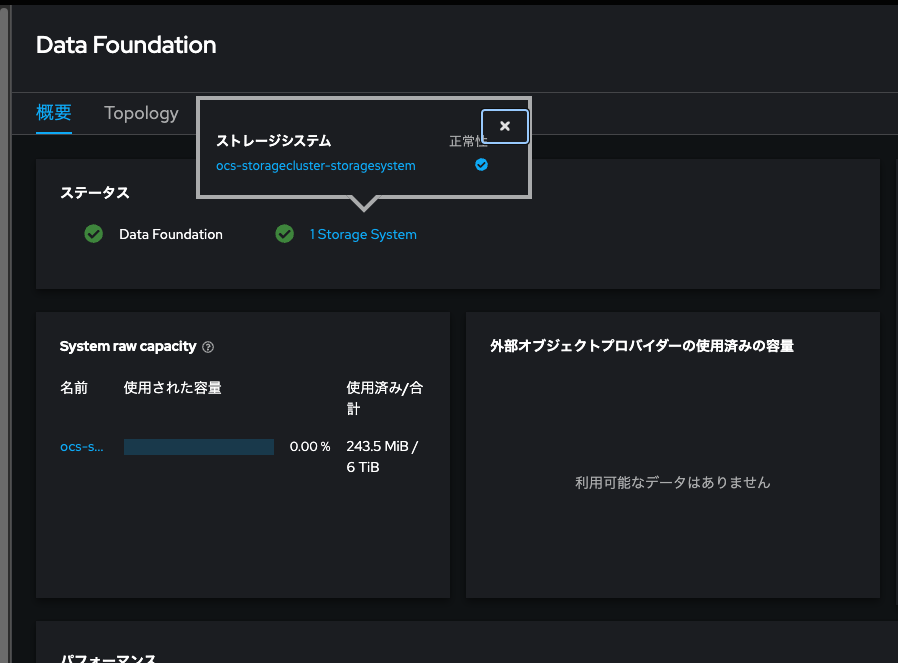
こんな感じです。
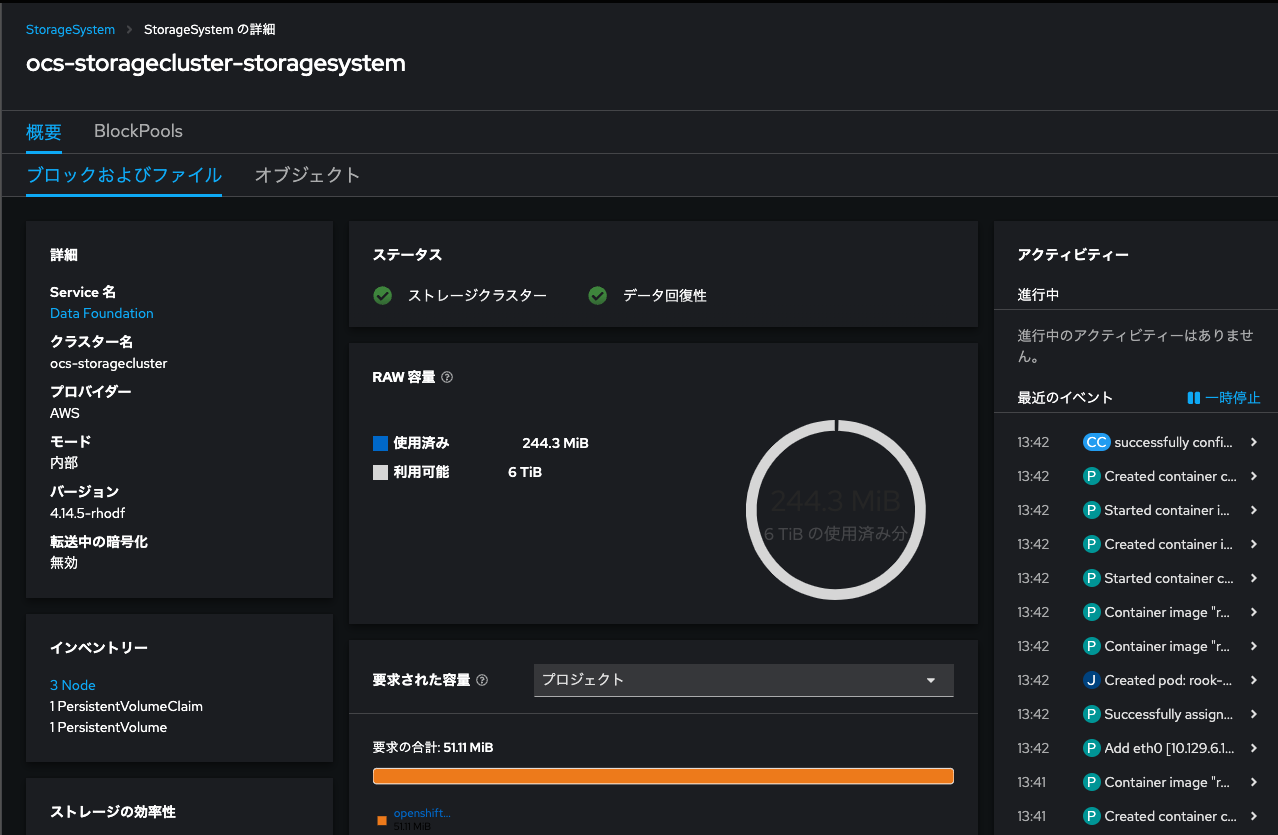
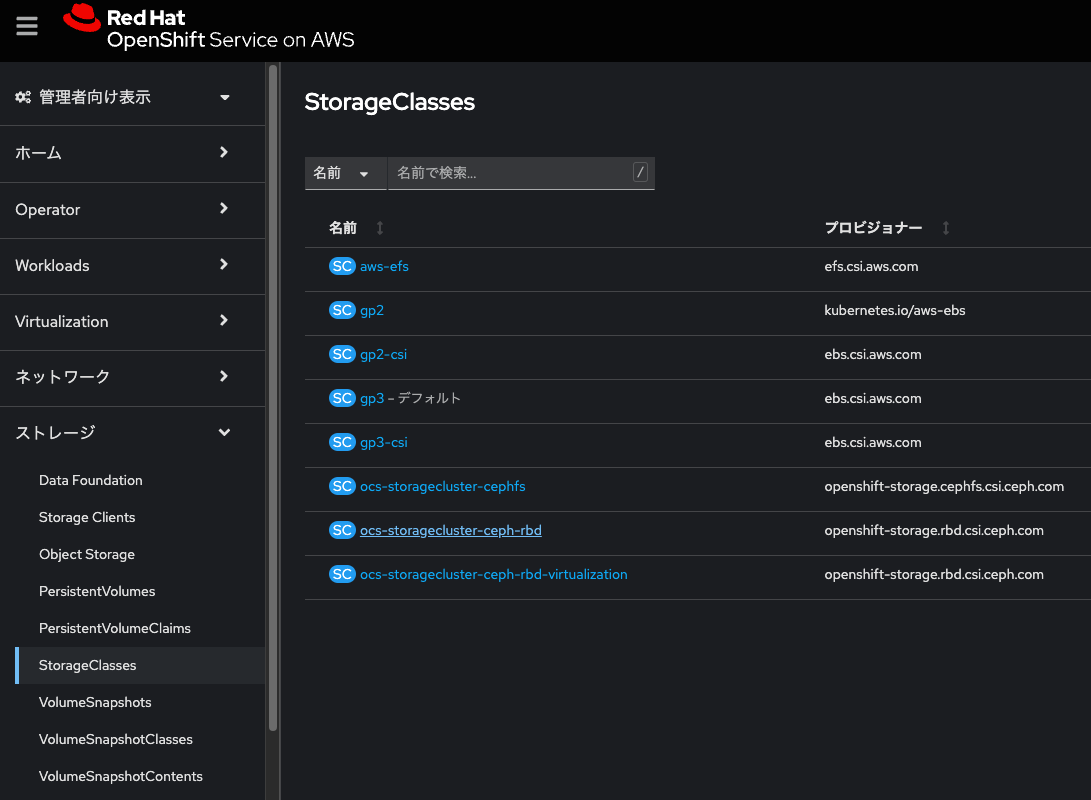
StorageClass一覧を見てみてください。ODFから払い出されたcephベースのリソースが見えますね。
※接頭辞にocsと付いてるやつ。上からファイルストレージ、ブロックストレージ(デバイス)、オブジェクトストレージに該当するStorageClassが追加されます。便利!
さて、VMのVolumeとしてアタッチするべきPVのStorageClassは、ocs-storagecluster-ceph-rbdです。
再度VMを作成する
「Create」をクリックし、「From template」からFedoraを選択します。
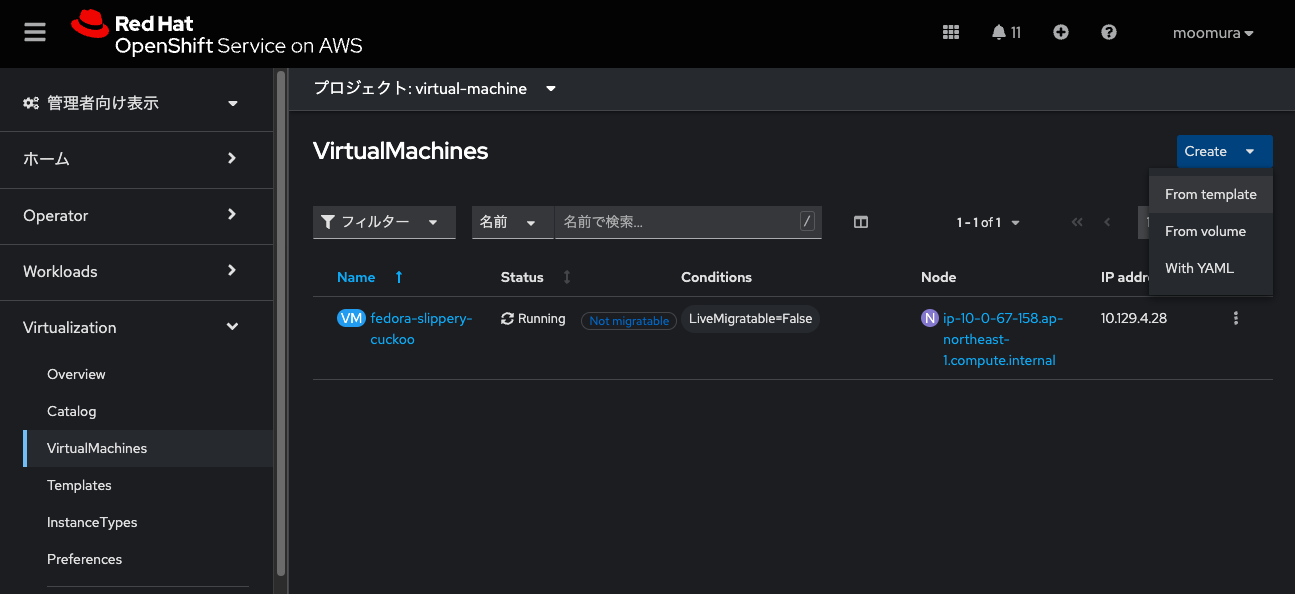
今回は「Customize VirtualMachine」をクリックします。
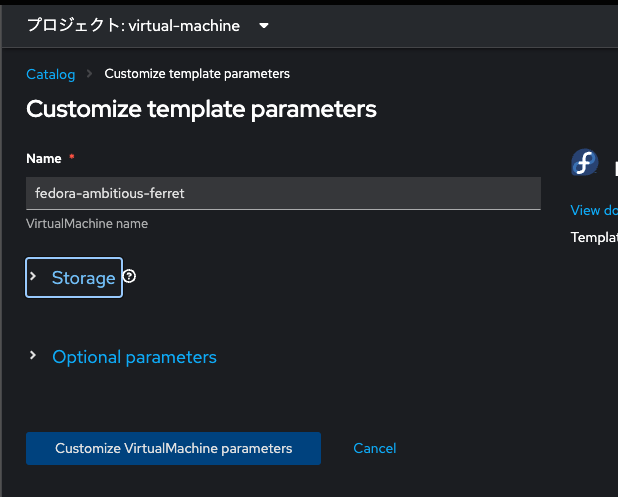
ここはそのまま先に進みます。
「Disk」タブをクリックします。ここでrootdiskをRWXなVolumeにしたいのです。
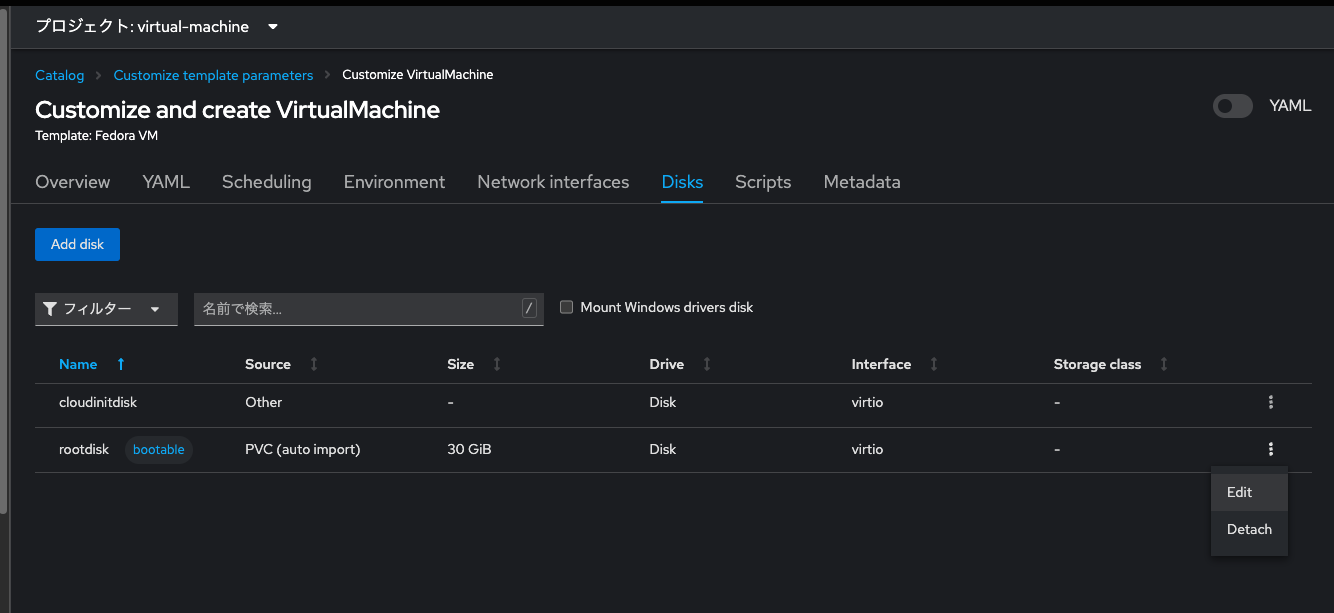
rootdisk行の右端の三点リーダみたいなボタンをクリックします。
StorageClassの選択画面に「ocs-storagecluster-ceph-rbd」が見えますね。
また、VM用にディファインされたと思しき「ocs-storagecluster-ceph-rbd-virtualization」も見えております。
ここではとりあえず通常の「ocs-storagecluster-ceph-rbd」を選択しておきます。
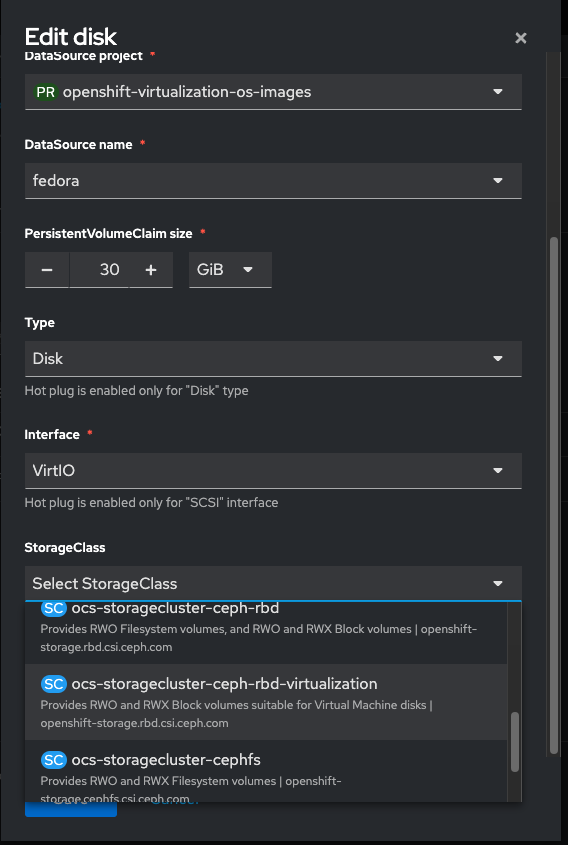
↓
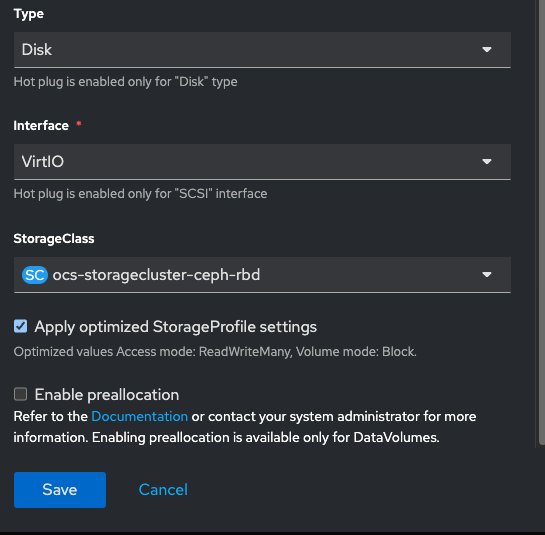
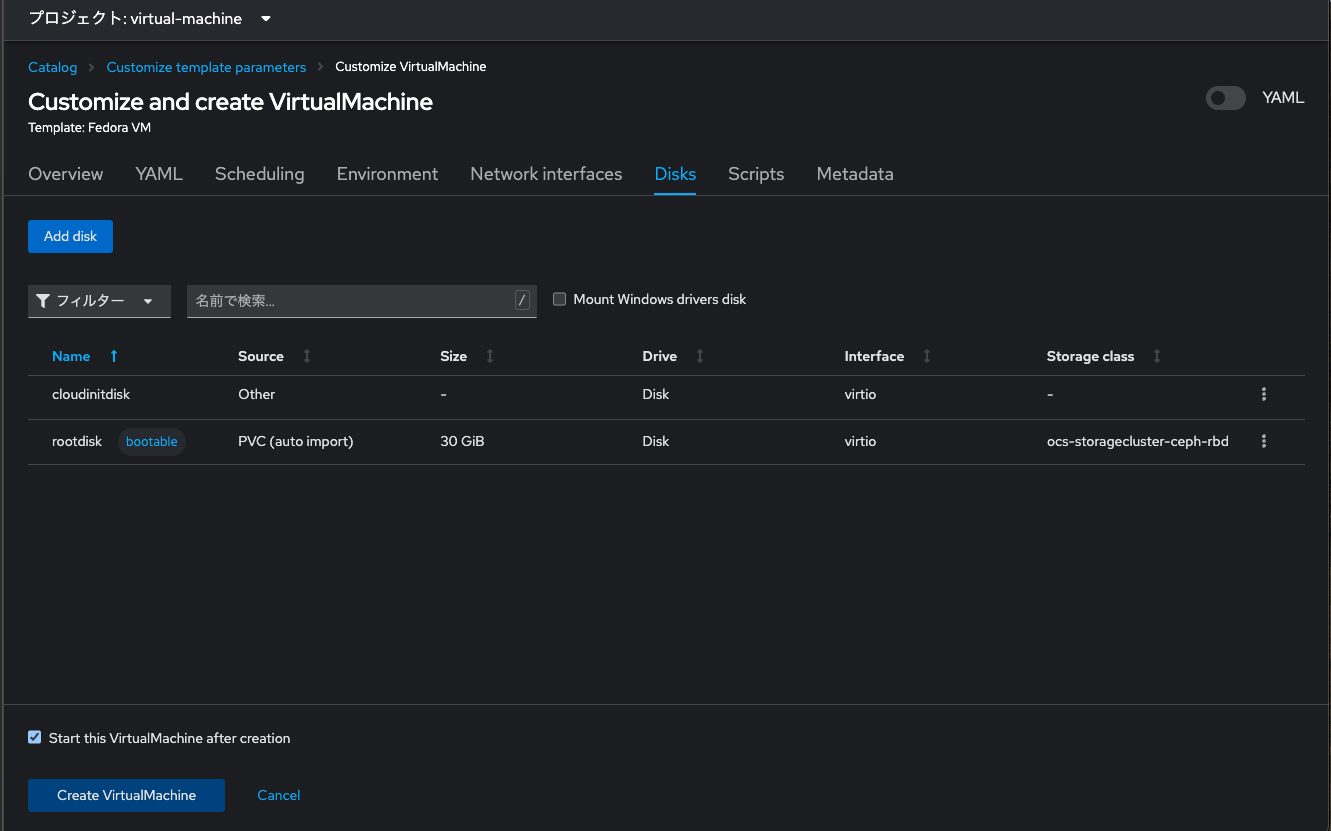
StorageClassを明示的に設定できました。「Create VirtualMachine」をクリック。
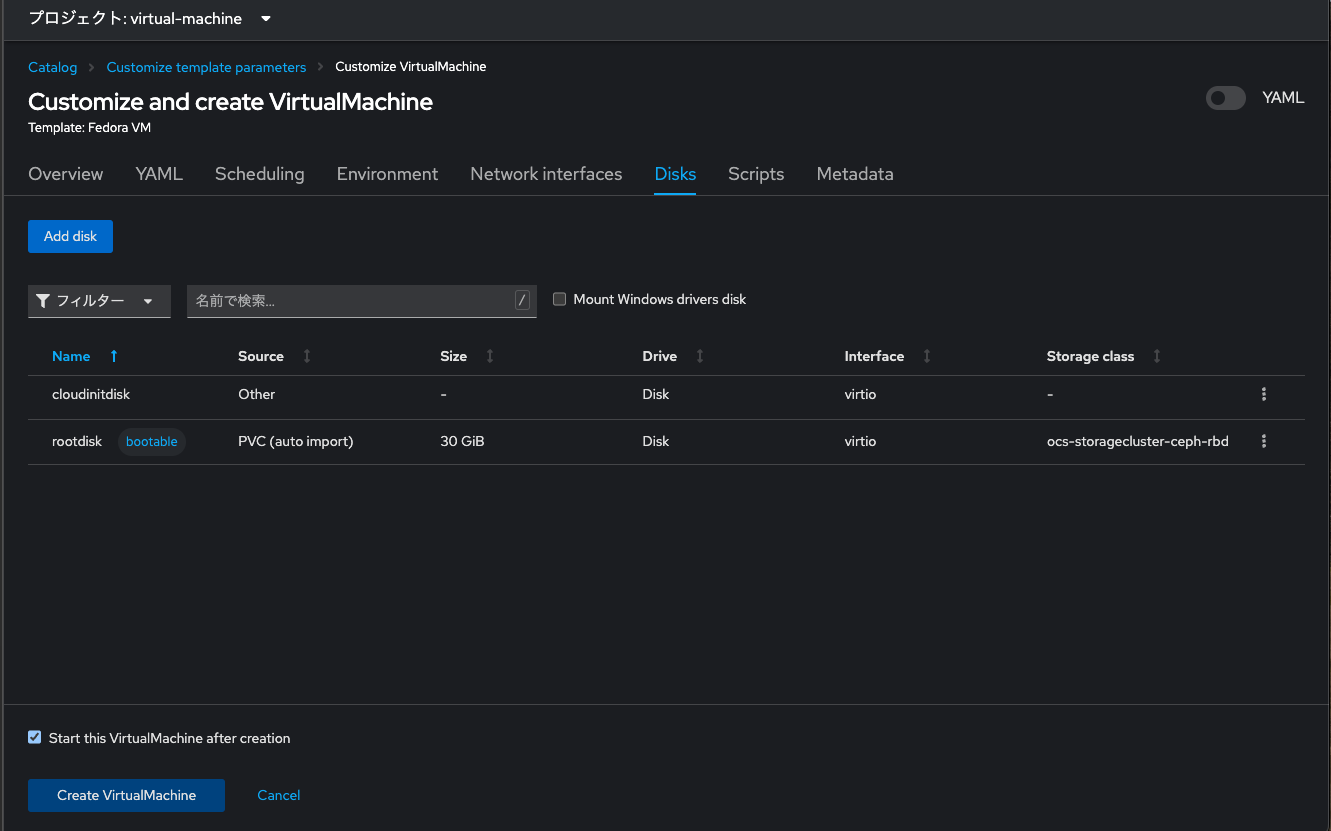
Provisioning開始されました。しばし待ちます。
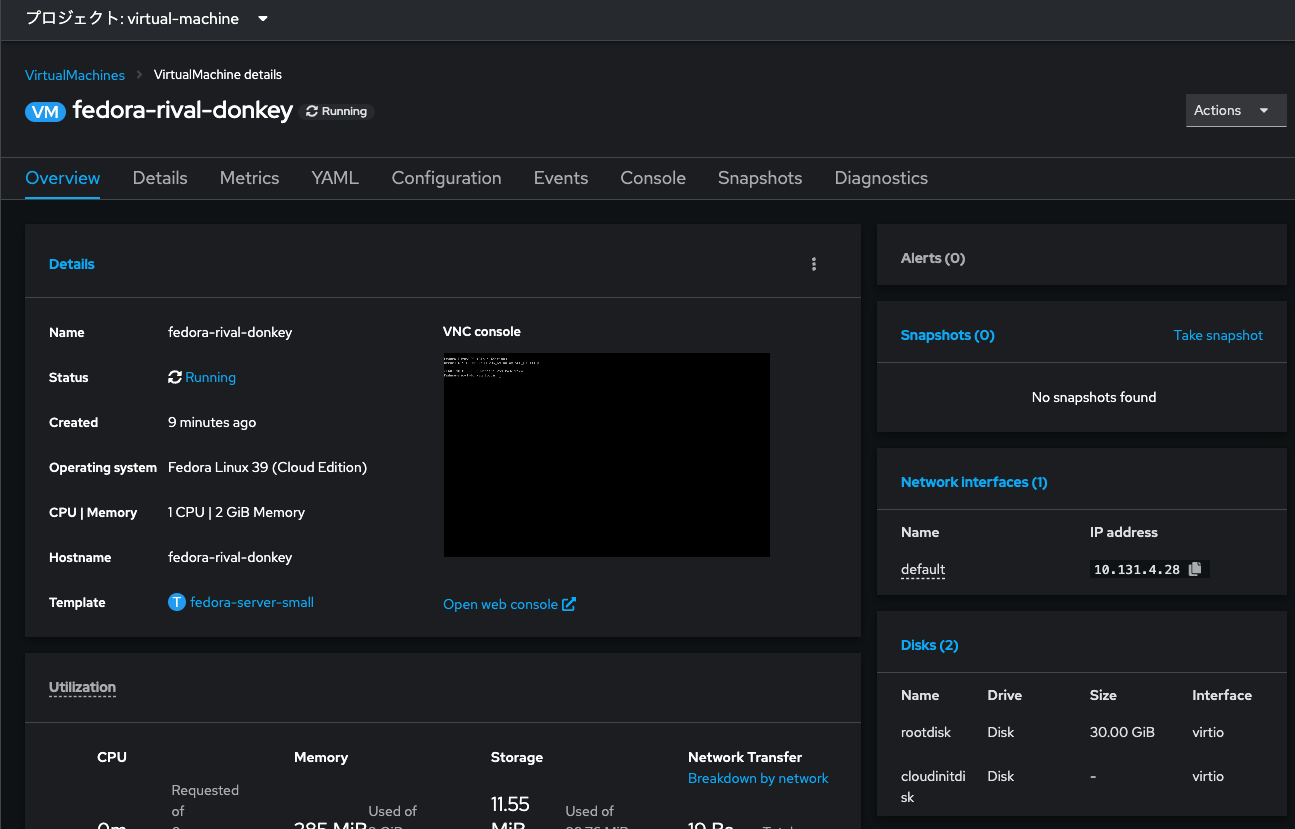
Provisioningが完了しました!しかもNot migratableも消えております!
Live Migrationをしてみる
前後の変化がシンプルに見やすいので、VM一覧画面から操作してみます。
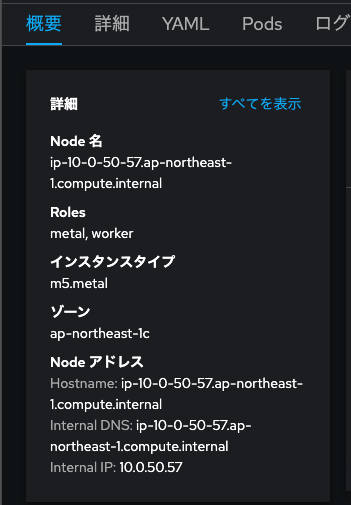
対象のFedora VMが動いているNodeはip-10-0-50-57.ap-northeast-1.compute.internalということです。

※ip-10-0-50-57.ap-northeast-1.compute.internalをクリックしてみれば、それは当然ながらBare Metal Nodeです。
三点リーダから「Migrate」をクリックしてみます。
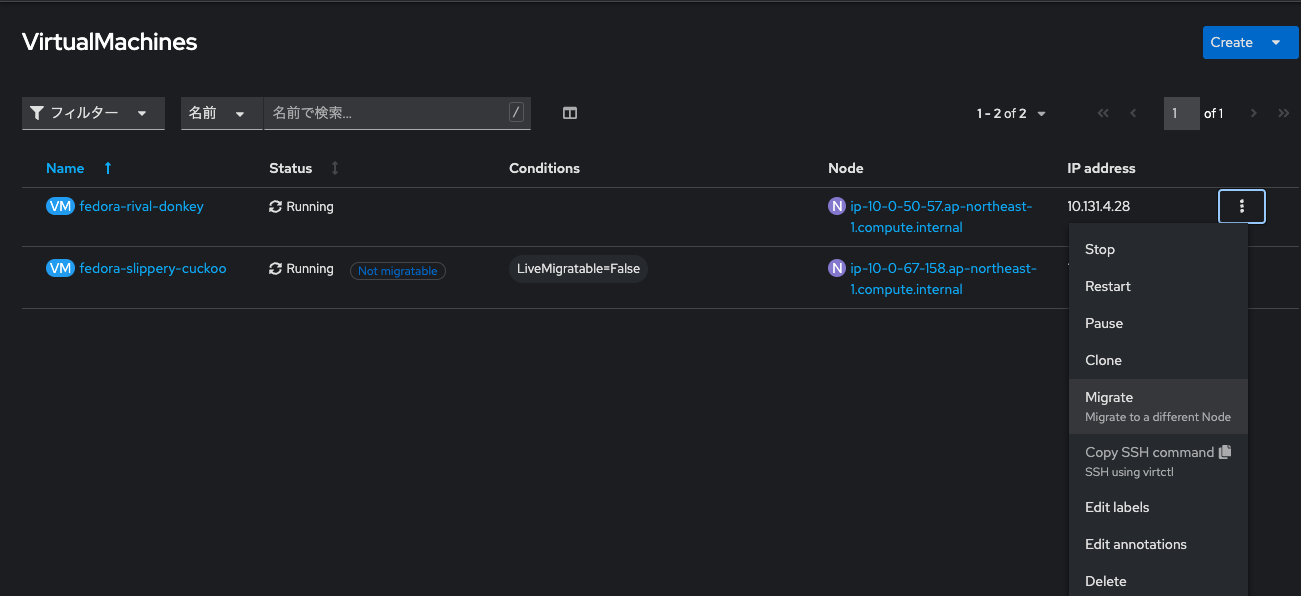
一瞬だけ「Status」がMigratingとなり、直ぐにRunningになります。
Nodeがip-10-0-67-158.ap-northeast-1.compute.internalに変わりました。

おわりに
ROSAでGAとなった「OpenShift Virtualization」を使い、Live Migration可能なVMを起動してみました。
「OpenShift Virtualization」によって、ContainerとVMを統一されたプラットフォームの上で取り扱う事ができるようになりました。
これから企業の仮想基盤上のシステム・アプリケーションは、徐々にContainerベースのCloud Nativeなワークロードにモダナイゼーションされていくと思いますが、それでもパッケージソフトの制約等から、VMが完全に無くなることはないでしょう。
そうした場合において、「OpenShift Virtualization」が大いに役立つと思います。