前提
- Salesforce
- Google Drive API
設定
[Google] Google Driveを有効化 (参照)
[Google] Client ID, Client Secretの取得 (参照)
[Salesforce] Auth. Providersの設定 (参照)
[Google] Authorized redirect URIsの設定 (参照)
こちらは記事「Files ConnectでGoogle DriveをSalesforceに接続」を参照ください。
追加設定
上記設定に加えて追加設定です。
- External Credential
- Principal
- Named Credential
外部サービスへのNamed Credentialsは通常のNamed Credentialsとは分かれて設定できるようになっています。2024.11以前の設定方法はまだLegacyバージョンとして利用可能ですが、そのうち設定方法も統合されるかと思います。今回はExternal Named Credentialsで設定していきます。
External Named Credential
まずNamed CredentialsでExternal Credentailsのタブへいき、Newを押します。

Auth. ProviderはすでにGoogleDriveという名称で作成しているので再利用します。
参照 Auth. Providersを作成

| 項目 | 値 |
|---|---|
| Label | GoogleDrive(任意) |
| Name | GoogleDrive(任意) |
| Authentication Protocol | OAuth 2.0 |
| Authentication Flow Type | Browser Flow |
| Authentication Provider | GoogleDrive (既に作成したものを選択) |
Principal
次は、Principalですが、同External Credentialsの画面をスクロールすると下の方にRelated Named CredentailsとPrincipalsという項目があります。

最初は何もないのでまずPrincipalsのセクションのNewでPrincipalをひとつ作成します。

| 項目 | 値 |
|---|---|
| Parameter Name | GoogleDriveV3(任意) |
| Sequence Number | 1 |
| Identity Type | Per User Principal(ユーザーが個々で承認するため) |
| Scope | https://www.googleapis.com/auth/drive |
Named Credential
次はNamed Credentialsを、上記手順で作成したExternal CredentialとPrincipalを使って2つ作成していきます。まずNamed Credentialsで今度はNamed CredentialsのタブへいきNewをクリックします。余談ですが、プルダウンメニューは以前の設定方法のLegacyの作成ですが、今回は対象外です。
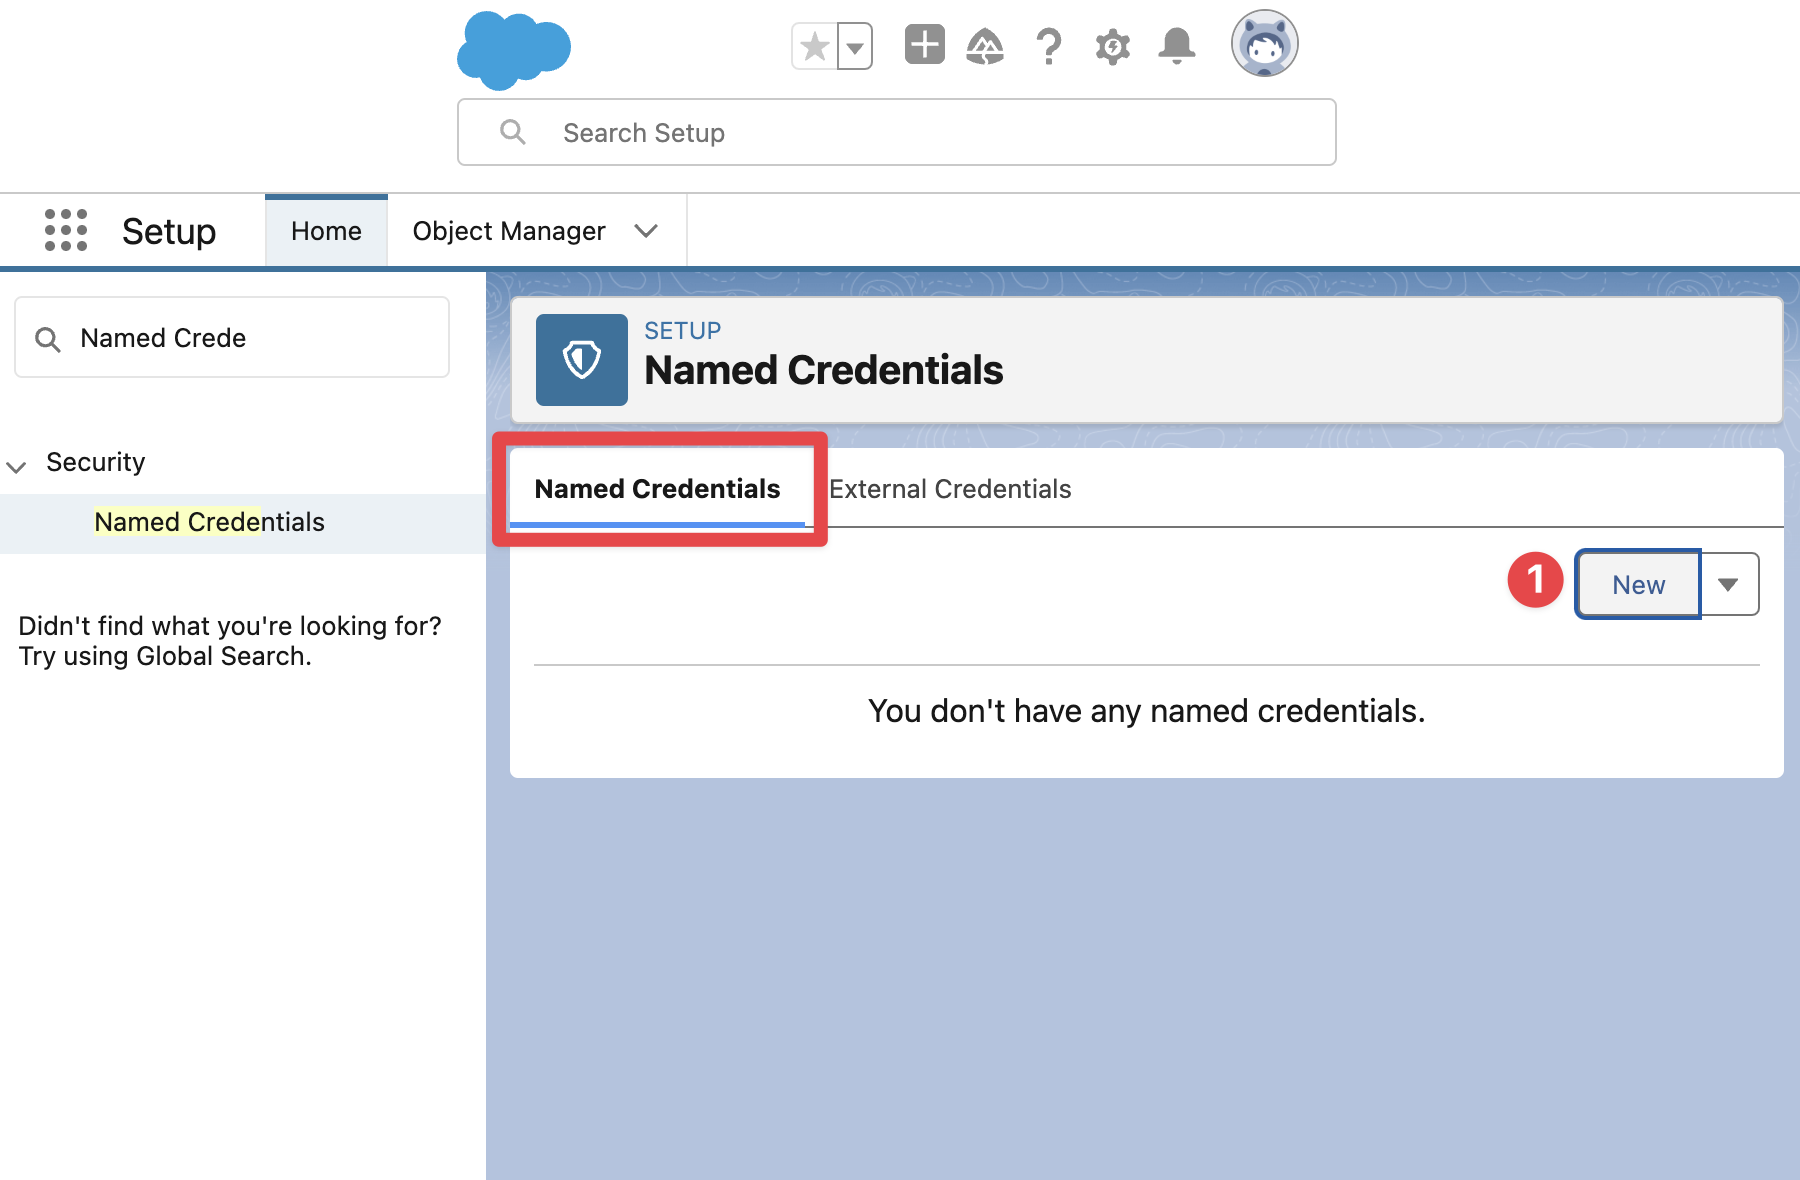
さて二つのNamed Credentailsを作成していきます。
- Google Drive API
- Google Drive APIのUpload
まずGoogle Drive APIですが、こちらはGoogle Drive APIの全体の機能を利用するScopeですが、もうひとつUpload用にNamed Credentialを作成します。
Named Credential (全体用)
| 項目 | 値 |
|---|---|
| Label | GoogleDrive(任意) |
| Name | GoogleDrive(任意) |
| URL | https://www.googleapis.com/drive/v3 |
| Enabled for Calouts | true |
| External Credential | GoogleDrive (上記で作成したものを選択) |
Named Credential(Upload用)
| 項目 | 値 |
|---|---|
| Label | GoogleDriveUpload(任意) |
| Name | GoogleDriveUpload(任意) |
| URL | https://www.googleapis.com/upload/drive/v3 |
| Enabled for Calouts | true |
| External Credential | GoogleDrive (上記で作成したものを選択) |
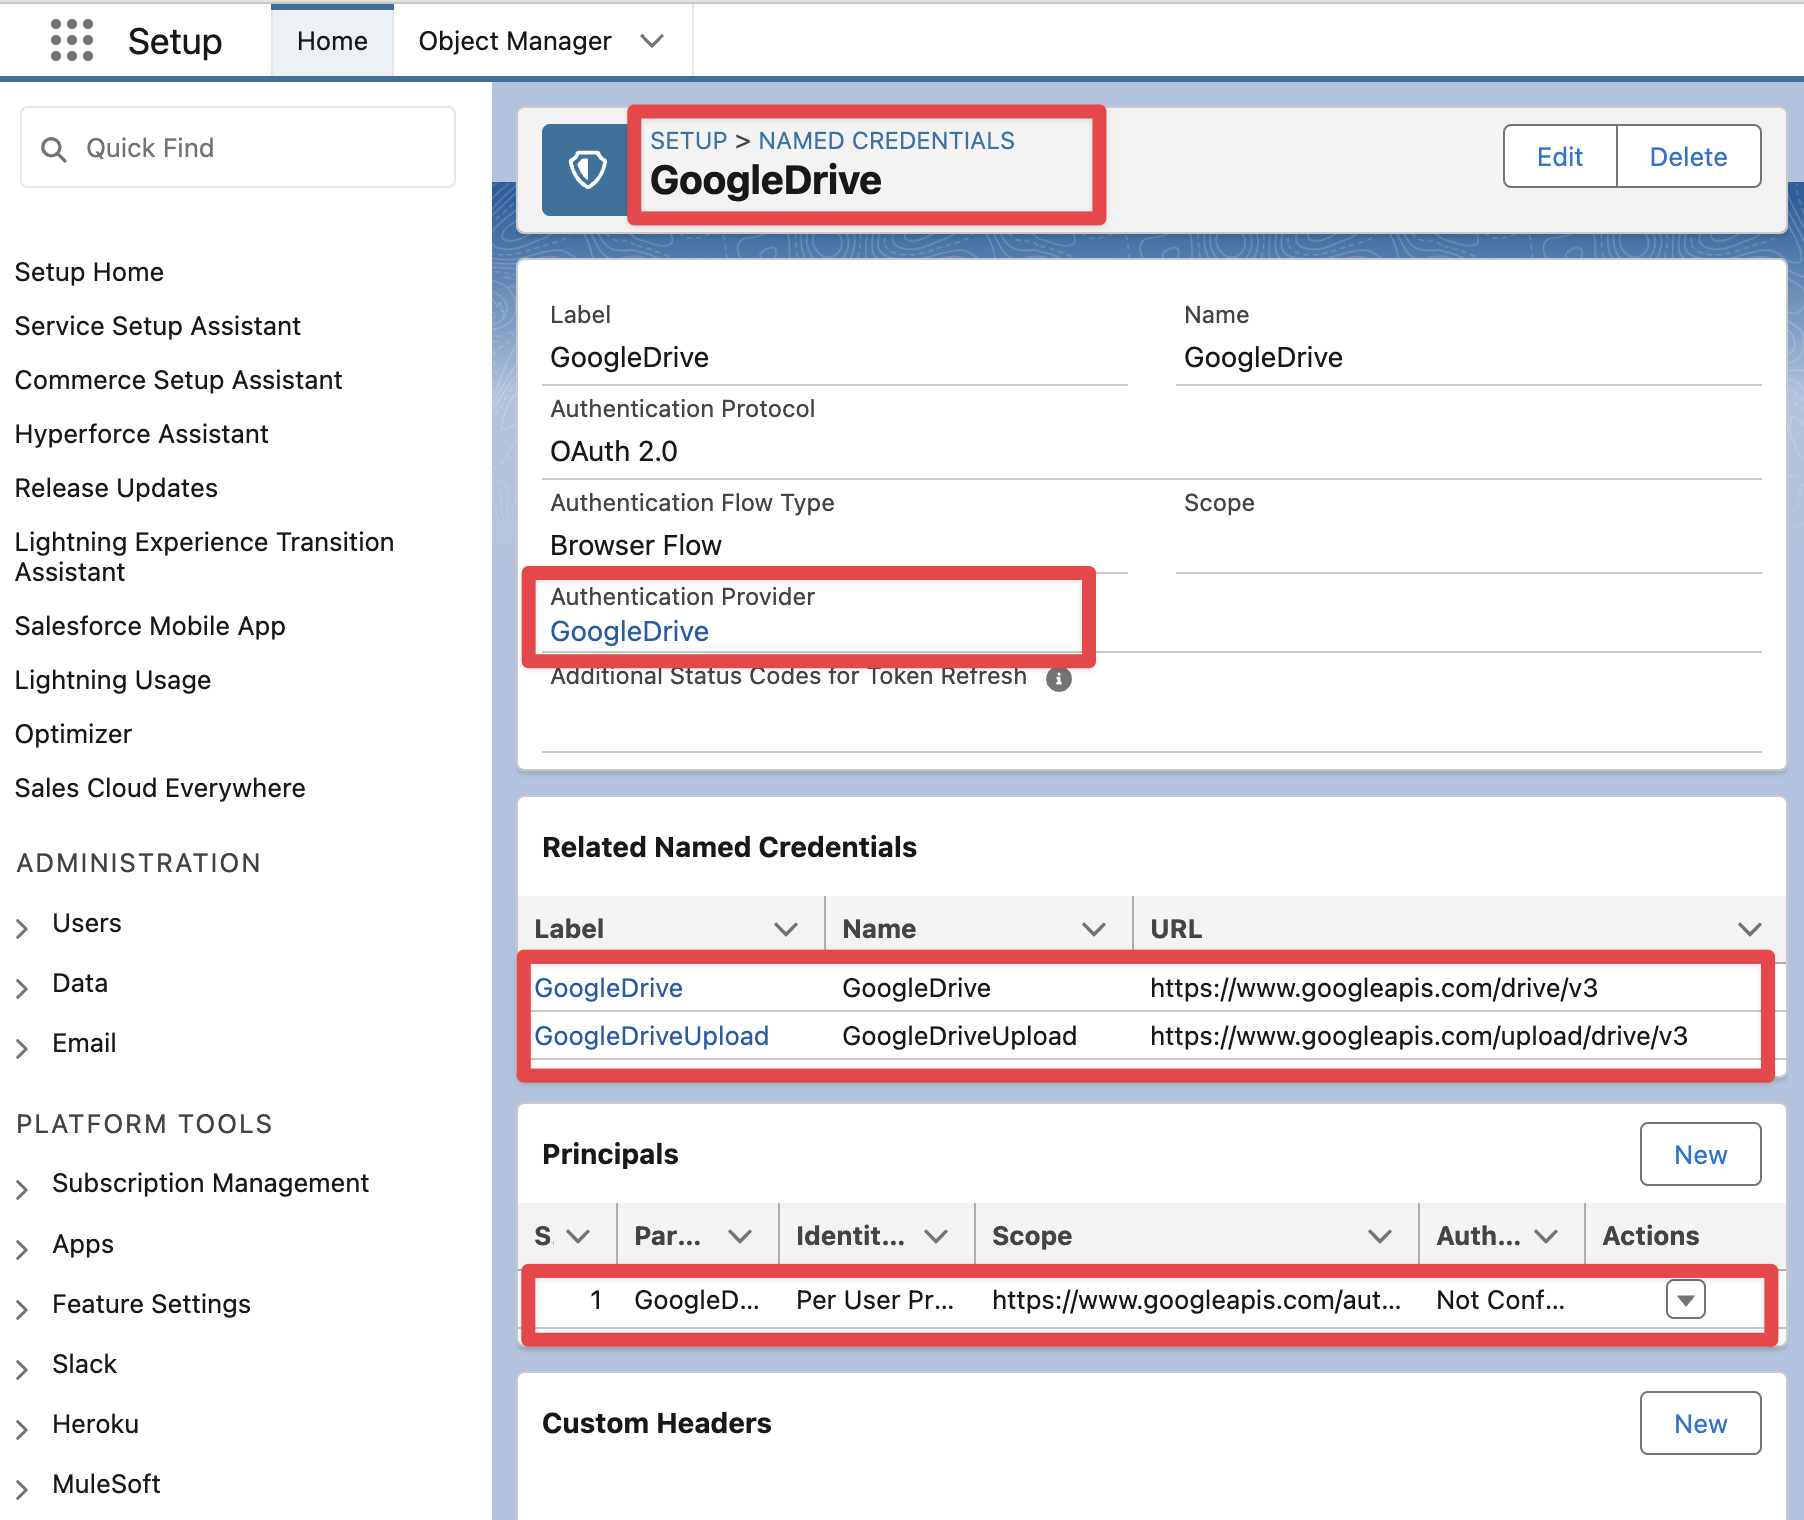
こちらをそれぞれ作成すると、同じExternal Credentialを利用したNamed Credentialsが作成されます。
Named Credentails (2つ)
External Credential(1つ)
External Credentialをクリックして再度見てみると、1つのAuth. Providerを利用して、2つのNamed Credentialsが紐づいているのがわかります。ただPrincipalがまだNot Configuredなので、次はConfigurationを行って有効化します。
Permission Set
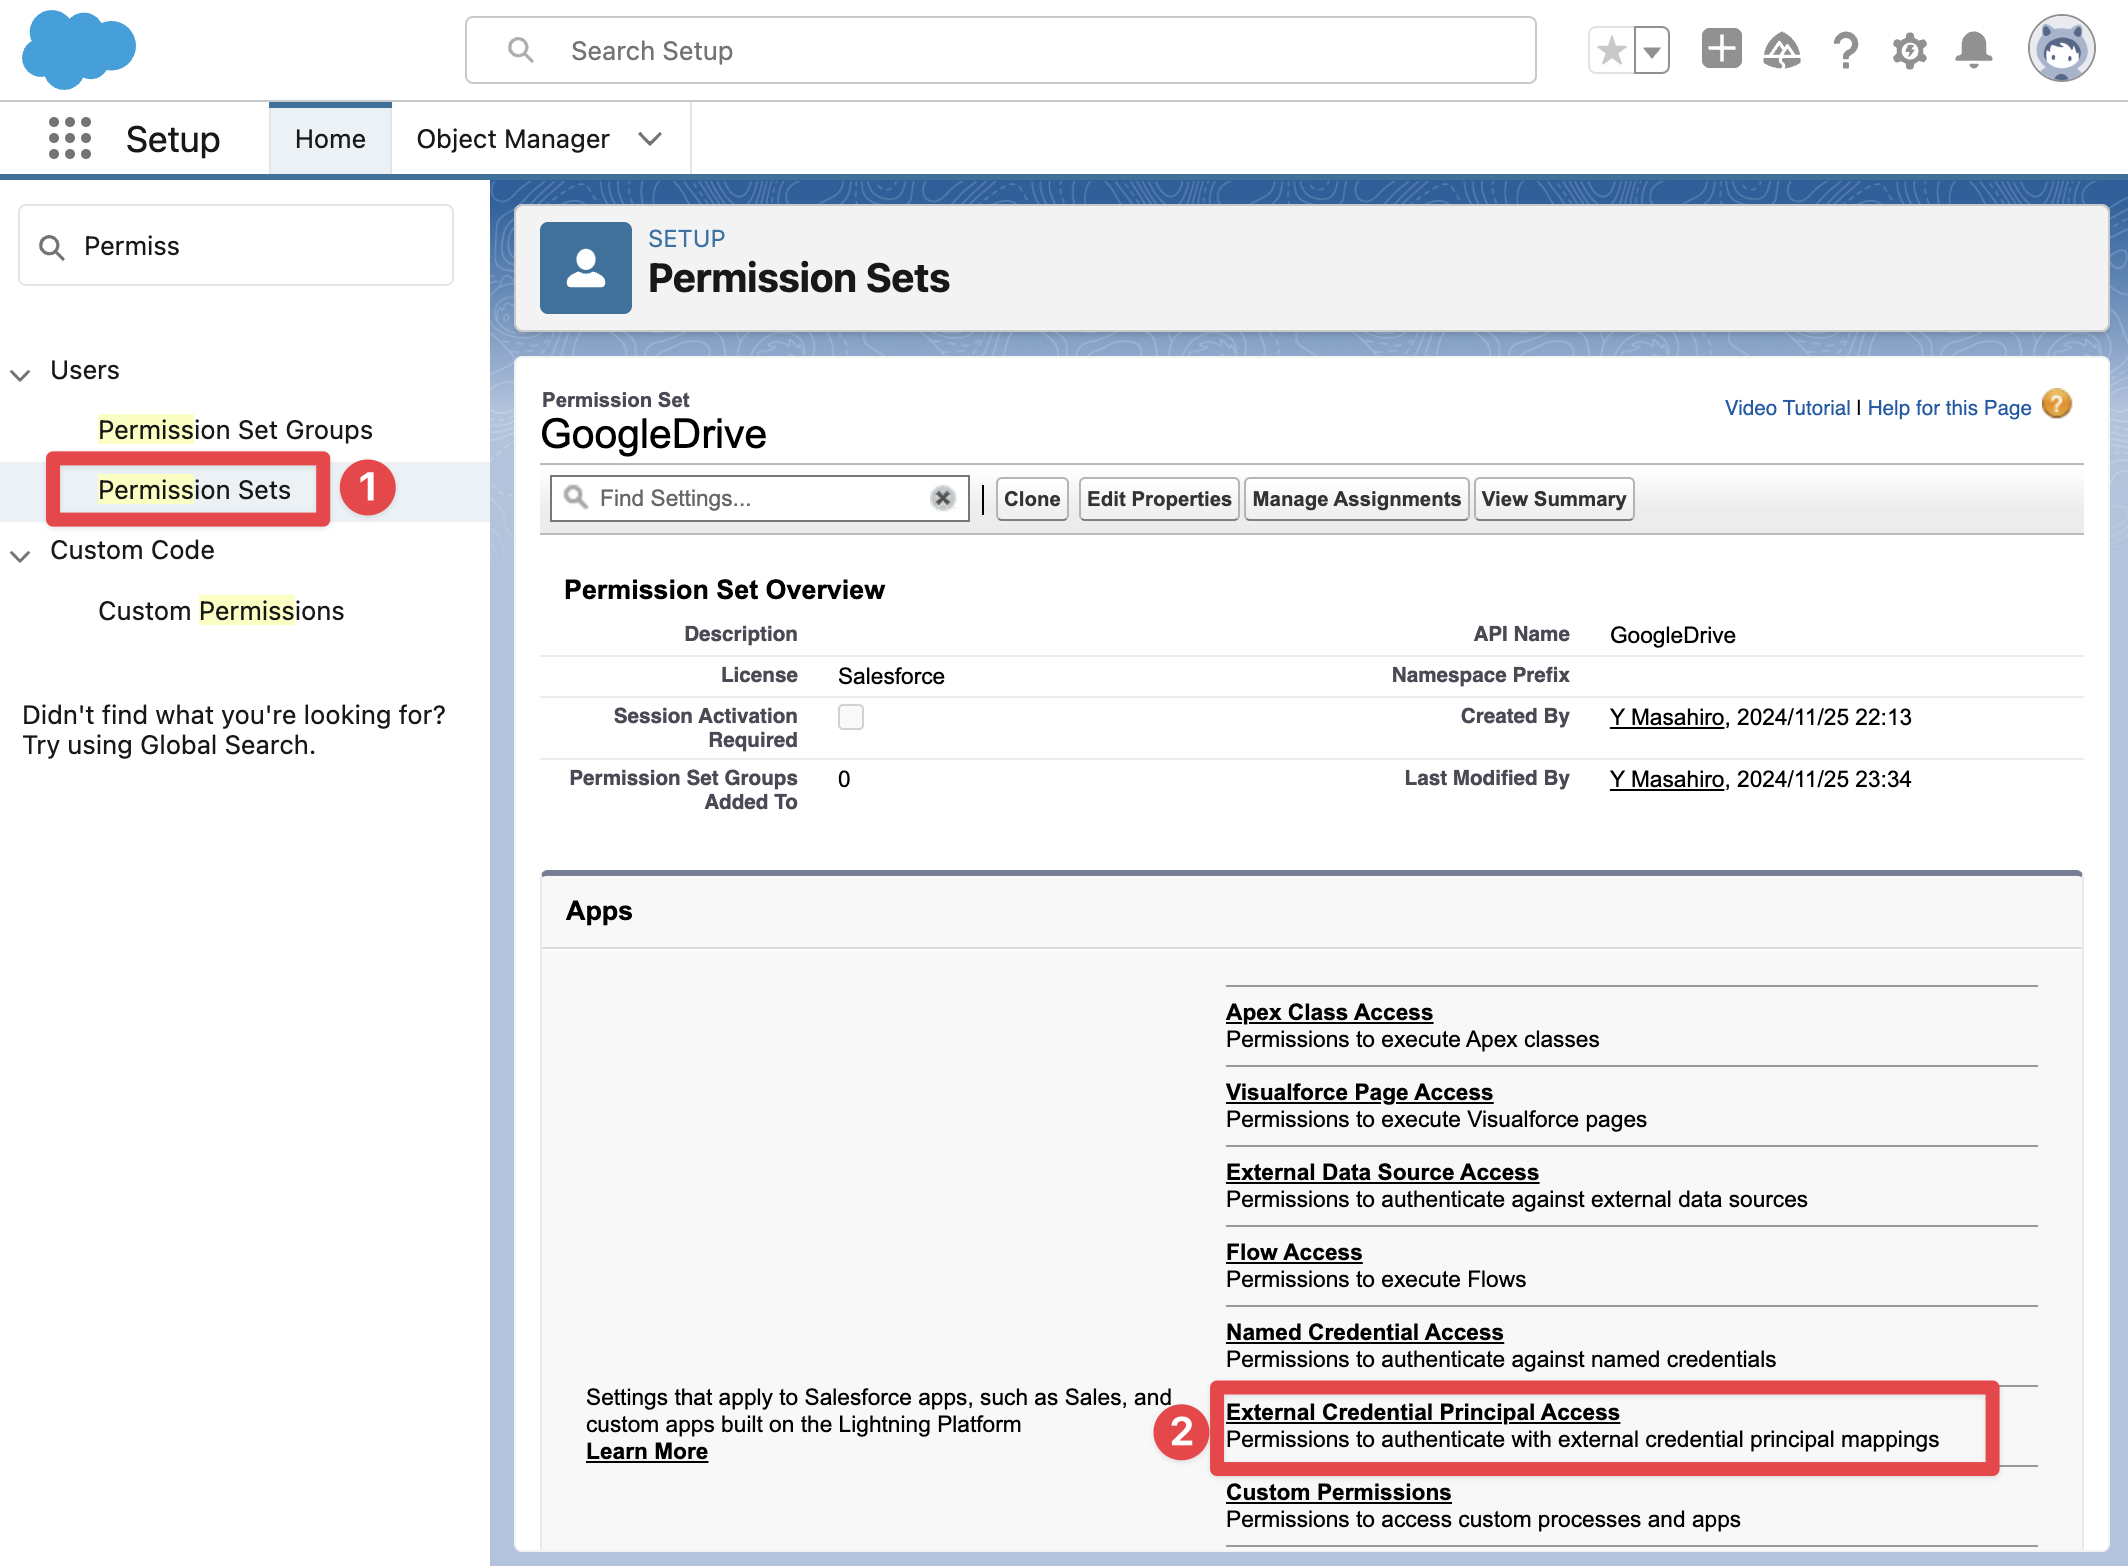
Configurationをする前にユーザーに対して先ほど作成したExternal Credentialsに対するAccessを付与する必要があります。Permission Setにいき、External Credentials Accessで付与します。
参照: Permission設定の作成し割り当て
Authentication
次は、PrincipalsがNot Configuredですので、こちらをConfiguredにします。Per User Principalなので、誰か一人がConfiguredにすればConfiguredになります。複数人が利用するためには、利用者個人がそれぞれ下記の認証プロセスをして、SalesforceからGoogle Driveへのアクセスを認証する必要があります。
- まずPersonal Settingに行くため右上のアイコンのSettingをクリック
- External Credentailsをクリック
- Allow Accessで認証プロセスへ
認証プロセスが始まるとGoogleとSalesforceへと認証の画面があるので進みます。
Googleとしてログイン認証
Salesforceへのログイン認証
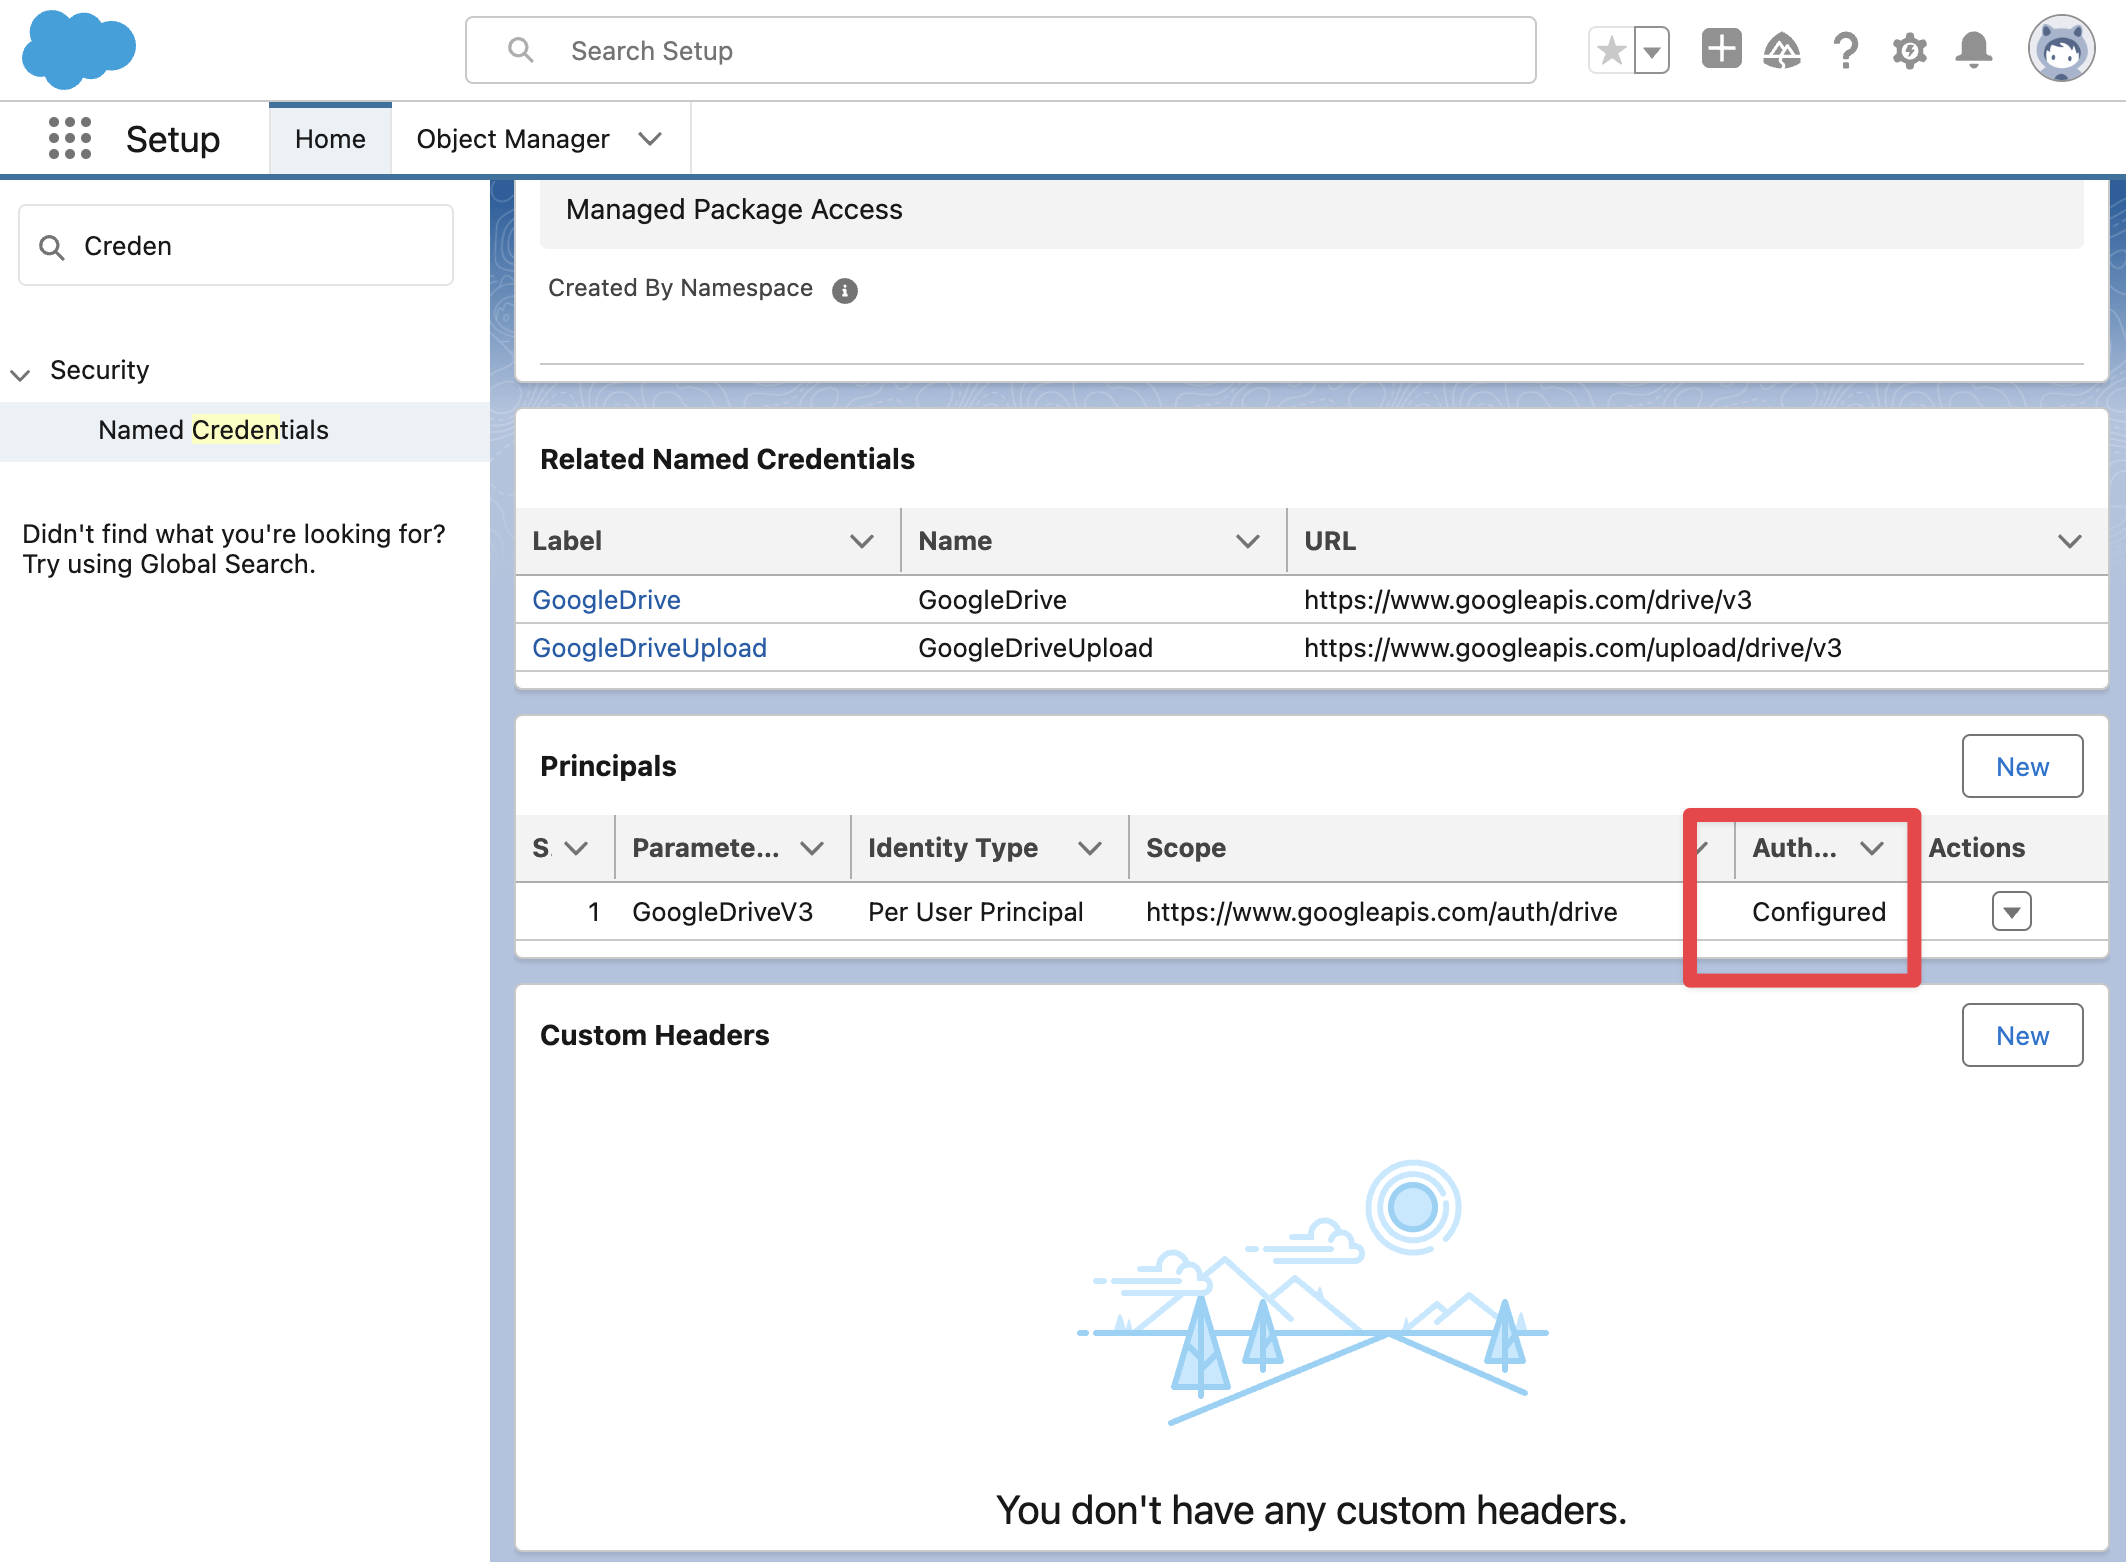
External Credentail側でもPrincipalsがConfiguredになっているのを確認します。
検証
さて、上記の設定はできました。お疲れさまです。
これからLWCでファイルアップロードのコンポーネントを作成していくのですが、ApexでいくつかのCalloutメソッドを作成していきます。その前に、Anonymous WindowでCalloutが無事通るか検証してみます。
Apex Anonymous Windowで検証 (Folder作成)
ApexでNamed Credentialを利用してGoogleDriveにFolderを作成できるか試します。今回はNamed CredentailsのGoogleDriveを使用してフォルダを作成します。
Developer Consoleを開き、Debug > Open Execute Anonymous Windowで以下のコードを実行します。
Apex Code
String folderName = 'FirstFolder';
String parentFolderId = 'root';
Map<String, Object> requestBody = new Map<String, Object>{
    'name' => folderName,
        'mimeType' => 'application/vnd.google-apps.folder',
        'parents' => new List<String>{ parentFolderId }
};

HttpRequest req = new HttpRequest();
req.setEndpoint('callout:GoogleDrive/files');
req.setMethod('POST');
req.setHeader('Content-Type', 'application/json');
req.setBody(JSON.serialize(requestBody));

Http http = new Http();
HttpResponse res = http.send(req);
実行画面
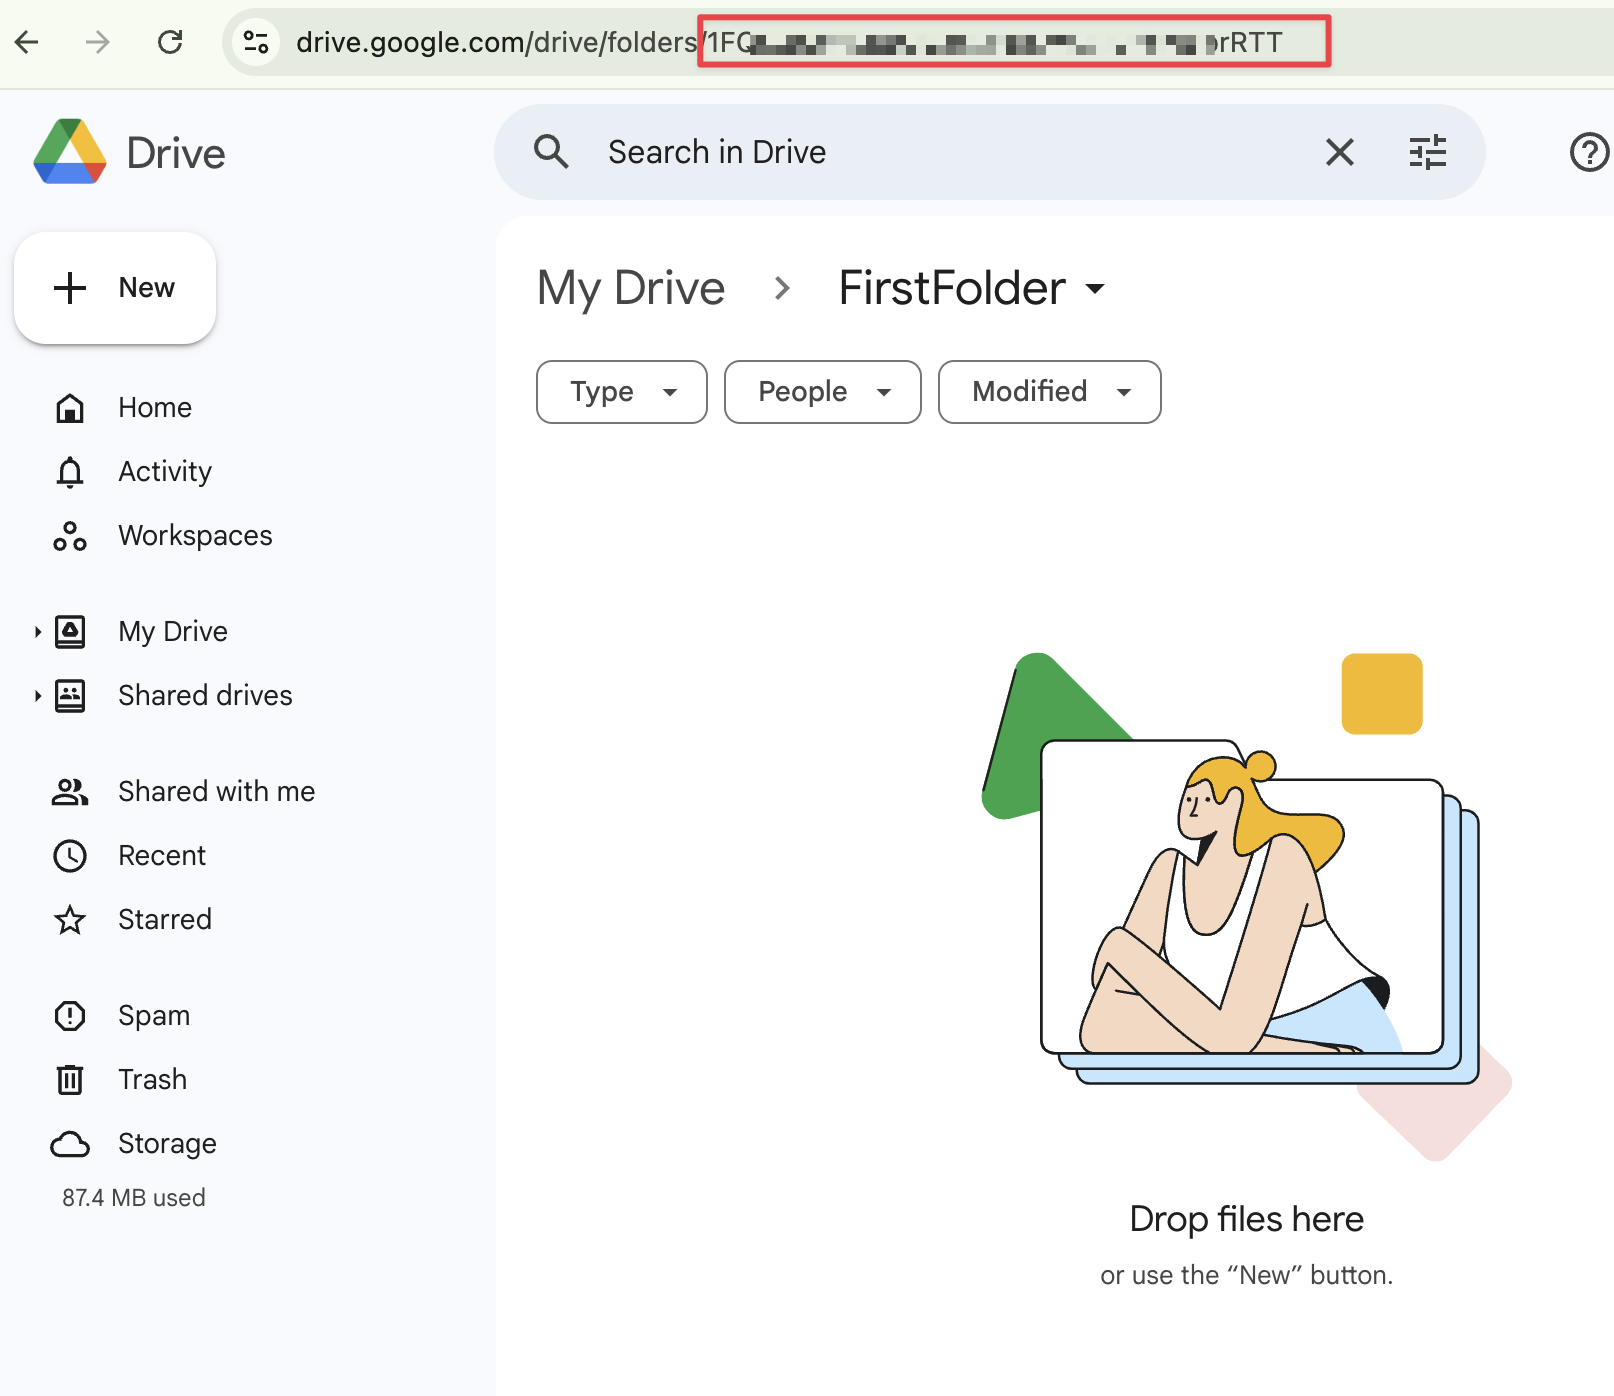
すると、GoogleDrive側で、rootの下にFirstFolderというフォルダが作成できていれば、Named CredentialをCalloutしてFolder作成の成功です。

実際作成されたFolderIdのURLをみていただくと、こちらをフォルダ名で取得してparentFolderIdに当てれば、このフォルダ配下にファイルをアップロードしていくこともできます。
まとめ
認証の設定は思ったより長いので大変ですね。記事もわけないと書ききれないので、設定だけで一旦この記事は終えます。次の記事では実際のApexとLWCの作成を行います。
参照:
関連記事


