ServletContainerInitializerを実装してみた
結構はまったので、自分用のメモとして残す
環境
Java17
Wildfly28
一番参考になったのは、以下の記事です。
https://www.logicbig.com/tutorials/java-ee-tutorial/java-servlet/servlet-container-initializer-example.html
要約すると
・ServletContainerInitializerを実装したクラスをおさめたJarファイルを作る。
・上記のJarを組み込んだWebアプリを作る。warが出来ます。
従って、プロジェクトは2個作成する必要があります。
プロジェクト1
ここでは ServletContainerInitializerを実装したクラスを作成します。
呼ばれた事を確認するだけの、ログ出力をしているだけです。
package iinit;

import jakarta.servlet.ServletContainerInitializer;
import jakarta.servlet.ServletContext;
import jakarta.servlet.ServletException;
import jakarta.servlet.annotation.HandlesTypes;
import jakarta.servlet.annotation.WebListener;
import jakarta.ws.rs.*;
import jakarta.ws.rs.core.Application;
import jakarta.ws.rs.ext.Provider;


import java.util.Set;

import org.slf4j.Logger;
import org.slf4j.LoggerFactory;

@HandlesTypes({ Application.class, Path.class, Provider.class })
public class HemmisServletContainerInitializer implements ServletContainerInitializer {
    // SLF4J
    private static final Logger LOG = LoggerFactory.getLogger(HemmisServletContainerInitializer.class);


    @Override
    public void onStartup(Set<Class<?>> c, ServletContext ctx) throws ServletException {

        LOG.warn("MyInitializer#onStartup -------------------- start");
        if (c ==null || c.size() == 0)
            return;

        for (Class<?> x : c) {
            LOG.warn("37) {}",   x.getCanonicalName());
        }
        LOG.warn("MyInitializer#onStartup -------------------- end");

    }

}
クラス名の前の行についているアノテーションの中に書かれているクラス名は、受け取りたいクラス名になります。
この例では、Applicationアノテーションと、Pathアノテーション、Providerアノテーションが付いたクラスのSetが、onStartupの第一引数にわたってきます。
resourceの下にMETA-INF/servicesというディレクトリを作成する
そのなかに、jakarta.servlet.ServletContainerInitializerというテキストファイルを作成します。
そのテキストファイルの中に、先ほど作成したJavaのクラス名をパッケージ名付きで記入します
iinit.HemmisServletContainerInitializer
pom.xmlは大事な所のみ記述します
   <groupId>com.example.jaxrs</groupId>
    <artifactId>mylistner</artifactId>
    <version>0.1-SNAPSHOT</version>
    <packaging>jar</packaging>
    <dependency>
      <groupId>jakarta.servlet</groupId>
      <artifactId>jakarta.servlet-api</artifactId>
      <scope>provided</scope>
    </dependency>
 </dependencies>
mvn install
を実行します。
targetディレクトリには、以下のjarファイルが出来ていました。
mylistner-0.1-SNAPSHOT.jar
2個目のWebアプリのプロジェクト
こちらは、既存のWebアプリがあったので、そのPOMに上記で作成したJarを組み込むように設定します。
    <dependency>
      <groupId>com.example.jaxrs</groupId>
      <artifactId>mylistner</artifactId>
    <version>0.1-SNAPSHOT</version >
    </dependency>

</dependencies>
Webアプリをビルドします。
mvn clean
mvn package
出来上がった war をWildflyにデプロイします。
./standalone.sh で、Wildflyを起動します。
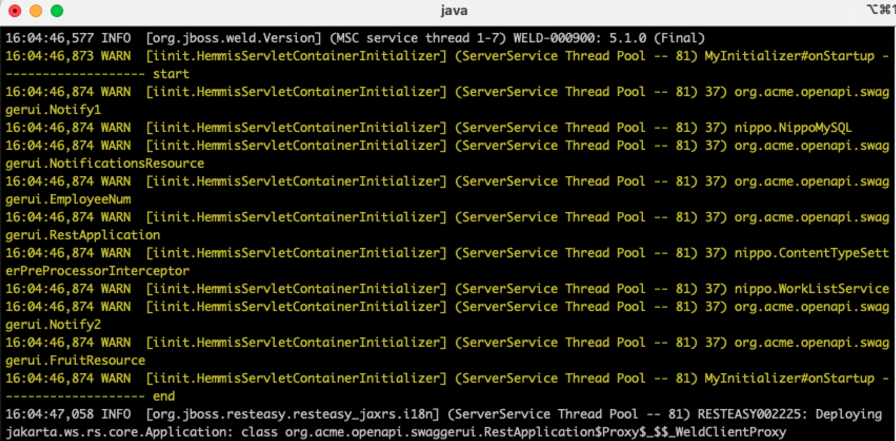
蛇足ですが、Macだとログに色が付くので、Windowsより見やすくて好きです> wildfly