はじめに
3Dレンダリングをお遊びでやってみようと、ふと思ったので、
Three.jsと普段使っているVueを組み合わせて、
今回試してみました!
結構ざっくり書いているのでコード汚い部分、冗長的な部分がありますが
ご了承ください。
今回の記事の実際のソースは
https://github.com/masanori0209/three_3d_vue
になります。

インストール
Three.jsをインストールしていきます。
npm install -S three
もしくは
vue ui
を使ってダッシュボードを表示後、インストールすることもできます。
※vue cli 3.0以上の場合

準備
コンポーネントを早速作成していきます。
vue create コマンドで初期プロジェクトを作成、
もしくは
vue ui
を使って、プロジェクトを作成していきます。

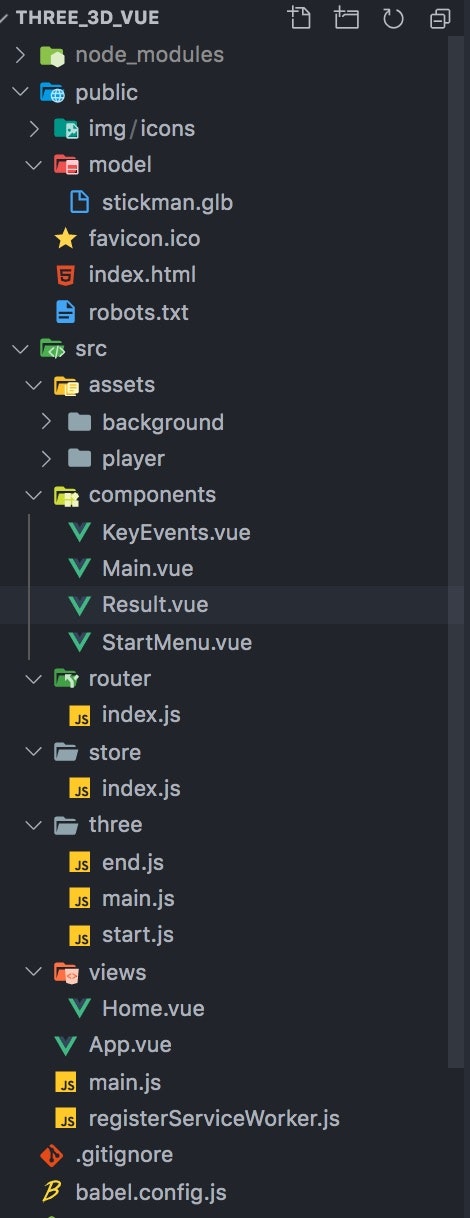
フォルダの構成をざっくり作成
コンポーネントを作成していきます。
今回はお試しなので、
componentsフォルダにThree.jsでレンダリングさせる
コンポーネントを作成し、
それを、大元のViewsと紐付けます。
ファイル構成はざっくり画像のような形で用意しております。
ゲームを管理する部分を作成
まず、各シーン(スタート画面、ゲームプレイ画面、リザルト画面)ごとに
コンポーネントを作成していきます。
ゲームのスコアや、フラグはこちらで管理していきます。
<template>
  <div class="home">
    <StartMenu
      @startGame="startGame"
      v-if="isStart"
    />
    <Main
      :score="score"
      :colorHP="colorHP"
      :isGameOver="isGameOver"
      :isDebug="isDebug"
      @calcColor="calcColor"
      @calcScore="calcScore"
      @calcGameOver="calcGameOver"
      v-if="!isStart&&!isGameOver"
    />
    <Result
      :score="score"
      :colorHP="colorHP"
      v-if="isGameOver"
    />
  </div>
</template>

<script>
import Main from "@/components/Main.vue"
import StartMenu from "@/components/StartMenu.vue"
import Result from "@/components/Result.vue"

export default {
  name: "home",
  components: {
    StartMenu,
    Main,
    Result
  },
  data () {
    return {
      colorHP    : {
        r: 0,
        g: 0,
        b: 0,
      },
      score      : 0,
      isGameOver : false,
      isStart    : true,
      isDebug    : false
    }
  },
  methods: {
    calcColor (color) {
      this.colorHP.r += color.r
      this.colorHP.g += color.g
      this.colorHP.b += color.b
      if (this.colorHP.r >= 255) this.colorHP.r = 255
      if (this.colorHP.g >= 255) this.colorHP.g = 255
      if (this.colorHP.b >= 255) this.colorHP.b = 255
      if (this.colorHP.r <= 0) this.colorHP.r = 0
      if (this.colorHP.g <= 0) this.colorHP.g = 0
      if (this.colorHP.b <= 0) this.colorHP.b = 0
      if (this.colorHP.r >= 255 && this.colorHP.g >= 255 && this.colorHP.b >= 255) this.calcGameOver()
    },
    calcScore () {
      this.score += Math.floor(1.5 * (this.colorHP.r / 100)) +
                    Math.floor(1.5 * (this.colorHP.g / 100)) +
                    Math.floor(1.5 * (this.colorHP.b / 100)) + 1
    },
    calcGameOver () {
      this.isGameOver = true
    },
    startGame () {
      this.isStart = false
    }
  }
}
</script>
スタート画面の用意
スタート画面を用意します。
まず。Three.jsを使ったシーン、ライティング、カメラや、
フロアなどを初期で用意しておきます。
import * as THREE from 'three'
import { GLTFLoader } from 'three/examples/jsm/loaders/GLTFLoader'

// object
const MAXOBJ = 10
// MAXLENGTH
const MAXLEN = 300

const scene = new THREE.Scene()

const renderer = new THREE.WebGLRenderer({ alpha: true, antialias: true })
renderer.setPixelRatio(window.devicePixelRatio)
renderer.setSize(window.innerWidth, window.innerHeight)
renderer.shadowMap.enabled = true
renderer.shadowMap.type = THREE.PCFSoftShadowMap

const camera = new THREE.PerspectiveCamera(45, window.innerWidth / window.innerHeight, 1, 2000)
camera.position.set(10, 7, 15)
camera.lookAt(new THREE.Vector3(0, 0, 0))

const ambientlight = new THREE.AmbientLight(0xFFFFFF, 0.5)
const directlight = new THREE.DirectionalLight(0xFFFFFF, 1, 100)
ambientlight.position.set(0, 30, 0)
directlight.position.set(-2, 20, 20)
directlight.castShadow = true
directlight.shadow.mapSize.width = 2048
directlight.shadow.mapSize.height = 2048
directlight.shadow.camera.position.set(0, 100, 0);
directlight.shadow.camera.left   = -30;
directlight.shadow.camera.right  = 30;
directlight.shadow.camera.top    = 30;
directlight.shadow.camera.bottom = -30;

// debug
const lightHelper = new THREE.DirectionalLightHelper(directlight)

const geometry = new THREE.BoxGeometry(10, 200, MAXLEN)
const floorMaterial = new THREE.MeshLambertMaterial({
  color: 0xF8F8F8
})
const floor = new THREE.Mesh(geometry, floorMaterial)
floor.position.y = -99.95
floor.receiveShadow = true
floor.castShadow = true

const gltfloader = new GLTFLoader()
const clock = new THREE.Clock()
export {
  scene,
  floor,
  camera,
  renderer,
  ambientlight,
  directlight,
  lightHelper,
  gltfloader,
  clock,
  MAXOBJ,
  MAXLEN
}
こちらの初期設定を呼び出すVueコンポーネントを書いていきます。
モデルは
https://free3d.com/ja/
用意しました。
リギングなどのアニメーションは
https://www.mixamo.com/
と、Blendarを組み合わせて、gltf形式で出力しております。
<template>
  <div ref="stage" class="back" @click="$emit('startGame')">
    <!-- Start Menu -->
    <div class="menu">
      <h2>Simple Action Game</h2>
      <p class="desc" style="padding: 24px; text-align: left;">
        カラフルなドーナツ状のアイテムを取って、スコアをどんどんあげていこう!
        赤い三角の障害物に当たるとゲームオーバー。
        色によってスコアが上昇、全ての色がMAXになるとゲームクリア。
      </p>
      <div class="click-start">
        クリックでスタート
      </div>
    </div>
  </div>
</template>

<script>
import * as threeObj from '@/three/start'
import * as THREE from 'three'
export default {
  name: 'StartMenu',
  data () {
    return {
      publicPath    : process.env.BASE_URL,
      MAXOBJ        : threeObj.MAXOBJ,
      MAXLEN        : threeObj.MAXLEN,
      scene         : threeObj.scene,
      renderer      : threeObj.renderer,
      camera        : threeObj.camera,
      ambientlight  : threeObj.ambientlight,
      directlight   : threeObj.directlight,
      lightHelper   : threeObj.lightHelper,
      floor         : threeObj.floor,
      gltfloader    : threeObj.gltfloader,
      clock         : threeObj.clock,
      mixer         : null,
      player        : null,
      controls      : null,
      animations    : null,
    }
  },
  created () {
    this.camera.position.set(0, 12, 20)
    this.camera.lookAt(new THREE.Vector3(0, 0, 0))
    this.scene.add(this.camera)
    this.scene.add(this.floor)
    this.scene.add(this.directlight)
    this.scene.add(this.ambientlight)
    if (this.isDebug) this.scene.add(this.lightHelper)
    this.loadModel()
  },
  mounted () {
    this.$refs.stage.appendChild(this.renderer.domElement)
    this.animate()
  },
  methods: {
    loadModel () {
      this.gltfloader.load(`${this.publicPath}model/stickman.glb`, (obj) => {
        this.mixer = new THREE.AnimationMixer(obj.scene)
        console.log(obj)
        this.player = obj.scene
        this.player.traverse( ( node ) => {
          if ( node instanceof THREE.Mesh ) {
            node.castShadow = true
            node.receiveShadow = true
          }
        } )
        this.animations = obj.animations
        this.mixer.clipAction(obj.animations[2]).play()
        this.scene.add(this.player)
      },
      function ( xhr ) {
        console.log( ( xhr.loaded / xhr.total * 100 ) + '% loaded' );
      },
      function ( error ) {
        console.error( error );
      })
    },
    animate () {
      this.renderer.render(this.scene, this.camera)
      if (this.mixer) this.mixer.update(this.clock.getDelta())
      requestAnimationFrame(this.animate)
    }
  }
}
</script>

<style scoped>
.back {
  position: relative;
  height: 100%;
  width: 100%;
  background-image: url('../assets/background/sky.jpg');
  background-size: cover;
}
.background {
  position: absolute;
  top: 0;
  left: 0;
  z-index: -998;
  height: 100%;
  width: 100%;
}
.menu {
  position: fixed;
  top: 0; right: 0;
  width: 100%; height: 100%; z-index: 100;
  background: #f0f0f099;
  display: flex;
  justify-content: center;
  align-items: center;
  flex-direction: column;
}
.menu > h2 {
  padding: 24px;
  font-weight: 600;
}
.menu > .desc {
  padding: 24px;
  text-align: left;
  background: #f2f2f2;
  width: 80%;
  border-left: solid #ccf 10px;
}
.menu > .click-start {
  font-size: 24px;
  font-weight: 600;
  animation: 2s huwanhuwan infinite;
}
@keyframes huwanhuwan{
  0% { opacity: 0; }
  100% { opacity :1; }
}
</style>
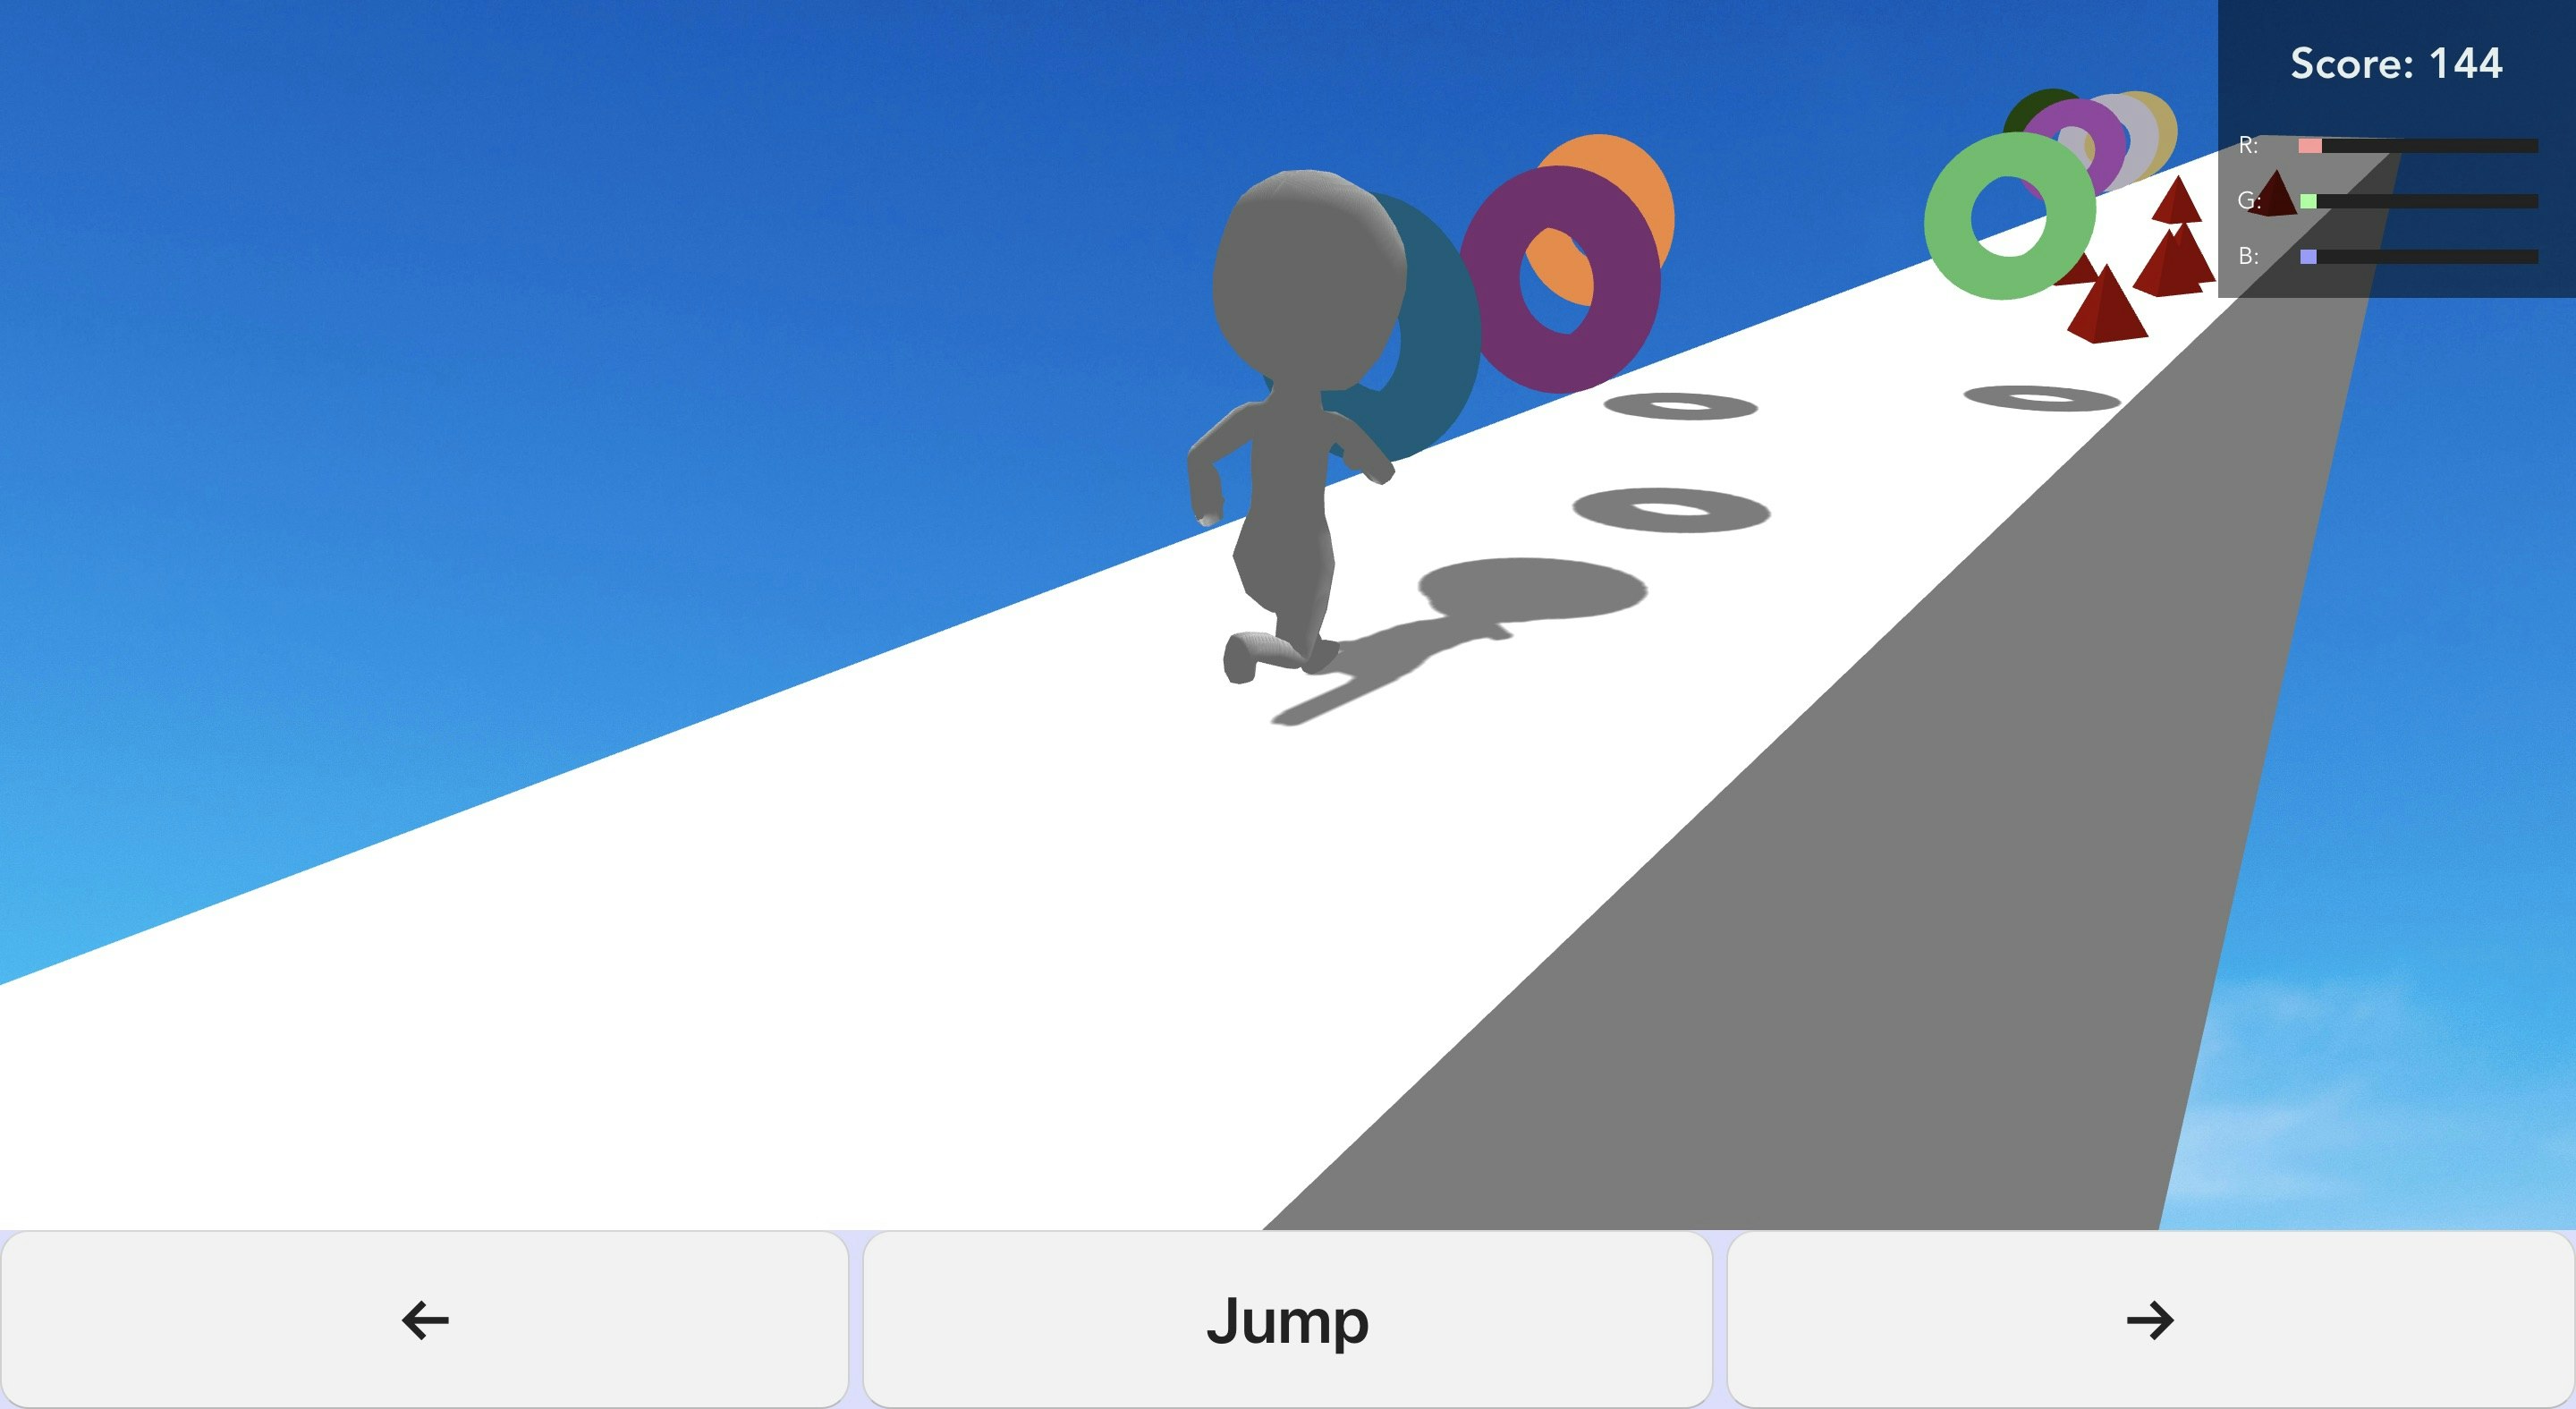
このような画面が出来上がります。

メイン画面の用意
メイン画面を用意します。
初期の生成の際にスコア用のドーナツ型のものと、障害物も合わせて生成します。
import * as THREE from 'three'
import { GLTFLoader } from 'three/examples/jsm/loaders/GLTFLoader'
import { ConvexGeometry } from 'three/examples/jsm/geometries/ConvexGeometry'

// object
const MAXOBJ = 10
// MAXLENGTH
const MAXLEN = 300

const scene = new THREE.Scene()

const renderer = new THREE.WebGLRenderer({ alpha: true, antialias: true })
renderer.setPixelRatio(window.devicePixelRatio)
renderer.setSize(window.innerWidth, window.innerHeight)
renderer.shadowMap.enabled = true
renderer.shadowMap.type = THREE.PCFSoftShadowMap

const camera = new THREE.PerspectiveCamera(45, window.innerWidth / window.innerHeight, 1, 2000)
camera.position.set(10, 7, 15)
camera.lookAt(new THREE.Vector3(0, 0, 0))

const ambientlight = new THREE.AmbientLight(0xFFFFFF, 0.5)
const directlight = new THREE.DirectionalLight(0xFFFFFF, 1, 100)
ambientlight.position.set(0, 30, 0)
directlight.position.set(-2, 20, 20)
directlight.castShadow = true
directlight.shadow.mapSize.width = 2048
directlight.shadow.mapSize.height = 2048
directlight.shadow.camera.position.set(0, 100, 0);
directlight.shadow.camera.left   = -30;
directlight.shadow.camera.right  = 30;
directlight.shadow.camera.top    = 30;
directlight.shadow.camera.bottom = -30;

// debug
const lightHelper = new THREE.DirectionalLightHelper(directlight)

const geometry = new THREE.BoxGeometry(10, 200, MAXLEN)
const floorMaterial = new THREE.MeshLambertMaterial({
  color: 0xF8F8F8
})
const floor = new THREE.Mesh(geometry, floorMaterial)
floor.position.y = -99.95
floor.receiveShadow = true
floor.castShadow = true

const axisGeometry = [
  new THREE.Vector3( 0, -2, 2 ),
  new THREE.Vector3( 0, 2, 2 ),
  new THREE.Vector3( 2, -2, -2 ),
  new THREE.Vector3( -2, -2, -2 )
]
const deadzoneMaterial = new THREE.MeshLambertMaterial( { color: 0xaa0000 } )
var deadzoneMesh = []
for (let i = 0; i < MAXOBJ; i++) {
  deadzoneMesh.push(new THREE.Mesh( new ConvexGeometry( axisGeometry ), deadzoneMaterial ))
}

var colorMesh = []
for (let i = 0; i < MAXOBJ; i++) {
  colorMesh.push(new THREE.Mesh( new THREE.TorusGeometry( 1, 0.5, 3, 50 ), new THREE.MeshBasicMaterial( { color: 0xaaaa00 } ) ))
}

const gltfloader = new GLTFLoader()
const clock = new THREE.Clock()
export {
  scene,
  floor,
  deadzoneMesh,
  colorMesh,
  camera,
  renderer,
  ambientlight,
  directlight,
  lightHelper,
  gltfloader,
  clock,
  MAXOBJ,
  MAXLEN
}
メイン画面ではアニメーションのレンダリングの際に、
当たり判定の処理を行います。
KeyEventも別コンポーネント化し、特定のキーが押されたタイミングで
$emitで親メソッドを呼び出しています。
<template>
  <div ref="stage" class="back">
    <!-- Status -->
    <div class="status">
      <p v-if="isDebug">{{camera.position.x}} - {{camera.position.y}} - {{camera.position.z}}</p>
      <h2 :style="getColor()">Score: {{score}}</h2>
      <p>R: <progress class="progress-red"   max="255" :value="colorHP.r">{{colorHP.r}}%</progress></p>
      <p>G: <progress class="progress-green" max="255" :value="colorHP.g">{{colorHP.g}}%</progress></p>
      <p>B: <progress class="progress-blue"  max="255" :value="colorHP.b">{{colorHP.b}}%</progress></p>
    </div>
    <!-- Action Menu -->
    <div class="action-menu">
      <button @click="move('left')">←</button>
      <button @click="jump()" :disabled="isJumping">Jump</button>
      <button @click="move('right')">→</button>
    </div>
    <KeyEvents @jump="jump()" @move="move($event, type)" :isJumping="isJumping"/>
  </div>
</template>

<script>
import * as threeObj from '@/three/main'
import * as THREE from 'three'
import { OrbitControls } from 'three/examples/jsm/controls/OrbitControls'
import KeyEvents from '@/components/KeyEvents'
export default {
  name: 'Three',
  components : {
    KeyEvents,
  },
  props: ['score', 'colorHP', 'isGameOver', 'isDebug'],
  data () {
    return {
      publicPath    : process.env.BASE_URL,
      MAXOBJ        : threeObj.MAXOBJ,
      MAXLEN        : threeObj.MAXLEN,
      scene         : threeObj.scene,
      renderer      : threeObj.renderer,
      camera        : threeObj.camera,
      ambientlight  : threeObj.ambientlight,
      directlight   : threeObj.directlight,
      lightHelper   : threeObj.lightHelper,
      floor         : threeObj.floor,
      deadzoneMesh  : threeObj.deadzoneMesh,
      colorMesh     : threeObj.colorMesh,
      gltfloader    : threeObj.gltfloader,
      clock         : threeObj.clock,
      mixer         : null,
      player        : null,
      controls      : null,
      animations    : null,
      isJumping     : false,
    }
  },
  created () {
    if (window.innerWidth < 500) {
      this.camera.position.set(4, 11, 21)
      this.camera.lookAt(new THREE.Vector3(0, 0, 0))
    } else {
      this.camera.position.set(10, 7, 15)
      this.camera.lookAt(new THREE.Vector3(0, 0, 0))
    }
    this.scene.add(this.camera)
    this.scene.add(this.floor)
    this.scene.add(this.directlight)
    this.scene.add(this.ambientlight)
    if (this.isDebug) this.scene.add(this.lightHelper)
    this.loadModel()
    // object 初期配置
    for (var i = 0; i < this.MAXOBJ; i++) {
      this.deadzoneMesh[i].position.z -= this.getRandomInt(15, this.MAXLEN/2)
      this.deadzoneMesh[i].position.x = this.getRandomInt(-1, 1) * 3
      this.colorMesh[i].position.z -= this.getRandomInt(15, this.MAXLEN/2)
      this.colorMesh[i].position.x = this.getRandomInt(-1, 1) * 3
      this.colorMesh[i].position.y = 4
      this.colorMesh[i].material.color.set('rgb(' + this.getRandomInt(0, 255) + ',' + this.getRandomInt(0, 255) + ',' + this.getRandomInt(0, 255) +')')
      this.deadzoneMesh[i].receiveShadow = true
      this.deadzoneMesh[i].castShadow = true
      this.colorMesh[i].receiveShadow = true
      this.colorMesh[i].castShadow = true
      this.scene.add(this.deadzoneMesh[i])
      this.scene.add(this.colorMesh[i])
      console.log(this.scene)
    }
  },
  mounted () {
    this.startObj()
  },
  methods: {
    startObj () {
      this.$refs.stage.appendChild(this.renderer.domElement)
      if (this.isDebug) {
        this.controls = new OrbitControls( this.camera, this.renderer.domElement )
        this.controls.update()
      }
      // this.run()
      this.animate()
    },
    getColor () {
      return {
        color: 'rgb(' + (255 - this.colorHP.r)  + ',' + (255 - this.colorHP.g)  + ',' + (255 - this.colorHP.b) + ')'
      }
    },
    getRandomInt (min, max) {
      return Math.floor( Math.random() * (max + 1 - min) ) + min
    },
    loadModel () {
      this.gltfloader.load(`${this.publicPath}model/stickman.glb`, (obj) => {
        this.mixer = new THREE.AnimationMixer(obj.scene)
        console.log(obj)
        this.player = obj.scene
        this.player.traverse( ( node ) => {
          if ( node instanceof THREE.Mesh ) {
            node.castShadow = true
            node.receiveShadow = true
          }
        } )
        this.player.useQuaternion = true
        let q = new THREE.Quaternion()
        q.setFromAxisAngle(new THREE.Vector3(0,1,0).normalize(), Math.PI);
        this.player.quaternion.copy(q)
        this.animations = obj.animations
        this.mixer.clipAction(obj.animations[6]).play()
        this.scene.add(this.player)
      },
      function ( xhr ) {
        console.log( ( xhr.loaded / xhr.total * 100 ) + '% loaded' );
      },
      function ( error ) {
        console.error( error );
      })
    },
    jump () {
      this.mixer.stopAllAction()
      let anime = this.mixer.clipAction(this.animations[0])
      anime.setLoop(THREE.LoopOnce)
      anime.clampWhenFinished = true
      anime.play()
      this.isJumping = true
      this.mixer.addEventListener('finished', event => {
        this.isJumping = false
        this.run()
      })
    },
    run () {
      this.mixer.stopAllAction()
      let anime = this.mixer.clipAction(this.animations[6])
      anime.play()
    },
    move (type) {
      switch (type) {
        case 'left':
          this.player.position.x <= -3 ? this.player.position.x = -3 : this.player.position.x -= 3
          break
        case 'right':
          this.player.position.x >= 3 ? this.player.position.x = 3 : this.player.position.x += 3
          break
        default:
          break
      }
    },
    animate () {
      this.renderer.render(this.scene, this.camera)
      if (this.controls && this.isDebug) this.controls.update()
      if (this.mixer) this.mixer.update(this.clock.getDelta())
      if (this.player && this.mixer && this.animations) this.getResult()
      for (var i = 0; i < this.MAXOBJ; i++) {
        this.deadzoneMesh[i].position.z >= Math.floor(this.MAXLEN/4) ? this.deadzoneMesh[i].position.z = -this.MAXLEN/4 : this.deadzoneMesh[i].position.z += 0.5
        this.colorMesh[i].position.z    >= Math.floor(this.MAXLEN/4) ? this.colorMesh[i].position.z    = -this.MAXLEN/4 : this.colorMesh[i].position.z    += 0.5
      }
      requestAnimationFrame(this.animate)
    },
    getResult () {
      // judge gameover
      if (!this.isJumping) {
        for (var i = 0; i < this.MAXOBJ; i++) {
          if (this.deadzoneMesh[i].position.z >= this.player.position.z - 0.2 && this.deadzoneMesh[i].position.z <= this.player.position.z + 0.2 && this.deadzoneMesh[i].position.x == this.player.position.x) {
            this.$emit('calcGameOver')
          } else if (this.deadzoneMesh[i].position.z >= Math.floor(this.MAXLEN/4)) {
            this.deadzoneMesh[i].position.z = -this.MAXLEN/4 + this.getRandomInt(-50, 5)
          }
        }
      }
      // color get
      for (var i = 0; i < this.MAXOBJ; i++) {
        if (this.colorMesh[i].position.z >= this.player.position.z - 0.2 && this.colorMesh[i].position.z <= this.player.position.z + 0.2 && this.colorMesh[i].position.x == this.player.position.x) {
          this.$emit('calcColor', {
            r: Math.floor((this.colorMesh[i].material.color.r) * 20),
            g: Math.floor((this.colorMesh[i].material.color.g) * 20),
            b: Math.floor((this.colorMesh[i].material.color.b) * 20)
          })
          this.colorMesh[i].position.z = -this.MAXLEN/4 + this.getRandomInt(-50, 5)
        }
      }
      // calc result
      this.$emit('calcScore')
    }
  }
}
</script>

<style scoped>
.back {
  position: relative;
  height: 100%;
  width: 100%;
  background-image: url('../assets/background/sky.jpg');
  background-size: cover;
}
.background {
  position: absolute;
  top: 0;
  left: 0;
  z-index: -998;
  height: 100%;
  width: 100%;
}
.menu {
  position: fixed; top: 0; right: 0; width: 100%; height: 100%; z-index: 100; background: white;
}
.status {
  position: fixed; top: 0; right: 0; width: 200px;
  background: rgba(0, 0, 0, 0.5);
}
.status > p {
  color: white;
  font-size: smaller;
  display: flex;
  justify-content: space-around;
  align-items: center;
  width: 95%;
  white-space: pre-line;
}
.progress-red[value], .progress-green[value], .progress-blue[value] {
  appearance: none;
  background-color: #22222299;
  border: none;
  border-radius: 4px;
  color: #fff;
  height: 8px;
}
.progress-red[value]::-webkit-progress-bar {
  background-color: #222;
}
.progress-red[value]::-webkit-progress-value {
  background-color: #f99;
}
.progress-red[value]::-moz-progress-bar {
  background-color: #f99;
}
.progress-green[value]::-webkit-progress-bar {
  background-color: #222;
}
.progress-green[value]::-webkit-progress-value {
  background-color: #9f9;
}
.progress-green[value]::-moz-progress-bar {
  background-color: #9f9;
}
.progress-blue[value]::-webkit-progress-bar {
  background-color: #222;
}
.progress-blue[value]::-webkit-progress-value {
  background-color: #99f;
}
.progress-blue[value]::-moz-progress-bar {
  background-color: #99f;
}
.action-menu {
  position: fixed;
  bottom: 0; left: 0;
  display: flex; justify-content: space-between;
  width: 100%;
  height: 100px;
  background: #ddf;
}
.action-menu > button {
  width: 33%; height: 100%;
  font-size: 36px;
  font-weight: 600;
  background: #f2f2f2;
  color: #222222;
  border-radius: 16px;
}
</style>
このような画面が出来上がります。
操作ボタンを用意し(キーボードでもできるのですが念のため)、
右上のスコアはHTMLの要素で表示しております。
リザルト画面はStartMenu.vueの流用で作ったので、割愛します。
ここまでで、一通りのものが完成となります。
実際にデプロイしてみる
今回はgithub.ioにデプロイしてみました。
vue.config.jsにリポジトリ先を記載しておきます。
module.exports = {
    publicPath: '/three_3d_vue/',
    outputDir: 'docs'
}
リポジトリ内のsettingから、
Github Pagesのプルダウンメニューを
master branch /docsに変更致します。

ビルド後、masterブランチにプッシュした後暫くしてから、アクセスすると、
設定したURL先にアクセスすると反映されていることが確認できるかと思います。
https://masanori0209.github.io/three_3d_vue/
最後に
現在弊社では、エンジニアを募集しております。
未経験の方でも研修制度もありスムーズに業務に入れるかと思います。
また、新規事業の企画などにも携われたり、自社開発などもやっておりますので、
介護×ITにご興味がおありの方はぜひご応募ください!