0. はじめに
Go言語を使ったAPIサーバーを構築したいと思い、今回作ったので共有いたします。
まだまだ初学者な部分もあるので、不備等ございましたらご連絡、よろしくお願いいたします。
Githubのほうに、今回作ったものを載せておりますので、併せてご参考ください。
(DB周りは少し付け足してあります)
1. 環境
- Mac v10.13.6
- Docker for Mac v2.0.0.0-mac81
2. Dockerfileを用意する
beegoと呼ばれるWebフレームワークを使って構築して行きます。
beegoはGo言語のフルスタックWebフレームワークです。
- GoのDockerfile
FROM golang:latest

ENV GOPATH /go
ENV PATH $PATH:$GOPATH/bin

RUN mkdir -p /go/src/api
COPY . /go/src/api
WORKDIR /go/src/api

RUN go get github.com/beego/bee
RUN go get github.com/astaxie/beego
RUN go get gopkg.in/mgo.v2

CMD bee run -downdoc=true -gendoc=true
3. Docker Compose ファイルを用意
ローカル環境で動かすために、Docker Compose ファイルを用意します。
version: '3'
services:

  # API Server
  api:
    build:
      context: ./api
      dockerfile: Dockerfile
    ports:
      - 8080:8080
    volumes:
      - ./api:/go/src/
    depends_on:
      - 'db'
  # DB Server
  db:
    image: mysql:5.7
    restart: always
    ports:
      - 3336:3336
    environment:
      MONGO_INITDB_ROOT_USERNAME: root
      MONGO_INITDB_ROOT_PASSWORD: {好きなパスワード}
    volumes:
      - ./db:/data/db
4. プロジェクトを作成
Docker Compose を立ち上げて、コンテナの中にプロジェクトを作成して行きます。
# docker 立ち上げ
docker-compose up -d
# コンテナ実行
docker-compose build {コンテナ名} bash
# プロジェクト作成
bee api {プロジェクト名} -driver=mysql -conn={ユーザー名}:{パスワード}@tcp(db:3306)/{DB名(お好みで)}
上記コマンド実行時ではconfingファイルとrouter, mainファイル以外生成されず、不便なので
bee api {適当な名前}で初期ファイルをさらに作成して、下記の図のようにファイルを移していくと楽です。
移し終わりましたら移し元のフォルダを削除して元どおりにしておけば大丈夫です。
(変則的ではありますが、、、)

5. 立ち上げ時のエラー修正
初期ファイルを移しただけでは、エラーとなってしまうので、models.goを少し書き換えます。
下記のようにinit(), User, Profileを書き換えてください。
(beegoのドキュメントを参考にしております。)
func init() {
	// mysql に Model を登録
	orm.RegisterModel(new(User), new(Profile))
	UserList = make(map[string]*User)
}

type User struct {
	// primary key を付与する
	Id       string   `orm:"column(uid);pk"`
	Username string
	Password string
	// profile を1対1で定義する
	Profile  *Profile `orm:"rel(one)"`
}

type Profile struct {
	// primary key を付与する
	Id      string   `orm:"column(uid);pk"`
	Gender  string
	Age     int
	Address string
	Email   string
	// user を1対1で定義する
	User    *User `orm:"null;reverse(one);"`
}
6. ログ確認
docker composeを一旦立ち上げ直してログを確認します。
beegoにはLiveReload機能があるので、立ち上げ直さなくても大丈夫です。
正常に立ち上がっていれば、下記のような感じになります。
$ dc logs api
Attaching to api_1
api_1  | ______
api_1  | | ___ \
api_1  | | |_/ /  ___   ___
api_1  | | ___ \ / _ \ / _ \
api_1  | | |_/ /|  __/|  __/
api_1  | \____/  \___| \___| v1.10.0
api_1  | 2019/02/10 03:57:27 INFO     ▶ 0001 Using 'api' as 'appname'
api_1  | 2019/02/10 03:57:27 INFO     ▶ 0002 Initializing watcher...
api_1  | github.com/astaxie/beego/orm
api_1  | api/models
api_1  | api/controllers
api_1  | api/routers
api_1  | api
api_1  | 2019/02/10 03:57:30 INFO     ▶ 0003 Generating the docs...
api_1  | 2019/02/10 03:57:30 SUCCESS  ▶ 0004 Docs generated!
api_1  | 2019/02/10 03:57:31 SUCCESS  ▶ 0005 Built Successfully!
api_1  | 2019/02/10 03:57:31 INFO     ▶ 0006 Restarting 'api'...
api_1  | 2019/02/10 03:57:31 SUCCESS  ▶ 0007 './api' is running...
api_1  | 2019/02/10 03:57:31.884 [I] [router.go:271]  /go/src/api/controllers no changed
api_1  | 2019/02/10 03:57:31.889 [I] [router.go:271]  /go/src/api/controllers no changed
api_1  | 2019/02/10 03:57:31.910 [I] [asm_amd64.s:1333]  http server Running on http://:8080
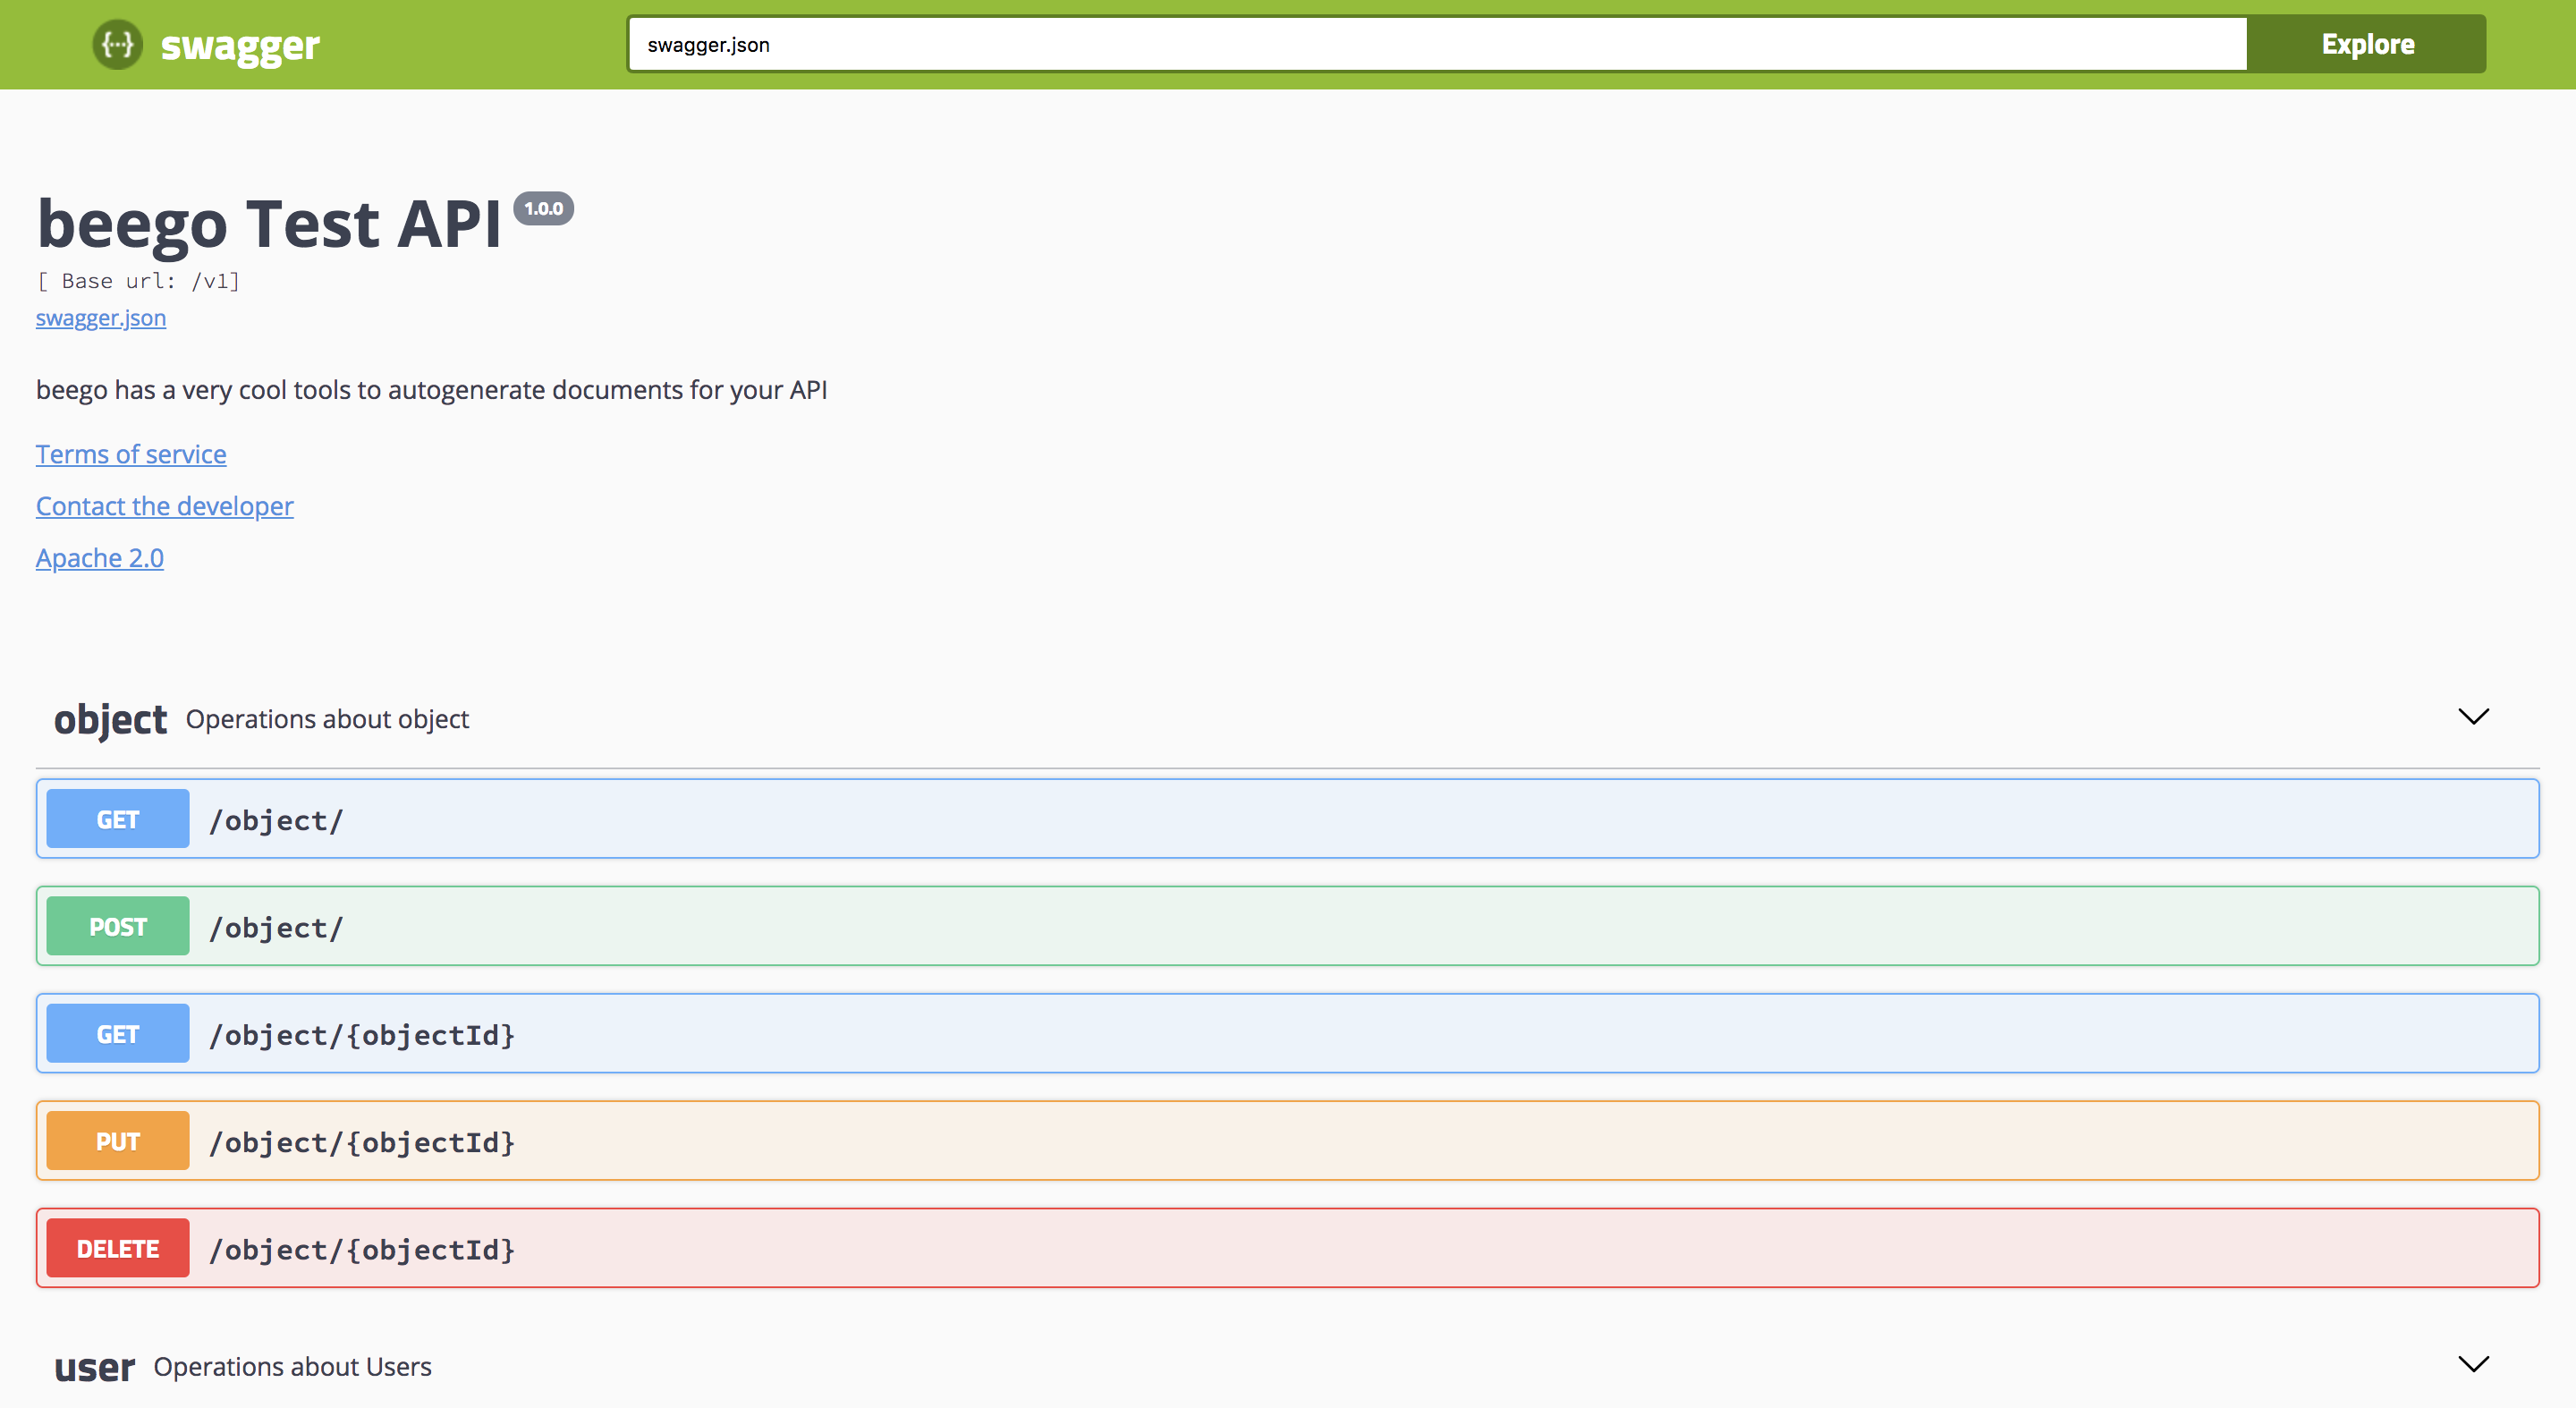
7. SwaggerからAPIサーバーが立ち上がっているか確認
beegoにはSwaggerと呼ばれる REST API の仕様確認、テストなどを行えるツールが
標準装備されています。
使うためには、サーバー立ち上げ時に-downdoc=true -gendoc=trueと定義することと、
app.confにEnableDocs = trueを定義します。
(今回は事前に定義済みです。)
下記のような図で表示されるため確認する際わかりやすくなっております。
アクセスするにはhttp://localhost:8080/swagger/から入ります。
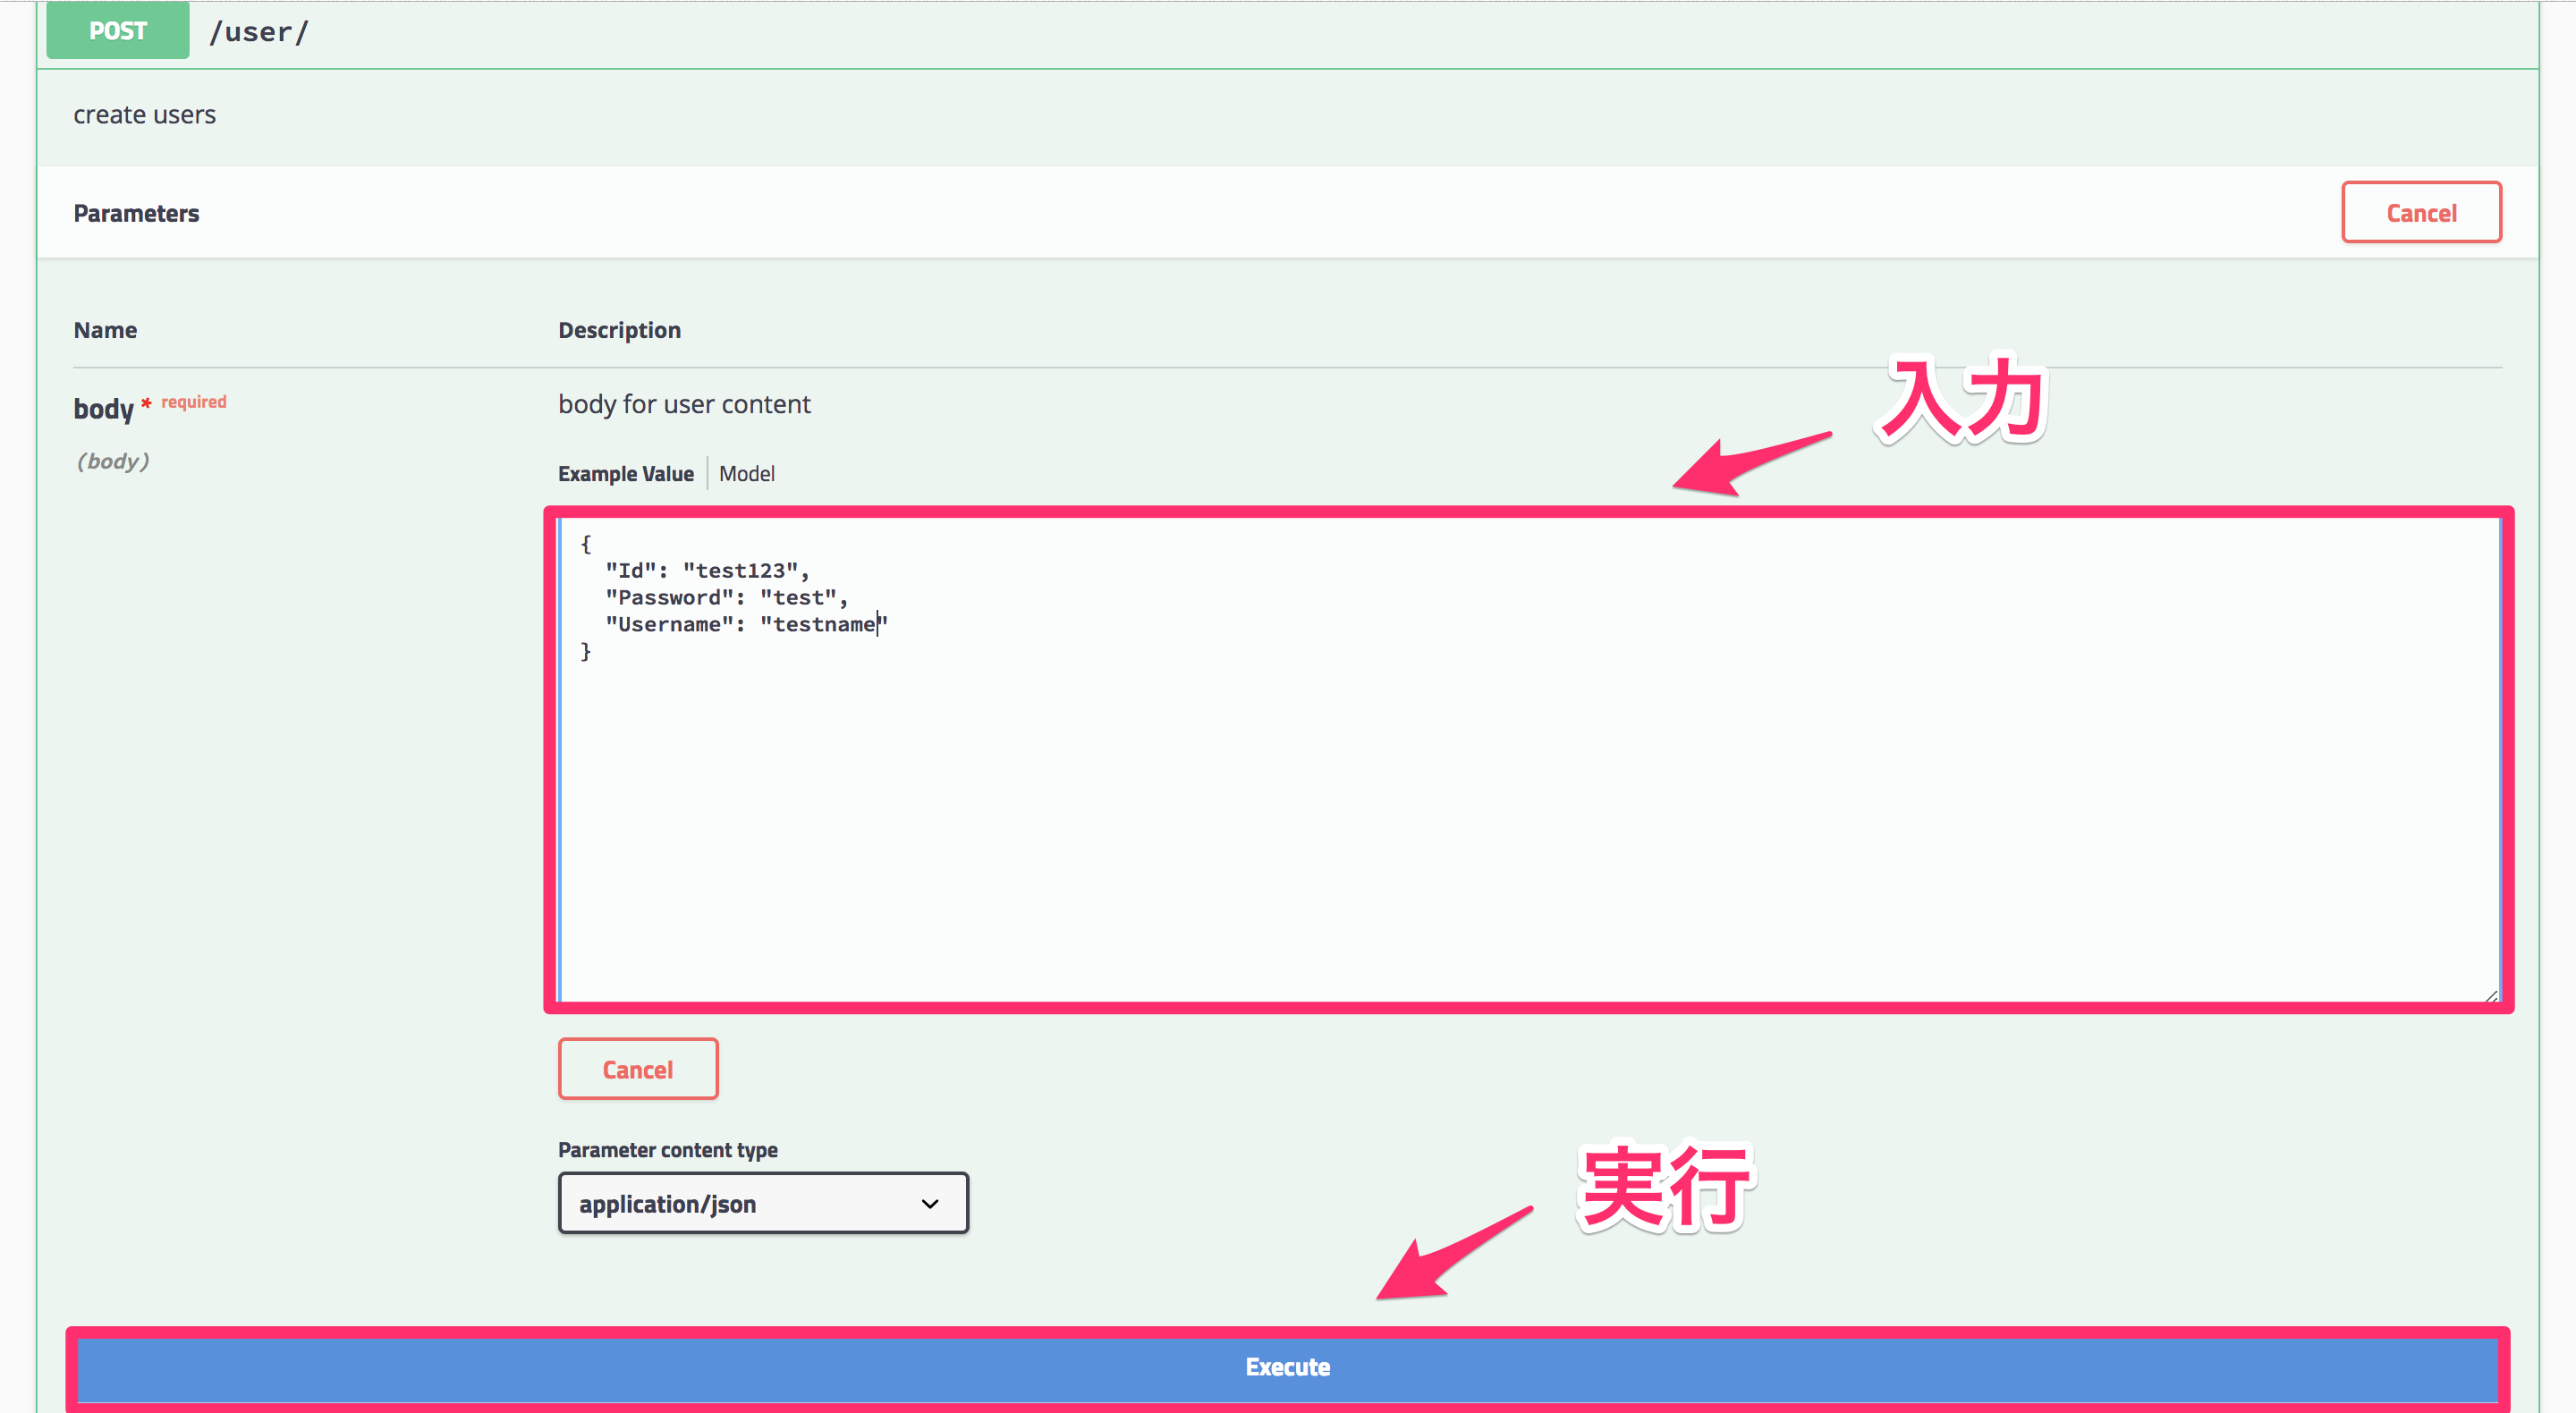
実際にPOSTできるか確認して見ます。
Try It Outボタンをクリックして下記図のように入力してテストします。
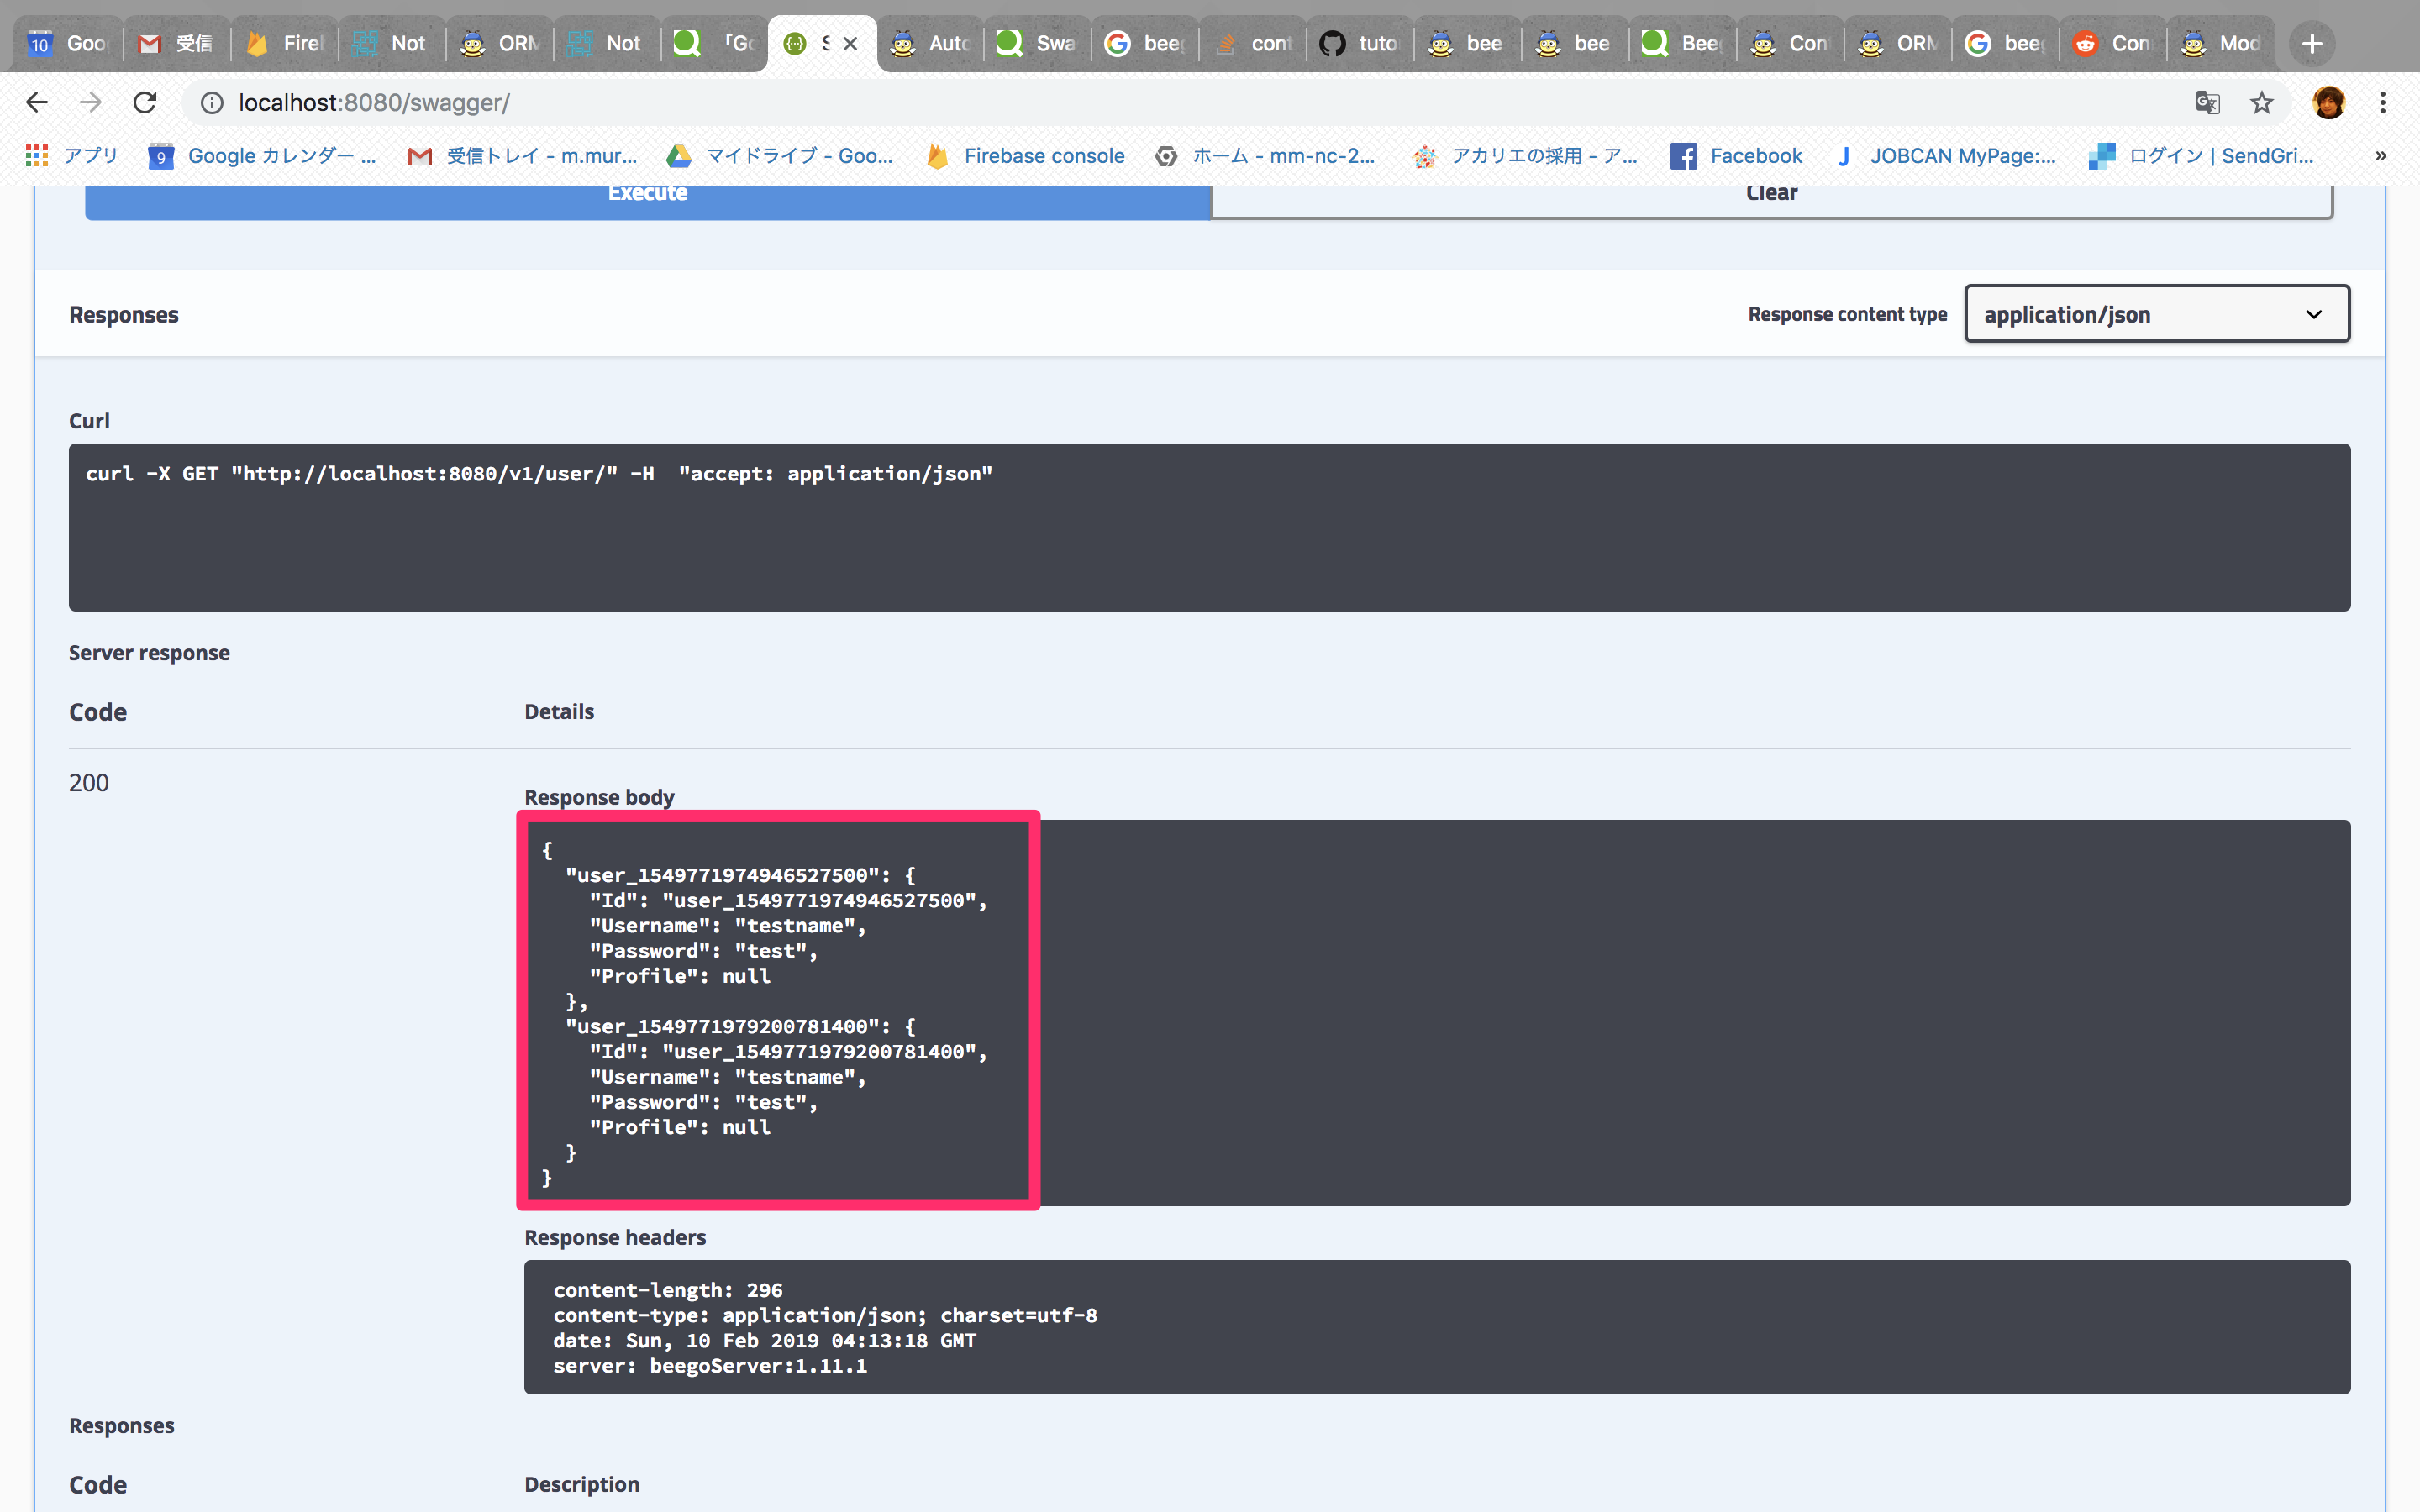
POSTしたものをGETできるか確認してみましょう。
同様にTry It OutボタンをクリックしてExecuteボタンでGETリクエストを送ります。
(POST時、2回送ってしまったので2個表示されております。。。)
8. 終わりに
今回はAPIサーバーの構築にチャレンジしてみました。
Go言語は初めてだったので、まだ不慣れではありますが、
C言語ライクにかけそうな感じ?がするので、とても入りやすそうではありますね。
これからもGo言語に関する記事をどんどん出して行きたい思います。