はじめに
フツーの会社員として働きながら、プログラミンを学び始めて2か月が経過しました。少しづつコード
は勉強していますが、まだまだやってみたことと実力の差が正直大きいです。そんな時、WEBフロントエンド用のフレームワークであるVue.jsを知ったので、試してみることにしました。
Vueとは?(超初心者の備忘録的に記載してます)
フロントエンド(front end)とはWebサービスやWebアプリケーションなどでユーザーがボタンを押したり入力をしたりする部分、またソフトウェアなどと直接やり取りをする部分のことを指します。
ユーザーがWebサービスなどを利用する時に目に見える表の部分はフロントエンドの部分です。(参考)
Vue.jsはフロントエンド開発支援のためのツールで、「こんな感じのパーツが欲しいなあ」と思うものに対し簡単に作れるように準備されています。ライブラリをインストールしてコードをコピーし、自分がカスタマイズしたい部分だけ変更すれば、あら不思議、作りたいものが簡単にできちゃいます(部分的だけど)。
今までコツコツ手計算していた難しい計算問題を一気にエクセルが解決してくれるくらいの有難さですね。
もうちょっとちゃんとした説明は下記のサイトにあります。
https://techacademy.jp/magazine/21456
https://jp.vuejs.org/v2/guide/
仕様
年末ということもあり、今の実力では作れないカレンダーをに挑戦しました。
・2か月分表示される
・カレンダーから日付をピックすることもできる。
環境
Node.js v10.16.3
Windows 10 pro
Visual Studio Code v1.39.1
Vue.js
方法
「Vue.jsのカレンダライブラリv-calendarを使って、日付ごとのデータをカレンダー上に表示」も参考にさせていただきました。
もっとスマートなやり方があるとは思いますが、初心者が再現しやすいように書いておきます。
1.ターミナルを起動し、npm init -yでpackage.jasonをインストール
2.次に同じくターミナルでnpm install v-calenderでVue.jsのカレンダーライブラリーをインストール
3. index.jsファイルを作成(下記index.jsコード参照)
4. main.jsファイルを作成(下記main.jsコードを参照)
5. publicフォルダを作成し、中にindex.html作成
6. heroku化のために.gitignore というファイル名でindex.jsなどと同じ場所に保存します(コードは一番下のコードを参照)。
7. Heroku化してサーバーにアップする。
コード
var express = require('express');
var app = express();

// public というフォルダに入れられた静的ファイルはそのまま表示
app.use(express.static(__dirname + '/public'));

// bodyParser
var bodyParser = require('body-parser');
app.use(bodyParser.json());
app.post('/post', function(req, res) {
  for (key in req.body) {
    console.log(key, '=', req.body[key]);
  }
  res.end();
});
// app.listen(8080);
app.listen(process.env.PORT || 8008);

console.log("server start! (heroku)");
import Vue from 'vue'
import App from './App.vue'

import VCalendar from 'v-calendar'

Vue.use(VCalendar)
Vue.config.productionTip = false

new Vue({
  render: h => h(App),
}).$mount('#app')
<html>
    <style>

        </style>

    <head>
           //ブラウザーのタグの所の名前
        <title>Hello Server!</title>
        <script src="https://unpkg.com/vue"></script>
        <meta charset='utf-8'>
        <meta name='viewport' content='width=device-width, initial-scale=1, shrink-to-fit=no'>
        <meta http-equiv='x-ua-compatible' content='ie=edge'>
        <!-- IMPORTANT: No CSS link needed as of v1 Beta (@next) - It's all inlined -->
        <!-- Pre v1.0.0 versions need the minified css -->
        <!-- <link rel='stylesheet' href='https://unpkg.com/v-calendar/lib/v-calendar.min.css'> -->
      </head>
    </head>

    <body>
         //カレンダーの上の文言
        <div>Calender</div>
        <div id='app'>
            <v-calendar :columns="$screens({ default: 1, lg: 2 })" /></v-calendar>
            <v-date-picker :mode='mode' v-model='selectedDate' />
          </div>

          <!-- 1. Link Vue Javascript -->
          <script src='https://unpkg.com/vue/dist/vue.js'></script>

          <!-- 2. Link VCalendar Javascript (Plugin automatically installed) -->
          <!-- @next v1 Beta  -->
          <script src='https://unpkg.com/v-calendar@next'></script>
          <!-- Latest stable (Right now, this is very different from the v1 Beta)-->
          <!-- <script src='https://unpkg.com/v-calendar'></script> -->
          <!-- Hardcoded version -->
          <!-- <script src='https://unpkg.com/v-calendar@1.0.0-beta.14/lib/v-calendar.umd.min.js'></script> -->
          <!--3. Create the Vue instance-->
          <script>
            new Vue({
              el: '#app',
              data: {
                // Data used by the date picker。datePickerは複数選択できる
                mode: 'multiple',
                selectedDate: null,
              }
            })
          </script>
          <template>
             <vc-calendar :attributes='attributes5' style="width:500px;">
               <template slot='header-title' slot-scope='page'>
                 {{page.yearLabel}}年{{page.monthLabel}}
               </template>
               <template slot='day-content' slot-scope='props'>
                 <div class="vc-day-content">
                 <div v-bind:style="addStyleTextColor(props.day.weekday)">
                   {{ props.day.day }}</div>
                 </div>
                 <div v-if="props.day.day % 2 ==0" style="text-align:center;">
                   <img src="../assets/gatsby.svg">
                 </div>
                 <div v-else style="text-align:center">
                   <img src="../assets/slack.svg">
                 </div>
               </template>
             </vc-calendar>
           </template>
    </body>
</html>
# Logs
logs
*.log
npm-debug.log*
yarn-debug.log*
yarn-error.log*

# Runtime data
pids
*.pid
*.seed
*.pid.lock

# Directory for instrumented libs generated by jscoverage/JSCover
lib-cov

# Coverage directory used by tools like istanbul
coverage

# nyc test coverage
.nyc_output

# Grunt intermediate storage (http://gruntjs.com/creating-plugins#storing-task-files)
.grunt

# Bower dependency directory (https://bower.io/)
bower_components

# node-waf configuration
.lock-wscript

# Compiled binary addons (https://nodejs.org/api/addons.html)
build/Release

# Dependency directories
node_modules/
jspm_packages/

# TypeScript v1 declaration files
typings/

# Optional npm cache directory
.npm

# Optional eslint cache
.eslintcache

# Optional REPL history
.node_repl_history

# Output of 'npm pack'
*.tgz

# Yarn Integrity file
.yarn-integrity

# dotenv environment variables file
.env

# next.js build output
.next
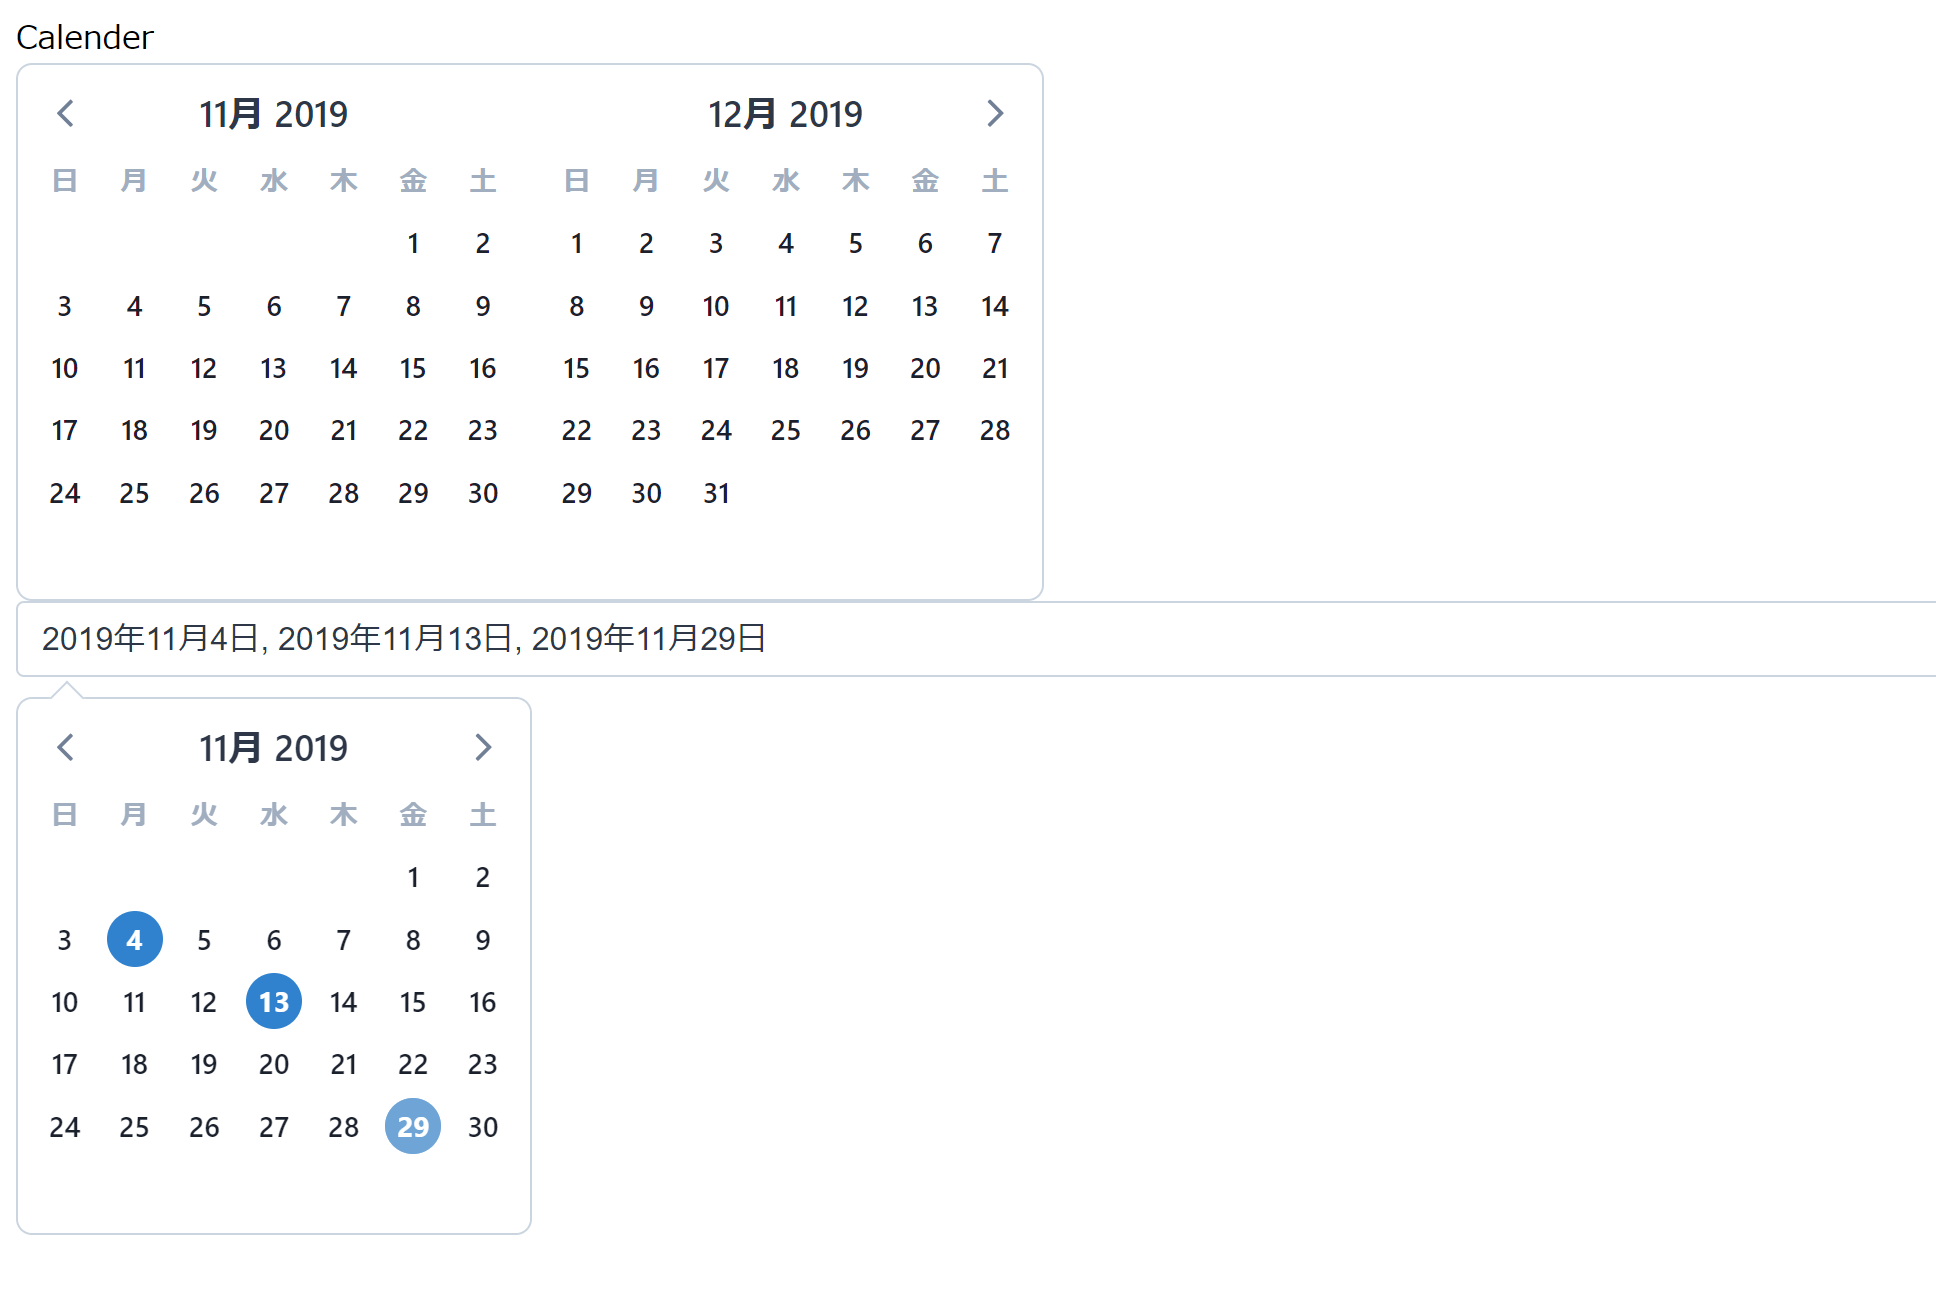
出力結果
2か月分のカレンダーを表示し、選択した日付が表示されています。
感想
自分ではどうやってコードを書いてカレンダーを作成できるのかわからない・・・。だけど「出来ちゃうんだあ~」。勉強不足を棚に上げてうれしいですね。無料でこんなツールを提供いただけるなんて、プログラミング業界はなんて心が広いのでしょうか。
ただ今回は、ほぼカレンダーが表示されているだけなので、今後はもう少しレベルアップして予定をインプットできるようにもしていきたいです。