きっかけ
WWDC2020でUICollectionViewに新APIが追加され、いろんな方がその概要や細かい機能を書いてくれていてとてもありがたい!
のですが、僕の理解不足か具体的にどう書けばいいのか・コードの全体像がわからず...
とても苦労をしたので、他にも同じ苦労している人がいるのでは!と思い記事にしました。
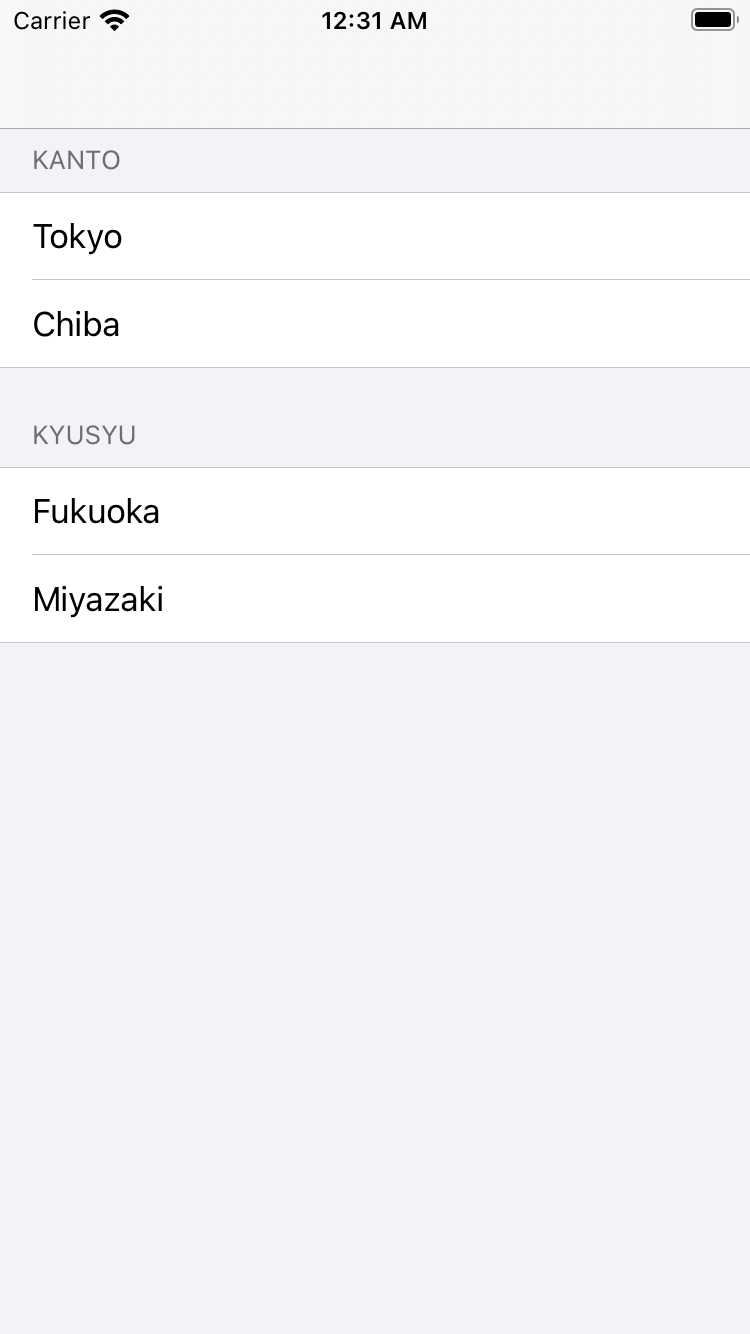
実装イメージ
全コード
class ViewController: UIViewController {

    @IBOutlet weak var collectionView: UICollectionView!

    enum Section: CaseIterable {
        case kanto
        case kyusyu
    }

    let data: [Section: [String]] = [
        .kanto: ["Kanto", "Tokyo", "Chiba"],
        .kyusyu: ["Kyusyu", "Fukuoka", "Miyazaki"]
    ]

    var collectionViewDataSource: UICollectionViewDiffableDataSource<Section, String>!

    override func viewDidLoad() {
        super.viewDidLoad()

        var layoutConfig = UICollectionLayoutListConfiguration(appearance: .grouped)
        layoutConfig.headerMode = UICollectionLayoutListConfiguration.HeaderMode.firstItemInSection

        let layout = UICollectionViewCompositionalLayout.list(using: layoutConfig)
        collectionView.collectionViewLayout = layout

        collectionViewDataSource = createDataSource()
        reloadList()
    }


    func createDataSource() -> UICollectionViewDiffableDataSource<Section, String> {
        let normalCell = UICollectionView.CellRegistration<UICollectionViewListCell, String> { (cell, indexPath, text) in
            var content = cell.defaultContentConfiguration()
            content.text = text
            cell.contentConfiguration = content
        }

        return UICollectionViewDiffableDataSource<Section, String>(collectionView: collectionView) {
            (collectionView, indexPath, text) -> UICollectionViewCell? in

            return collectionView.dequeueConfiguredReusableCell(using: normalCell, for: indexPath, item: text)
        }
    }

    func reloadList(){
        var snapshot = NSDiffableDataSourceSnapshot<Section, String>()
        snapshot.appendSections(Section.allCases)
        snapshot.appendItems(data[.kanto]!, toSection: .kanto)
        snapshot.appendItems(data[.kyusyu]!, toSection: .kyusyu)
        collectionViewDataSource.apply(snapshot)
    }
}
かいせつ
表示データ定義
enum Section: CaseIterable {
    case kanto
    case kyusyu
}

let data: [Section: [String]] = [
    .kanto: ["Kanto", "Tokyo", "Chiba"],
    .kyusyu: ["Kyusyu", "Fukuoka", "Miyazaki"]
]
ここでは、表示するデータを定義しています。
data一番最初の「Kanto」と「Kyusyu」はセクションタイトルです。
(実装イメージを見ての通りセクションは自動で大文字になるみたいです。)
レイアウト設定
var layoutConfig = UICollectionLayoutListConfiguration(appearance: .insetGrouped)
layoutConfig.headerMode = UICollectionLayoutListConfiguration.HeaderMode.firstItemInSection

let layout = UICollectionViewCompositionalLayout.list(using: layoutConfig)
collectionView.collectionViewLayout = layout
ここでは、collectionViewのレイアウトを設定しています。
今回はデフォルトで使用できるレイアウトを使っていますが、セルの大きさなどカスタマイズするときはここら辺を変更する予定です。
HeaderMode.firstItemInSection←ここがデータの最初をセクションタイトルとして扱う設定です。
セル設定
func createDataSource() -> UICollectionViewDiffableDataSource<Section, String> {
	let normalCell = UICollectionView.CellRegistration<UICollectionViewListCell, String> { (cell, indexPath, text) in
		var content = cell.defaultContentConfiguration()
		content.text = text
		cell.contentConfiguration = content
	}

	return UICollectionViewDiffableDataSource<Section, String>(collectionView: collectionView) {
		(collectionView, indexPath, text) -> UICollectionViewCell? in

		return collectionView.dequeueConfiguredReusableCell(using: normalCell, for: indexPath, item: text)
	}
}
ここでは、渡されたデータをどのように表示するかを設定しています。
従来のUICollectionViewDataSourceの
func collectionView(_ collectionView: UICollectionView, cellForItemAt indexPath: IndexPath) -> UICollectionViewCell
と同じ役割です。
normalCellは、collectionViewにセルを登録するための変数です。登録とセルの設定が一度にできるので見通しがよくなりました。
データ更新
func reloadList(){
	var snapshot = NSDiffableDataSourceSnapshot<Section, String>()
	snapshot.appendSections(Section.allCases)
	snapshot.appendItems(data[.kanto]!, toSection: .kanto)
	snapshot.appendItems(data[.kyusyu]!, toSection: .kyusyu)
	collectionViewDataSource.apply(snapshot)
}
最初に定義したデータをcollectionViewにapplyすることによって画面に表示しています。
まとめ
セクションタイトルをもっといい感じに書きたい気持ちはありますが、今までと比べてすっきり書くことができました。
この記事では基本的なUICollectionViewの機能しか使っていないので、他の記事でもっと応用的な記事も書いていこうと思います。
励みになるのでよかったらLGTMお願いします\(^o^)/