概要
McGwire MarkdownはHTMLコンテンツをPDFとして出力する機能を備えたElectron製マークダウンエディタです。
このPDF出力はElectron(Chromium)が持つ標準機能のみで実現可能です。
今回はこの「ElectronでHTMLコンテンツをPDFする機能」の実装方法をアウトプットします。
実装手順
実行環境
今回の環境は次のとおりです。
| 環境 | 内容 |
|---|---|
| OS | Ubuntu Desktop 22.04 |
| Node.js | v18.16.0 |
| Electron | 25.3.2 |
1. プロジェクトの作成
まずはnpmを使用して新規プロジェクトを作成しましょう。
mkdir electron-app && cd electron-app
npm init -y
npm install electron --save-dev
次のようなプロジェクトディレクトリが出来上がりましたら、package.jsonの編集に進みます。
/electron-app
  ├─node_modules
  ├─package.json
  └─package-lock.json
2. package.jsonの編集
次の設定項目を変更します。
- エントリーポイントを
index.jsから./src/main.jsに変更 -
"test": "echo \"Error: no test specified\" && exit 1"を削除 - 起動スクリプトを
electron .とするために"start": "electron ."を追記
{
  "name": "electron-app",
  "version": "1.0.0",
  "description": "",
-    "main": "index.js",
+    "main": "./src/main.js",
  "scripts": {
-   "test": "echo \"Error: no test specified\" && exit 1"
+   "start": "electron ."
  },
  "keywords": [],
  "author": "",
  "license": "ISC",
  "devDependencies": {
    "electron": "^25.3.2"
  }
}
3. 各ファイルの作成
続いて、srcというディレクトリを作成し、その中に必要な各ファイルを作成していきましょう。
/electron-app
  ├─node_modules
  ├─package.json
  ├─package-lock.json
  └─src
     ├─main.js     # メインプロセス(Node.js側)
     ├─renderer.js # UIにボタンイベントを設定するなどを行う(画面側)
     ├─preload.js  # メインプロセスとレンダラープロセスを中継するファイル
     ├─index.html  # メイン画面に表示するHTML
     └─topdf.html  # PDFに出力するHTML
main.js
Electronの読み込み、設定、起動を行う「メインプロセス」となるファイルです。
Node.jsの機能を使用するため、セキュリティ対策として、UI側(画面側)からメインプロセスの機能を呼び出すためにはipcMainを定義します。
今回はPDF出力を行うoutputPDFという関数をipcMain.handle("outputPDF", outputPDF);のように定義します。
なお、ウィンドウ作成といった基本的なElectronの操作説明は割愛しますが、なるべくコメントを記載するようにしましたので、参考にしてください。
const path = require("path");
const fs = require("fs");
const os = require("os");
const electron = require("electron");
const { BrowserWindow, ipcMain } = electron;

// Electronのappインスタンスを定義
const app = electron.app;
let mainWindow;

/** メインウィンドウを作成する関数 */
function createWindow() {
    const settings = {
        width: 800,
        height: 500,
        webPreferences: {
            preload: path.join(app.getAppPath(), "./src/preload.js"),
        }
    }
    mainWindow = new BrowserWindow(settings);
    mainWindow.loadFile("./src/index.html");
    mainWindow.setMenuBarVisibility(false);
    mainWindow.show();

    mainWindow.on("closed", () => {
        mainWindow = null;
        app.quit();
    });
};

// 初期化完了時にメインウィンドウを起動
app.on("ready", createWindow);

// 全ウィンドウがクローズ時にappを終了
app.on("window-all-closed", () => {
    // macOS以外のOS
    if (process.platform !== "darwin") {
        app.quit();
    }
});


// index.html(レンダラープロセス)から呼び出し可能な関数を設定
ipcMain.handle("outputPDF", outputPDF);


/** PDFを出力する関数
 *
 *  topdf.htmlというHTMLファイルの内容をPDFに出力します。
 *  出力にはwebContents.printToPDFを使用します。
 *
 *  処理を簡素化していますが、html文字列を引数として受け取り、一時的なHTMLファイルを
 *  作成してPDFで出力といった処理も当然ながら可能です。
 *  注意点として、ウィンドウを非表示で作成していますので、完了時にcloseする処理が本来は必要です。
 */
async function outputPDF(event) {
    // 出力先を定義
    let basePath = path.join(os.homedir(), "Desktop");
    let outputFilename = "output-html-topdf.pdf";
    outputPath = path.join(basePath, outputFilename);

    // 出力用ウィンドウの設定
    let setting = {
        width: 950,
        height: 700,
        show: false,
        webPreference: {
        }
    }
    let outputPDFWindow = new BrowserWindow(setting);
    outputPDFWindow.loadFile("./src/topdf.html");

    // 非表示でPDF出力用のoutputPDFWindowを起動して、ロードが完了したらPDFとして出力
    outputPDFWindow.webContents.on("did-finish-load", () => {
        // 出力時のサイズなどを設定
        outputPDFWindow.webContents.printToPDF({
            scale: 0.8,
            pageSize: "A4",
            printBackground: true,
            margins: {
                bottom: 1,
            }
        }).then(data => {
            try {
                // OK.
                fs.writeFileSync(outputPath, data);
                console.log("PDF Output Ok.")

            } catch (error) {
                // Error.
                console.error("An error occurred while writing the file: ", error);
            }
        }).catch((error) => {
            console.log(error);
        });
    });
    return "PDF Output function end.";
};
outputPDF関数の仕様は次のようになっています。
-
topdf.htmlというHTMLファイルの内容をPDFに出力します。 - デスクトップに
output-html-topdf.pdfというPDFファイルを作成します。 - 出力には
webContents.printToPDFを使用します。
注意点として、ウィンドウを非表示で作成していますので、完了時にcloseする処理が本来は必要です。
また、今回は処理を簡素化していますが、例えば、
- outputPDF関数がhtml文字列を引数として受け取る
- 一時的なHTMLファイルを作成
- PDFで出力
といった処理も当然ながら可能です。
上記については、McGwire Markdownで実装していますので参考として頂けたらと思います。
index.html
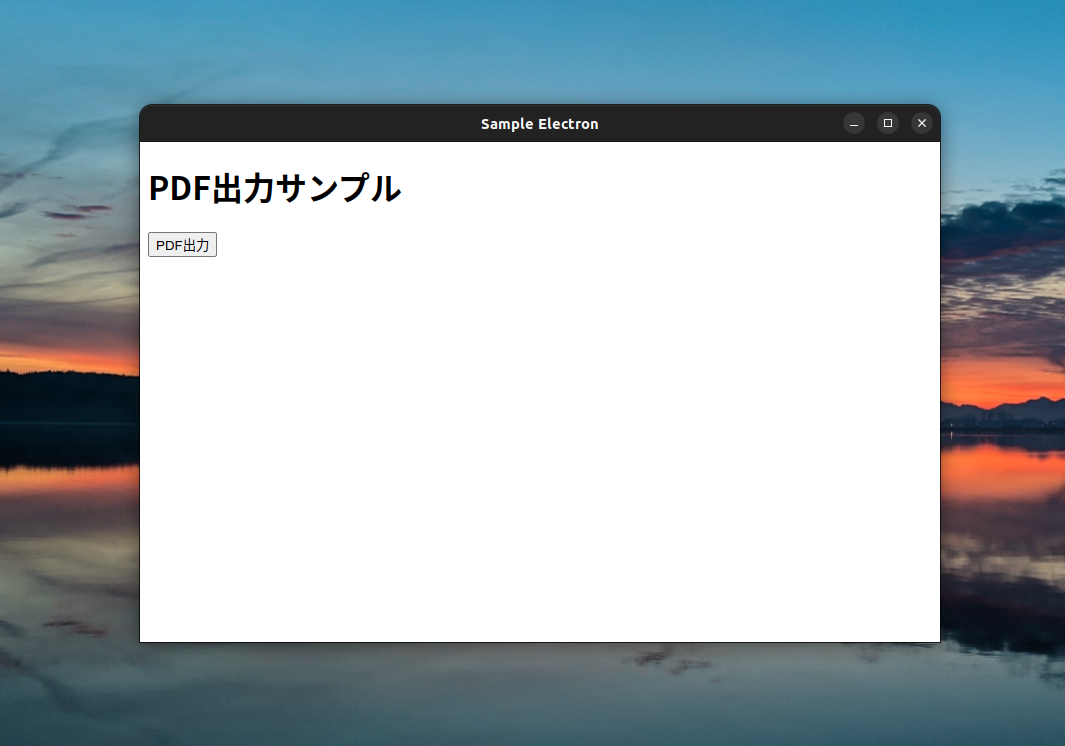
メインウィンドウとなるHTMLファイルです。特筆すべき点はありませんが、outputPDF関数を発火させるボタンを設置しています。
<!DOCTYPE html>
<html lang="ja">
<head>
    <meta charset="UTF-8">
    <meta name="viewport" content="width=device-width, initial-scale=1.0">
    <title>Sample Electron</title>
</head>
<body>
    <h1>PDF出力サンプル</h1>
    <button class="btn-function" id="btnPDFOutput">PDF出力</button>
</body>
<script src="./renderer.js"></script>
</html>
renderer.js
メインウィンドウであるindex.htmlに読み込ませるファイルです。
主に次のことを行っています。
- index.htmlで配置したボタンにイベントを定義
-
メインプロセスの関数を呼び出す処理を定義
-
直接呼び出すことはできないので、後述する
preload.jsを経由して呼び出します。
-
直接呼び出すことはできないので、後述する
/** ボタンイベント */
document.querySelector("#btnPDFOutput").addEventListener("click", () => {
    outputPDF();
});

/** preload.jsを経由してmain.jsの関数を呼び出す関数 */
async function outputPDF() {
    const result = await window.myApp.outputPDF();
    console.log(result);
};
preload.js
メインプロセス(main.js)とレンダラープロセス(renderer.js)の橋渡しを行うファイルです。
このファイルによって、main.jsで定義したipcMain.handle("outputPDF", outputPDF);をレンダラープロセス(renderer.js)から呼び出すことができます。
const { contextBridge, ipcRenderer } = require("electron");

contextBridge.exposeInMainWorld("myApp", {
  async outputPDF() {
    const result = await ipcRenderer.invoke("outputPDF");
    return result;
  },
});
topdf.html
出力するPDFの内容となるファイルです。
特に内容に意味はありませんので、そのままコピーしてください。
<!DOCTYPE html>
<html lang="ja">
<head>
    <meta charset="UTF-8">
    <meta name="viewport" content="width=device-width, initial-scale=1.0">
    <title>Export PDF</title>
</head>
<body>
    <h1>Export PDF</h1>
    <svg width="400" height="400" viewBox="0 0 200 200" xmlns="http://www.w3.org/2000/svg">
        <!-- Penguin's body -->
        <ellipse cx="100" cy="160" rx="80" ry="90" style="fill:#133463" />

        <!-- Penguin's head -->
        <ellipse cx="100" cy="85" rx="60" ry="40" style="fill:#133463" />

        <!-- Penguin's belly -->
        <ellipse cx="100" cy="175" rx="60" ry="65" style="fill:white" />

        <!-- Penguin's eyes -->
        <circle cx="80" cy="75" r="10" style="fill:white" />
        <circle cx="120" cy="75" r="10" style="fill:white" />

        <!-- Penguin's pupils -->
        <circle cx="80" cy="75" r="5" style="fill:black" />
        <circle cx="120" cy="75" r="5" style="fill:black" />

        <!-- Penguin's beak -->
        <polygon points="100,105 90,95 110,95" style="fill:orange" />

        <!-- Penguin's feet -->
        <polygon points="70,255 60,275 80,275" style="fill:orange" />
        <polygon points="130,255 120,275 140,275" style="fill:orange" />

        <!-- Penguin's left arm -->
        <polygon points="20,140 60,110 60,170" style="fill:#133463" />

        <!-- Pencil in right hand -->
        <rect x="140" y="75" width="20" height="190" style="fill:green" />

        <!-- Pencil tip wood -->
        <polygon points="140,75 160,75 150,60" style="fill:#DEB887" />

        <!-- Pencil tip graphite -->
        <polygon points="148,65 152,65 150,60" style="fill:black" />

        <!-- Penguin's right arm, covering pencil -->
        <polygon points="180,140 140,110 140,170" style="fill:#133463" />
    </svg>
</body>
</html>
起動
1. 起動コマンド実行
上記のファイルが整いましたら、Electronアプリケーションを起動します。
プロジェクトフォルダ(electron-app)で、次のコマンドを実行しましょう。
electron .
次のようなウィンドウが表示されれば起動完了です。
2. PDF出力
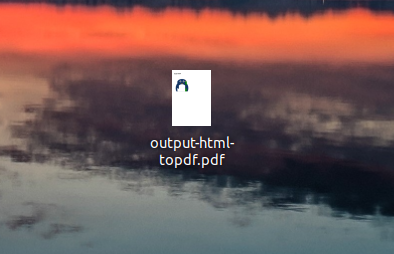
PDF出力ボタンを押すとデスクトップ上にoutput-html-topdf.pdfというファイルが出力されます。
開いて、中身がtopdf.htmlで定義したものとなっていれば完了です。
お疲れ様でした。
関連記事


