この記事は株式会社クロノスの「~2020年春~勝手にやりますアドベントカレンダー」の19日目の記事です。
はじめに
Googleカレンダーのfaviconをご存知でしょうか?
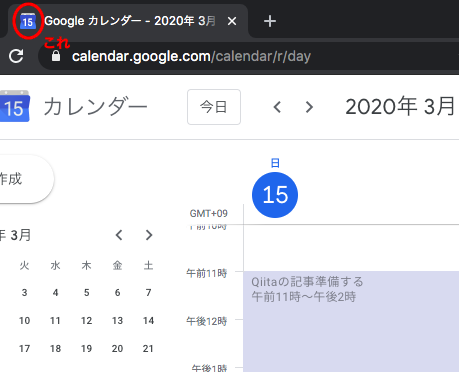
この画像は3月15日に取った画像ですが、実はアクセスした日によって中の数字が変わる仕組みになってたりします。
ということで自分も前にカレンダー的なアプリを作ったのでそれに導入してみることにします。
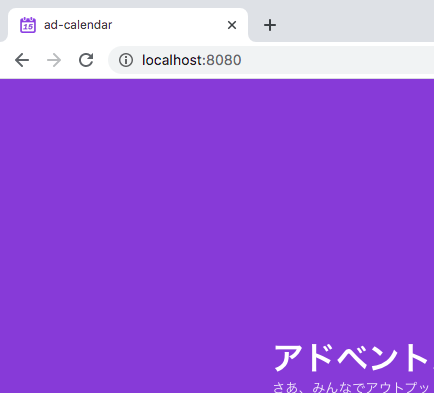
前まではこんな感じでした。
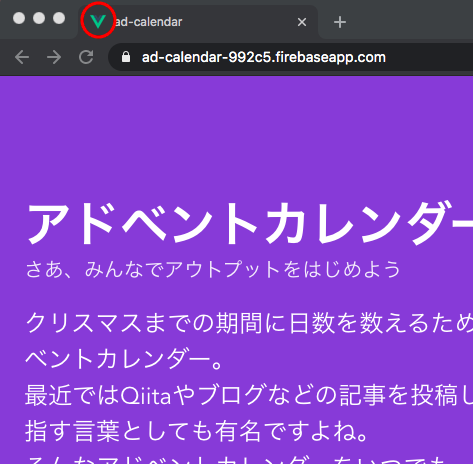
はい、デフォルトです。
めっちゃ**Vue.jsで作ってます!!!!**っていうのが伝わる感じになっていますね。
技術のアピールは大事ですが、アプリとしては若干かっこ悪いので修正してみます。
開発者ツールでGoogleカレンダーを見てみると、1〜31まで全パターンのfaviconを用意しているみたいなので、Googleにならって全パターン用意して表示を切り替えるような感じにしてみます。
画像を用意する
使用したツール等
- Google Colaboratory
- Python 3.6.9(Colaboratoryに入ってたバージョン)
- PIL(Python Image Library)
- ICOOON MONO(アイコン)
ベースとなる画像を用意する
今回はICOOON MONOにあるカレンダーのアイコンに数字を重ねて画像を生成してみます。
こちらのアイコンを使用させていただきました。
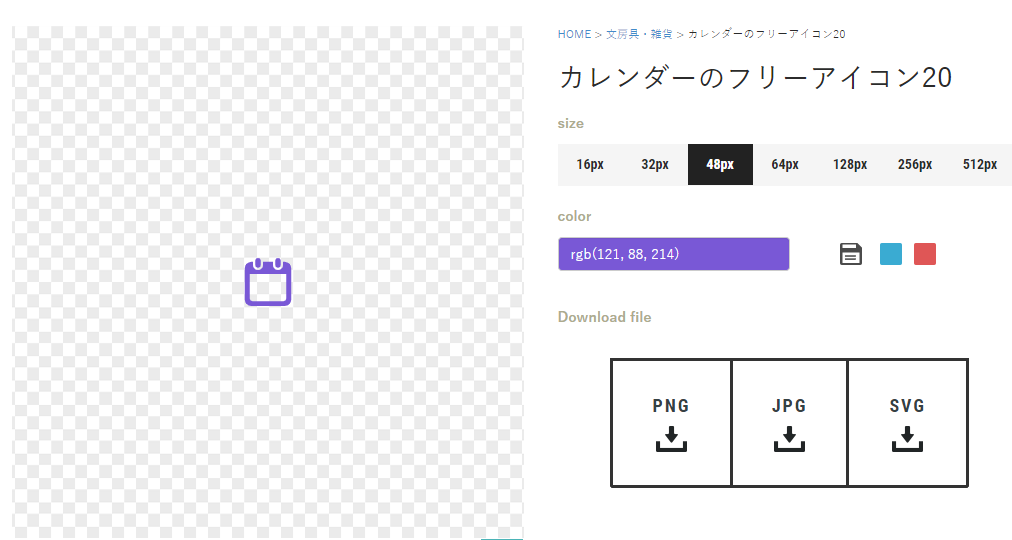
サイズは48×48、カラーはアプリのテーマに合わせて紫(rgb(121, 88, 214))にしました。
Colaboratoryを開く
以下の画像のような状態にします。
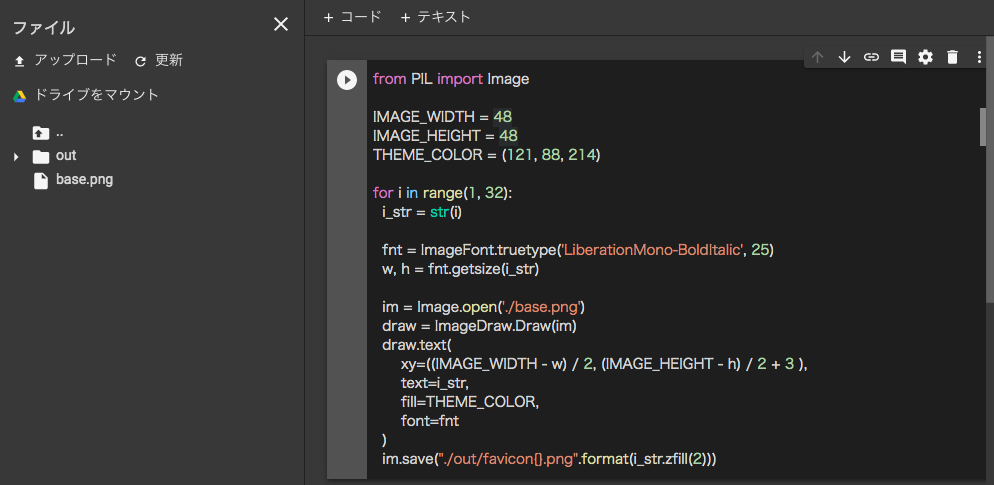
まずベース画像をアップロードします。今回はbase.pngという名前でアップロードしました。
次に加工後の画像を格納するフォルダを作成します。今回はoutというフォルダを作成しました。
以上の準備ができたらPythonのコードを書いていきます。
真ん中に数字を配置するためにちょっとトリッキーなことやってたりします。
from PIL import Image

# 各種設定
IMAGE_WIDTH = 48
IMAGE_HEIGHT = 48
THEME_COLOR = (121, 88, 214)

# 1〜31までループして作成する
for i in range(1, 32):
  # faviconに表示する数字
  i_str = str(i)

  # Font名、サイズを設定する
  fnt = ImageFont.truetype('LiberationMono-BoldItalic', 25)
  # 数字を配置する場所を計算するために文字の横幅、縦幅を取得する
  w, h = fnt.getsize(i_str)

  # ベースの画像を読み込む
  im = Image.open('./base.png')
  draw = ImageDraw.Draw(im)
  # 読み込んだ画像にテキストを合成する
  draw.text(
      # こう書くと真ん中に配置できるみたい(高さだけ3px微調整してます)
      xy=((IMAGE_WIDTH - w) / 2, (IMAGE_HEIGHT - h) / 2 + 3 ),
      text=i_str,
      fill=THEME_COLOR,
      font=fnt
  )

  # 保存 ./out/favicon01.pngみたいなファイル名にしています
  im.save("./out/favicon{}.png".format(i_str.zfill(2)))
ちなみにフォントは好きなものをダウンロードしてCalaboratoryにアップロードすれば使えるようになりますが、以下のコードを実行すると組み込まれているフォントを確認できます。
今回は数値を扱うだけだったので組み込みのものを使用しました。
import subprocess

res = subprocess.check_output("fc-list")

print(str(res).replace(":", "\n"))
上手く行けばoutフォルダ内に以下のような画像が生成されるはずです。

outフォルダ内の画像をダウンロードしましょう。
Colaboratoryだとフォルダ丸ごとダウンロードできなさそうなので
以下のコードでzipにしておくと楽にダウンロードできます。
import shutil

shutil.make_archive('./out', 'zip', root_dir='./out')
Vueのプロジェクトに組み込む
Vueのプロジェクトのpublicフォルダ内に生成した画像を配置しましょう。
index.htmlを修正します。
faviconを設定しているlinkタグのhref属性を書き換えるscriptを追加します。
<!DOCTYPE html>
<html lang="ja">
  <head>
    <meta charset="utf-8">
    <meta http-equiv="X-UA-Compatible" content="IE=edge">
    <meta name="viewport" content="width=device-width,initial-scale=1.0">
    <link rel="icon" href="<%= BASE_URL %>favicon.ico">
    <!-- 追加部分 -->
    <script>
      const faviconLink = document.querySelector("link[rel='icon']");
      // 0埋めした日付を取得して favicon01.png みたいな文字列を生成してます
      faviconLink.href = `favicon${("0" + new Date().getDate()).slice(-2)}.png`
    </script>
    <link rel="stylesheet" href="https://use.fontawesome.com/releases/v5.2.0/css/all.css">
    <title><%= htmlWebpackPlugin.options.title %></title>
  </head>
  <body>
    <noscript>
      <strong>We're sorry but <%= htmlWebpackPlugin.options.title %> doesn't work properly without JavaScript enabled. Please enable it to continue.</strong>
    </noscript>
    <div id="app"></div>
    <!-- built files will be auto injected -->
  </body>
</html>
いい感じになりました。(満足)
あとはビルドして本番環境にデプロイです。
めでたしめでたし・・・
と思いきや・・・
次の日(16日)にアクセスしてみると、アイコンが15から変わってないじゃないですか。
なんでや…!と思い、トランスパイルされたindex.htmlを見てみると
<!DOCTYPE html><html lang=ja><head><meta charset=utf-8><meta http-equiv=X-UA-Compatible content="IE=edge"><meta name=viewport content="width=device-width,initial-scale=1"><link rel=icon href=/favicon.ico><script>const faviconLink = document.querySelector("link[rel='icon']");
これ →  faviconLink.href =  `favicon15.png`</script><link rel=stylesheet href=https://use.fontawesome.com/releases/v5.2.0/css/all.css><title>ad-calendar</title><link href=/css/app.9c57fa73.css rel=preload as=style><link href=/css/chunk-vendors.a4393e1d.css rel=preload as=style><link href=/js/app.ed32e83e.js rel=preload as=script><link href=/js/chunk-vendors.80e1df9b.js rel=preload as=script><link href=/css/chunk-vendors.a4393e1d.css rel=stylesheet><link href=/css/app.9c57fa73.css rel=stylesheet></head><body><noscript><strong>We're sorry but ad-calendar doesn't work properly without JavaScript enabled. Please enable it to continue.</strong></noscript><div id=app></div><script src=/js/chunk-vendors.80e1df9b.js></script><script src=/js/app.ed32e83e.js></script></body></html>
なんとビルドを実行した日付に固定されてしまってますね。
index.html内でJavaScriptのテンプレート記法を使うと実行時の値に固定されてしまうっぽいです。
最終的には以下のように修正すると期待通り動作するようになりました。
<!DOCTYPE html>
<html lang="ja">
  <head>
    <meta charset="utf-8">
    <meta http-equiv="X-UA-Compatible" content="IE=edge">
    <meta name="viewport" content="width=device-width,initial-scale=1.0">
    <link rel="icon" href="<%= BASE_URL %>favicon.ico">
    <script>
      const faviconLink = document.querySelector("link[rel='icon']");
      // 変数に格納するようにした
      const now = new Date();
      const nowDate = ("0" + now.getDate()).slice(-2);
      // +演算子で文字列結合する
      faviconLink.href = "<%= BASE_URL %>favicon" + nowDate + ".png";
    </script>
    <link rel="stylesheet" href="https://use.fontawesome.com/releases/v5.2.0/css/all.css">
    <title><%= htmlWebpackPlugin.options.title %></title>
  </head>
  <body>
    <noscript>
      <strong>We're sorry but <%= htmlWebpackPlugin.options.title %> doesn't work properly without JavaScript enabled. Please enable it to continue.</strong>
    </noscript>
    <div id="app"></div>
    <!-- built files will be auto injected -->
  </body>
</html>
参考
https://qiita.com/agajo/items/90a29627e7c9a06ec24a
https://www.tech-tech.xyz/drawtext.html
https://icooon-mono.com/license/
https://stackoverflow.com/questions/1970807/center-middle-align-text-with-pil