概要
Databricks にて Azure IoT Hub に対して Cloud-to-device messages を送受信する方法を紹介します。本記事で詳細する方法は、検証目的で実行する方法です。
事前準備
環境構築
- Azure IoT Hub の構築 (本手順は Free tier で実施)
- Databricks (本手順は Serveless ではなく汎用コンピュートで実行)
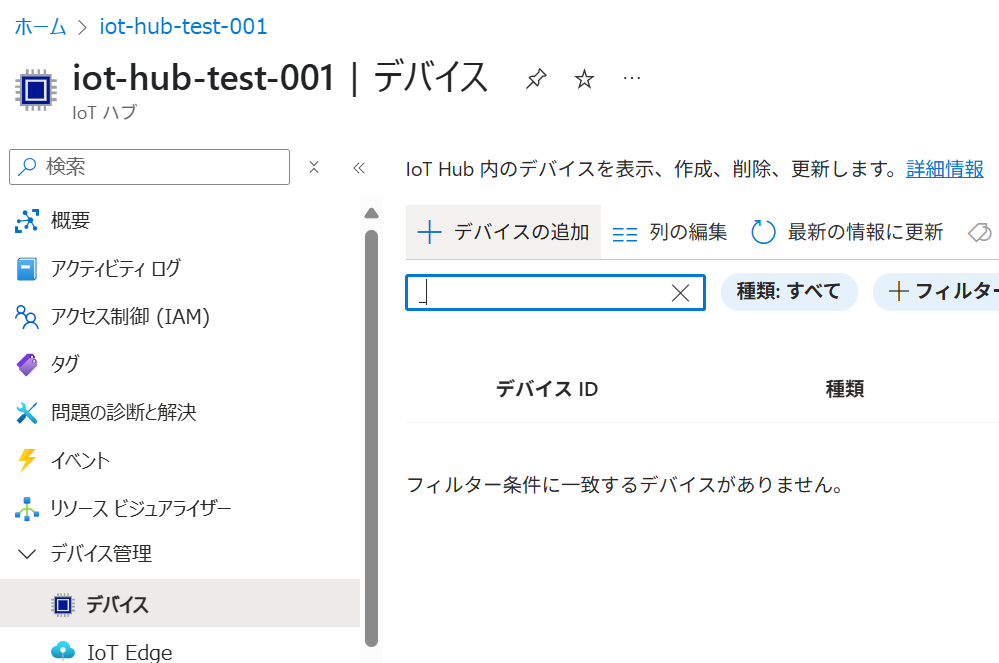
デバイスの作成と接続文字列の取得
Azure IoT Hub のリソース画面にて、デバイスタブを選択後、+ デバイスの追加を選択します。
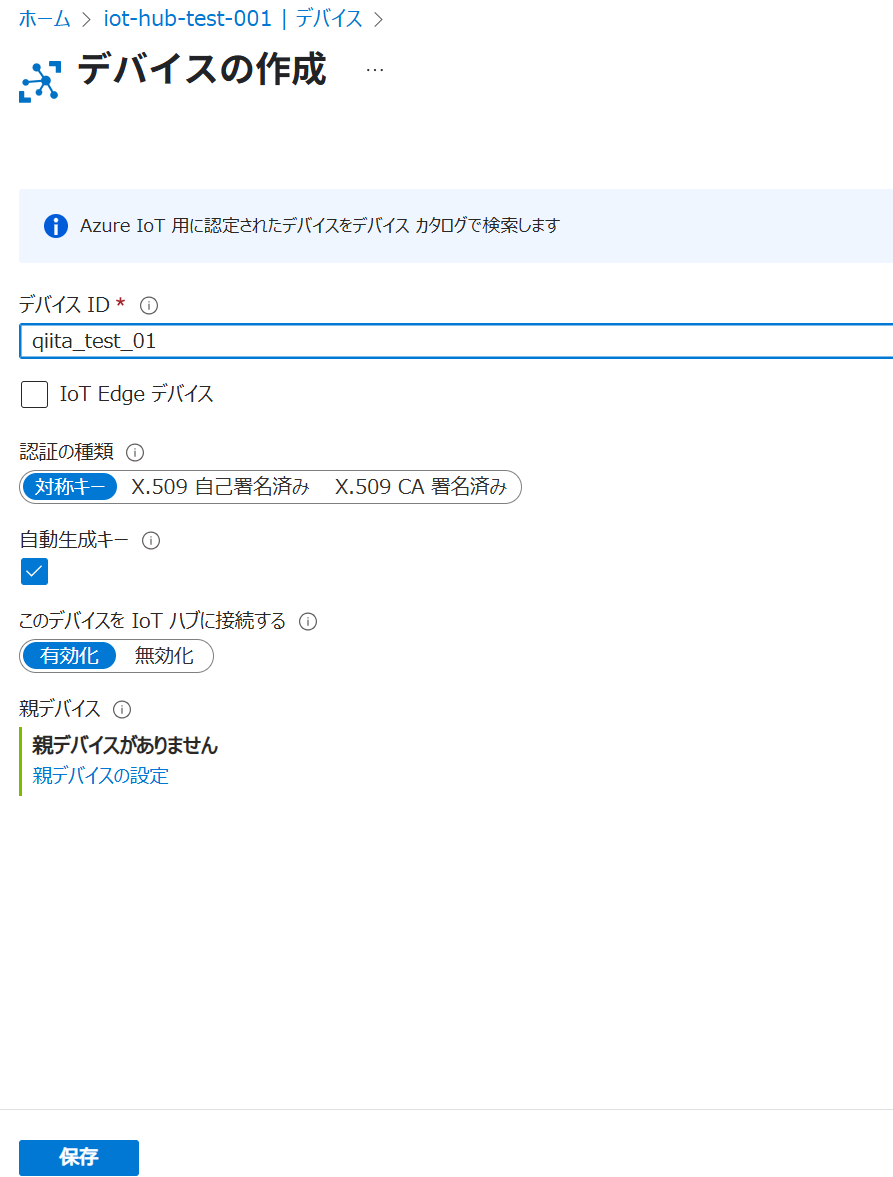
デバイス IDに任意の値を入力し、保存を選択してデバイスを作成します。
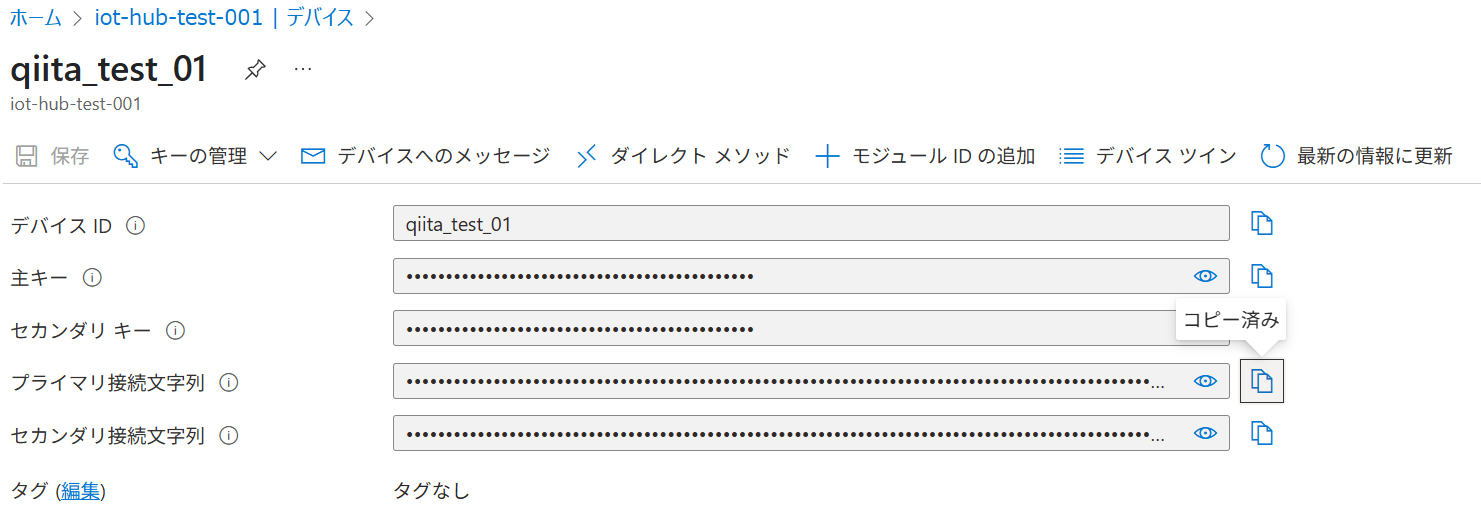
作成したデバイスを表示して、プライマリ接続文字列のコピー済みを選択して値をコピーします。
組み込みのエンドポイントの接続文字列を取得
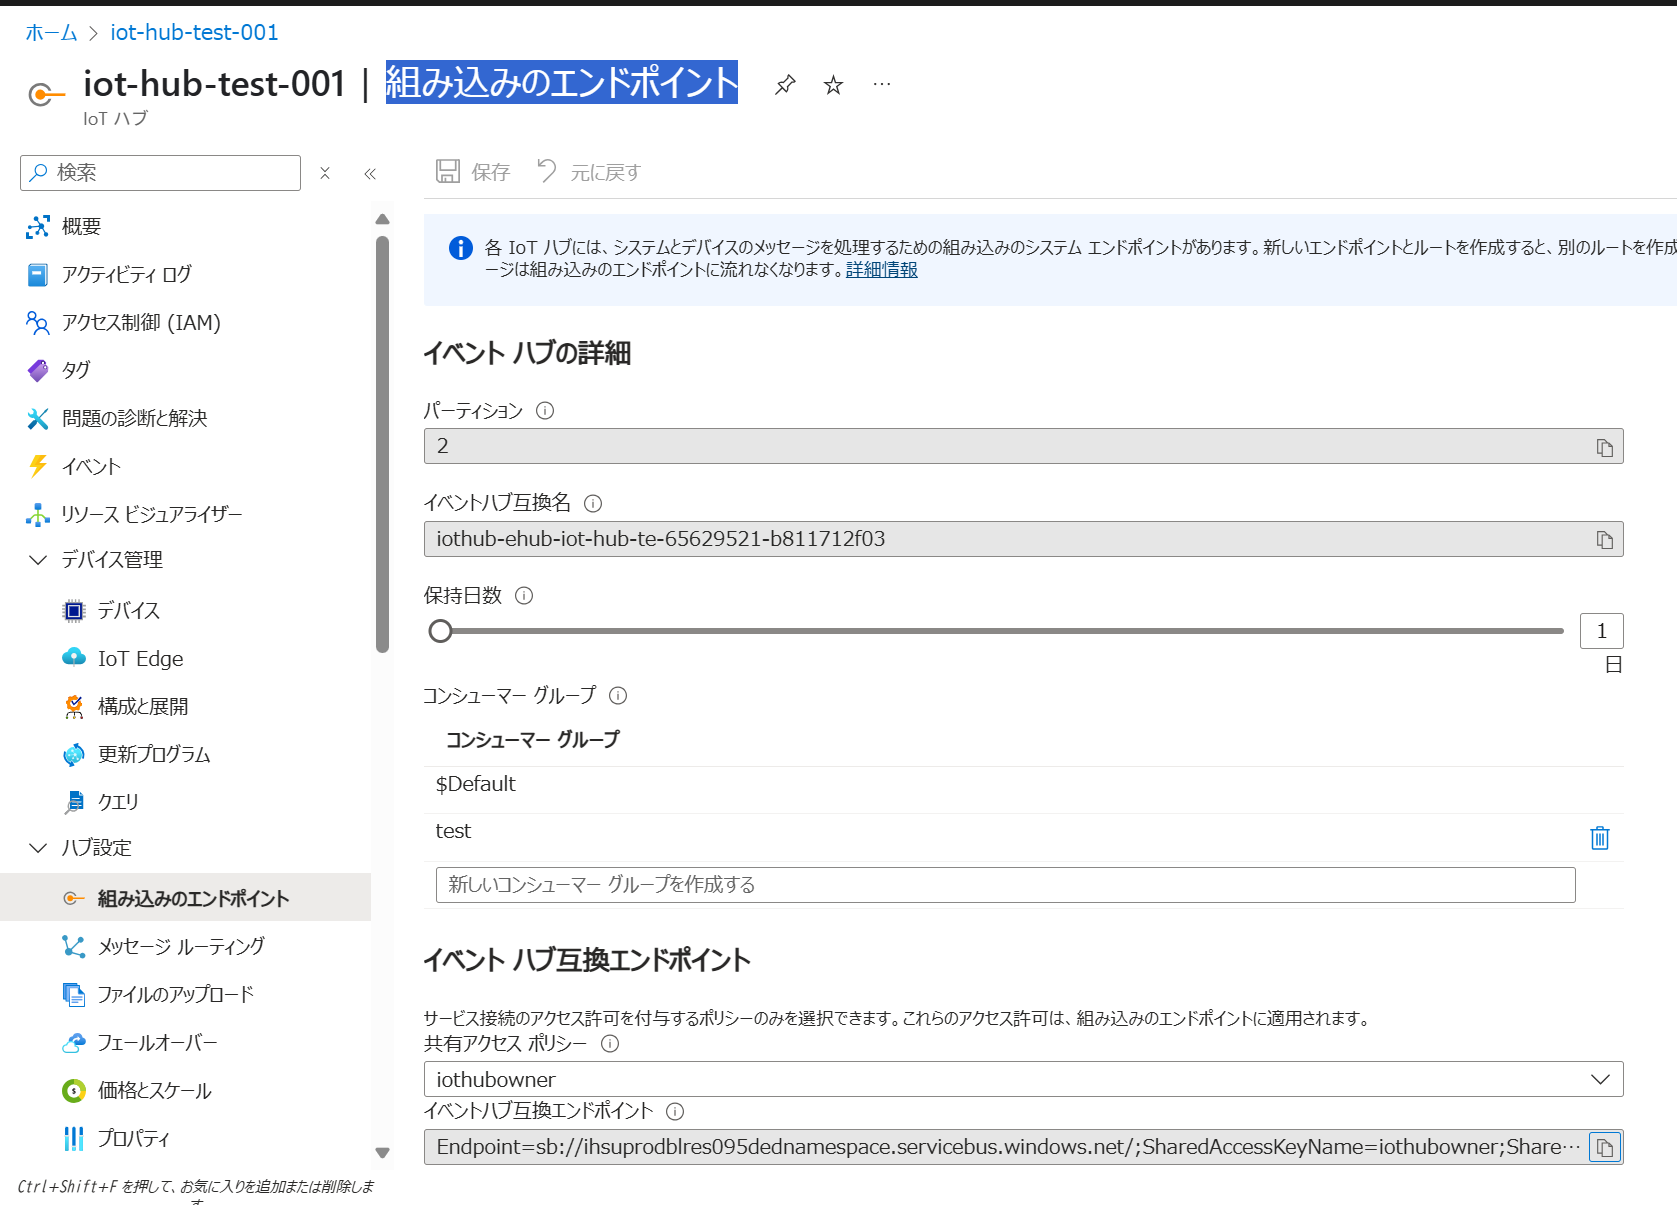
Azure IoT Hub のリソース画面にて、組み込みのエンドポイントタブを選択して、イベントハブ互換エンドポイントの値をコピーします。
Azure IoT Hub の接続文字列を取得
Azure IoT Hub のリソース画面にて、共有アクセス ポリシータブ -> iothubownerポリシーを選択して、プライマリ接続文字列の値をコピーします。

Cloud-to-device messages を送信する方法
Databricks にて下記のコードを実行して、Cloud-to-device messages を送信します。
%pip install azure-iot-device==2.9.0 -q
dbutils.library.restartPython()

iot_conn_str = "HostName=iot-hub-test-001.azure-devices.net;SharedAccessKeyName=iothubowner;SharedAccessKey=FUum/tiOgEuhye/JqAb+XXXXX="
device_id = "qiita_test_01"

from azure.iot.hub import IoTHubRegistryManager
import uuid, json

payload = json.dumps({"command": "blink", "interval": 1})
rm = IoTHubRegistryManager.from_connection_string(iot_conn_str)
message = {"messageId": str(uuid.uuid4()), "priority": "high"}
rm.send_c2d_message(
    device_id,
    payload.encode(),
    properties=message,
)
print("送信完了")

Cloud-to-device messages を受信する方法
Databricks にて別のノートブックを作成して、下記のコードを実行して、Cloud-to-device messages を受信します。
%pip install azure-iot-device -q
dbutils.library.restartPython()

device_conn_str = "HostName=iot-hub-test-001.azure-devices.net;DeviceId=qiita_test_01;SharedAccessKey=r2fxXUdn/4w9iNJdhqnIJZ+h0qxxxxx="

import time, json
from azure.iot.device import IoTHubDeviceClient


client = IoTHubDeviceClient.create_from_connection_string(
    device_conn_str,
    websockets=True,
)

client.connect()

def handler(msg):
    print("受信:", msg.data.decode())
    print("Props:", msg.custom_properties)

client.on_message_received = handler

# 一定時間待機後に停止
time.sleep(60)
client.shutdown()
