概要
Databricks 環境で Microsoft ODBC Driver for SQL Server をオフラインでインストールする手順を説明します。具体的には、以下のステップをカバーします。
- Databricks 上にて
apt-getを--download-onlyオプションを指定して実行することでパッケージをダウンロードし、Repo にてファイルを保存 - ダウンロード済みのパッケージをインストール
apt-get コマンドの --download-only オプションを使用すると、必要なパッケージが /var/cache/apt/archives ディレクトリにダウンロードされます。不足しているパッケージは環境に依存するため、Databricks 上での実行が推奨されます。
       -d, --download-only
           Download only; package files are only retrieved, not unpacked or installed.
           Configuration Item: APT::Get::Download-Only.

引用元:Ubuntu Manpage: apt-get - APT package handling utility -- command-line interface
実行手順
1. Databricks 上にてapt-getを--download-onlyオプションを指定して実行することでパッケージをダウンロードし、Repo にてファイルを保存
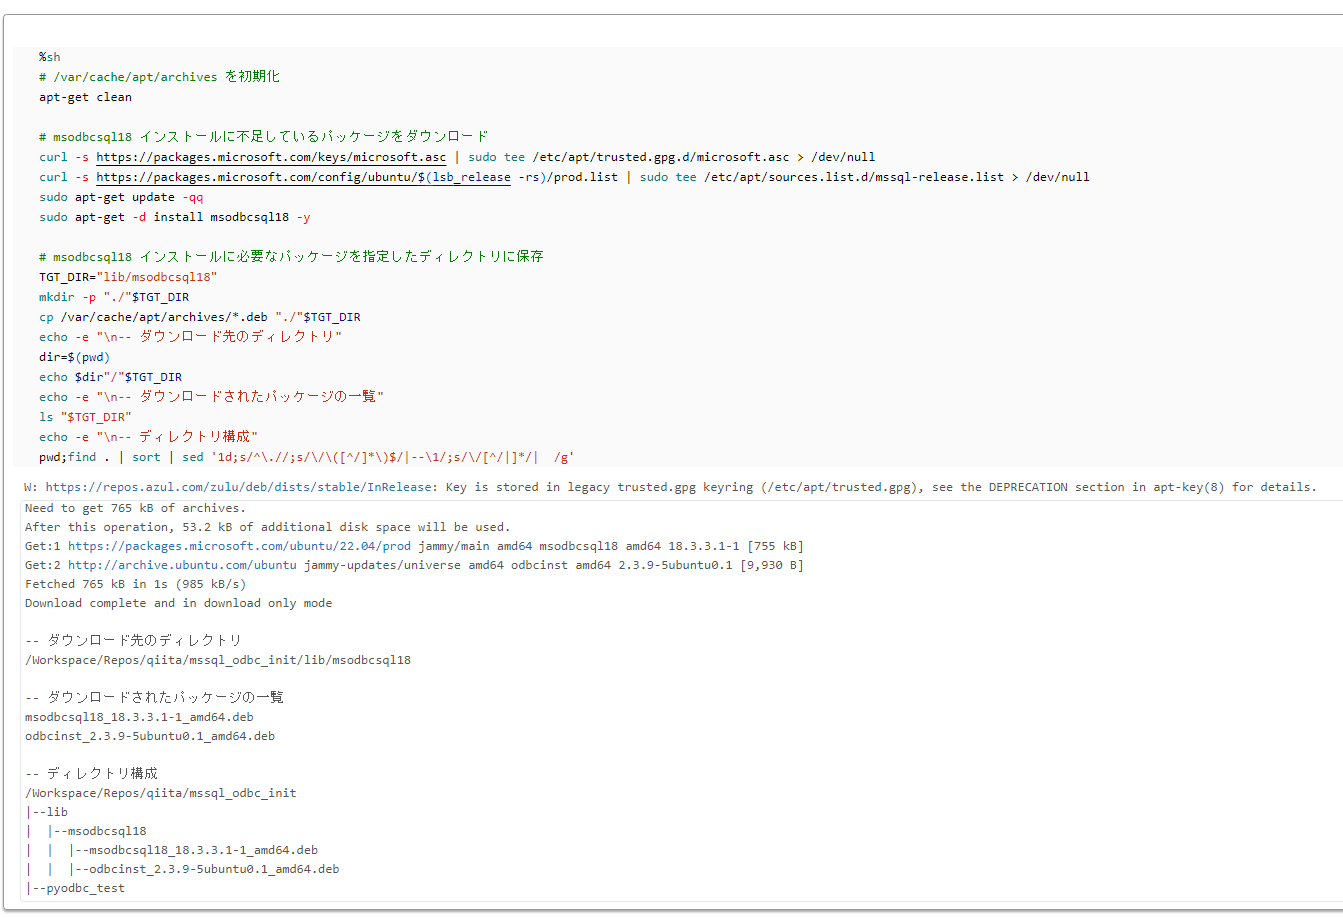
Databricks で以下のコマンドを実行し、Microsoft ODBC Driver for SQL Server のインストールに必要なパッケージをダウンロードします。
%sh
# /var/cache/apt/archives を初期化
apt-get clean

# msodbcsql18 インストールに不足しているパッケージをダウンロード
curl -s https://packages.microsoft.com/keys/microsoft.asc | sudo tee /etc/apt/trusted.gpg.d/microsoft.asc > /dev/null
curl -s https://packages.microsoft.com/config/ubuntu/$(lsb_release -rs)/prod.list | sudo tee /etc/apt/sources.list.d/mssql-release.list > /dev/null
sudo apt-get update -qq
sudo apt-get -d install msodbcsql18 -y

# msodbcsql18 インストールに必要なパッケージを指定したディレクトリに保存
TGT_DIR="lib/msodbcsql18"
mkdir -p "./"$TGT_DIR
cp /var/cache/apt/archives/*.deb "./"$TGT_DIR
echo -e "\n-- ダウンロード先のディレクトリ"
dir=$(pwd)
echo $dir"/"$TGT_DIR
echo -e "\n-- ダウンロードされたパッケージの一覧"
ls "$TGT_DIR"
echo -e "\n-- ディレクトリ構成"
pwd;find . | sort | sed '1d;s/^\.//;s/\/\([^/]*\)$/|--\1/;s/\/[^/|]*/|  /g'
-- ダウンロード先のディレクトリ
/Workspace/Repos/qiita/mssql_odbc_init/lib/msodbcsql18

-- ダウンロードされたパッケージの一覧
msodbcsql18_18.3.3.1-1_amd64.deb
odbcinst_2.3.9-5ubuntu0.1_amd64.deb

-- ディレクトリ構成
/Workspace/Repos/qiita/mssql_odbc_init
|--lib
|  |--msodbcsql18
|  |  |--msodbcsql18_18.3.3.1-1_amd64.deb
|  |  |--odbcinst_2.3.9-5ubuntu0.1_amd64.deb
|--pyodbc_test
2. ダウンロード済みのパッケージをインストール
ダウンロードしたパッケージをインストールします。TGT_DIRの値とパッケージ名を必要に応じて変更します。
%sh
TGT_DIR="/Workspace/Repos/qiita/mssql_odbc_init/lib/msodbcsql18"

sudo dpkg -i $TGT_DIR"/""odbcinst_2.3.9-5ubuntu0.1_amd64.deb"
sudo ACCEPT_EULA=Y dpkg -i $TGT_DIR"/""msodbcsql18_18.3.3.1-1_amd64.deb"

3. 動作確認
Azure SQL Database への接続をテストして、インストールが正常に行われたことを確認します。接続情報を必要に応じて変更します。
import pyodbc

server = "ads-01"  ## サーバー名
database = "ads-01"  ## データベース名
username = "user"  ## Azure SQL DB のユーザー名
password = "password"  ## Azure SQL DB のパスワード

sql_connect_string = f"Driver={{ODBC Driver 18 for SQL Server}};SERVER=tcp:"
sql_connect_string += f"{server}.database.windows.net,1433;"
sql_connect_string += f"Database={database};Uid={username};Pwd={password};"
sql_connect_string += f"Encrypt=yes;TrustServerCertificate=no;ConnectionTimeout=30;"

sql = """
SELECT 'abc' as str_col
UNION ALL
SELECT N'あいう' as str_col
UNION ALL
SELECT NULL as str_col
;
"""

try:
    with pyodbc.connect(sql_connect_string, timeout=300) as conn:
        with conn.cursor() as cursor:
            # SQLクエリを実行します。
            cursor.execute(sql)

            # # 結果を取得して表示します。
            for row in cursor:
                print(row)

except pyodbc.Error as e:
    print("An error occurred while connecting to the database.")
    print(e)
